
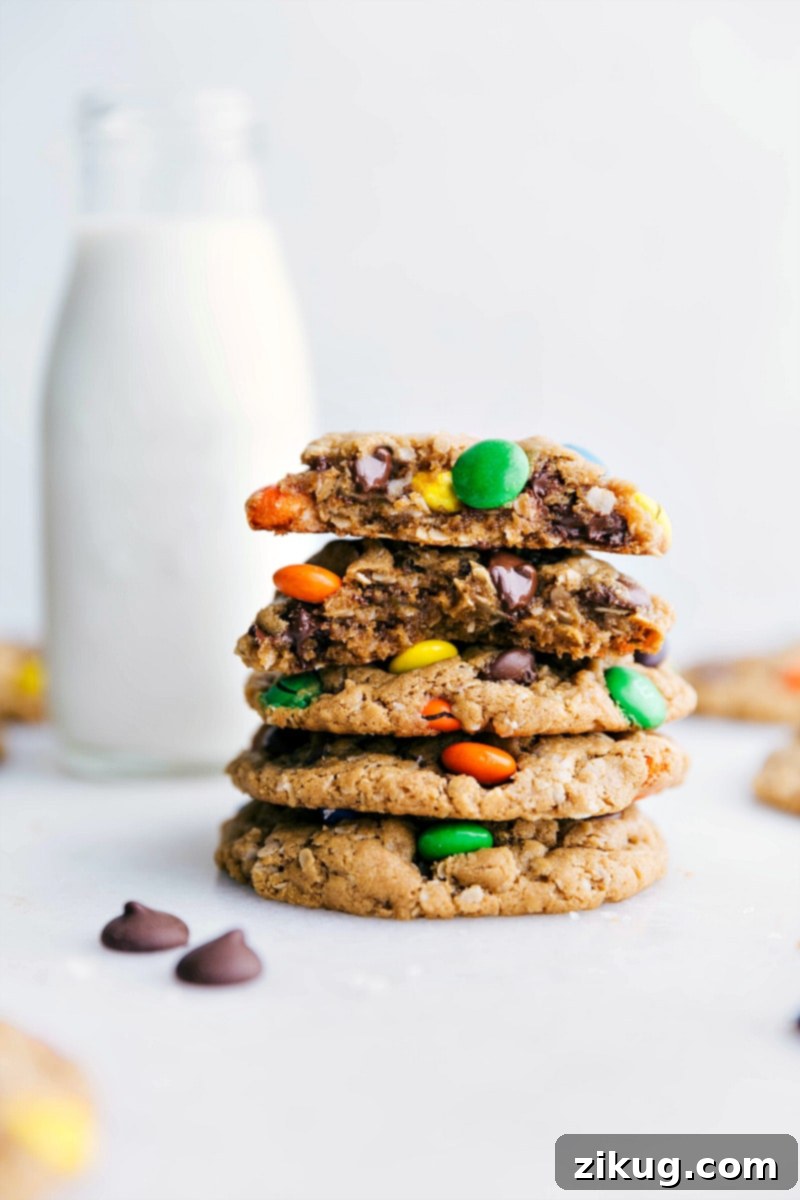
The Ultimate Gluten-Free Monster Cookies are a revelation for anyone seeking a delightful treat without gluten! Made with smart swaps like creamy peanut butter and quick oats replacing traditional flour, and coconut oil instead of butter, these cookies are incredibly soft, wonderfully chewy, and bursting with classic monster cookie flavor. You won’t believe they’re gluten-free, and they vanish from the cookie jar just as quickly as their flour-based counterparts!
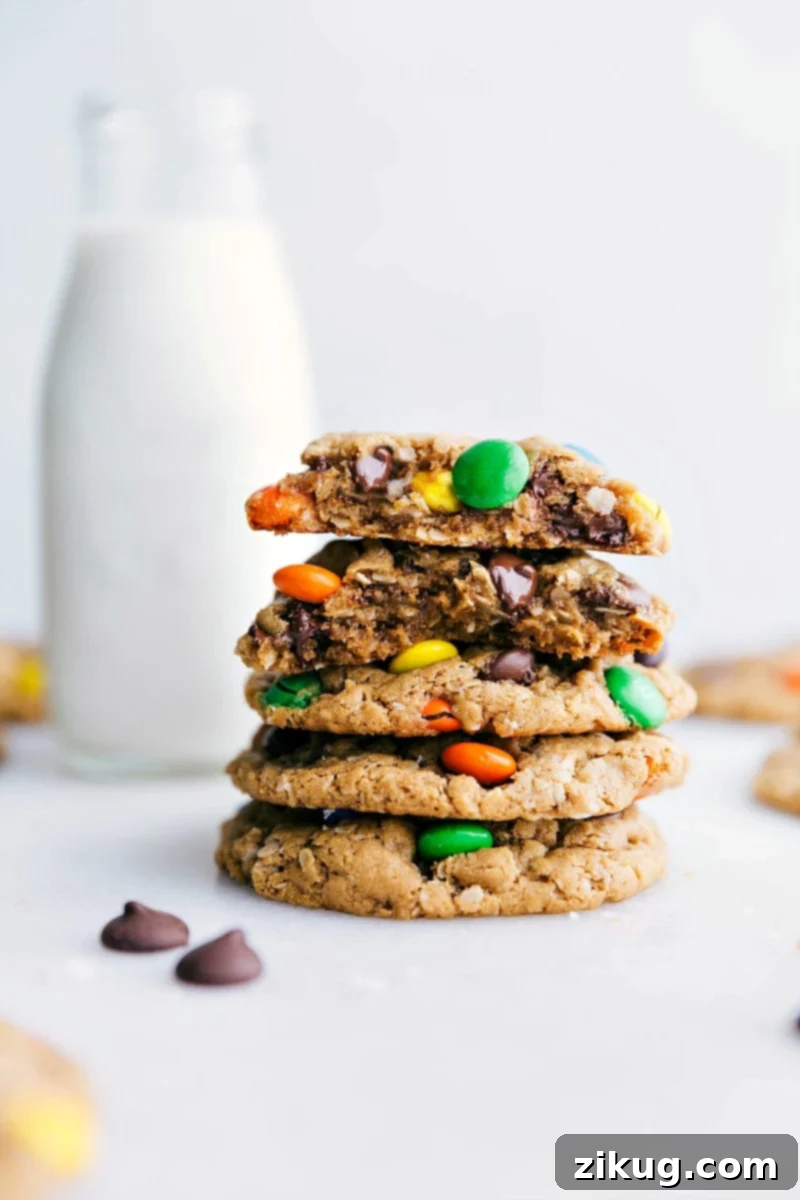

Author’s Note
My Journey to the Perfect Soft, Chewy, Chocolatey… and Totally Gluten-Free Monster Cookies!
Coming from a large family, I’ve seen firsthand how dietary needs can evolve. Over half of my family now follows gluten-free or dairy-free diets, which always makes meal planning and hosting a fun and rewarding challenge! When I gather everyone together, my unwavering goal is to ensure there’s an abundance of delicious food that *everyone* can enjoy, without feeling left out or compromising on taste.
I distinctly remember a time after preparing a huge batch of my classic M&M cookies. As delightful as they were, a nagging thought persisted: I absolutely needed a fantastic gluten-free version for those who couldn’t indulge in the original. It quickly became a personal mission to craft a cookie that retained all the charm, nostalgic appeal, and irresistible deliciousness of a traditional monster cookie but was completely free of gluten, and optionally dairy.
Using my tried-and-true regular recipe as a foundational guide, I embarked on a dedicated baking adventure. This wasn’t a one-and-done process; it took five dedicated batches, each meticulously tested and refined, filled with numerous tweaks and adjustments to ingredients and ratios, to finally achieve perfection. The result was these truly incredible gluten-free monster cookies. They boast the ideal soft, delightfully chewy texture, and are generously loaded with vibrant M&M’s and rich chocolate chips, delivering that quintessential monster cookie experience.
The best part? Every single person who tries them is amazed – you’d honestly never guess they were gluten-free! This recipe has received the ultimate seal of approval in my home: they consistently vanish from the cookie jar just as quickly as their flour-based counterparts, proving that a gluten-free cookie can be every bit as satisfying and decadent as any other. It’s a testament to the fact that you don’t need traditional flour or butter to create an absolutely unforgettable cookie.
Why You’ll Fall in Love with These Flourless Monster Cookies
These aren’t just any gluten-free cookies; they are a delightful culinary experience designed to satisfy even the most discerning cookie lover. Here’s why these monster cookies will quickly become a cherished favorite in your recipe collection:
- Naturally Gluten-Free Simplicity: Say goodbye to expensive, specialized gluten-free flour blends! This ingenious recipe brilliantly utilizes readily available quick oats and creamy peanut butter as its primary base, making it inherently free from gluten. Just a friendly reminder to ensure your quick oats are certified gluten-free if you are catering to individuals with celiac disease or severe gluten sensitivities.
- Unbelievably Flavorful Profile: Each bite is a delightful symphony of tastes. These cookies are generously packed with the rich, nutty essence of peanut butter, balanced by the sweet warmth of brown sugar, and an abundance of vibrant M&M’s and luscious chocolate chips. The result is a truly irresistible explosion of classic monster cookie flavor that leaves you craving more.
- Achieving the Perfect Texture: Prepare for a cookie that transcends expectations. These monster cookies boast a wonderfully soft, delightfully chewy interior, complemented by perfectly crispy edges. The carefully balanced combination of ingredients ensures a moist and tender crumb that maintains its integrity beautifully, offering an ideal bite every time.
- Thoughtful Healthier Swaps: By intelligently incorporating coconut oil as a primary fat source instead of butter, we introduce a slightly healthier alternative. This strategic swap also renders the recipe easily adaptable for those who are actively avoiding dairy products, expanding its appeal to a wider audience without sacrificing taste or texture.
- Effortless Preparation: Despite their gourmet taste, these cookies are surprisingly easy to make. With straightforward, step-by-step instructions and a list of common pantry staples, the dough comes together quickly, making them an ideal choice for addressing a sudden cookie craving or preparing a delightful treat for a special gathering with minimal fuss.
- Universal Crowd-Pleaser: Regardless of whether your guests follow a gluten-free diet or not, these delectable cookies are absolutely guaranteed to disappear in record time. Their universal deliciousness and satisfying appeal transcend dietary restrictions, making them a surefire hit at any event or as an everyday indulgence.
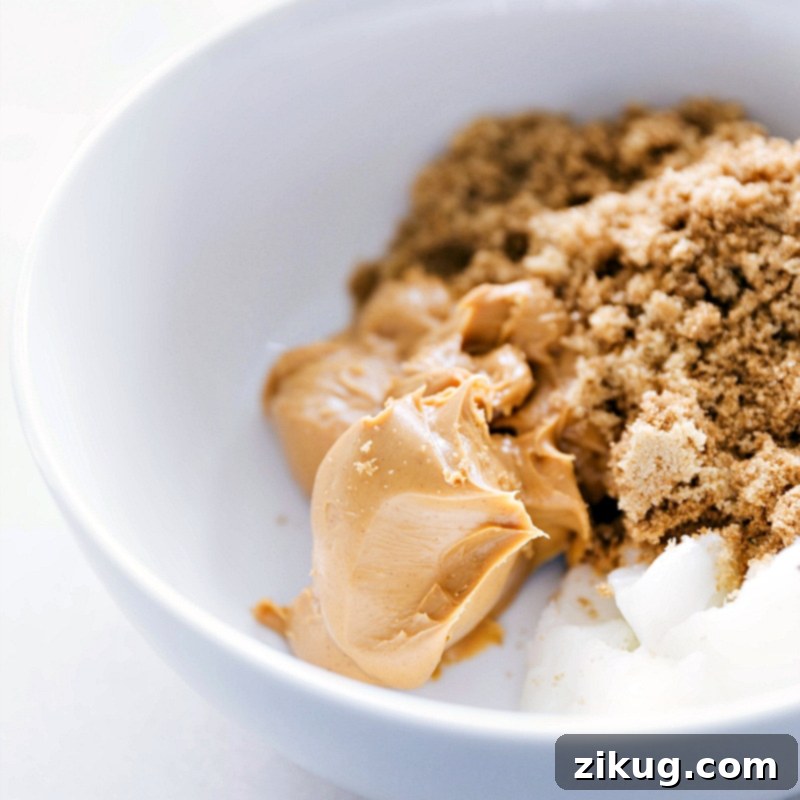
Gluten-Free Monster Cookies Ingredients & Expert Swaps
Crafting these delectable gluten-free monster cookies starts with selecting the right ingredients and understanding how each contributes to the final perfect bite. Here’s a closer look at what you’ll need and how you can make smart substitutions to fit various dietary needs and preferences:
| Ingredient | Swaps & Tips for Success |
|---|---|
| Peanut Butter | For the absolute best texture and consistency in your cookies, opt for a no-stir, creamy peanut butter. Natural peanut butters that tend to separate their oil can lead to a drier, crumblier cookie texture if not thoroughly mixed. While almond butter or cashew butter can be used for variation, be aware that substituting will subtly alter the signature flavor profile of your monster cookies. Always ensure your chosen nut butter is unsweetened and contains only nuts (and perhaps salt). |
| Brown Sugar | Brown sugar is an indispensable component in this recipe, providing not only its characteristic sweetness but also contributing crucial moisture and an unbeatable chewiness to the cookies. The natural molasses content in brown sugar is key to achieving that soft, tender texture that makes monster cookies so addictive. For those looking to experiment with flavor and a slightly less refined sugar, you can swap a portion (up to half) of the brown sugar with coconut sugar, which will lend a deeper, more caramel-like note to your cookies. |
| Coconut Oil | This recipe specifically calls for solid, unmelted coconut oil. Its firm consistency at room temperature plays a vital role in binding the dough and directly contributes to the cookie’s structure and its desirable chewy texture. If dairy is not a dietary concern for you, unsalted butter can be used as a direct 1:1 substitute. When using butter, ensure it is also at a cool room temperature and still firm, not melted or overly soft, for consistent results. |
| Egg + Egg Yolk | The strategic combination of one whole large egg and an additional egg yolk is a secret weapon for achieving super chewy cookies. The added fat from the extra yolk significantly enhances the richness of the cookies and contributes to that highly sought-after soft, tender crumb. If you need a vegan or egg-free alternative, a flax egg (prepared by mixing 1 tablespoon of ground flaxseed with 3 tablespoons of water, then letting it sit for 5 minutes to thicken) can be used. However, please note that cookies made with a flax egg may not be quite as chewy as those prepared with real eggs. |
| Quick Oats | This is a critical structural component and texture builder in these flourless cookies. It is absolutely imperative to use quick oats, and to avoid instant, steel-cut, or old-fashioned oats. Instant oats are too finely processed and will result in a different, often denser texture, while steel-cut and old-fashioned oats are too coarse and won’t absorb moisture correctly, leading to a gritty or excessively dry cookie. For those with gluten sensitivities or celiac disease, always ensure your quick oats are explicitly certified gluten-free to prevent cross-contamination. |
| M&Ms + Chocolate Chips | These beloved additions are the hallmark of classic monster cookies, bringing vibrant color and bursts of chocolatey goodness! Feel free to customize this aspect to your heart’s content. For a slightly healthier option, consider using dark chocolate chips, which offer a deeper, more intense chocolate flavor. If you require a dairy-free treat, make sure to seek out dairy-free chocolate chips and explore brands that offer dairy-free candy-coated chocolates as an excellent alternative to traditional M&M’s. |
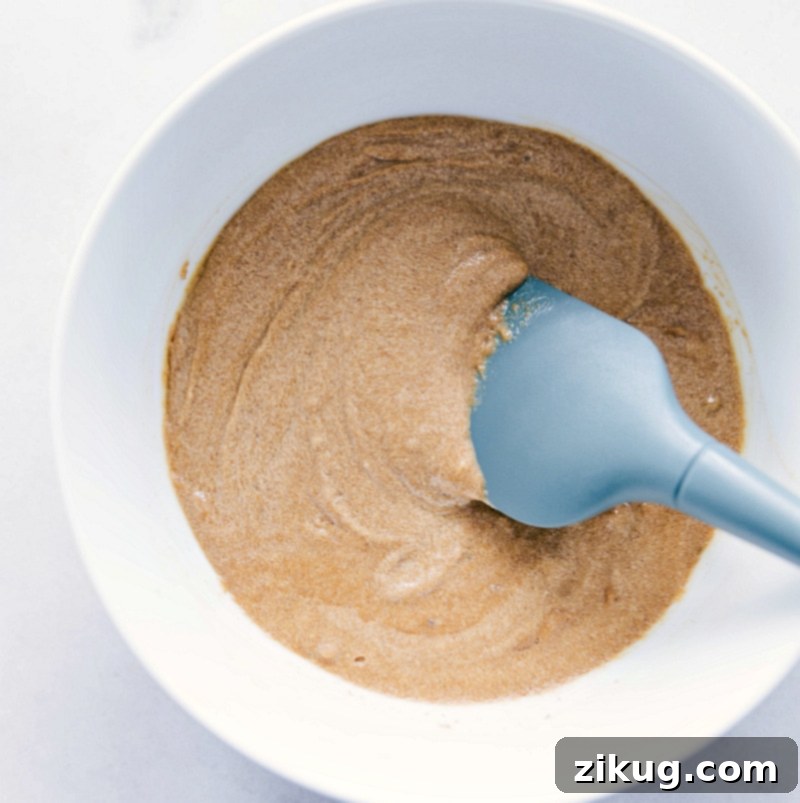
How To Make Gluten-Free Monster Cookies: A Simple Guide to Perfection
Making these delightful gluten-free monster cookies is a straightforward and enjoyable process that yields incredibly satisfying results. Follow these detailed steps for perfect cookies every time:
- Prepare Your Baking Station: Begin by preheating your oven to 350°F (175°C). This ensures the oven is at the correct temperature for even baking. Next, line a large baking sheet (a 15″ x 21″ size works well) with parchment paper or a silicone baking mat. This crucial step prevents the cookies from sticking, promotes uniform baking, and makes cleanup incredibly easy.
- Cream the Wet Ingredients: In a spacious mixing bowl, combine the creamy peanut butter, light brown sugar, and firm (unmelted) coconut oil. It’s important that the coconut oil is solid, not liquid, to maintain the dough’s consistency. Using a hand mixer, beat these ingredients together on medium speed until the mixture is smooth, creamy, and well combined. This forms the essential flavorful and structural base of your cookie dough.
- Incorporate Eggs and Flavorings: To the creamed mixture, add the large egg, the extra egg yolk (for added chewiness and richness), baking soda (for lift), and vanilla extract (for depth of flavor). If you plan to sprinkle flaky sea salt on top of the baked cookies for an extra savory-sweet touch, you can omit the salt from this step now. Continue to beat with the hand mixer until all these ingredients are fully incorporated and the mixture is uniformly blended and fluffy.
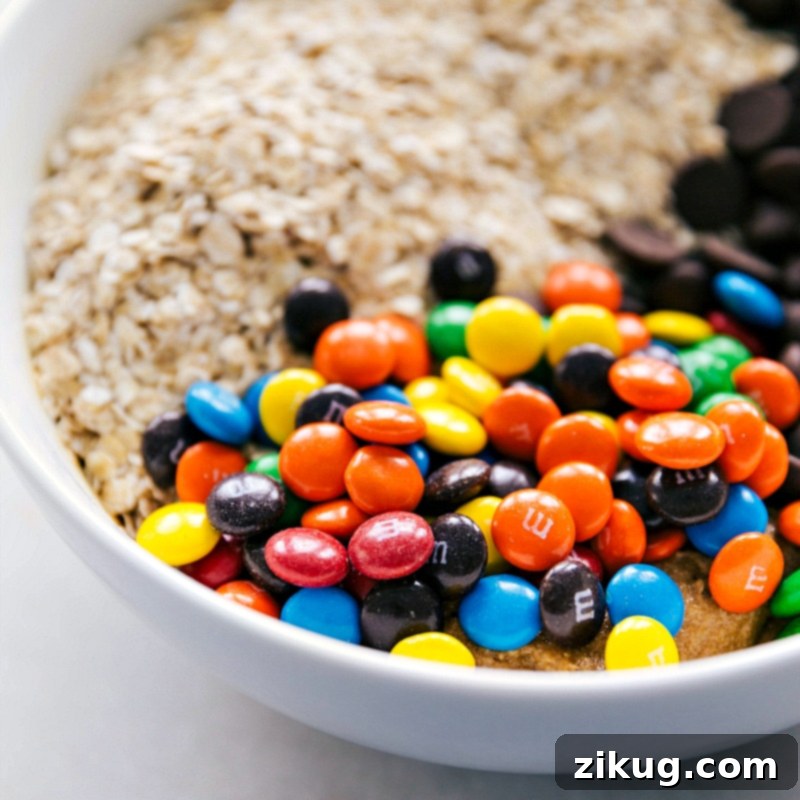
- Fold in Dry Ingredients and Mix-ins: Now, it’s time for the signature monster cookie additions! Gently stir in the quick oats, your chosen chocolate chips, and colorful M&M’s. Use your hand mixer on low speed, or a sturdy spatula, to beat until everything is just combined. Be careful not to overmix at this stage; overmixing can develop gluten in flour-based recipes (though less of a concern here) and can negatively impact the final texture, leading to tougher cookies.
- Chill the Dough (The Non-Negotiable Step): This step is absolutely crucial for perfectly shaped, non-spreading cookies. Cover the cookie dough and place it in the refrigerator for at least 10 minutes. This chilling period allows the fats in the dough (coconut oil, peanut butter) to firm up, significantly preventing excessive spreading during baking and helping them maintain their lovely thick and chewy shape.
- Shape and Bake to Perfection: Using a cookie scoop (approximately 3 tablespoons or about 2 ounces of dough per cookie is ideal for a good-sized monster cookie), roll the dough into even-sized balls. Place them on the prepared baking sheet, ensuring adequate space (about 2 inches) between each cookie, as they will spread slightly during baking. A standard sheet pan can typically fit 6-8 cookies. Bake for 9-12 minutes, or until the edges are just beginning to turn golden brown. The centers should still look visibly soft and slightly underbaked; this is the key to maintaining their signature chewiness.
- Cool and Enjoy: Once baked, let the cookies cool on the hot baking sheet for 2-3 minutes. This critical cooling time allows them to set and firm up sufficiently, preventing them from crumbling or falling apart when you transfer them. Then, carefully move them to a wire rack to cool completely. If desired, sprinkle a tiny pinch of flaky sea salt on the hot cookies immediately after they come out of the oven for an extra pop of complex flavor and visual appeal. Repeat the baking process until all the dough has been used.
Expert Tips for Baking the Best Flourless Monster Cookies
Achieving bakery-quality gluten-free monster cookies is easier than you think when armed with these insider tips and tricks:
- Measure Accurately for Consistency: Precision is paramount in baking, especially with flourless recipes where ingredient ratios are crucial for texture. When measuring dry ingredients like quick oats and sticky ones like peanut butter, always spoon them into your measuring cup and then level off the top with a straight edge. Avoid scooping directly with the measuring cup, as this can inadvertently pack ingredients too tightly and lead to inaccurate measurements and a denser cookie.
- Utilize a Quality Baking Liner: Always ensure your baking sheets are properly lined. Silicone baking mats or parchment paper are your best allies here. They not only ensure your cookies bake evenly without sticking to the pan but also play a vital role in preventing the bottoms from burning and make cleanup an absolute breeze, saving you time and effort.
- Embrace the Chill Time: Even a seemingly short 10-minute chill in the refrigerator can make a monumental difference in the final outcome of your cookies. This allows the fats in the dough (namely the coconut oil and peanut butter) to firm up considerably, which is essential in preventing the cookies from spreading too much during baking and helps them maintain their lovely thick, chewy, and perfectly formed shape.
- Top Cookies with Extra Goodies for Appeal: For that irresistible, visually stunning, and truly bakery-style appearance, along with an extra burst of chocolate in every single bite, gently press a few extra chocolate chips or M&M’s onto the tops of your freshly formed cookie dough balls just before baking, or immediately after they come out of the oven while still warm.
- Patience is a Virtue – Cool on the Pan: It’s incredibly tempting to move hot cookies right off the pan, but resist this urge! Allow your monster cookies to sit undisturbed on the baking sheet for at least 2-3 minutes after baking. This crucial initial cooling time allows them to firm up, set their structure, and prevents them from crumbling or falling apart when you eventually transfer them to a wire cooling rack.
- Avoid Overbaking at All Costs: For truly soft, moist, and delightfully chewy monster cookies, it is imperative to take them out of the oven when the edges are just barely golden brown and the centers still appear slightly soft and not fully set. Remember, cookies continue to cook slightly on the hot baking sheet as they cool, firming up to the perfect texture. Overbaking is the quickest way to end up with dry, hard, and crumbly cookies, so trust the process and remove them early.
- Room Temperature Eggs: Ensuring your eggs are at room temperature is a subtle yet effective trick. Room temperature eggs emulsify much better with other ingredients, particularly fats and sugars, creating a smoother, more uniform, and cohesive dough. If you forget to take them out ahead of time, a quick fix is to place them in a bowl of warm (not hot) water for 5-10 minutes.
- Don’t Overmix the Dough: Once the dry ingredients (oats and mix-ins) are added, mix just until combined. Overmixing can lead to a tougher cookie, even in flourless recipes, by overworking the starches in the oats and nut butter.
Customizing Your Gluten-Free Monster Cookies
One of the greatest joys of monster cookies is their incredible versatility! While the classic combination of M&M’s and chocolate chips is undeniably delicious, feel free to unleash your creativity and experiment with various mix-ins and flavor enhancements to make these cookies uniquely yours:
- Nutty Additions: For an extra layer of texture and nutty flavor, consider stirring in a handful of chopped walnuts, pecans, or even a sprinkle of chopped peanuts.
- Explore Different Chocolates: Expand beyond semi-sweet chips! Experiment with white chocolate chips for a creamy sweetness, butterscotch chips for a distinct caramel note, or even chop up your favorite dark chocolate bar for varied chocolatey goodness.
- Additional Candy Fun: Beyond M&M’s, you can explore chopped peanut butter cups, Reese’s Pieces (always double-check for gluten-free certification if needed), or other small, bite-sized candies that complement the peanut butter base.
- A Touch of Fruitiness: For a less traditional but equally delicious twist, add a small amount of dried cranberries or golden raisins. These provide a lovely chew and a hint of tartness.
- Spice it Up: A delicate pinch of cinnamon, a dash of nutmeg, or even a touch of espresso powder can beautifully enhance the chocolate and peanut butter flavors, adding depth and warmth.
Serving Suggestions for Your Delicious Monster Cookies
These glorious gluten-free monster cookies are undeniably delightful on their own, but here are a few inspired ways to elevate your cookie experience and make them even more special:
- The Classic Milk Pairing: There’s arguably no pairing more iconic and comforting than a warm, freshly baked monster cookie served alongside a tall, cold glass of milk (whether it’s traditional dairy or your favorite non-dairy alternative like almond or oat milk!).
- Perfect Coffee Break Treat: Indulge in one with your morning coffee, a midday latte, or an afternoon tea for a truly delightful and satisfying pick-me-up that brightens any part of your day.
- The Ultimate Ice Cream Sandwich: For an indulgent and show-stopping dessert, take two cooled monster cookies and sandwich a generous scoop of your favorite ice cream in between. Vanilla bean, chocolate, or even peanut butter ice cream would be heavenly!
- Creative Cookie Crumble: Crumble cooled cookies over scoops of vanilla ice cream, creamy yogurt, or even a vibrant smoothie bowl for added texture, sweetness, and a burst of flavor that transforms a simple dish.
- Thoughtful Gift Giving: Beautifully package these homemade cookies in a festive box, a charming cellophane bag tied with a ribbon, or a reusable cookie tin. They make a wonderfully thoughtful and much-appreciated homemade gift that anyone will adore, especially those with gluten sensitivities who often miss out on such treats.
More Delicious Gluten-Free Treats to Explore:
Breakfast
Gluten Free Zucchini Muffins
Desserts
Gluten Free Apple Muffins
Desserts
Gluten Free Brownies Recipe
Desserts
Gluten-Free Pumpkin Cake

Gluten-Free Monster Cookies
By Chelsea Lords
These Gluten-Free Monster Cookies are a healthy twist on a classic, made with wholesome coconut oil, quick oats, and creamy peanut butter instead of traditional flour and butter. So irresistibly good, you won’t even miss the conventional ingredients!
Prep Time: 10 minutes
Cook Time: 10 minutes
Chilling Time: 10 minutes
Total Time: 30 minutes
Yields: 14 cookies
Pin Recipe
Equipment
- Large sheet pan (15″ x 21″)
- Parchment paper or silicone baking mat
- Hand mixer
- Cookie scoop (recommended for even sizing)
Ingredients
- 3/4 cup creamy peanut butter (no-stir recommended)
- 1 cup light brown sugar, lightly packed
- 3 tablespoons coconut oil, firm (unmelted)
- 1 large egg
- 1 egg yolk
- 1 teaspoon baking soda
- 1/8 teaspoon salt (omit if using flaky sea salt topping)
- 1 teaspoon vanilla extract
- 1-1/4 cups quick oats (ensure certified gluten-free if needed; do not use instant, steel-cut, or old-fashioned)
- 1/2 cup chocolate chips (semi-sweet, milk, or dark; use dark chocolate for a healthier option)
- 1/2 cup M&M’s (or dairy-free candy-coated chocolates)
- Flaky sea salt, optional, for topping
Instructions
- Preheat your oven to 350°F (175°C). Line a large sheet pan with parchment paper or a silicone baking mat and set aside.
- In a large mixing bowl, combine the peanut butter, brown sugar, and firm coconut oil. Use a hand mixer to beat until the mixture is smooth and creamy.
- Add the large egg, egg yolk, baking soda, salt (if not using flaky sea salt on top), and vanilla extract. Mix well with the hand mixer until all ingredients are fully incorporated.
- Gently stir in the quick oats, chocolate chips, and M&M’s. Beat until just combined, being careful not to overmix.
- Chill the cookie dough in the refrigerator for 10 minutes. This step helps the cookies hold their shape better during baking.
- Using a cookie scoop (about 3 tablespoons or 2 ounces of dough), roll the dough into balls and place them on the prepared sheet pan. Leave enough space between cookies, as they will spread slightly (allow for 6-8 cookies per standard sheet).
- Bake for 9-12 minutes, or until the edges are just beginning to turn golden. The centers should still appear soft. Be careful not to overbake, as this will reduce their characteristic softness and chewiness.
- Allow the baked cookies to set on the sheet pan for 2-3 minutes before carefully transferring them to a wire cooling rack to cool completely. Repeat with any remaining dough.
- If desired, sprinkle a tiny pinch of flaky sea salt on top of the hot cookies immediately after they come out of the oven.
Recipe Notes
Gluten-Free Oats: Ensure that your quick oats are certified gluten-free if you are baking for someone with celiac disease or a severe gluten intolerance. This is crucial to prevent cross-contamination. As mentioned, do not substitute with instant, old-fashioned, or steel-cut oats, as they will dramatically alter the texture of these cookies.
Storage: Store completely cooled gluten-free monster cookies in an airtight container at room temperature. For optimal freshness and chewiness, consume them within 1-2 days. They will, however, remain delicious for up to 5 days.
Freezing Baked Cookies: For longer storage, allow the cookies to cool completely. Arrange them in a single layer on a baking sheet and freeze until solid (about 1-2 hours). Once firm, transfer them to an airtight freezer-safe bag or container, separating layers with parchment paper. They can be frozen for up to 3 months. Thaw at room temperature or warm briefly in the microwave for a fresh-baked feel.
Freezing Dough: You can also freeze the raw cookie dough. Form the dough into balls, place them on a parchment-lined baking sheet, and freeze until solid. Transfer to a freezer-safe bag. When ready to bake, place frozen dough balls on a prepared baking sheet and bake as directed, adding 2-3 extra minutes to the baking time.
Nutrition Information
Serving: 1 cookie
Calories: 260 kcal
Carbohydrates: 30g
Protein: 6g
Fat: 14g
Saturated Fat: 6g
Cholesterol: 31mg
Sodium: 192mg
Potassium: 153mg
Fiber: 2g
Sugar: 23g
Vitamin A: 59IU
Calcium: 38mg
Iron: 1mg
Nutrition information is automatically calculated and should be considered an approximation.
Enjoyed this recipe? Leave a comment below! Your feedback helps others discover delicious gluten-free treats and is always appreciated.
Extended Storage Tips
- Store leftover gluten-free monster cookies in an airtight container at room temperature for up to 5 days. Ensure they are completely cooled before storing to prevent any sogginess or condensation.
- For longer-term storage, freezing is an excellent option for both baked cookies and raw dough. To freeze baked cookies, allow them to cool completely. Arrange them in a single layer on a baking sheet and freeze until they are solid (typically about 1-2 hours). Once firm, transfer the frozen cookies to an airtight, freezer-safe bag or container, using parchment paper between layers to prevent them from sticking together. They will maintain their quality in the freezer for up to 3 months. You can simply thaw them at room temperature or gently warm them in the microwave for a fresh-baked feel. If you choose to freeze raw dough balls, bake them straight from frozen, adding an extra 2-3 minutes to the baking time.