
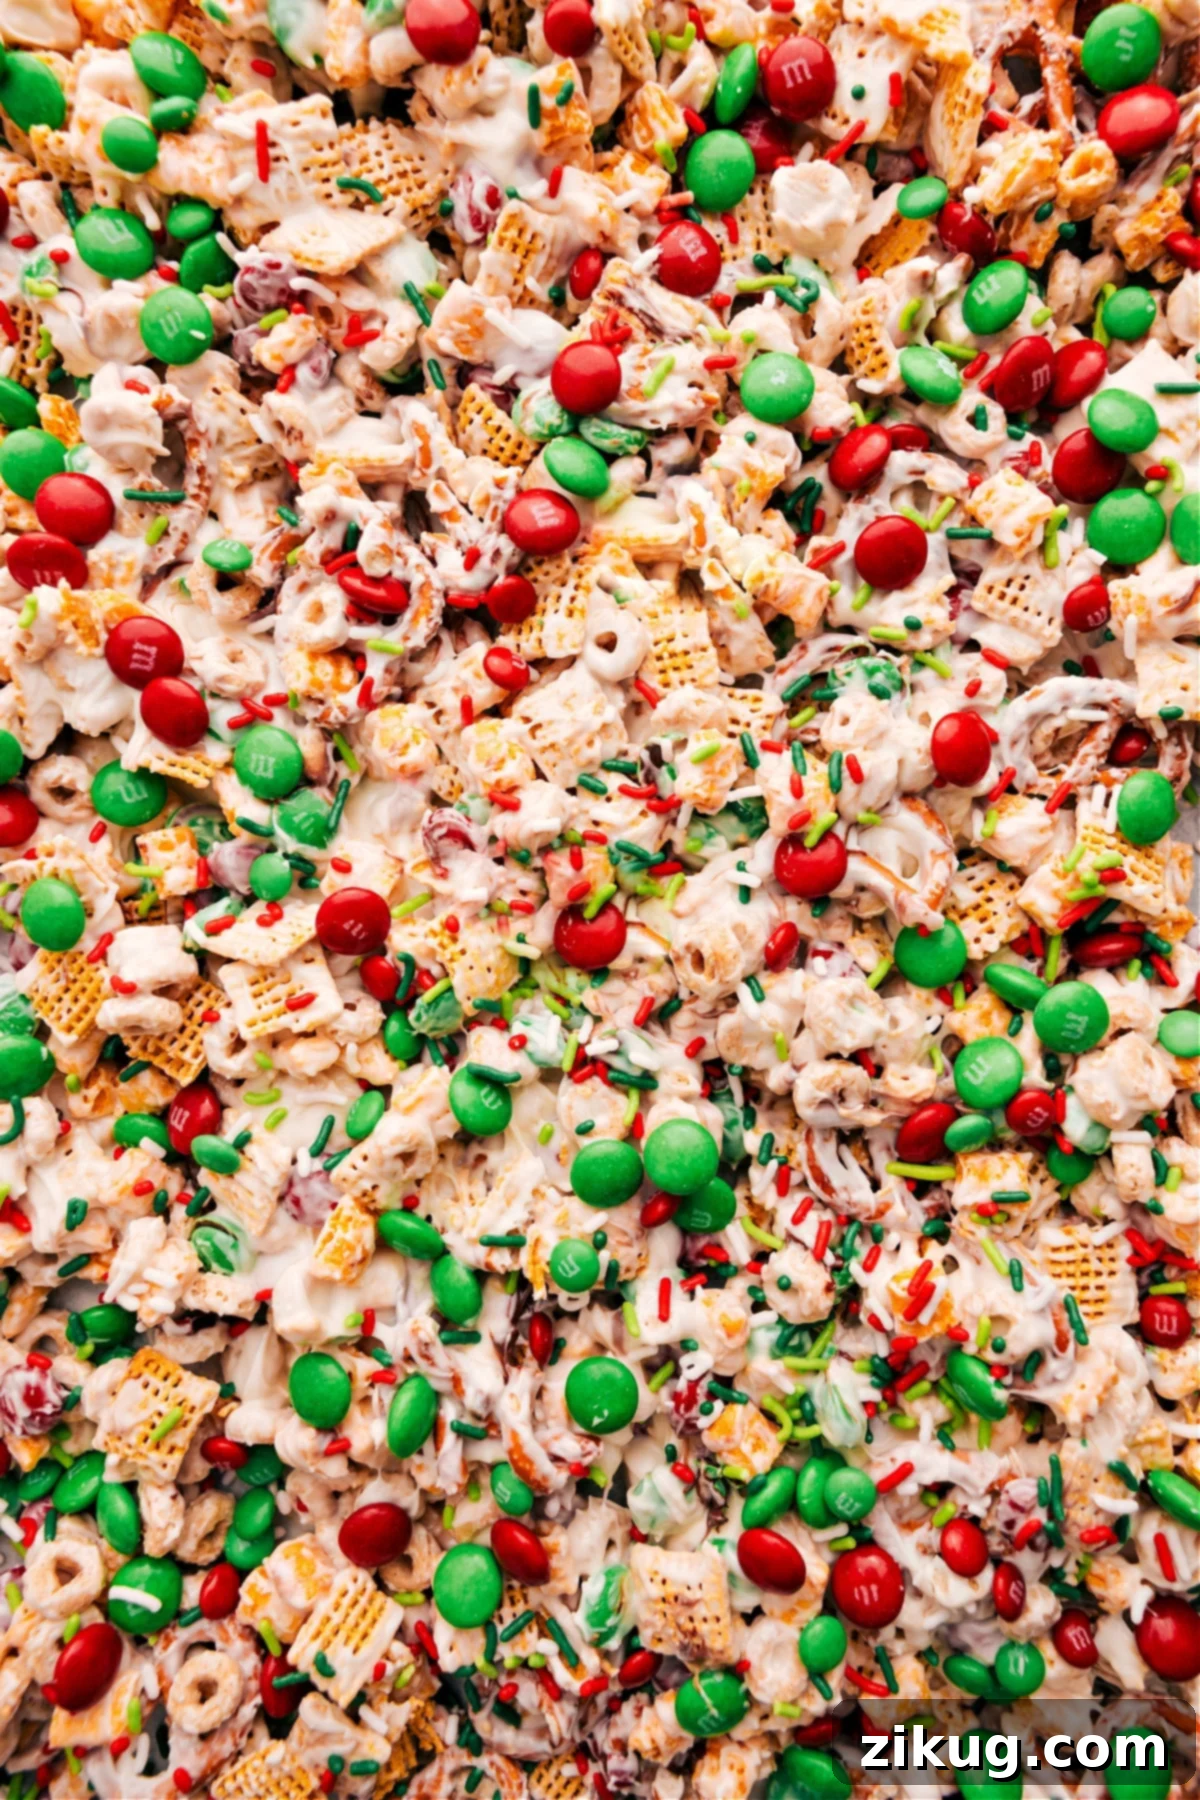
Christmas Snack Mix is a festive, no-bake treat with cereal, pretzels, M&M’s, and creamy white chocolate—perfect for the holidays!
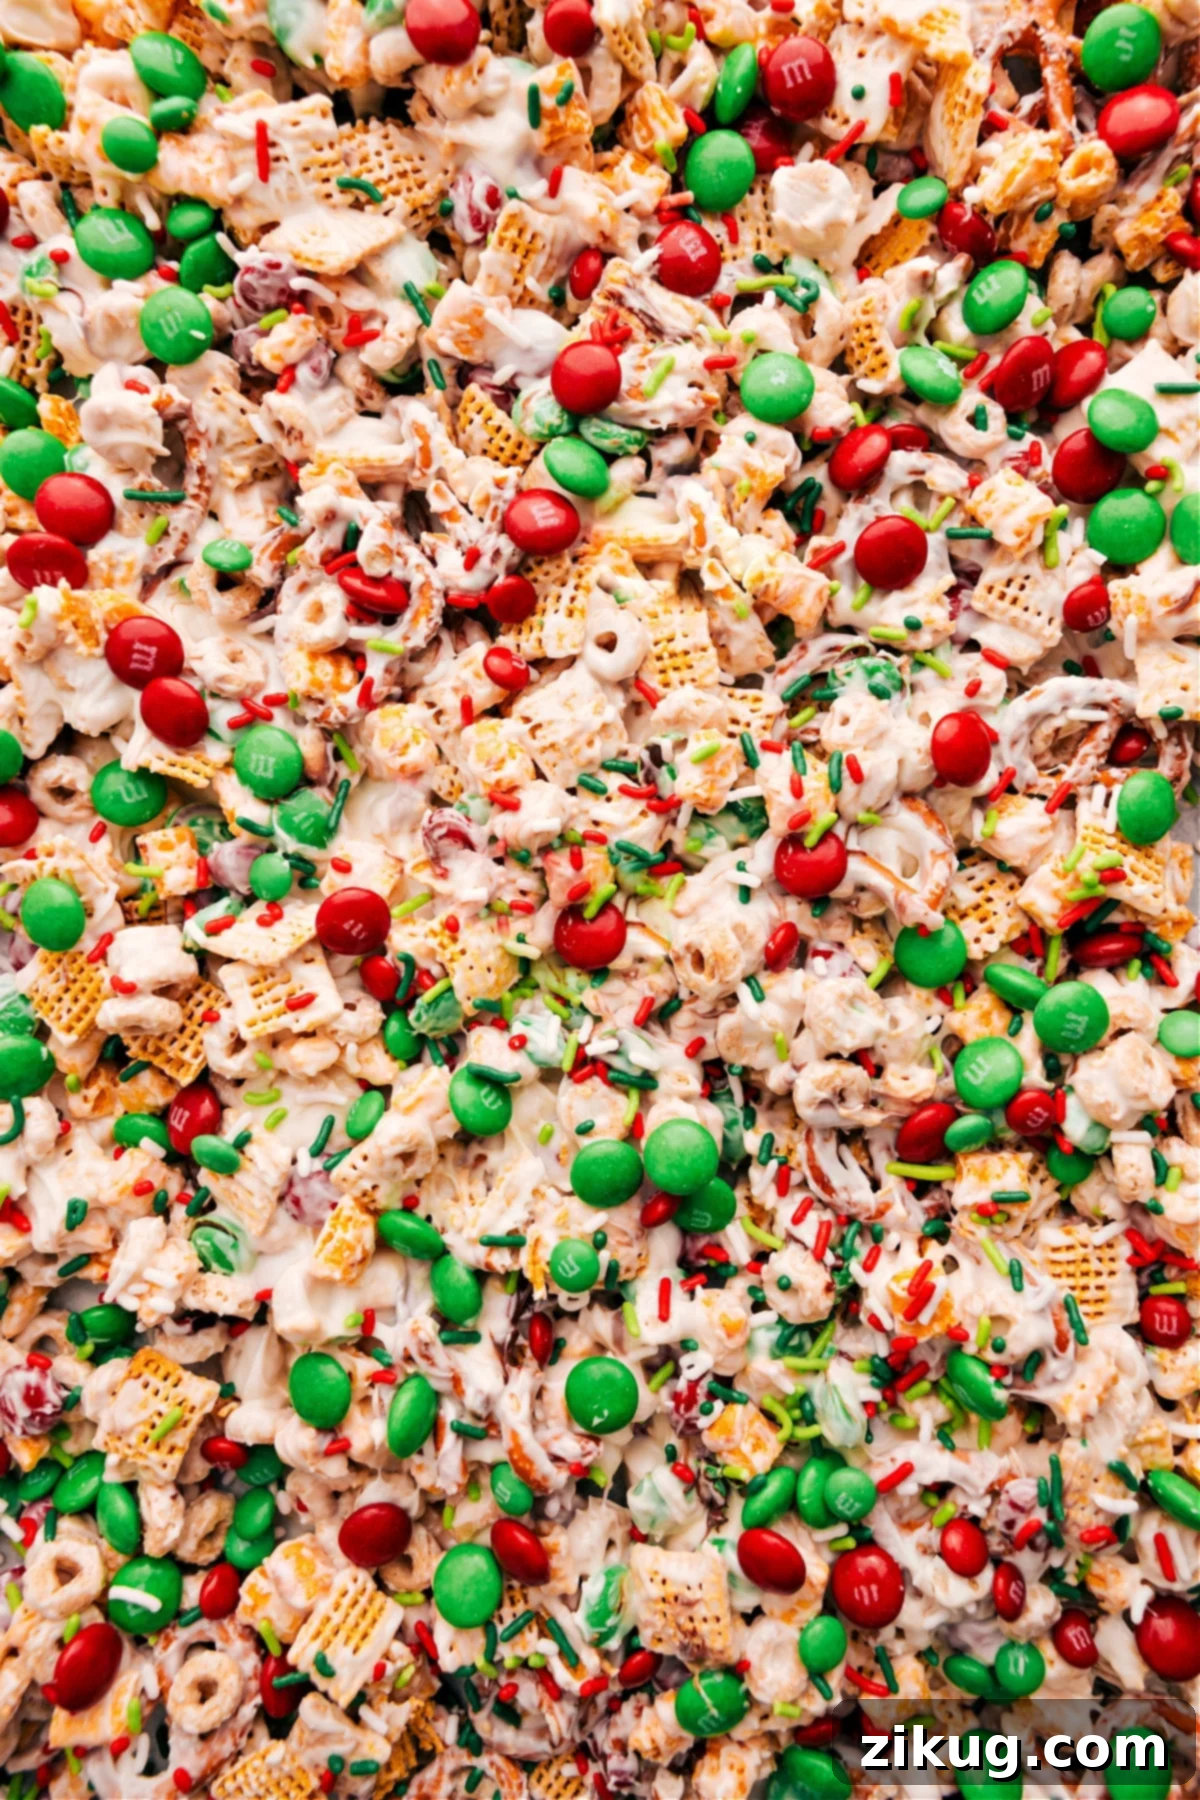
Easy White Chocolate Christmas Snack Mix: Your Go-To Holiday Treat
The holiday season is a whirlwind of activities, from decorating to gift shopping, and sometimes, elaborate baking simply isn’t an option. But that doesn’t mean you have to skip out on delicious homemade treats! This irresistible **White Chocolate Christmas Snack Mix** is here to save the day. It’s a delightful, no-bake recipe that comes together in roughly 15 minutes, offering maximum festive cheer with minimal effort. Imagine a delightful blend of crunchy cereals, salty pretzels, vibrant M&M’s, all coated in a luscious layer of smooth white chocolate. It’s truly a holiday masterpiece that’s as fun to make as it is to eat!
This **holiday snack mix** is wonderfully sweet, perfectly salty, and undeniably festive. Its vibrant colors and varied textures make it an instant hit at any gathering, from casual family movie nights to bustling holiday parties. One of its greatest charms is its adaptability; you can easily customize the ingredients to suit your taste, dietary needs, or even match different holiday themes. Just keep the ingredient ratios similar, and you’re all set to create your own unique batch of deliciousness. Get ready to impress everyone with this quick and easy **no-bake Christmas treat** that will become a staple in your annual holiday traditions!
Essential Ingredients for Your Perfect Christmas Snack Mix
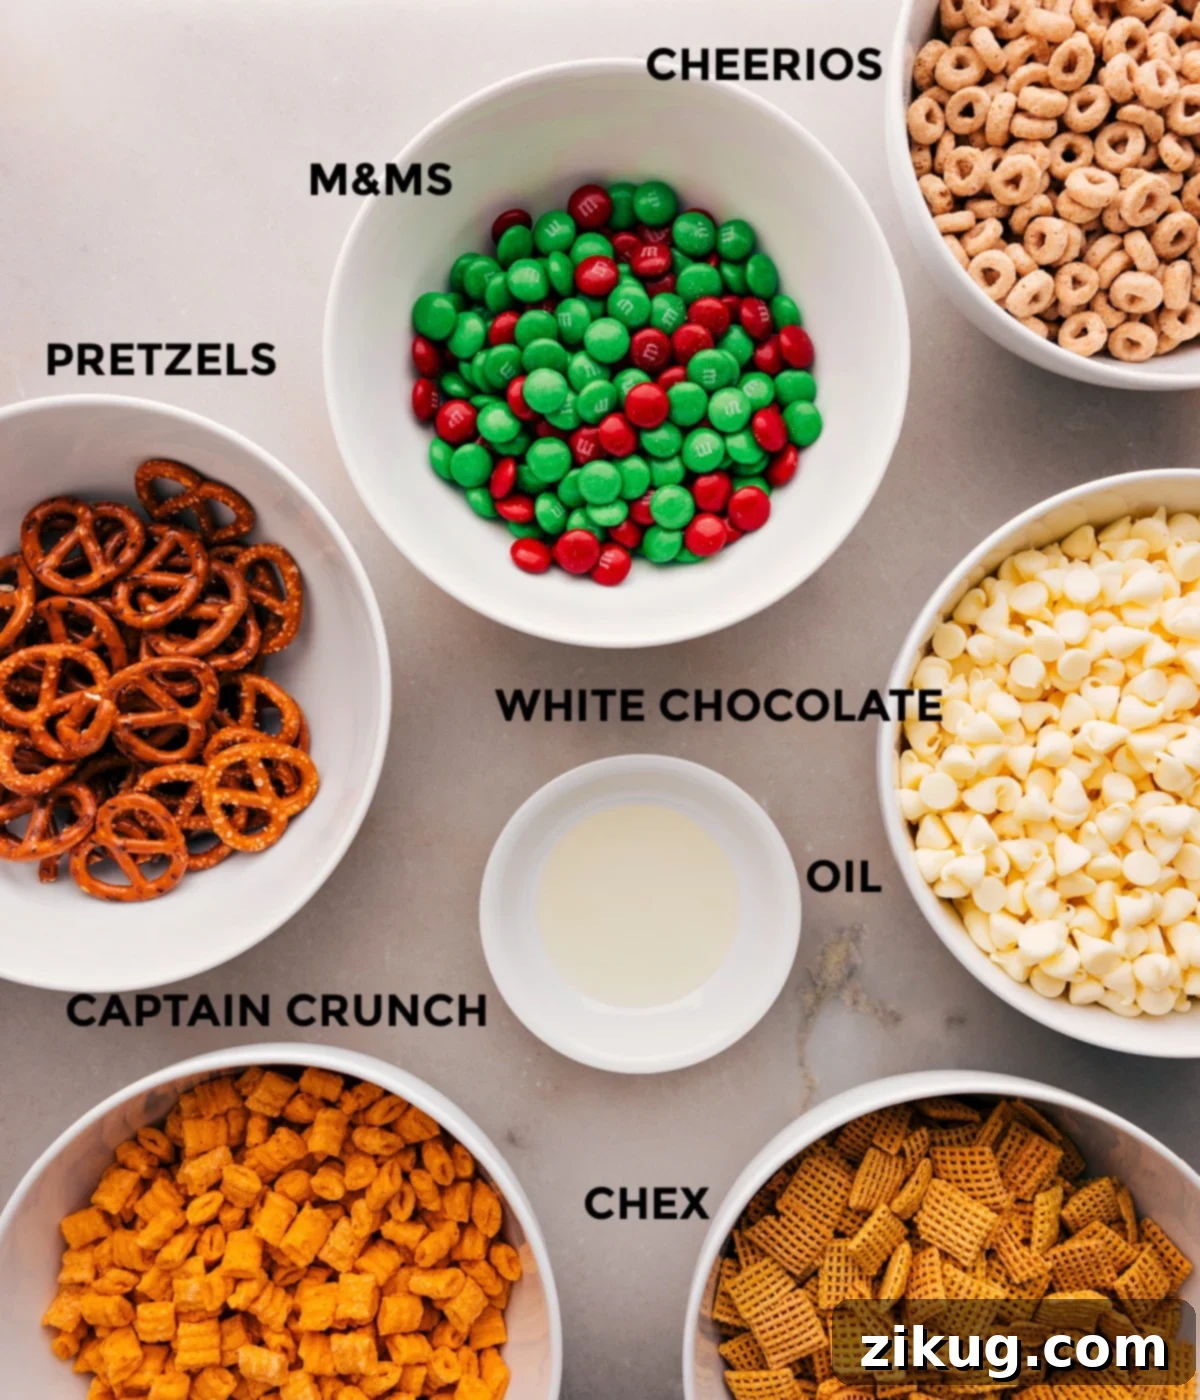
Crafting this delightful **Christmas Snack Mix** requires a simple list of ingredients, most of which you likely already have in your pantry or can easily find at any grocery store. The key is to select components that offer a fantastic balance of sweetness, saltiness, and satisfying crunch. Here’s a detailed look at what you’ll need to create this **festive snack**, ensuring every bite is a harmonious blend of textures and flavors:
- Chex Cereal: This forms the foundational crunch of our snack mix. Whether you choose classic Rice Chex, wholesome Corn Chex, or subtly sweet Honey-Nut Chex, its light, airy, and crisp texture is absolutely essential. It provides a neutral base that perfectly absorbs the white chocolate coating, ensuring a consistent texture throughout the mix. This cereal acts like a sponge, soaking up the sweet goodness.
- Pretzels: A crucial element for that irresistible sweet and salty contrast. Mini pretzel twists or pretzel rods work wonderfully, adding a robust savory crunch. If using rods, a quick snap in half ensures easier mixing and bite-sized pieces throughout the mix. The saltiness from the pretzels cuts through the sweetness of the chocolate and M&M’s, creating a perfectly balanced flavor profile that keeps you coming back for more of this **holiday snack mix**.
- Cap’n Crunch: Opt for the plain version (without berries) to introduce a distinct, sugary crunch and a hint of corn syrup sweetness. Its unique, slightly rough texture stands out among the other cereals and adds another layer of delightful complexity to the mix, making each bite more interesting and satisfying. It’s a nostalgic addition for many!
- Cheerios: Another beloved cereal that contributes to the overall crunch and a slightly nutty, comforting flavor. Plain Cheerios offer a subtle backdrop, allowing other flavors to shine, while Honey-Nut Cheerios enhance the sweetness, complementing the white chocolate beautifully. Both options integrate seamlessly into this **easy Christmas recipe**, providing a familiar and beloved crunch.
- M&M’s: These iconic chocolate candies are not just for taste; they’re vital for adding that vibrant, unmistakable Christmas color! Red and green M&M’s instantly make the snack mix festive and visually appealing. However, feel free to use other colors if you’re making this for a different occasion. They add little bursts of chocolatey sweetness and a satisfying chew that breaks up the crunch of the cereals.
- White Chocolate Chips: The star of the coating! High-quality white chocolate chips are paramount for achieving a smooth, creamy, and decadent coating. When melted with a touch of oil, they become the perfect binder, enveloping all the ingredients in a delicious, sweet embrace. Using good quality chocolate will make a significant difference in both the texture and flavor of your **white chocolate snack mix**.
- Vegetable Oil: A small amount of neutral-flavored vegetable oil (like canola, grapeseed, or even a touch of coconut oil) is added to the white chocolate chips during melting. This helps create a smoother, more fluid consistency, making it much easier to evenly coat all the dry ingredients without the chocolate becoming too thick or seizing prematurely.
- Christmas Sprinkles (Optional): For an extra dash of holiday magic! Festive sprinkles in red, green, and white add a beautiful visual appeal and a fun, celebratory touch that kids and adults alike will adore. They make the **no-bake Christmas treat** look even more appealing and truly ready for any festive occasion.
Step-by-Step Guide: Crafting Your Delicious Christmas Snack Mix
Making this **White Chocolate Christmas Snack Mix** is incredibly straightforward and requires no baking, making it perfect for busy holiday schedules. Even beginner cooks can achieve fantastic results with this recipe. Follow these simple steps for a perfect batch every time:
- Prepare Your Workspace: Begin by lining a large baking sheet (approximately 15″ x 21″ or your largest available) with parchment paper. This crucial step prevents the snack mix from sticking to the pan as it sets and makes for incredibly easy cleanup once the chocolate has hardened. Set this aside, ready for your coated mixture. If you’re using pretzel rods, gently break them into smaller, bite-sized pieces now to ensure even distribution in the mix.
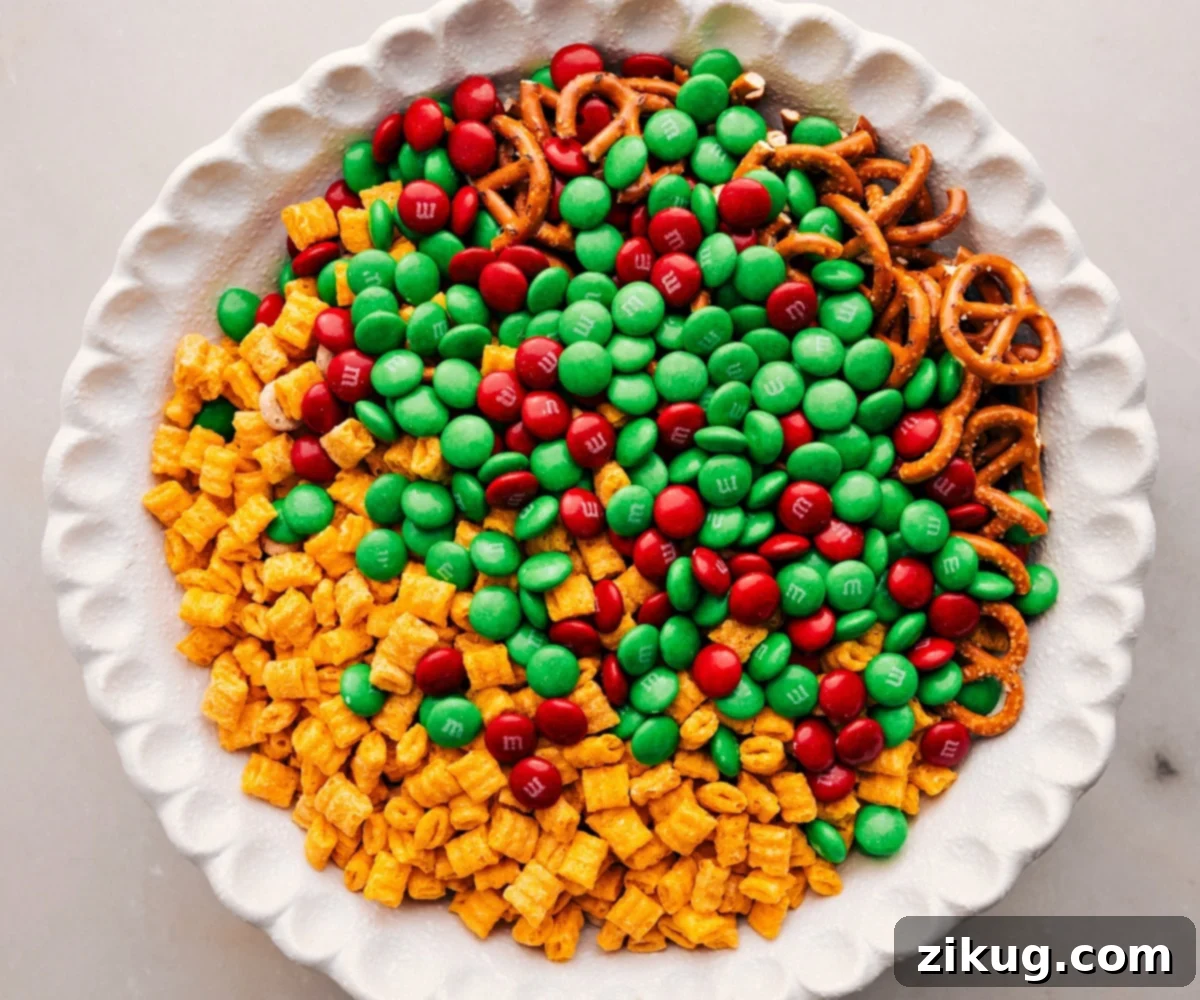
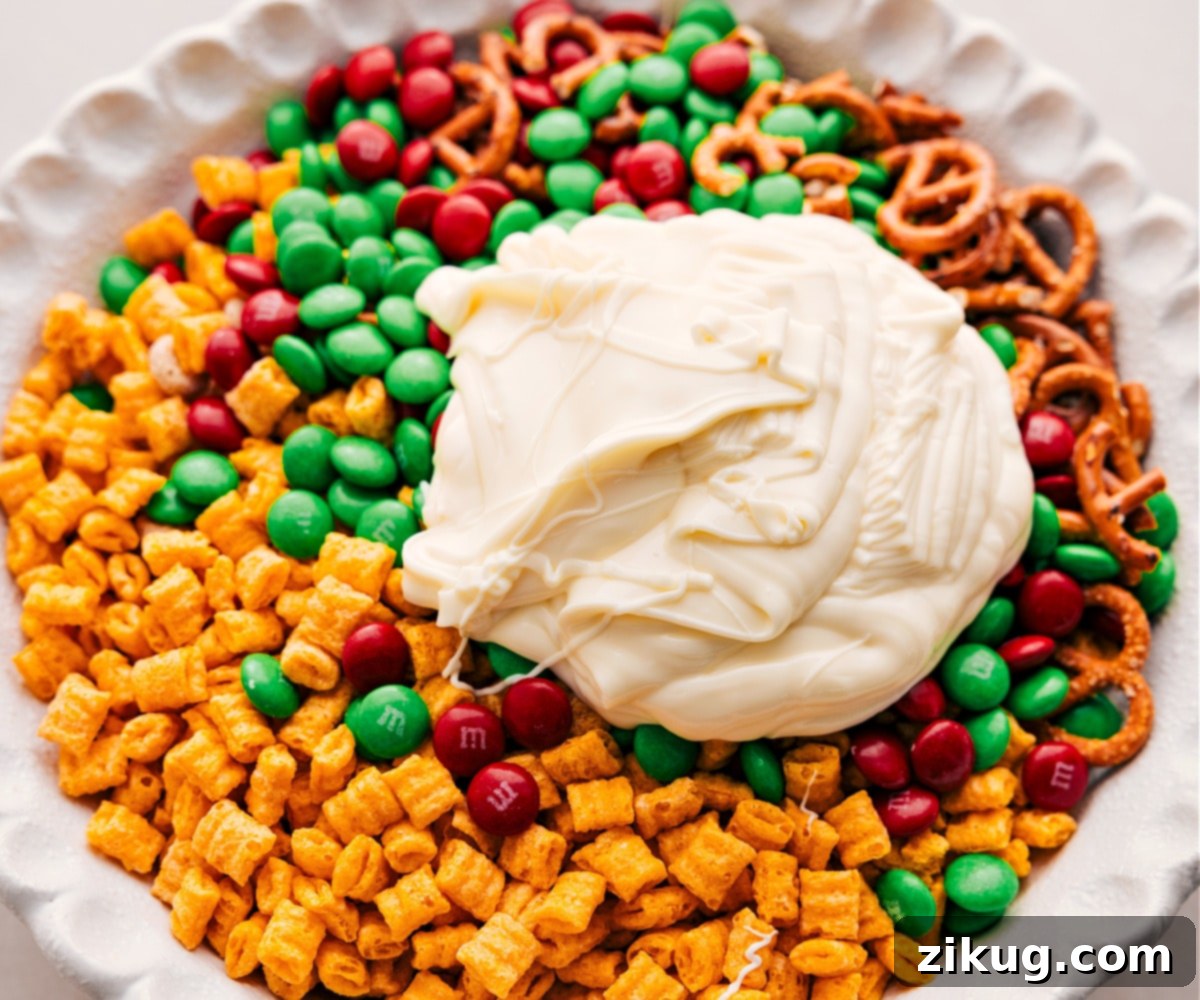
- Combine Dry Ingredients: In a generously sized mixing bowl, combine all your dry components: Chex cereal, pretzels, Cap’n Crunch, Cheerios, and the festive Christmas M&M’s. Take a moment to gently stir these ingredients together using a large spoon or your hands until they are well combined. This ensures a consistent flavor and texture in every bite of your **holiday snack mix** and prevents any single ingredient from dominating.
- Melt the White Chocolate: In a separate microwave-safe bowl, place your white chocolate chips and vegetable oil. Microwave on high for 30 seconds. Remove the bowl from the microwave and stir thoroughly with a spoon or spatula. The chocolate may not look fully melted yet, but the stirring distributes the heat. Return to the microwave for another 25 seconds. Stir again until the chocolate is completely smooth and creamy. If there are still a few unmelted lumps, microwave in short 10-second bursts, stirring vigorously after each interval, until perfectly melted and fluid. Avoid overheating the chocolate, as this can cause it to seize or burn, ruining the texture.
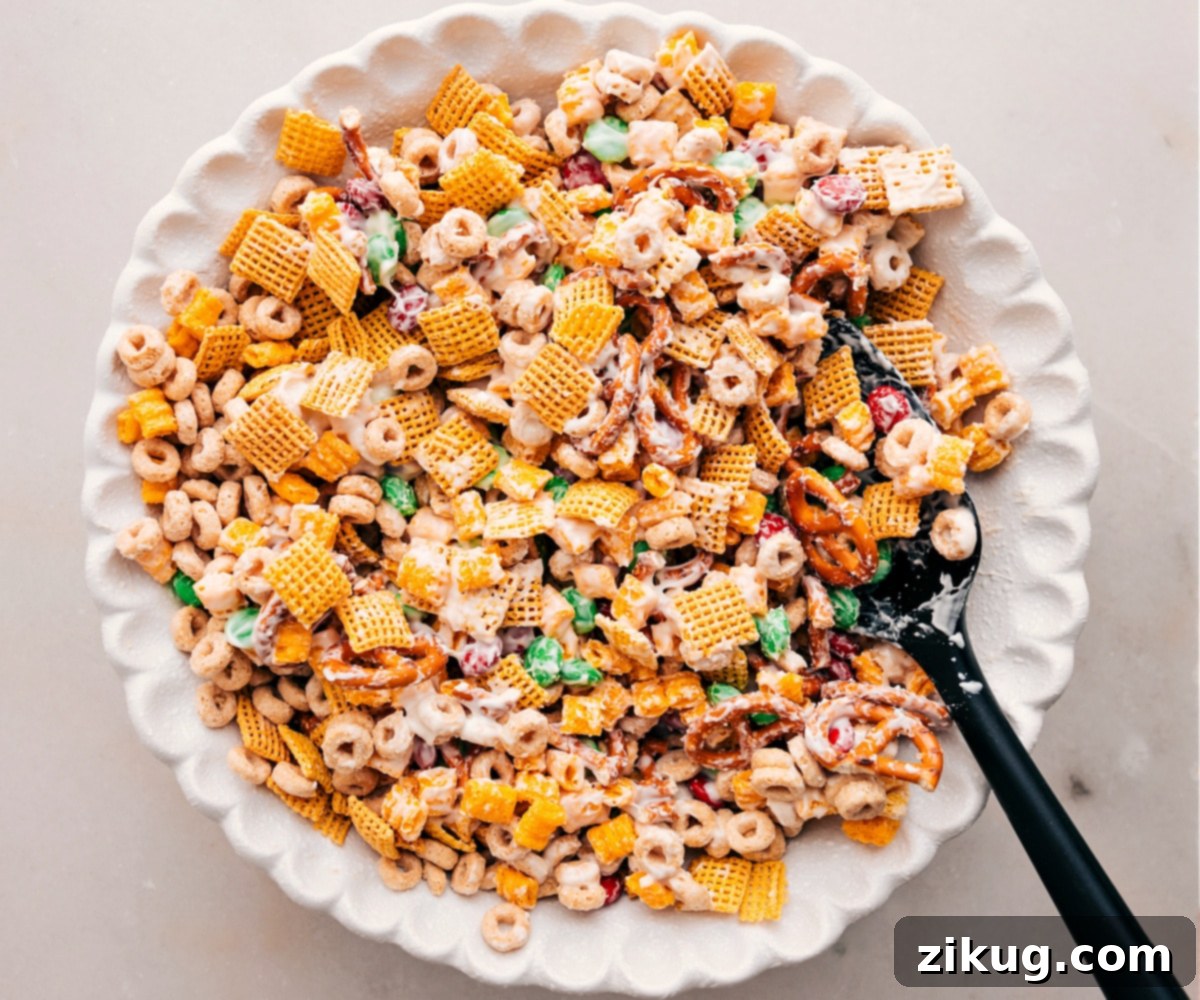
- Coat the Mix: Immediately pour the warm, melted white chocolate over the combined dry ingredients in your large bowl. Working quickly, use a spatula or large spoon to gently fold and stir the mixture. Continue stirring until all the cereals, pretzels, and M&M’s are thoroughly and evenly coated with the luscious white chocolate. The key here is to be gentle yet swift, as white chocolate tends to set quite rapidly once it starts to cool. Ensure every piece gets its fair share of chocolate!
- Spread and Set: Once fully coated, transfer the entire **Christmas Snack Mix** onto the prepared parchment-lined baking sheet. Spread it out into a single, even layer using your spatula or the back of a spoon. Avoid piling it too high, as this will slow down the setting process. If you’re adding Christmas sprinkles for extra flair, now is the perfect time to generously sprinkle them over the top before the chocolate fully hardens. Allow the mix to set at room temperature for about 30-60 minutes, or speed up the process by refrigerating it for 10-20 minutes until the chocolate is firm to the touch.
- Break and Serve: Once the **white chocolate snack mix** is completely firm and the chocolate is solid, simply break it apart into smaller, bite-sized clusters. You can use your hands or a knife for this. Transfer to a festive serving bowl or arrange on a platter. Your crunchy, sweet, salty, and utterly delicious **no-bake Christmas treat** is now ready to be enjoyed by everyone!
Quick Customization Tips for Your Snack Mix
This recipe for **Christmas Snack Mix** is wonderfully versatile, making it easy to adapt for any occasion or dietary preference! Don’t hesitate to experiment with different cereals, candies, or even switch up the type of chocolate. For example, instead of white chocolate, you could use milk chocolate or dark chocolate for a richer, bolder flavor profile. Consider adding mini marshmallows for a softer texture, toasted nuts (like pecans or almonds) for added protein and crunch, dried cranberries or cherries for a chewy tartness, or other festive candies that match your theme. You can easily adapt this basic framework for other holidays too – think orange and black M&M’s for Halloween, pastels for Easter, or red, white, and blue for patriotic celebrations. The possibilities for creating a unique and delicious **festive snack** are truly endless, allowing your creativity to shine!
Mastering the Melt: Expert Tips for Perfect White Chocolate Coating
The creamy white chocolate coating is what truly brings this **Christmas Snack Mix** together, creating that delightful indulgence and binding all the delicious components. However, melting white chocolate can sometimes be a bit tricky, as it’s prone to seizing or burning if not handled correctly. Here are my top tips to ensure your white chocolate melts perfectly smooth and coats your snack mix beautifully every single time:
- Choose Quality Ingredients: This is perhaps the most important tip for any chocolate-based recipe. High-quality white chocolate chips or bars contain more cocoa butter and fewer additives, which results in a smoother melt and a much richer, more delicious flavor. Inferior chocolate can be grainy, seize easily, or have an unpleasant waxy texture. Investing in good quality white chocolate will make a significant difference in the final taste and texture of your **white chocolate snack mix**.
- Stir Often and Gently: When microwaving white chocolate, it’s crucial to stir it frequently, even if it doesn’t look fully melted. Always remove the bowl and stir every 30 seconds. The residual heat in the bowl and chocolate chips will continue to melt them. Constant, gentle stirring helps distribute the heat evenly and prevents hot spots that can scorch or burn the chocolate, which is a common pitfall.
- Avoid Any Contact with Water: White chocolate is highly sensitive to water. Even a tiny drop of water or steam can cause it to “seize,” instantly turning it from a smooth, liquid consistency into a thick, lumpy, unworkable paste. Ensure your bowl, spatula, and any utensils you use are completely dry before you begin melting. If using a double boiler method, make sure the simmering water does not touch the bottom of the bowl holding the chocolate.
- Work Quickly After Melting: White chocolate sets relatively fast once it’s removed from the heat and begins to cool. As soon as your chocolate is perfectly smooth and melted, immediately pour it over your dry ingredients and begin stirring to coat them. Don’t let the melted chocolate sit too long, or it will start to harden, making it difficult to coat everything evenly. Speed and efficiency are key to a perfectly coated **festive snack**.
- Chop for Even Melting: If you are using a block of white chocolate instead of chips, chop it into small, uniform pieces before melting. Smaller pieces will melt more evenly and quickly, reducing the risk of overheating certain parts while others remain solid. This also applies if you are using a double boiler, as it ensures a consistent melt.
Creative Variations & Perfect Serving Ideas for Your Holiday Snack Mix
Beyond the classic **Christmas Snack Mix** recipe, there are countless ways to customize and enhance this delicious treat, making it uniquely yours. Its versatility makes it ideal for various occasions and flavor preferences, ensuring it’s always a hit:
Fun Flavor Twists:
- Nutty Crunch: For added depth and protein, incorporate 1/2 cup of roasted chopped pecans, almonds, walnuts, or even a mix of your favorite nuts. Toasting them lightly before adding enhances their flavor.
- Peppermint Delight: Elevate the festive spirit by crushing a few candy canes and sprinkling them generously over the white chocolate before it sets. This provides a refreshing minty kick that is a classic **Christmas flavor** and always delights taste buds.
- Dried Fruit Fusion: Add a chewy texture and tart sweetness with dried cranberries, cherries, or golden raisins. These fruits also add beautiful pops of color, especially cranberries for a holiday feel.
- Spicy & Sweet: For an adventurous twist, add a tiny pinch (about 1/8 to 1/4 teaspoon) of cayenne pepper to the melted white chocolate. This unexpected subtle heat beautifully complements the sweetness and creates a sophisticated flavor profile.
- Chocolate Overload: If you’re a true chocolate lover, mix in additional chocolate elements like mini semi-sweet chocolate chips, chocolate-covered raisins, or small pieces of chopped chocolate bars alongside the M&M’s for extra indulgence.
- Toasted Coconut: Lightly toast some shredded coconut in a dry pan until golden, then add it to the mix for a tropical twist and added texture.
Perfect Serving Ideas:
- Holiday Parties: Serve it in a large, decorative bowl as a festive centerpiece snack. Its vibrant colors and inviting aroma make it perfect for guests to graze on throughout any holiday gathering.
- Homemade Gifts: The **Christmas Snack Mix** makes for an incredibly thoughtful and appreciated homemade holiday gift. Package the cooled mix in cute cellophane bags, tie them with festive ribbons, and perhaps add a small handwritten tag. They are perfect for friends, neighbors, teachers, and colleagues.
- Cozy Movie Night Treat: Enjoy a generous bowl of this crunchy, sweet, and salty mix during a cozy Christmas movie marathon with family or friends. It’s the ultimate comfort snack.
- Stocking Stuffers: Small, individual portions of this mix in small bags are fantastic, delicious additions to Christmas stockings, offering a sweet surprise.
- Dessert Bar Addition: Include it as part of a larger dessert spread alongside cookies, festive fudge, cupcakes, and other holiday treats. Its unique texture and flavor will stand out.
- Travel Snack: Pack individual servings for car trips or visits to family during the busy holiday travel season. It’s a convenient and mess-free snack.
Storage Solutions to Keep Your Snack Mix Fresh
Proper storage is essential to keep your **Christmas Snack Mix** crunchy and delicious for as long as possible, preserving its delightful texture and flavor. Follow these guidelines for optimal freshness:
- Room Temperature Storage: Once the white chocolate has fully set, transfer your snack mix to an airtight container. Store it at room temperature, ideally in a cool, dry place away from direct sunlight or heat sources. Under these conditions, it will maintain its best quality for up to a week. For peak freshness, where the cereals remain crispiest and the flavors are most vibrant, I highly recommend enjoying it within 2–4 days of preparation.
- Freezing for Longer Shelf Life: If you’ve made a large batch and wish to extend its shelf life, or want to prepare it well in advance, this **holiday snack mix** freezes beautifully. Place the completely cooled and set snack mix in a freezer-safe, airtight container or a heavy-duty freezer bag. Ensure it’s sealed tightly to prevent freezer burn. It can be stored in the freezer for up to 3 months. When you’re ready to enjoy it again, simply remove it from the freezer and let it thaw at room temperature for about 30 minutes to an hour before serving. There’s no need to reheat, and the texture will return to its delightful crunch.
Discover More Delightful Christmas Treat Recipes:
- 6 Easy Christmas Gifts with creative bag toppers for thoughtful, homemade presents everyone will adore.
- Mint Chocolate Fudge – a simple, microwave-made delight that’s rich, creamy, and wonderfully refreshing for the holidays.
- Christmas Oreo Truffles – explore five different festive ideas for this popular no-bake treat, perfect for any holiday party.
- Three-Ingredient Peppermint Ice Cream Bars – an unbelievably easy and quick dessert using readily available ice cream sandwiches.
- Festive Christmas Punch made with tangy cranberry juice and other delightful flavors, perfect for holiday gatherings and celebrations.
Christmas Snack Mix Recipe
Rating: 5 out of 5 stars from 12 votes
By Chelsea Lords
A festive **Christmas Snack Mix** that’s loaded with cereal, pretzels, M&M’s, and creamy white chocolate—a holiday treat everyone will love! This quick and easy recipe is perfect for parties, gifting, or simply enjoying with family during the festive season.
Prep Time: 15 minutes
Total Time: 15 minutes
Yields: 8 servings
Recipe Video
Watch this quick video to see how easily this delicious Christmas Snack Mix comes together!
Equipment
- Large sheet pan (15″ x 21″)
- Large mixing bowl
- Microwave-safe bowl
- Spatula or large spoon
Ingredients
- 1 cup pretzel twists or sticks (break pretzel rods in half for better distribution)
- 2 cups Chex cereal (rice, corn, or Honey-Nut variety)
- 2 cups Cap’n Crunch cereal (ensure it’s the plain version without berries)
- 2 cups Honey Nut Cheerios cereal (plain Cheerios also work well)
- 1 cup M&M’s (preferably Christmas colors like red and green)
- 3 cups (16-ounces) high-quality white chocolate chips
- 2 teaspoons neutral vegetable oil (such as canola or grapeseed)
- Christmas sprinkles (optional, for a festive garnish)
Instructions
- Prepare Pan: Line a large baking sheet with parchment paper. If using pretzel rods, break them into smaller, uniform pieces for easier mixing and consumption.
- Combine Dry Mix: In a generously sized mixing bowl, gently combine the Chex cereal, broken pretzels, Cap’n Crunch, Cheerios, and Christmas M&M’s. Stir until all ingredients are evenly distributed throughout the mixture.
- Melt White Chocolate: In a separate microwave-safe bowl, add the white chocolate chips and vegetable oil. Microwave on high for 30 seconds, then remove and stir thoroughly. Return to the microwave for another 25 seconds. Stir again until the chocolate is completely smooth and creamy. If necessary, continue microwaving in 10-second bursts, stirring vigorously after each, until fully melted and free of lumps. Avoid overheating to prevent seizing.
- Coat the Snack Mix: Immediately pour the warm, melted white chocolate over the combined dry ingredients in the large mixing bowl. Using a spatula or a large spoon, gently but quickly fold and stir the mixture until all the cereals, pretzels, and M&M’s are thoroughly and evenly coated with the luscious white chocolate. Work swiftly as white chocolate sets quickly.
- Spread & Decorate: Transfer the coated **Christmas Snack Mix** onto the prepared parchment-lined baking sheet, spreading it into a single, even layer. If using, generously sprinkle with Christmas sprinkles over the top before the chocolate has a chance to fully harden.
- Set & Serve: Allow the snack mix to set completely at room temperature for 30-60 minutes, or place it in the refrigerator for 10-20 minutes to expedite the setting process until the chocolate is firm to the touch. Once firm, break the mix into desired bite-sized pieces and serve. Enjoy your festive and easy-to-make **no-bake Christmas treat**!
Recipe Notes
Nutrition
Nutrition information is automatically calculated and is an approximation; values may vary based on exact ingredients and brands used.
- Serving: 1 serving
- Calories: 373 kcal
- Carbohydrates: 67g
- Protein: 6.8g
- Fat: 9.3g
- Cholesterol: 4.1mg
- Sodium: 537.8mg
- Fiber: 3.9g
- Sugar: 25.1g