
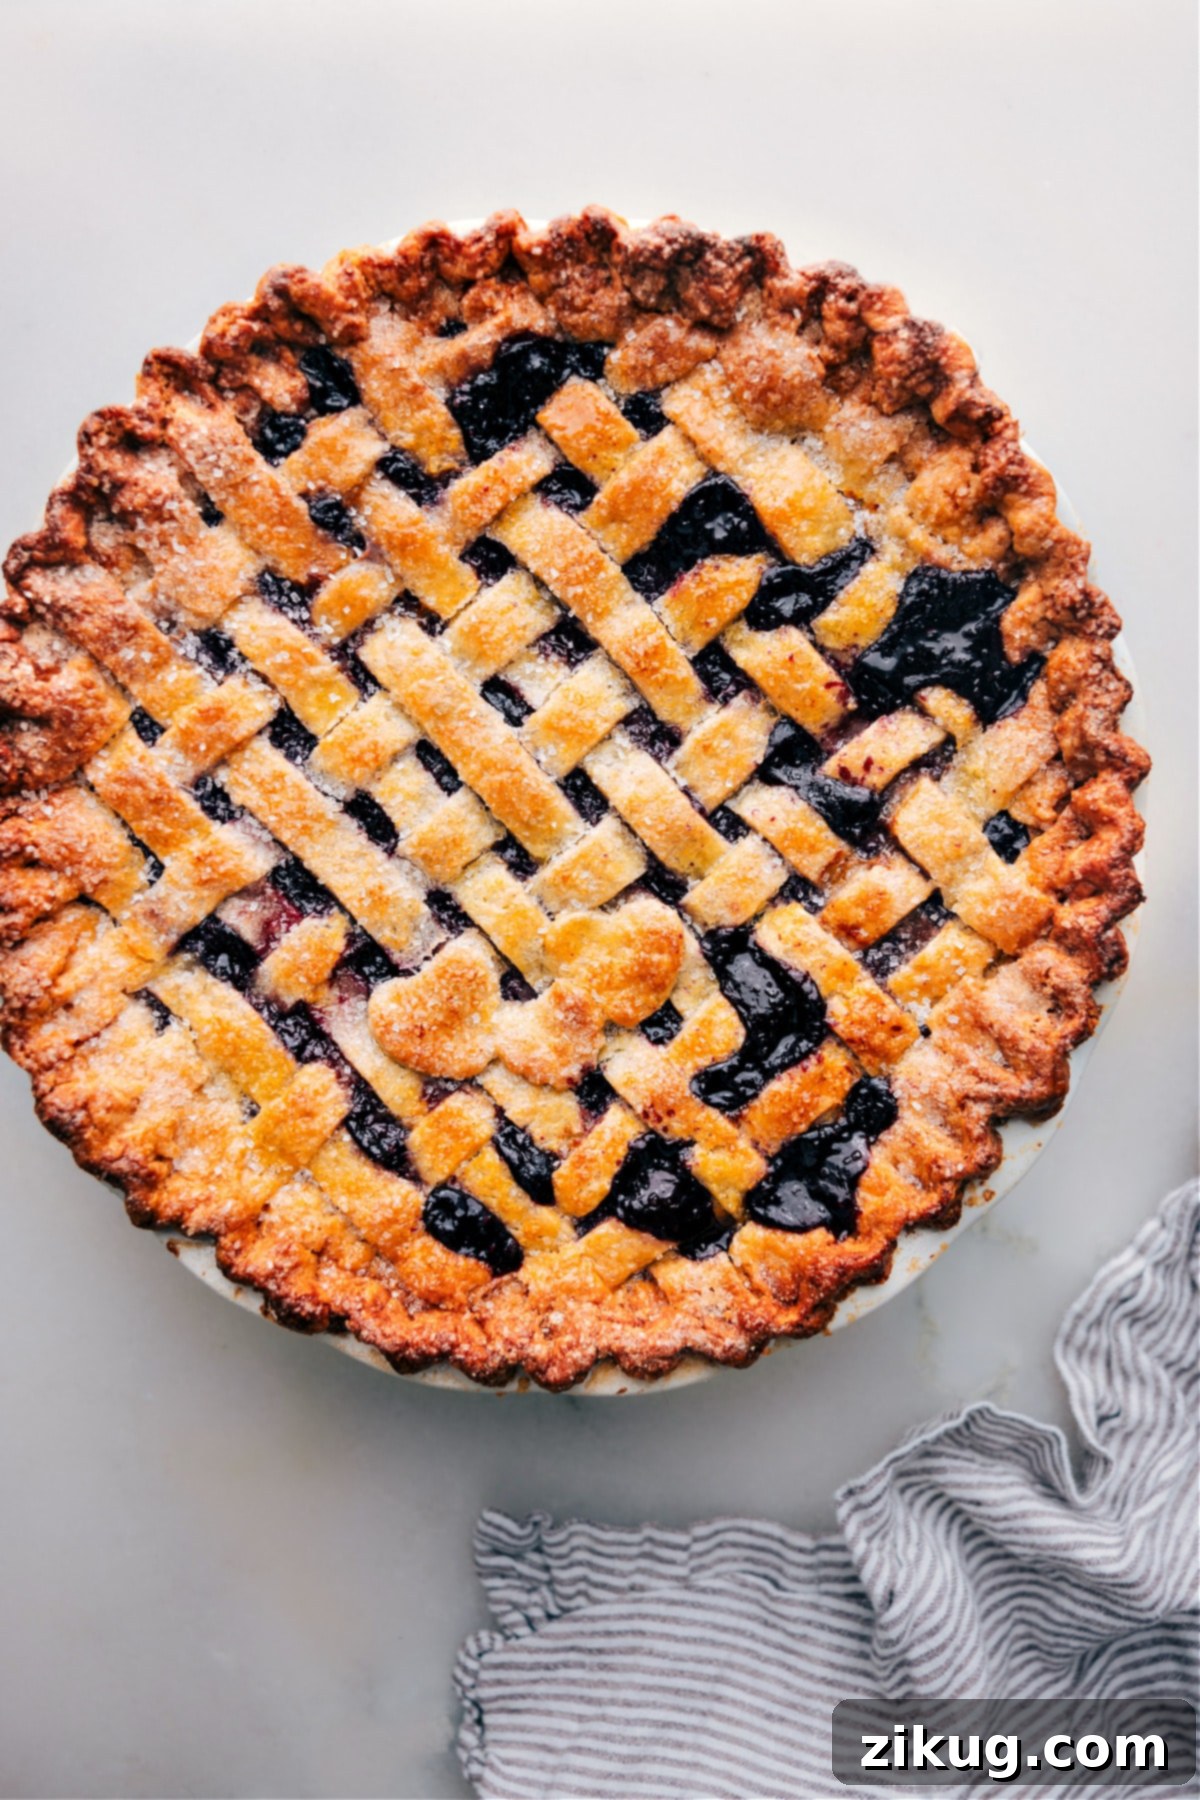
Welcome to your new favorite Pie Crust Recipe! This foolproof method promises a consistently flaky, tender, and richly buttery crust that will elevate any pie, sweet or savory. Whether you’re a seasoned baker or just starting, this guide makes achieving pie perfection remarkably easy, especially with the help of a food processor. Prepare to say goodbye to store-bought crusts forever!
Beyond the simple steps, we’re also sharing invaluable pro tips gleaned from a renowned French pastry chef, ensuring your pie crust is not just good, but truly exceptional.
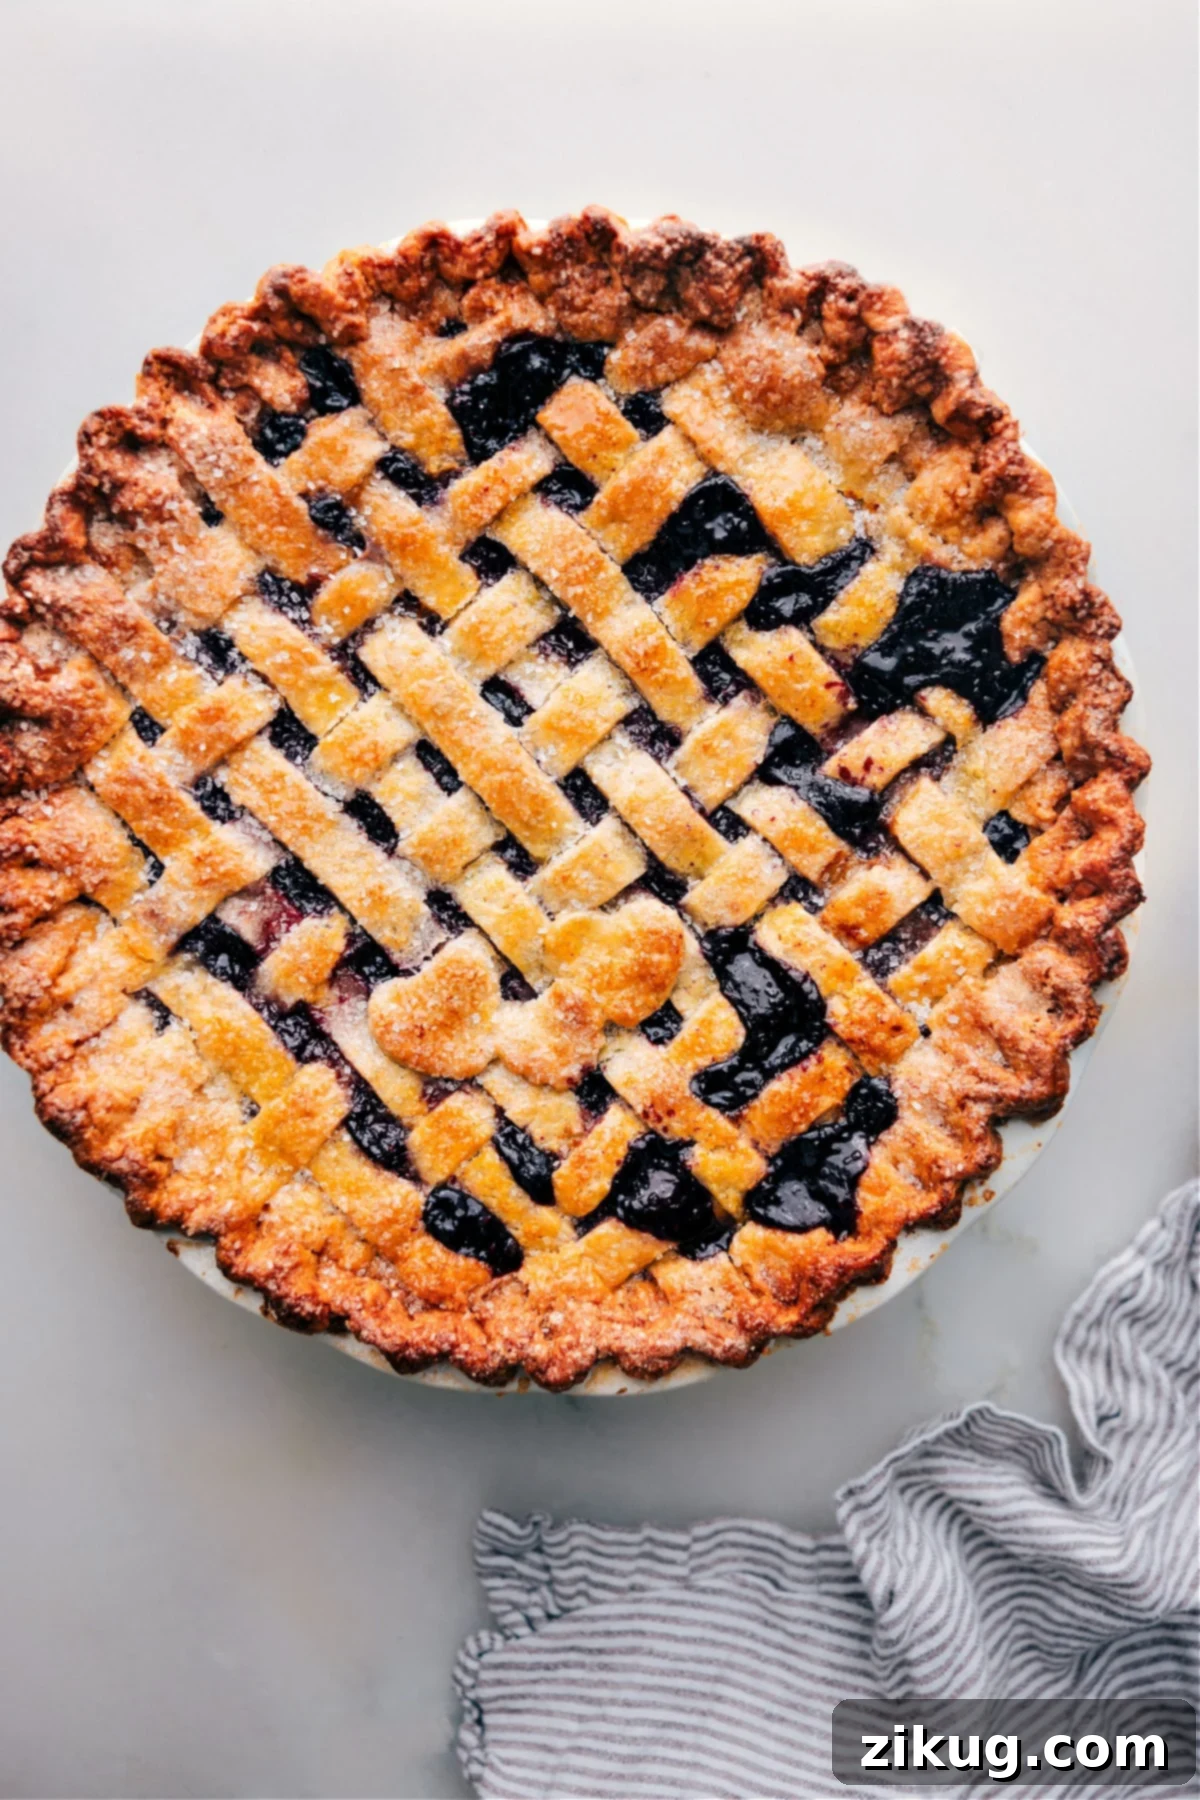

Author’s Insights
The Only Pie Crust You’ll Ever Need!
If there’s one dessert that brings pure joy, it’s a perfectly baked pie. For my husband, his ultimate indulgence is often a classic Apple Pie, which he can miraculously finish in a mere two days! This recipe for an all-butter pie crust is the secret behind those delicious creations.
I rely on this specific crust every single time because it consistently delivers an unparalleled buttery flavor and a delicate flakiness that melts in your mouth. What makes it even better is how manageable it is to roll out—no frustrating cracking, tearing, or shrinking during baking. Just a perfectly formed, incredibly flavorful pie crust that tastes absolutely *amazing*.
You only need a few essential pantry staples and, crucially, all butter for the very best flavor and texture. Unlike some recipes, we steer clear of shortening here to truly maximize that rich, dairy goodness. In this comprehensive guide, I’m also sharing my best-kept secrets, including precise instructions on how to par-bake (or blind bake) a crust and effective strategies to avoid the dreaded soggy bottom, ensuring your pies are always a triumph.
Once you’ve experienced the ease and superior taste of this homemade pie crust, you’ll find that store-bought options simply won’t measure up. Get ready to transform your baking with this truly dependable recipe!
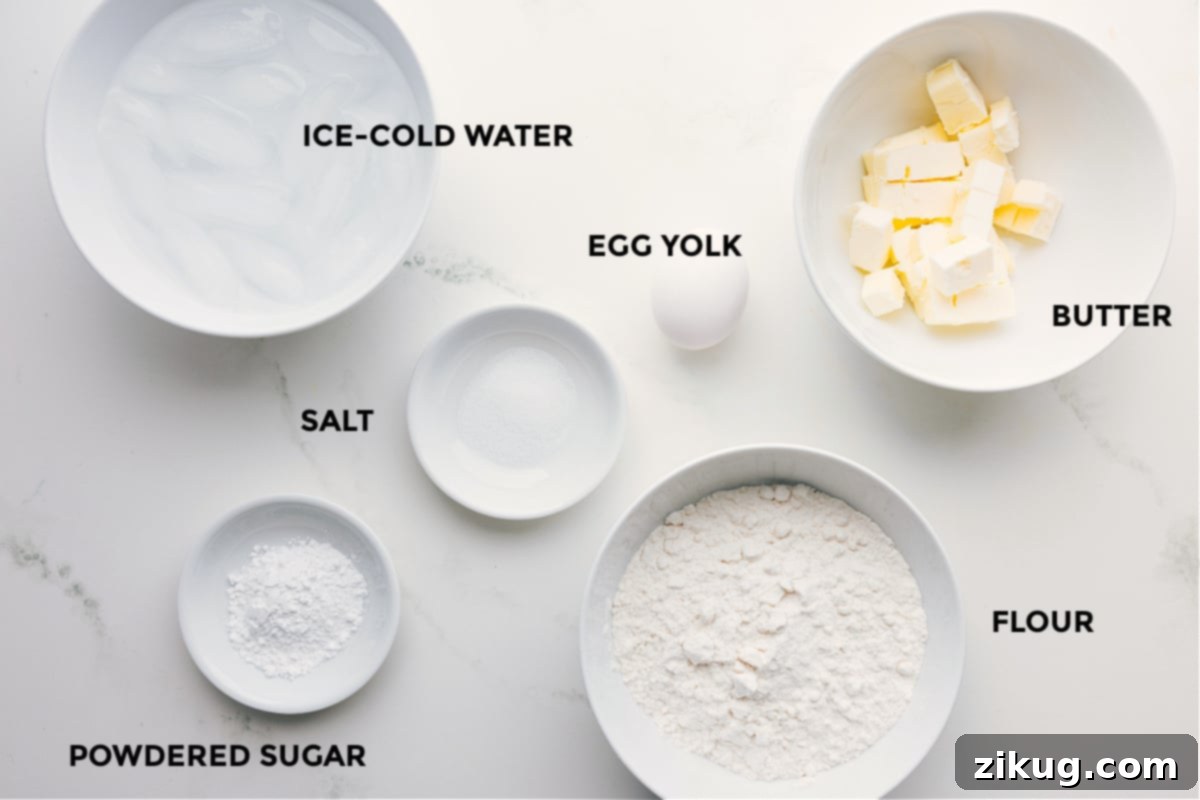
Essential Pie Crust Ingredients for Unbeatable Flavor
Crafting the perfect pie crust starts with understanding the role of each ingredient. Quality and temperature are key!
- Unsalted Butter: This is the star of the show, delivering that rich, unmistakable flavor and contributing significantly to the crust’s coveted flakiness. Always use unsalted butter to control the salt content in your recipe. The most crucial tip? Keep it as cold as possible—this is vital for creating steam pockets during baking, which separate the dough into distinct, tender layers.
- Ice Water: Water helps bring the dough together, hydrating the flour and creating a cohesive mass. Using ice-cold water is imperative as it keeps the butter pieces firm and prevents the butter from melting prematurely, which would result in a tough, rather than flaky, crust. Start with the minimum amount and add more only if needed, tablespoon by tablespoon.
- All-Purpose Flour: This forms the structural base of your pie crust. Standard all-purpose flour provides the right balance of protein for a tender yet manageable dough.
- Salt: A small amount of salt is essential for balancing and enhancing all the flavors in the crust. It also helps to tenderize the dough and makes the butter taste even richer. Don’t skip it!
- Powdered Sugar (Confectioners’ Sugar): While many recipes use granulated sugar, powdered sugar dissolves more easily and contributes to a slightly more tender crust. It also adds a subtle sweetness that complements both sweet and savory fillings. If you only have granulated sugar on hand, you can certainly use it, though the texture might be minimally different.
- Egg Yolk: This is a secret weapon for an incredibly rich and tender pie crust. The fat in the yolk adds richness and helps to bind the dough, making it more pliable and easier to roll out without cracking. It also contributes to a beautiful golden color. Save the whites for other delicious recipes, like airy Meringue Cookies!
Crafting Your Homemade Pie Crust: Step-by-Step Excellence
There are several effective methods for making homemade pie crust, but after much experimentation, I’ve found that using a 10 to 14-cup food processor yields the most consistent and effortless results. The key to a truly flaky crust is to handle the dough as little as possible, preventing over-development of gluten, which can lead to a tough crust. The food processor achieves this perfectly, bringing the dough together with minimal handling and maximum efficiency.
Using a Food Processor (Recommended Method):
- Prep Your Ingredients: Begin by cutting your very cold unsalted butter into small cubes (about ½-inch pieces) and returning them to the refrigerator or freezer for a few minutes while you prepare other ingredients. Fill a small bowl with ice water and keep it close by.
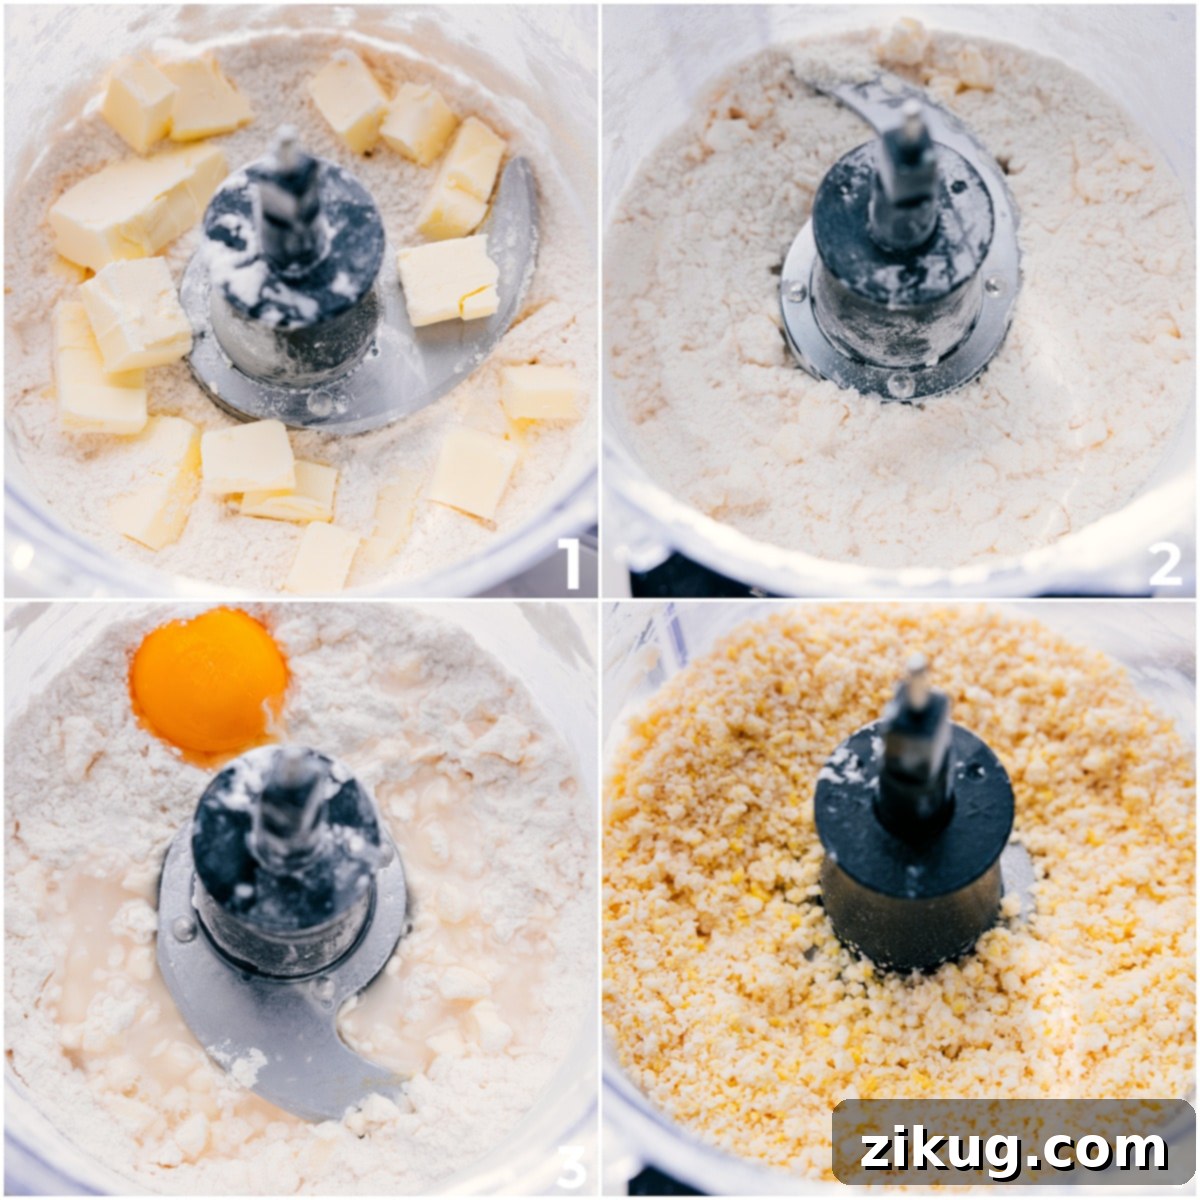
- Combine Dry Ingredients: In the bowl of your food processor, combine the all-purpose flour, salt, and powdered sugar. Pulse these dry ingredients together for just 2 seconds to ensure they are well-mixed.
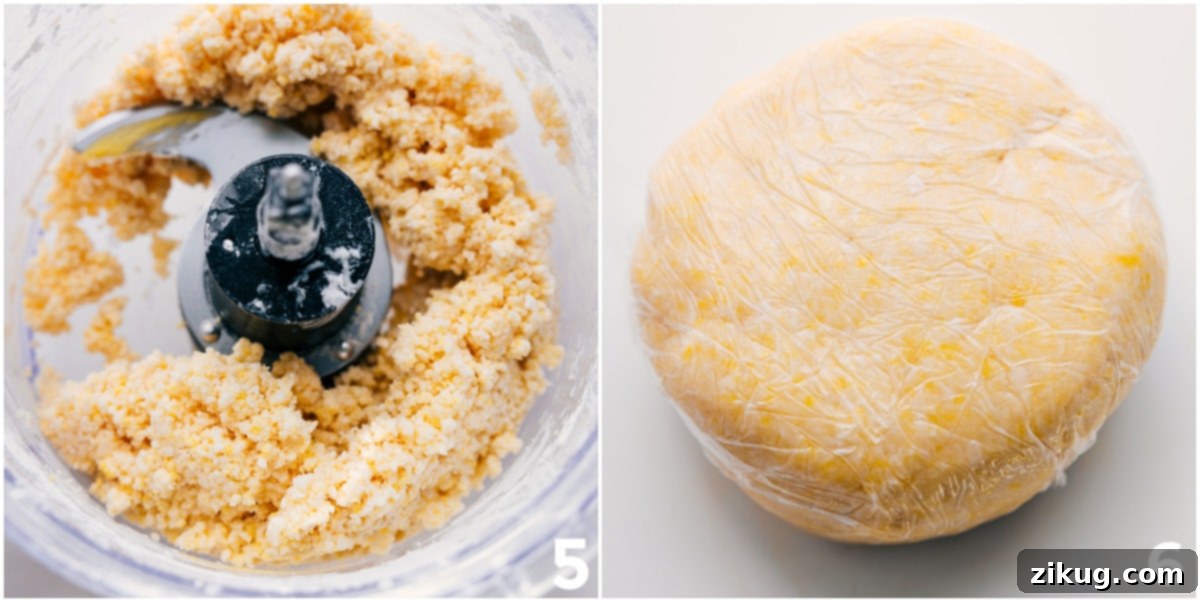
- Incorporate the Butter: Add the chilled butter cubes to the dry mixture. Pulse 10–12 times in short bursts. You’re looking for a mixture that resembles coarse meal with some pea-sized pieces of butter still visible. These butter pieces are crucial for flakiness.
- Add Wet Ingredients: Add the egg yolk and 2 tablespoons of ice water to the food processor. Pulse a few more times, just until soft crumbles begin to form. The dough should look shaggy but start to clump together. If the mixture still appears too dry and isn’t forming clumps, add the last tablespoon of ice water and pulse a few more times. Be careful not to over-mix; stop as soon as the dough starts to gather in large clumps.
- Form and Chill: Carefully transfer the dough from the food processor to a clean, lightly floured surface. Gently press the dough together to form a flat disc; avoid kneading it, as this will develop too much gluten. Wrap the disc tightly in plastic wrap and chill it in the refrigerator for at least 1–2 hours. This chilling period is essential for allowing the gluten to relax and the butter to firm up, making the dough easier to roll out and preventing shrinkage during baking.
No Food Processor? No Problem! (Manual Method):
If you don’t have a food processor, you can still achieve a beautiful, flaky pie crust using traditional methods:
- Combine Dry Ingredients: In a large bowl, whisk together the flour, salt, and powdered sugar.
- Cut in the Butter: Add your cold, cubed butter to the dry ingredients. Use a pastry cutter (or two knives, scissors-style) to cut the butter into the flour mixture until it resembles coarse crumbs with some pea-sized pieces of butter remaining. Work quickly to keep the butter cold.
- Add Wet Ingredients: Stir in the egg yolk and 2 tablespoons of ice water with a wooden spoon or a fork. Continue mixing gently until the dough just begins to come together. If it’s too dry, add the remaining tablespoon of water, one teaspoon at a time, until the dough forms shaggy clumps.
- Form and Chill: As with the food processor method, transfer the dough to a clean surface, gently press into a flat disc, wrap tightly, and chill for 1-2 hours.
Mastering the Roll: Pastry Chef’s Secrets for Effortless Dough Handling
Rolling out pie dough used to be my biggest baking hurdle. The dough would stick, tear, or shrink, leading to endless frustration. My perspective changed completely when a French exchange student stayed with my family. Her father was a professional pastry chef, and she generously shared his invaluable techniques, which revolutionized my approach to pie making. The most impactful tip? Handle the dough as little as possible. This minimizes gluten development and keeps the butter cold, both crucial for a flaky crust. Here’s her ingenious method for perfect rolling and transferring:
- The Plastic Wrap and Parchment Paper Method: This simple technique makes transferring your delicate dough into the pie dish incredibly easy, preventing rips and tears.
- Prepare Your Surface: Lay two large, overlapping sheets of plastic wrap directly onto your clean counter. Make sure there’s enough overlap to create a wide surface.
- Center the Chilled Dough: Take your well-chilled disc of dough and place it directly in the center of the plastic wrap. The cold dough will be much easier to handle.
- Add a Parchment Top Layer: Carefully place one sheet of parchment paper over the dough. This creates a non-stick sandwich, allowing you to roll without adding excess flour.
- Roll with Precision: Using a rolling pin, roll the dough into a uniform circle, aiming for about 1/8 inch thickness. Ensure it’s slightly larger than the diameter of your pie dish (about 2-3 inches wider) to account for the sides. Once rolled, gently remove the top layer of parchment paper.
- Effortless Transfer: Now, using the bottom sheet of plastic wrap as a sling, carefully lift and invert the rolled dough directly into your pie pan. The plastic wrap provides the necessary support.
- Gentle Shaping is Key: Once the dough is in the pan, gently press it into the contours of the dish. The critical instruction here is to do so without pulling or stretching the dough. Stretching will cause the dough to shrink back during baking, resulting in a misshapen crust.
- Final Touches: Carefully peel off the plastic wrap. Now you’re ready to finish shaping the edges, creating a beautiful and delicious pie crust that’s perfectly prepped for your filling!
Perfecting Your Pie: How to Crimp Pie Edges Like a Pro
Crimped pie edges aren’t just for aesthetics; they serve a practical purpose too! A beautifully crimped edge creates a seal that helps prevent your delicious filling from leaking out during baking. Furthermore, a thicker edge bakes up more evenly and holds its shape better, while thin edges are prone to shrinking or even burning before the rest of the pie is cooked.
- The Classic Crimp Method: Once your dough is settled in the pie pan, trim any excess dough, leaving about a 1-inch overhang. Then, gently fold this excess dough under itself to create a thick, even edge that rests along the rim of the pie pan. Press this thick edge firmly and evenly around the entire pan, being careful not to pull or stretch the dough. To create the crimped pattern, use your thumb and index fingers to pinch the dough, forming a scalloped design. Shorter fingernails can be helpful for a clean finish.
- An Easier Method (Fork Crimp): If intricate crimping feels daunting, or if you’re short on time, there’s a quick and charming alternative. After you’ve trimmed the excess dough and folded it under to create a thick edge, simply press the tines of a fork all around the crust for a simple yet elegant patterned border.
Creating a Stunning Lattice Pie Crust
For an extra touch of elegance and visual appeal, why not try a beautiful lattice top for your pie? A lattice crust isn’t just pretty; it also allows steam to escape during baking, preventing your top crust from becoming soggy. While it might look complex, it’s a very achievable skill. Elise at Simply Recipes offers a fantastic step-by-step tutorial with clear photos that can guide you through the process. Even if you opt for a traditional full top crust, your pie will still look and taste absolutely amazing with this perfect homemade base!
Elevate Your Baking: Use This Pie Crust in These Delicious Recipes
This versatile, flaky pie crust isn’t just for sweet treats. It’s the perfect foundation for a wide array of pies, both savory and sweet. Here are some of our favorite recipes where this crust truly shines, promising a delicious outcome every time:
Pork
EASY Ham Pot Pie
Desserts
Irresistible Berry Pie Recipe
Dinner
Comforting Chicken Pot Pie Recipe
Desserts
Classic Peach Pie Recipe
Pin
The Ultimate All-Butter Pie Crust Recipe
Chelsea Lords
15 minutes
20 minutes
1 hour 30 minutes
2 hours 5 minutes
1 pie crust (8 servings)
Video Tutorial
Watch our step-by-step video tutorial to visually guide you through making this perfect pie crust, ensuring you don’t miss any crucial tips for ultimate flakiness!
Click here to watch the Pie Crust Recipe video!
Equipment
-
Large food processor (10-14 cups; see note 2 for manual method)
-
Plastic wrap (plastic film, not press and seal)
-
Parchment paper
-
Pie pan (and pie weights, dried beans, sugar, or lentils for blind baking)
Ingredients
- 7 tablespoons unsalted butter cubed and chilled (very cold)
- 2 to 3 tablespoons ice water (start with 2, add more only if needed)
- 1-1/3 cups all-purpose flour
- 1/2 teaspoon salt
- 1 tablespoon powdered sugar (or granulated sugar)
- 1 large egg yolk (straight from the fridge; see note 1)
Instructions
-
Prepare Ingredients: Cut the very cold butter into small, ½-inch cubes and keep it chilled in the refrigerator. Fill a small bowl with ice water and set it aside; having it ready ensures no delays.
-
Process Dough: In the bowl of a 12-cup food processor, combine the all-purpose flour, salt, and powdered sugar. Pulse these dry ingredients for just 2 seconds to mix thoroughly. Add the cold butter cubes and pulse 10–12 times until the butter is mostly pea-sized, with some smaller bits remaining. Add the large egg yolk and 2 tablespoons of ice water. Pulse again just until soft crumbles begin to form and the mixture looks shaggy. If the dough still feels too dry and isn’t clumping, add the last tablespoon of water, pulsing a few more times until large clumps start to collect. Be careful not to over-mix; stop as soon as the dough barely comes together.
-
Chill the Dough: Transfer the dough from the food processor to a clean, lightly floured surface. Gently press it together to form a flat, uniform disc (avoid kneading). Wrap the disc tightly in plastic wrap and chill it in the refrigerator for a minimum of 1–2 hours. This chilling step is crucial for gluten relaxation and firming up the butter.
-
Roll Out Dough (Chef’s Tip): Lay two overlapping sheets of plastic wrap on your counter. Place the chilled dough disc in the center, then cover it with one sheet of parchment paper. Roll the dough into a circle approximately 1/8 inch thick and about 3 inches wider than your pie dish. This extra width allows for crimping. Carefully remove the top parchment paper. Use the plastic wrap underneath to gently lift and invert the dough into your pie pan. Carefully press the dough into the pan’s contours without pulling or stretching, then peel off the plastic wrap.
-
For a Single Crust Pie: Trim any excess dough, leaving about a 1-inch overhang. Fold this overhang under itself to create a thick, stable edge. Crimp the edges with your fingers for a traditional look, or press a fork around the rim for a simpler pattern. Freeze the prepared crust for 30–60 minutes before baking (refer to the baking notes for specific instructions on par-baking or fully baking).
-
For a Double Crust Pie: Chill the base crust in the pie pan for about 20 minutes after shaping. Then, add your desired filling and top with a second rolled-out crust (or a lattice top). Seal the edges of both crusts together and crimp or press with a fork to secure. Cut a few slits in the top crust to allow steam to escape during baking.
Recipe Notes for Success
Note 2: Manual Mixing Alternative: If you do not own a food processor, this pie crust can still be made successfully by hand. Instead of pulsing, use a pastry cutter or two table knives to ‘cut’ the cold butter into the dry ingredients until small, pea-sized pieces remain. Then, use a wooden spoon to carefully mix in the egg yolk and ice water until the dough just starts to come together. Avoid overworking it.
Note 3: Baking Instructions for Pie Crust
- If pie bakes for 40+ minutes (e.g., fruit pies): No par-baking is usually needed. Simply add your cooled filling to the raw, chilled pie crust and bake as directed by your specific pie recipe. The long baking time will cook the crust thoroughly.
- Par-bake (Blind Bake) for shorter bake times or wet fillings: This method partially bakes the crust, preventing a soggy bottom for fillings that are very wet or have shorter baking times. Prick the bottom and sides of the chilled crust all over with a fork. Line the crust with parchment paper and fill it with pie weights, dried beans, or even granulated sugar to hold its shape. Bake at 400°F (200°C) for 15 minutes. Carefully remove the weights and parchment paper, then bake for an additional 5 minutes until the crust appears dry and lightly golden. Cool completely before adding your filling.
- Fully Bake (for no-bake pies): This is for pies where the filling doesn’t require further baking, such as chocolate pudding pie, coconut cream pie, or an ice cream pie. Follow the par-bake steps above. After removing the weights and parchment, continue baking at 350°F (175°C) for an additional 60–75 minutes, or until the crust is deeply golden brown. If the edges begin to brown too quickly, use a pie shield or a homemade foil ring to protect them. Cool the crust completely on a wire rack before filling.
Nutrition Note: The nutrition information provided is for the entire pie crust. To determine individual nutrition figures, divide these values by the total number of slices in your finished pie.
Storage Tips: Once your pie crust (baked or unbaked) has cooled completely, wrap it tightly in plastic wrap or aluminum foil. Unbaked dough can be stored in the refrigerator for up to 2 days or frozen for up to 2 months. Thaw frozen dough in the refrigerator overnight before use. A fully baked, cooled crust can be stored at room temperature for 1-2 days, or frozen in an airtight container for up to 2 months. Allow it to thaw at room temperature before using.
Nutrition Facts
Nutrition information is automatically calculated, so should only be used as an approximation and can vary based on specific ingredients and preparation methods.
Loved this recipe? Share your thoughts below!
Your feedback helps us grow and inspires other home bakers.
Mastering the Art of Blind Baking Your Pie Crust
Blind baking, also known as par-baking, is a crucial technique for achieving a perfectly crisp pie crust, especially for pies with very wet fillings or those that require no additional baking. Once your crust is expertly shaped and nestled in the pie pan, you have a couple of options: you can either add a cooled filling directly (if the recipe calls for it) or bake the crust first to prevent a soggy bottom and ensure structural integrity.
Understanding Your Pie Crust Baking Options:
- Par-bake (Partially Bake): This method involves baking the crust until it’s set but not fully browned. It’s ideal for pies with fillings that are wet and bake quickly (like quiches or custards), or for pies that will undergo further baking with their filling. Par-baking creates a barrier against moisture, ensuring the bottom crust remains flaky. Always check your specific pie recipe to see if this step is recommended.
- Fully Bake (for No-Bake Pies): For pies that won’t be returned to the oven after filling, such as luscious chocolate pudding pie, creamy coconut cream pie, or refreshing ice cream pie, you’ll need to fully bake the crust until it’s golden brown and completely cooked through. This ensures a crisp, sturdy base that can hold up to rich, unbaked fillings.
Expert Blind Baking Tips for a Perfect Crust:
Follow these essential tips to ensure your blind-baked crust turns out perfectly golden and maintains its shape:
- Avoid Stretching the Dough: When fitting the rolled dough into the pie pan, gently ease it in without pulling or stretching. Stretching the dough causes the gluten to tighten, leading to significant shrinkage during baking.
- Prick the Base for Even Baking: Use a fork to prick the bottom and sides of the raw pie crust all over. These small holes allow steam to escape during baking, preventing the crust from puffing up or forming large bubbles, which can lead to an uneven surface.
- Chill Thoroughly: After fitting the dough into the pan and crimping the edges, chilling the crust for at least 30 minutes (or even freezing for 15-20 minutes) is crucial. This helps the butter firm up and the gluten relax, further reducing shrinkage.
- Use Weights for Stability: Before baking, line the chilled crust with parchment paper (crumpling it first helps it fit better) and fill it completely with pie weights. If you don’t have pie weights, dried beans, uncooked rice, or lentils work just as well. These weights prevent the crust sides from slumping down and the bottom from puffing up.
- Two-Stage Baking for Crispness: Bake the crust initially with the weights, allowing the edges and bottom to set. Then, carefully remove the weights and parchment paper and continue baking for a few more minutes. This second stage allows the bottom of the crust to dry out and become crisp without the obstruction of the weights.
- Protect Edges from Over-browning: If the edges of your crust are browning too quickly, gently cover them with a pie shield or create a homemade one with aluminum foil. This ensures the entire crust bakes evenly to a perfect golden hue.
Frequently Asked Questions About Pie Crust
The egg yolk plays a significant role in enhancing the richness and tenderness of the pie crust. Its fat content contributes to a more delicate crumb and helps to bind the dough, making it more pliable and easier to roll out without tearing or cracking. This results in a superior texture and a beautiful golden color.
Several factors can cause pie crust to crack. It might be too dry, meaning it needs an extra tablespoon or two of ice water to reach the correct consistency. Another common issue is that the dough is too cold; if it’s been chilling for an extended period, let it sit at room temperature for 5-10 minutes to soften slightly before rolling. Finally, insufficient resting time for the flour to fully hydrate can also lead to cracking, so ensure you chill the dough for the recommended 1-2 hours.
Chilling the pie crust before baking is a critical step that prevents dreaded shrinkage during baking and promotes flakiness. The cold temperature allows the butter pieces to firm up, which creates distinct layers as the butter melts and releases steam in the oven. Additionally, chilling gives the gluten in the flour time to relax, making the dough less elastic and less likely to retract or shrink away from the pie pan’s edges.
Top Expert Tips for Your Best Pie Crust Ever
Achieving pie crust perfection is a skill that improves with practice, but these pro tips will give you a significant head start, ensuring your crust is flaky, tender, and delicious every single time.
- Keep Everything Cold: This is arguably the most important rule for flaky pie crust. Always use very cold butter, ice water, and a cold egg yolk. Work quickly to minimize the warmth transferred from your hands, and don’t hesitate to chill the dough again if it starts to feel warm or sticky during handling.
- Minimize Handling: The less you touch and work the dough, the more tender and flaky your pie crust will be. Overworking the dough develops gluten, leading to a tough, bready texture instead of the delicate, melt-in-your-mouth quality we’re after.
- Avoid Over-mixing: Whether you’re using a food processor or mixing by hand, stop as soon as the dough barely comes together in shaggy clumps or coarse crumbles. It’s better to have a slightly crumbly dough than an over-mixed one.
- The Magic of an Egg Wash: For a beautifully golden, shiny finish, mix 1 egg with 1 tablespoon of milk or water. Lightly brush this mixture onto the edges (or entire top crust) of your pie before baking. This also helps with browning and a slight crispness.
- Embrace Rustic Charm: Don’t get stressed striving for absolute perfection. Homemade pies, even with slightly imperfect edges or minor flaws, possess a charming, rustic beauty that store-bought pies can’t replicate. Your pies will be loved for their taste and homemade warmth, not just their flawless appearance!
- Protect Delicate Edges: Pie crust edges are prone to burning before the rest of the pie is cooked, especially during longer baking times. Use a silicone pie shield or fashion one yourself from aluminum foil. Simply cut a donut shape out of foil and place it over the pie’s edges about halfway through baking to prevent over-browning. You can find many online tutorials for making a DIY pie shield.
**Self-Correction/Review:**
1. **SEO-friendly:**
* Added `html lang=”en”`, `