
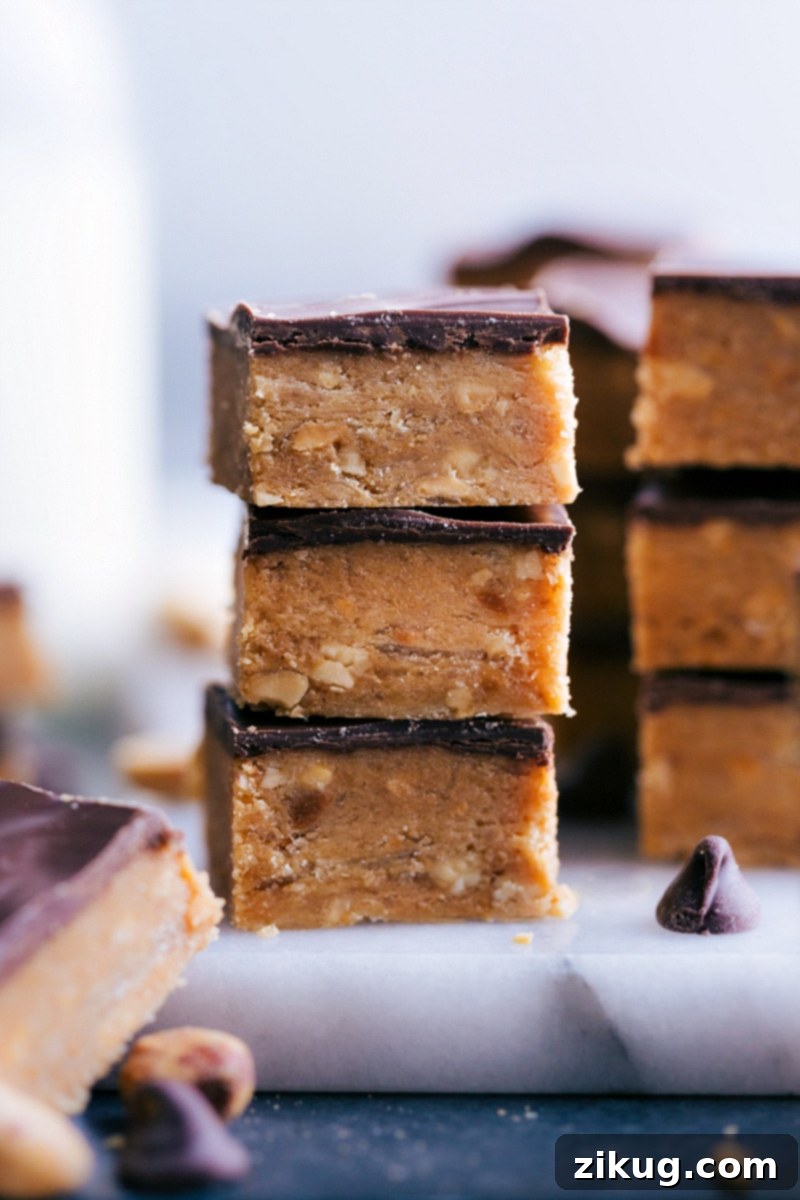
Experience the ultimate delight with Homemade Peanut Butter Crunch Candy! This irresistible treat perfectly blends creamy peanut butter, delightful crispiness, and a rich chocolate topping, creating a truly unforgettable indulgence. Perfect for holidays or any time you crave a sweet, crunchy escape.
Looking for more simple yet delicious homemade treats? You might love these: Butter Mints, Honeycomb Candy, or our popular Homemade Marshmallows.
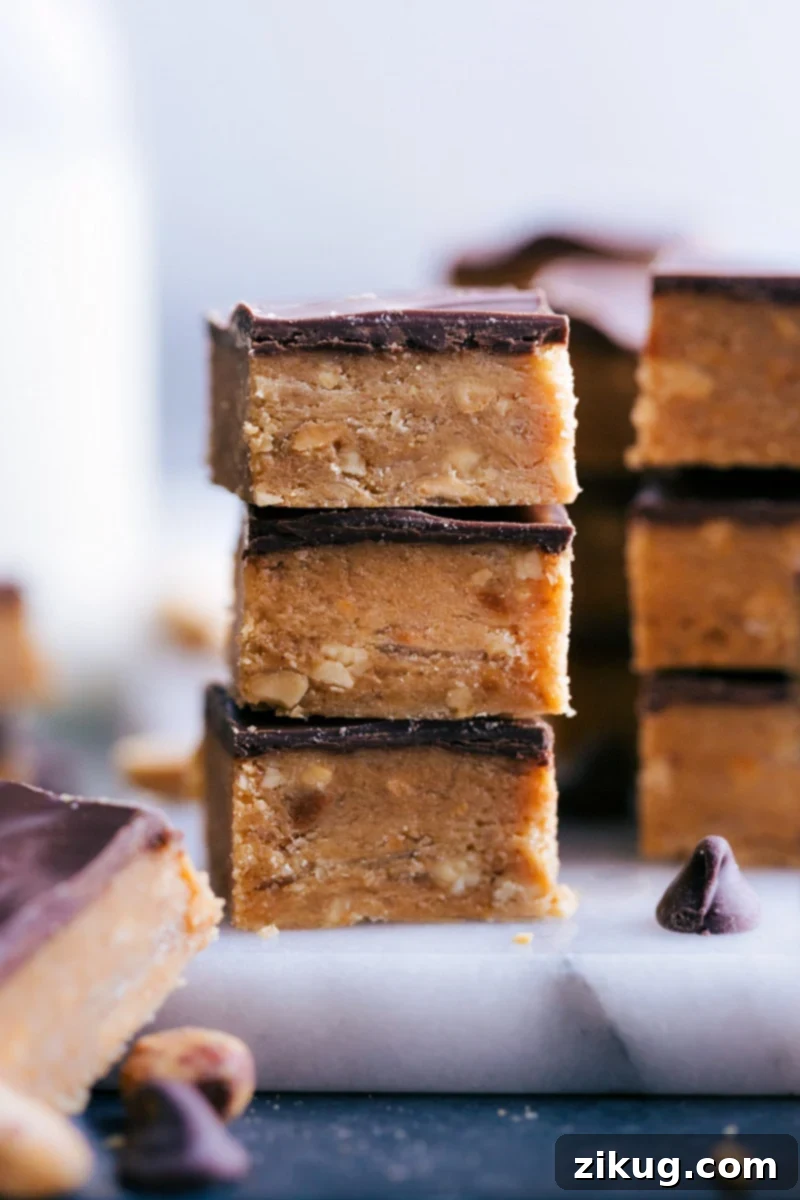
Irresistible Homemade Peanut Butter Crunch Candy
Get ready to discover your new favorite dessert with this incredible Peanut Butter Crunch Candy recipe! While I adore holiday classics like Sugar Cookie Snack Mix and Chocolate Covered Oreo Fudge, this homemade buttercrunch truly stands out. It boasts a phenomenal texture reminiscent of a beloved Butterfinger® bar – a wonderfully crispy, crunchy peanut butter base generously enrobed in a smooth, rich chocolate topping. The harmonious blend of salty peanut butter and sweet chocolate creates a flavor profile that is simply addictive; you’ll find it impossible to stop at just one piece!
This delightful candy is surprisingly easy to whip up, making it a fantastic addition to your baking repertoire. However, for guaranteed success, you absolutely need a reliable candy thermometer. This essential tool eliminates guesswork, ensuring your sugar syrup reaches the precise temperature needed to achieve that signature crispy texture without wasting precious ingredients. Investing in a good candy thermometer is the secret to perfect homemade buttercrunch every single time.
Why You’ll Love This Crispy Peanut Butter Treat
There are countless reasons why this Peanut Butter Crunch Candy will become a staple in your home. First and foremost, the taste is unmatched. The sweet and salty balance is utterly divine, satisfying every craving. Then there’s the texture – that incredible crispy, airy, and crunchy quality that makes each bite an experience. It’s not just a candy; it’s a symphony of textures and flavors.
Beyond its deliciousness, this recipe is perfect for various occasions. It makes a fantastic homemade gift during the holidays, a delightful party favor, or simply a special treat for your family. Its relative simplicity, especially with the right tools, means you don’t need to be a professional confectioner to achieve impressive results. Plus, making candy from scratch is incredibly rewarding!
Essential Ingredients for Perfect Buttercrunch
Crafting the perfect Peanut Butter Crunch Candy starts with understanding the role of each ingredient. Quality ingredients make a significant difference in the final taste and texture of your homemade buttercrunch.
- Peanut Butter: For an extra layer of texture and a robust peanut flavor, I highly recommend Skippy’s® Super Chunk. The small peanut pieces contribute to the signature crunch. While other brands can be used, ensure it’s a standard, non-natural peanut butter for best consistency in candy making.
- Unsalted Butter: Opting for unsalted butter gives you complete control over the candy’s saltiness. This is crucial for balancing the sweetness and achieving that perfect sweet-and-salty harmony.
- Salt: A touch of salt elevates all the flavors. Adjust the amount based on the natural salt content of your chosen peanut butter. Start with a smaller amount and add more if needed.
- Vanilla Extract: This essential flavoring adds warmth and depth to the peanut butter base. To preserve its delicate aroma and flavor, always stir it in *after* heating the peanut butter mixture.
- Granulated Sugar: Regular white granulated sugar is key for achieving the correct crystalline structure and the signature crispy texture of buttercrunch.
- Light Corn Syrup: A crucial ingredient that acts as an invert sugar, preventing the granulated sugar from crystallizing and becoming grainy. It ensures a smooth, glossy, and beautifully crispy candy.
- Water: Used to help dissolve the sugar and corn syrup, creating the initial syrup base that will cook down to form the candy.
- Baking Soda: This is the magical ingredient that reacts with the hot sugar syrup to create the airy, porous, and wonderfully crispy texture that defines buttercrunch. Ensure your baking soda is fresh for the best results.
- Dark Chocolate: A rich dark chocolate provides a wonderful contrast to the sweet peanut butter. Chopping the chocolate finely allows for easier melting and ensures a smoother, more even coating. Melting in stages (tempering) helps achieve a beautiful shine and a firm snap.
- Coconut Oil: A small amount of coconut oil, or shortening, helps the chocolate melt smoothly, spread evenly, and set with a lovely, glossy finish, preventing it from blooming or becoming dull.
Mastering Temperature: The Candy Thermometer
As emphasized earlier, a reliable candy thermometer is not just a suggestion – it’s a non-negotiable tool for making perfect Peanut Butter Crunch Candy. Candy making is a science, and temperature is the most critical variable. Without precise temperature control, your buttercrunch might end up too soft, too hard, or grainy.
A good candy thermometer removes all the guesswork, allowing you to accurately track the sugar syrup’s temperature. This ensures it reaches the exact 285°F (soft crack stage) required for that signature crispy, shatter-in-your-mouth texture. Digital thermometers offer quick, precise readings, while traditional glass thermometers are also effective if handled carefully.
To ensure perfect results every single time, it’s vital to check your thermometer’s accuracy regularly. You can do this by placing it in boiling water; it should read 212°F (100°C) at sea level. If it doesn’t, you’ll need to adjust your target temperature accordingly. For instance, if it reads 210°F, then you’d aim for 283°F in your recipe. This simple calibration step can save your candy batch from disaster!
Crafting Your Homemade Peanut Butter Crunch Candy: A Step-by-Step Guide
Creating this delicious homemade candy is a rewarding process, especially when you follow these steps carefully. Precision and timing are key to achieving the perfect crispy texture and rich flavor.
- Prepare Your Pan: Start by lining a 9×9-inch or 8×8-inch baking pan with parchment paper. Ensure there’s enough overhang on the sides to easily lift the finished candy out once it’s set. This simple step prevents sticking and makes removal effortless.
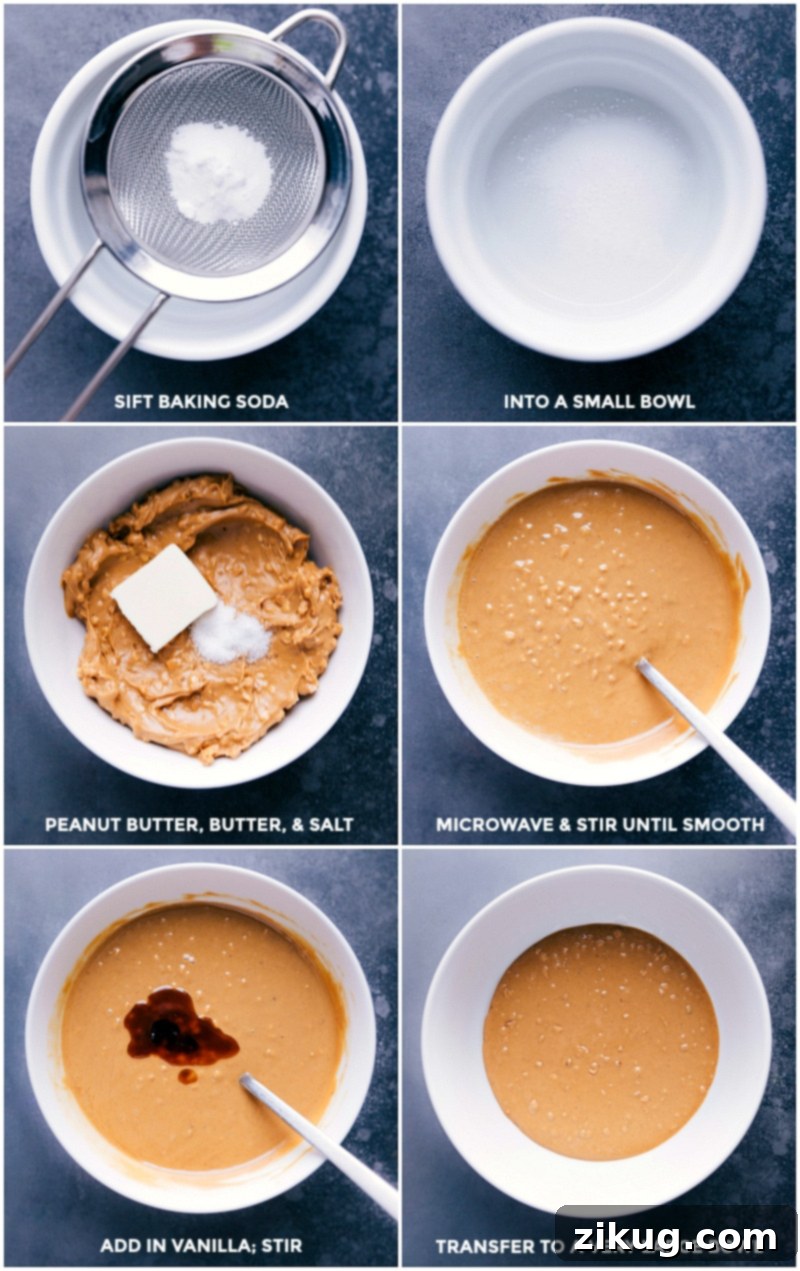
- Melt Peanut Butter Mixture: In a microwave-safe bowl, combine the peanut butter, unsalted butter, and salt. Microwave in short 20-second bursts, stirring well after each interval, until the mixture is smooth and easily pourable. Once melted, stir in the vanilla extract. Transfer this warmed peanut butter mixture to a large bowl and keep it close to your stovetop – speed is important in the next steps!
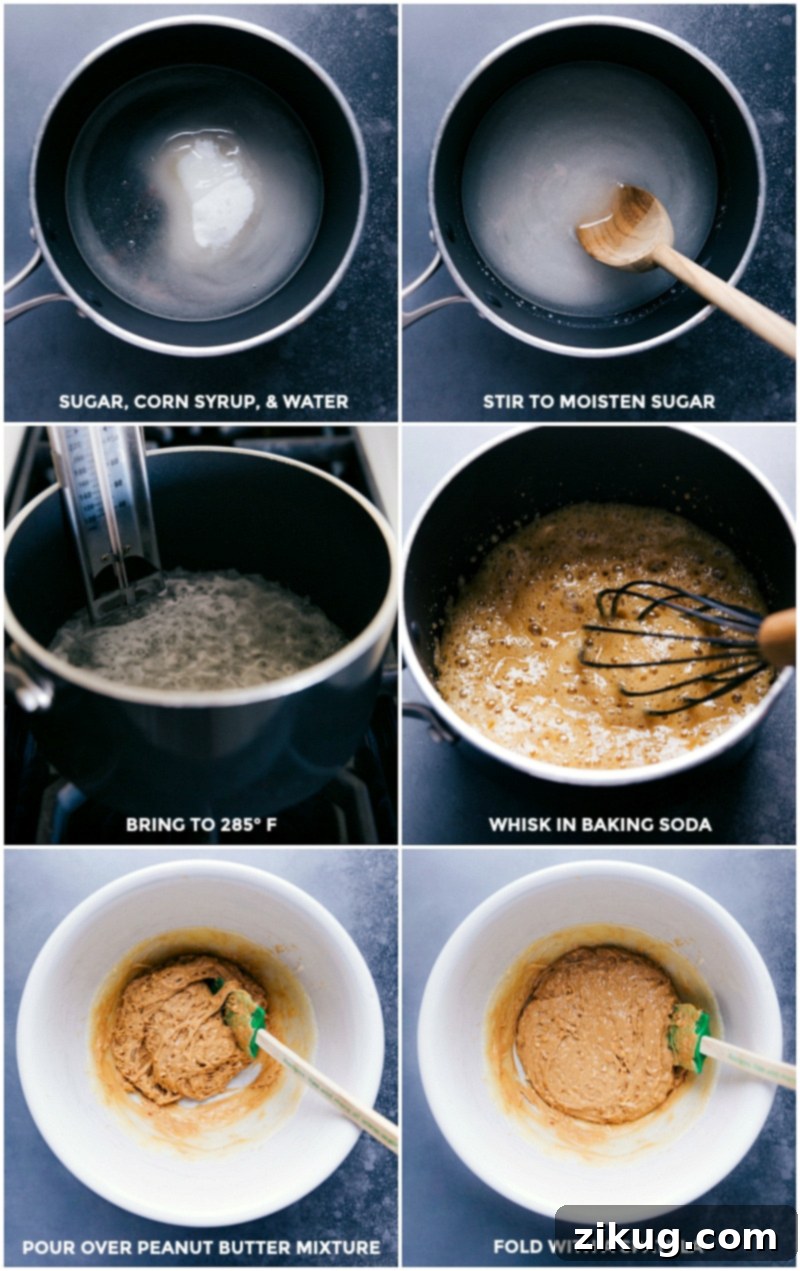
- Cook the Sugar Syrup to Perfection: In a heavy-bottomed, nonstick pot, combine the granulated sugar, light corn syrup, and water. Stir gently until the sugar is moistened, being careful not to splash sugar crystals onto the sides of the pot. Attach your calibrated candy thermometer to the side of the pot, ensuring the bulb is submerged in the syrup but not touching the bottom. Bring the mixture to a boil over high heat, cooking without stirring until it reaches precisely 285°F (the soft crack stage). Monitor the thermometer closely, as the temperature can rise rapidly towards the end.
- Incorporate Baking Soda: The moment the sugar syrup hits 285°F, swiftly remove the pot from the heat. Immediately whisk in the sifted baking soda vigorously. The syrup will begin to foam and expand rapidly – this is the reaction that creates the candy’s signature airy crispiness!
- Combine and Cool: As soon as the baking soda is fully incorporated and the syrup is foamy, pour it immediately into the large bowl containing your warmed peanut butter mixture. Quickly switch to a heat-resistant silicone spatula and fold the peanut butter into the foamy syrup. Work very swiftly, as the mixture will begin to thicken and set into a solid, stringy mass quite quickly. Once combined, transfer the mixture into your prepared baking pan and spread it out to about 1 inch thick. Don’t worry if it doesn’t fill the entire pan. Allow the candy to cool completely at room temperature for 3-5 hours, or until it is firm and fully set.
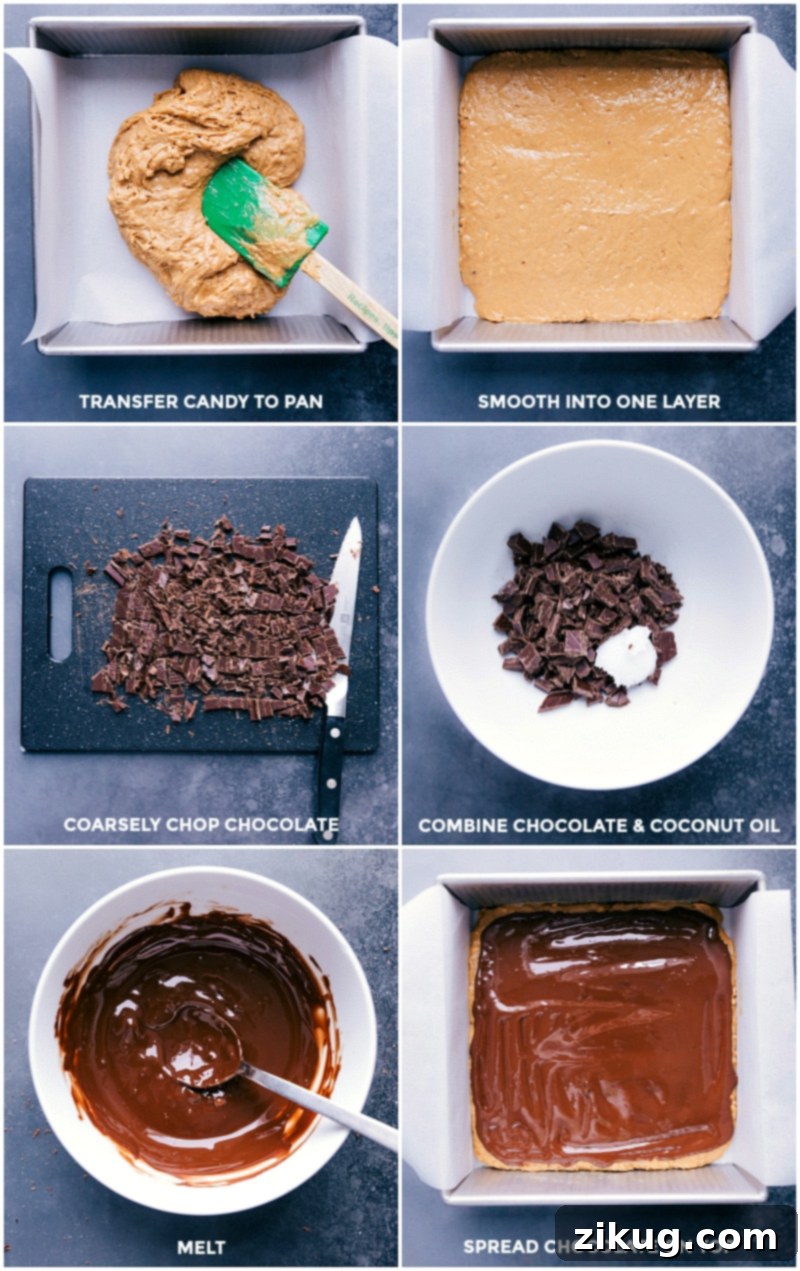
- Add the Decadent Chocolate Topping: Once your buttercrunch base is thoroughly cooled and firm, finely chop your dark chocolate bar. Place about two-thirds of the chopped chocolate in a microwave-safe bowl. Microwave for 20-second intervals, stirring thoroughly for 30 seconds after each, until it is mostly melted and smooth. Then, add the remaining one-third of the chopped chocolate to the melted chocolate and stir continuously until all the chocolate is melted and smooth. This “tempering” technique helps to cool the chocolate slightly, resulting in a shiny, streak-free topping with a satisfying snap.
- Set, Cut, and Serve: Evenly spread the perfectly melted chocolate across the entire surface of the cooled peanut butter crunch. Allow the chocolate topping to set at room temperature for at least 1 hour, or until completely firm. Once set, use the parchment paper overhang to lift the entire slab of candy from the pan. Place it on a cutting board and use a sharp chef’s knife to cut it into desired squares or bars. Your homemade Peanut Butter Crunch Candy is now ready to be enjoyed!
Expert Tips for Homemade Candy Success
Making candy can be a delightful experience, but it often requires a bit of patience and attention to detail. These expert tips will help you achieve perfect Peanut Butter Crunch Candy every time:
- Practice Makes Perfect: Don’t be discouraged if your first batch isn’t absolutely perfect. Candy making is a skill that improves with practice. It’s okay to make a mistake or two; consider them learning experiences. Get comfortable with the process a few times before planning to share your creations.
- Mise en Place (Get Everything Ready First): Speed is essential when working with hot sugar. Once the syrup reaches temperature, things move very quickly. Prepare all your ingredients (chop chocolate, measure baking soda, have your peanut butter mixture ready) and arrange your tools near the stovetop *before* you start cooking. This “mise en place” approach ensures you can react quickly and efficiently, preventing your candy from burning or setting prematurely.
- Pay Close Attention to the Thermometer: While the candy thermometer might seem to climb slowly at first, temperatures can rise dramatically in a matter of seconds once it gets closer to the target. Do not step away from the pot. Stay focused on the thermometer, even if it feels like a slow ascent, to catch that precise 285°F mark.
- Always Line Your Pan: This small step makes a huge difference. Lining your baking pan with parchment paper (or even a silicone baking mat) ensures that your finished peanut butter crunch candy will lift out effortlessly once cooled and set, preventing any sticking disasters.
- Consider Humidity: High humidity can negatively impact candy making, making it difficult for sugar to reach the correct temperature and causing finished candies to become sticky. If you live in a humid environment, consider making candy on a dry day, or be prepared for slight variations in setting time and texture.
Storage
Storing Your Homemade Peanut Butter Crunch Candy
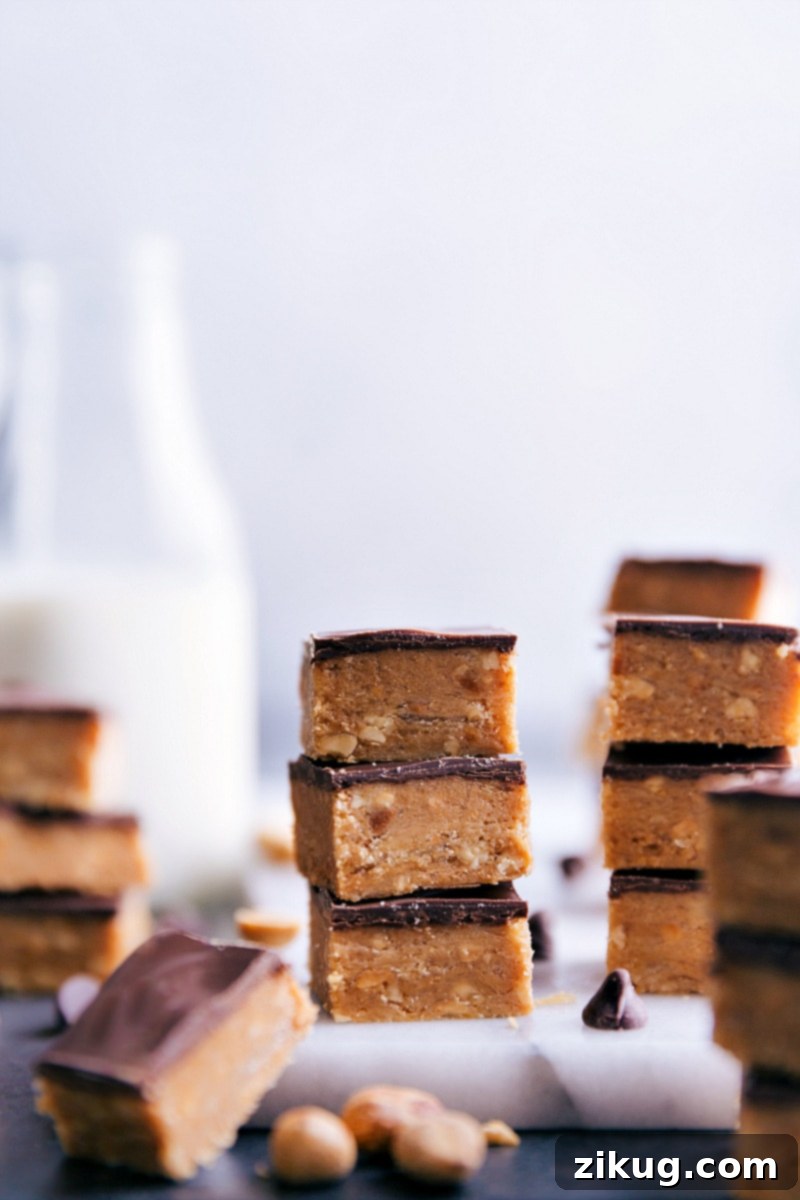
Proper storage is key to maintaining the delicious crispiness of your Peanut Butter Crunch Candy. Keep your candy in an airtight container at room temperature. In dry conditions, it can stay fresh and perfectly crunchy for up to a week. However, if your environment is humid, the candy may absorb moisture and become sticky, potentially lasting only 1 to 2 days. It’s important to avoid refrigerating this candy, as the moisture and cold temperature can cause it to become unpleasantly sticky and diminish its delightful texture.
To freeze your homemade buttercrunch for longer enjoyment, wrap each individual piece tightly in parchment paper or wax paper. Then, place the wrapped pieces in a freezer-safe, airtight container or a heavy-duty freezer bag. Frozen buttercrunch can be stored for up to 3 months. When you’re ready to enjoy a piece, simply remove it from the freezer and let it thaw at room temperature until it reaches its original delicious consistency. This method ensures you always have a delightful treat on hand!
More Delicious Homemade Desserts to Explore
If you’ve fallen in love with making your own candy and desserts, you’re in for a treat! Here are more fantastic recipes to satisfy your sweet tooth and impress your friends and family:
- Turtle Candy: An incredibly simple recipe, made with just three ingredients, for a classic caramel and pecan delight.
- Peppermint Sugar Cookies: Festive and flavorful sugar cookies generously topped with a creamy, refreshing peppermint frosting – perfect for the holidays.
- Classic Apple Pie: Master the art of pie making with this comforting apple pie featuring a buttery, flaky homemade crust.
- Dessert Cheese Ball: A decadent and easy-to-make cheese ball that tastes just like rich brownie batter, ideal for gatherings.
- Muddy Buddies: A fan-favorite snack mix combining the irresistible flavors of chocolate and peanut butter, coated over crunchy cereal.

Pin
Peanut Butter Buttercrunch Candy
Equipment
-
9 x 9-inch baking pan lined with parchment paper
-
Medium nonstick pot
-
Candy thermometer
-
Heat-resistant silicone spatula
-
Whisk
-
Fine-mesh sieve
-
Microwave-safe bowls (small and large)
-
Sharp chef’s knife
Ingredients
- 1-1/2 cups peanut butter
- 1 tablespoon unsalted butter
- 1/4 teaspoon salt see note 1
- 1 teaspoon vanilla extract
- 1 cup granulated sugar
- 3/4 cup light corn syrup
- 2 tablespoons water
- 1/2 teaspoon baking soda
- 1 (3.5-ounce) bar dark chocolate, finely chopped
- 1 teaspoon coconut oil or shortening
Instructions
-
Prepare Your Workspace: Line a 9×9-inch or 8×8-inch baking pan with parchment paper, ensuring there’s an overhang on the sides for easy removal later. Gather all your ingredients and tools. Sift the baking soda through a fine-mesh sieve into a small bowl to remove any lumps, and set it aside. Keep a heat-resistant silicone spatula and a whisk readily accessible near your stovetop.
-
Prepare Peanut Butter Base: Combine the peanut butter, butter, and salt in a microwave-safe bowl. Microwave in 20-second bursts, stirring well after each, until the mixture is completely soft and pourable. Stir in the vanilla extract until fully incorporated. Transfer this warmed peanut butter mixture to a large heat-resistant bowl and keep it close to your cooking area.
-
Cook the Sugar Syrup: In a nonstick, heavy-bottomed pot, combine the granulated sugar, light corn syrup, and water. Stir gently only until the sugar is moistened, being careful to avoid splashing sugar crystals onto the sides of the pot. Attach your candy thermometer to the side of the pot (ensuring it doesn’t touch the bottom). Place the pot over high heat and cook without stirring until the syrup reaches precisely 285°F (soft crack stage). Watch carefully, as the temperature can rise rapidly once it gets close to the target.
-
Activate the Crunch: As soon as the sugar syrup hits 285°F, remove the pot from the heat immediately. Swiftly whisk in the sifted baking soda. Whisk vigorously; the syrup will rapidly expand and become foamy. This is the crucial step that creates the candy’s signature crispy texture.
-
Combine and Set: Immediately pour the hot, foamy syrup into the large bowl with the warmed peanut butter mixture. Switch to your silicone spatula and quickly fold the peanut butter into the syrup. Work as fast as possible, as the mixture will begin to thicken into a solid, stringy mass very quickly. Transfer the combined mixture to your prepared 9×9-inch pan and spread it out evenly to about 1 inch thick. It’s perfectly fine if it doesn’t completely fill the pan. Allow the candy to cool undisturbed at room temperature for 3–5 hours, or until it is completely firm and set.
-
Temper and Apply Chocolate Topping: Once the peanut butter crunch is fully cooled and solid, finely chop the dark chocolate. Place about two-thirds of the chopped chocolate into a microwave-safe bowl. Microwave for 20 seconds, then remove and stir for 30 seconds. Repeat this process until the chocolate is mostly melted and smooth. Add the remaining one-third of the finely chopped chocolate to the melted chocolate and stir continuously until it also melts and the mixture is smooth. This technique helps to “temper” the chocolate, ensuring a beautiful, glossy finish and preventing streaks.
-
Final Set and Serve: Evenly spread the tempered chocolate across the top of the cooled peanut butter crunch candy. Allow the chocolate topping to set at room temperature for at least 1 hour, or until it is completely firm to the touch. Once set, use the parchment-paper overhang to lift the entire candy slab out of the pan. Place it on a clean cutting board and use a sharp chef’s knife to cut it into desired squares or bars. Your delightful homemade Peanut Butter Crunch Candy is now ready to be savored!
Recipe Notes
Storage Tips: The shelf life of your homemade buttercrunch candy is significantly influenced by humidity. In environments with high humidity, the candy can absorb moisture, potentially becoming sticky and lasting only 1 to 2 days. In dry conditions, however, it can remain fresh and perfectly crispy for up to a week when stored in an airtight container at room temperature. It is crucial to avoid refrigerating the candy, as this can cause it to become overly sticky and lose its desirable texture. For longer preservation, see freezing instructions in the main article.
Nutrition
Nutrition information is automatically calculated, so should only be used as an approximation.