
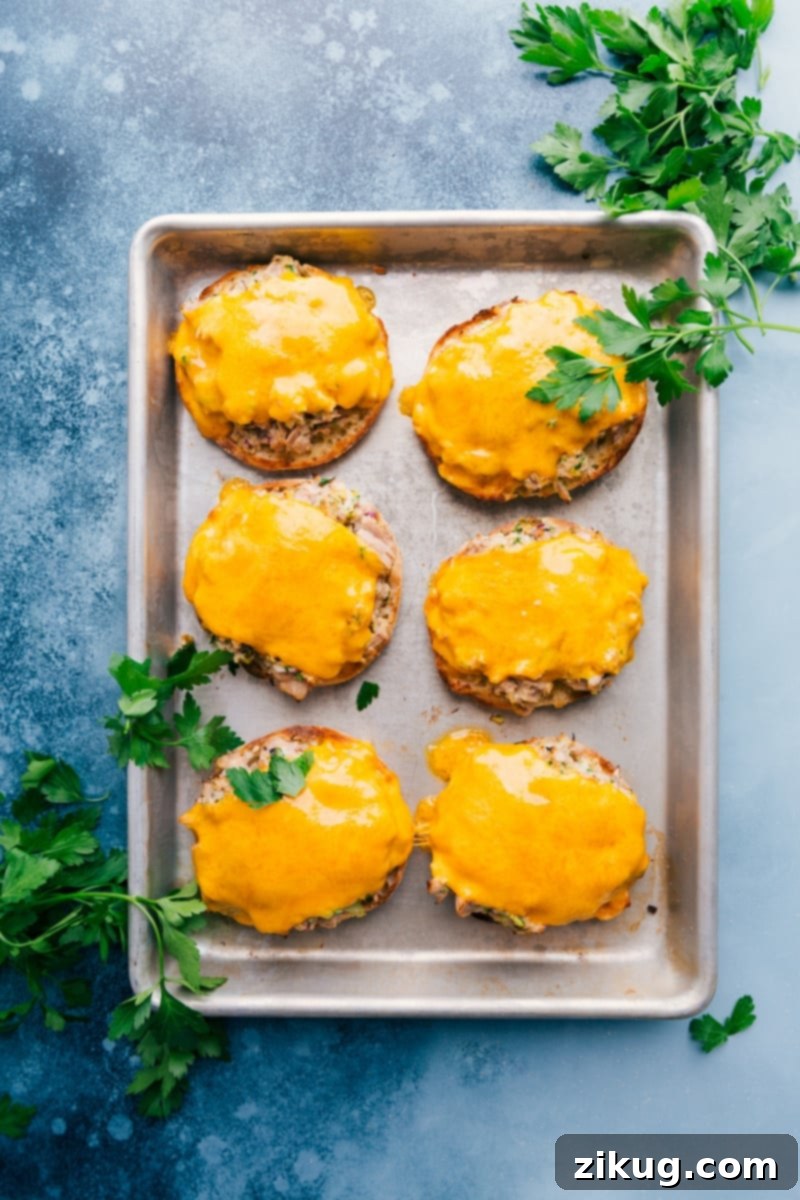
Master the art of making the **ultimate Tuna Melts**! This recipe features perfectly toasted English muffins, a super simple and creamy tuna mixture, and an abundance of rich, melty Cheddar cheese for a truly satisfying meal.
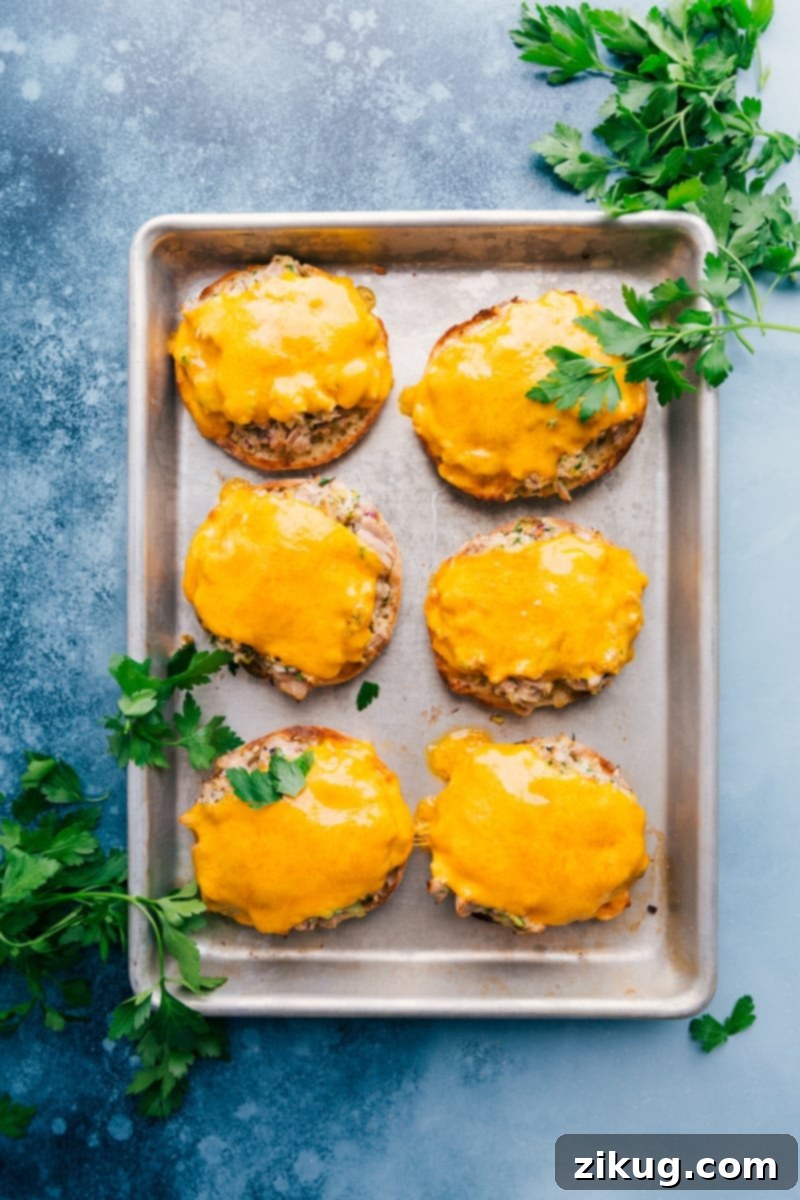
The Ultimate Easy Tuna Melt Recipe: A Quick & Cheesy Comfort Food Classic
Tuna melts hold a special place in the pantheon of comfort foods. They’re a nostalgic favorite that delivers warmth, creaminess, and cheesy goodness in every bite. This isn’t just another tuna melt recipe; it’s a guide to creating the most satisfying version with minimal effort. Using humble canned tuna as its foundation, this dish transforms into a hearty, family-friendly meal that’s perfect for a speedy weeknight dinner or a delightful weekend lunch. Forget complicated preparations; our streamlined approach ensures you get maximum flavor with minimum fuss.
What sets this recipe apart is its incredible simplicity. While many traditional tuna salad recipes require meticulous chopping of various vegetables, we leverage the power of a food processor to do the heavy lifting. This smart shortcut means you can achieve that perfect finely diced texture for your celery, parsley, and red onion in mere seconds. By combining everything in the food processor, the prep work for these delectable melts becomes unbelievably simple, allowing you to enjoy your delicious creation sooner.
Tuna Melt: Hot vs. Tuna Salad: Cold – The Delicious Difference
It’s a common question: what exactly differentiates a tuna melt from a regular tuna salad sandwich? The answer lies in the temperature and the magical transformation that heat brings. A tuna melt is, by definition, a hot sandwich. It’s designed to be served immediately after being baked or broiled, with the cheese gloriously melted and the bread perfectly toasted. The heat enhances all the flavors, making the tuna mixture even more savory and the cheese wonderfully gooey and stretchy.
On the other hand, a classic tuna salad sandwich is a cold affair, typically served chilled on soft bread or in a wrap. While equally delicious in its own right, it lacks the comforting warmth and rich, caramelized cheese texture that makes a tuna melt truly irresistible. The interplay of warm, crispy bread, creamy tuna filling, and bubbling cheese is what elevates the tuna melt into a category all its own.
The Essential Ingredients for a Perfect Tuna Melt
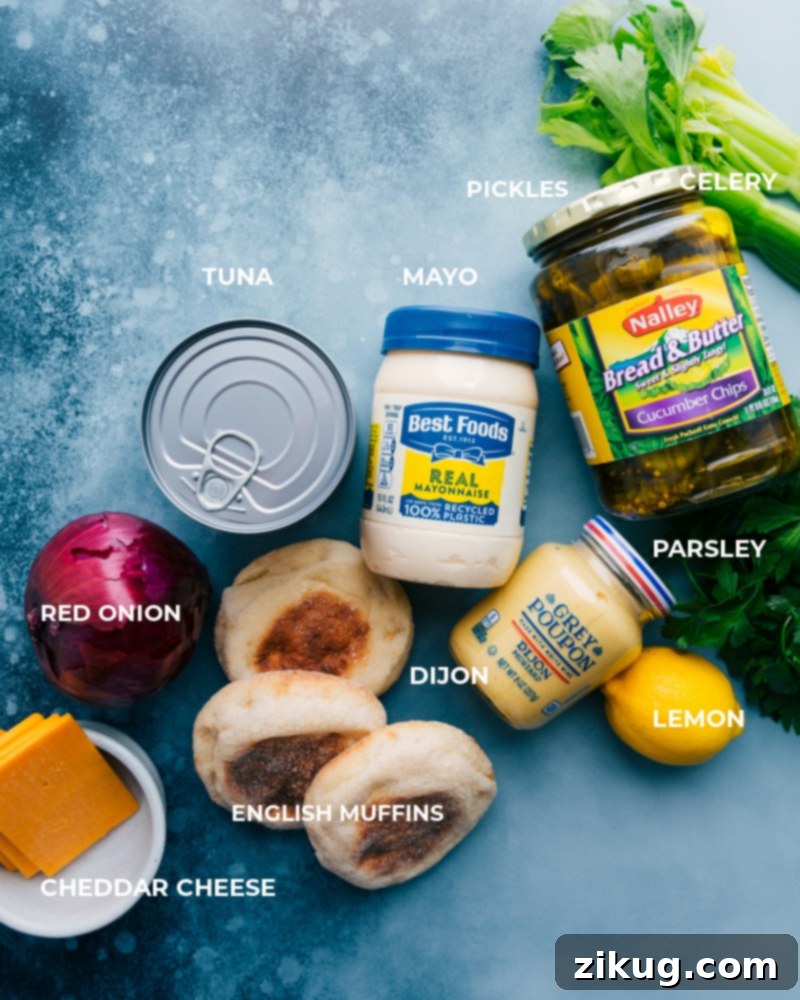
Crafting an exceptional tuna melt relies on a few key ingredients. While the list isn’t extensive, the quality and choice of each component significantly impact the final flavor. Here’s a closer look at what you’ll need and why:
- Canned Tuna: The Foundation
Your choice of tuna makes a substantial difference. We highly recommend using tuna packed in extra-virgin olive oil. This type of tuna offers a richer, more nuanced flavor and a wonderfully moist texture compared to water-packed varieties. While water-packed tuna can be used, oil-packed tuna (like Genova’s® canned tuna, a personal favorite, not sponsored) will elevate your tuna melts to another level. Remember to drain it thoroughly and flake it gently with a fork before mixing.
- Mayonnaise: The Binder and Creaminess
Mayonnaise is crucial for binding the tuna mixture together and adding that signature creamy texture. A good quality mayo, such as Hellman’s/Best Foods®, provides a balanced tang and richness that complements the other flavors without overpowering them. You can always adjust the amount to achieve your desired consistency.
- Bread and Butter Pickles: The Sweet & Tangy Crunch
These pickles are not just for garnish! Their unique balance of sweet and tangy flavors, combined with their crisp texture, provides a refreshing counterpoint to the rich tuna and cheese. They add a vibrant zest that is often missing in other tuna recipes. If you can’t find bread and butter pickles, a good quality dill pickle can work, but consider a touch of sugar to balance the acidity.
- Flat-Leaf Italian Parsley: Freshness and Color
Fresh herbs are often overlooked in quick sandwiches, but flat-leaf Italian parsley (also known as Italian parsley) contributes a bright, earthy freshness and beautiful green flecks. It’s much more flavorful and aromatic than curly parsley, which is typically used for garnish. Finely chopping it in the food processor ensures an even distribution of flavor throughout the mixture.
Rounding Out the Flavor Profile: Important Additions
Beyond the core ingredients, a few simple additions truly elevate the taste of your tuna melts:
- Dijon Mustard and Lemon Juice: The Zesty Kick
The combination of Dijon mustard and fresh lemon juice introduces a delightful tang and subtle sharpness that cuts through the richness of the mayo and cheese. Dijon adds a complex, slightly spicy note, while lemon brightens the entire mixture. These complementary flavors are highly recommended, but if you prefer a milder taste, you can certainly omit either or both.
- Red Onion: Aromatic Bite
Finely diced red onion provides a pleasant sharpness and aromatic depth. For those sensitive to the strong flavor of raw red onion, a simple trick is to soak the diced onions in salted ice water for about 10 minutes. This process helps mellow their pungency. Just be sure to drain them thoroughly and pat them dry before adding to the tuna mixture.
- Cheddar Cheese: The Melty Heart of the Melt
Sharp or extra-sharp Cheddar cheese is our preferred choice for its robust, pronounced flavor that stands up beautifully to the other ingredients. While mild Cheddar will melt, it won’t offer the same depth of taste. Shredded cheese melts more evenly and quickly, but thinly sliced cheese also works wonderfully, creating a delightful molten top layer.
- English Muffins: The Ideal Vessel
English muffins are fantastic for tuna melts due to their nooks and crannies, which perfectly cradle the tuna mixture and absorb moisture without becoming soggy too quickly. Their sturdy texture also holds up well under the broiler. However, feel free to experiment with other breads like rye, sourdough, or even a good quality sandwich bread – whatever you enjoy most. Lightly toasting them before adding the tuna mixture prevents them from getting saturated and adds an extra layer of crunch.
Expert Tips for Flawless Tuna Melts
Achieving the perfect tuna melt is simple with these expert tips:
- Broiler Vigilance is Key: The broiler works quickly, and English muffins can go from perfectly golden and toasted to burned in a matter of seconds. Keep a close eye on them during the broiling process, and don’t step away from the oven.
- Consider a Slice of Tomato: Many tuna melt aficionados swear by adding a thin slice of fresh tomato between the tuna mixture and the cheese. It introduces a burst of juiciness, a touch of acidity, and an extra layer of texture. Give it a try if you enjoy fresh tomatoes!
- Customize Mayo to Preference: After incorporating the initial amount of mayonnaise, taste the mixture. If you prefer an even creamier consistency, feel free to add another tablespoon or two until it reaches your desired creaminess.
- Thinly Slice Your Cheddar: If you’re using block Cheddar, slice it very thinly. Thick slices can take longer to melt evenly and might make the cheese flavor a bit too overpowering. Thin slices melt beautifully, creating an even, gooey layer.
- Serve Immediately for Best Experience: Tuna melts are truly best enjoyed straight out of the oven. The warmth of the bread, the melty cheese, and the creamy filling are at their peak freshness and texture then. They tend to get soggy if left to sit for too long and do not store well as a completed sandwich. Call your family to the table a minute before they’re ready!
- Don’t Skimp on Draining the Tuna: Regardless of whether your tuna is packed in oil or water, thorough draining is crucial. Excess liquid can make your tuna mixture watery and soggy, compromising the texture of the melt. Press down firmly with a fork or a can lid to remove as much liquid as possible.
- Season to Taste: While the recipe provides a guideline for salt and pepper, always taste your tuna mixture before assembling the melts. Adjust the seasoning as needed to suit your palate. A pinch more salt, a dash of hot sauce, or a sprinkle of garlic powder can make a world of difference.
Storage and Make-Ahead Tips
Make Ahead & Storage
- Prepare Tuna Salad Ahead: The tuna mixture (tuna, celery, parsley, pickles, red onion, lemon juice, mayo, olive oil, and mustard) can be mixed up to 2 days in advance. Store it in an airtight container in the refrigerator. This makes assembly incredibly fast when you’re ready to eat.
- Storing Completed Tuna Melts: It’s genuinely best not to store the completed tuna melts. As mentioned, they can become soggy quickly. If you absolutely must store leftovers, they can be kept in an airtight container in the fridge for up to one day. Reheating might compromise the texture of the bread.
How to Make the Easiest Cheesy Tuna Melts (Step-by-Step Recipe)

Print Recipe
Tuna Melts
Equipment
-
Food processor
Ingredients
Default Servings: 2 (US Standard Units)
- 3 English muffins split in half, or 4 slices of rye/sourdough bread
- Softened unsalted butter optional, for the muffins
- 3 (5-ounce) cans tuna drained and flaked with a fork, see note 1
- 1/3 cup celery
- 1/3 cup fresh flat-leaf parsley
- 1/4 cup bread and butter pickles
- 1/4 cup red onion
- 1 tablespoon lemon juice
- 1/3 cup mayo
- 1 teaspoon olive oil
- 1 teaspoon Dijon-style mustard
- 6 slices shredded sharp Cheddar cheese or extra sharp Cheddar cheese; or 1 cup
- Salt and freshly ground black pepper to taste (approx. 1/2 tsp salt, 1/4 tsp pepper)
Instructions
- Preheat your oven to 375°F (190°C).
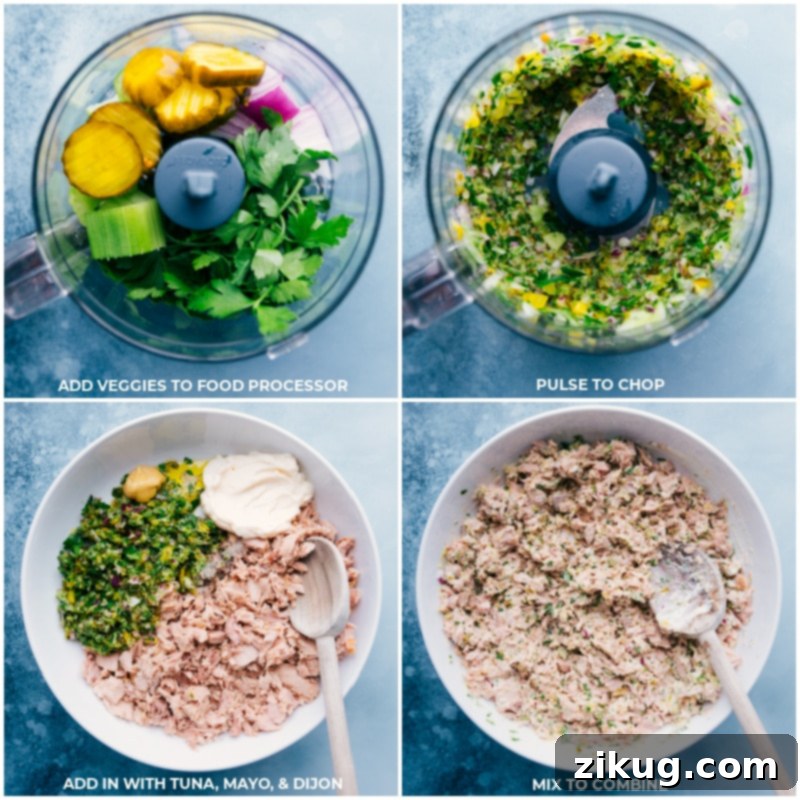
- To prepare the tuna mixture: Coarsely chop the celery into 2-inch pieces. Remove the parsley leaves from their stems. Coarsely chop the red onion. Add these three ingredients along with the drained bread and butter pickles to your food processor. Pulse the food processor to finely chop the vegetables, usually about 20–30 seconds. If needed, use a spoon or spatula to scrape down the sides of the bowl and pulse again for an even chop. Transfer the finely chopped vegetables to a medium-sized mixing bowl.
- To the bowl with the chopped vegetables, add the drained and flaked tuna, mayonnaise, lemon juice, Dijon mustard, olive oil, and season with salt and pepper to taste (a good starting point is about 1/2 teaspoon of salt and 1/4 teaspoon of black pepper). Stir all ingredients together thoroughly until well combined. If you desire a creamier consistency, add an additional tablespoon or two of mayonnaise and mix again.
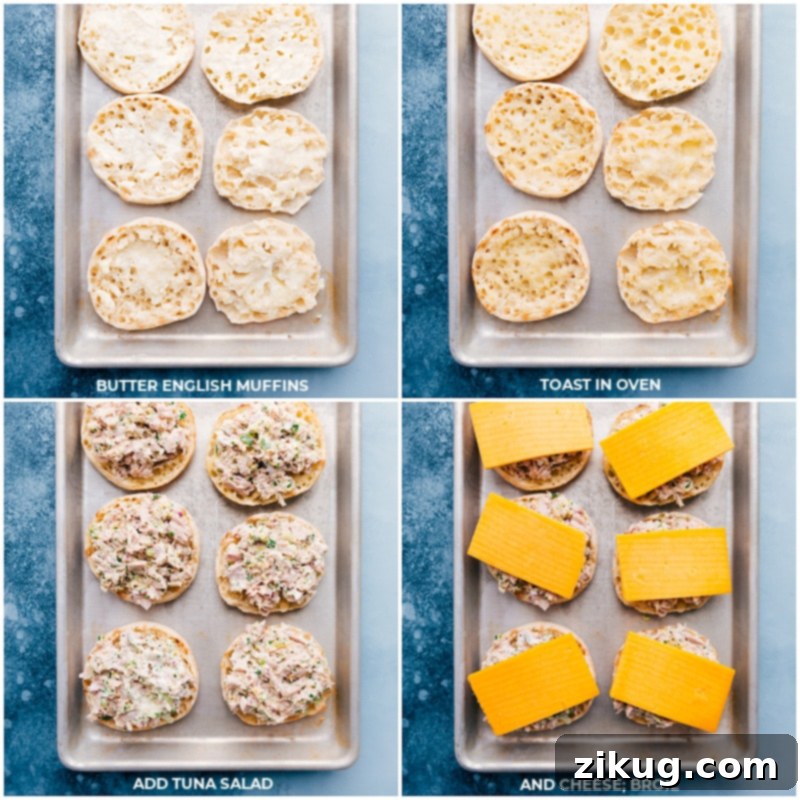
- Prepare your English muffins: If desired, lightly butter the cut sides of each English muffin. Place the English muffin halves on a baking sheet, cut-side up. You can lightly toast them in a toaster or under the broiler for a minute or two until golden, then remove them and leave them on the baking sheet. This step is optional but adds a nice crispness.
- Assemble and bake: Divide the prepared tuna mixture evenly among the toasted English muffin halves. Spread it generously to cover the surface. Top each muffin with a thin slice of sharp Cheddar cheese, or sprinkle about a few tablespoons of shredded Cheddar cheese over the tuna mixture.
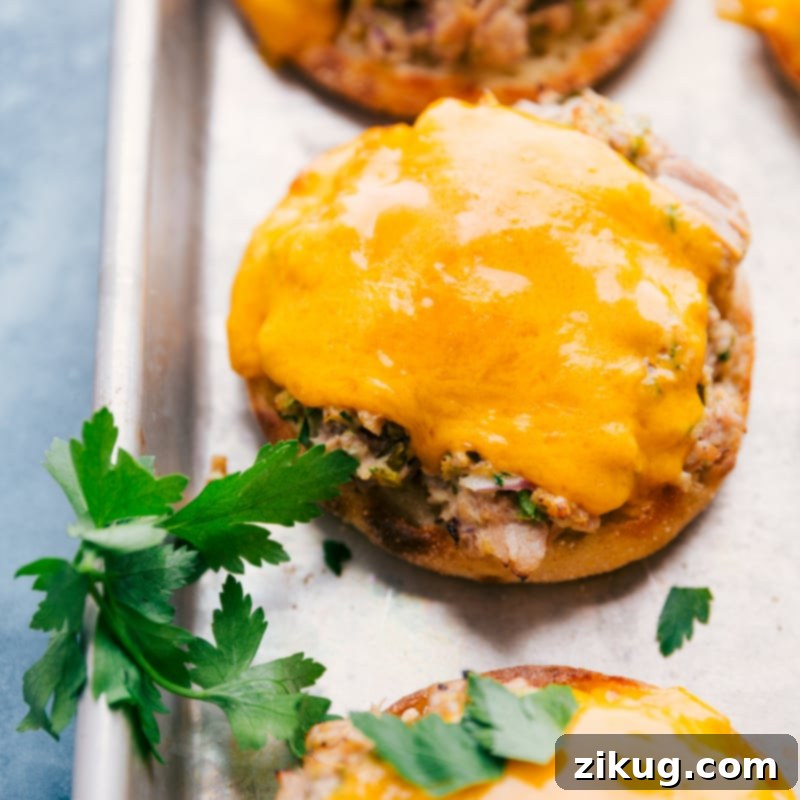
- Place the baking sheet back into the preheated oven and bake for approximately 5 minutes, or until the cheese is beautifully melted and bubbly. For extra crispiness and golden-brown cheese, you can carefully switch to the broiler for the last 1-2 minutes, but watch it very closely to prevent burning.
- Serve immediately and enjoy your hot, cheesy, and incredibly satisfying tuna melts!
Recipe Notes
Nutrition
Calories: 653kcal |
Carbohydrates: 39.7g |
Protein: 42.4g |
Fat: 36g |
Cholesterol: 116.6mg |
Sodium: 968.3mg |
Fiber: 0.7g |
Sugar: 3.3g
Nutrition information is automatically calculated and should only be used as an approximation. Factors such as specific ingredient brands and preparation methods may alter values.
Serving Suggestions: What to Pair with Tuna Melts
While tuna melts are wonderfully satisfying on their own, pairing them with a simple side can complete the meal. For a classic diner experience, serve them with a generous handful of crispy potato chips. If you’re aiming for something lighter, a fresh green salad with a vinaigrette dressing provides a refreshing contrast. Tomato soup is another timeless accompaniment, perfect for dipping your cheesy sandwich. For a touch of sweetness, a side of fresh fruit or coleslaw can also be a delightful addition.
Tuna Melt Variations: Customize Your Classic
This recipe provides a fantastic base, but don’t hesitate to get creative with variations. Here are some ideas to inspire you:
- Cheese Swaps: Experiment with different cheeses! Swiss, provolone, Monterey Jack, or even a smoked gouda can add unique flavors. A blend of cheeses can also be incredibly delicious.
- Spice It Up: Add a pinch of cayenne pepper, a dash of hot sauce (like Sriracha or Tabasco), or finely minced jalapeños to the tuna mixture for a spicy kick.
- Herbaceous Additions: Fresh dill or chives can offer a different aromatic profile. Mix them in with the parsley for an extra layer of flavor.
- Extra Veggies: Finely diced bell peppers (red, yellow, or green) or grated carrots can add extra crunch and nutrients. Sautéed mushrooms or spinach could also be a delicious addition.
- Bread Alternatives: While English muffins are great, try this recipe on sourdough, rye bread, thick-cut white bread, ciabatta rolls, or even sturdy whole wheat bread for a different texture and flavor profile.
- Mediterranean Twist: Incorporate chopped Kalamata olives, a sprinkle of oregano, and perhaps some crumbled feta cheese for a Greek-inspired tuna melt.
- Capertastic: A tablespoon of briny capers, finely chopped, can add a delightful salty punch to the tuna mixture.
More Delightful Tuna Recipes:
Seafood
Savory Tuna Patties
Dinner
Light & Fresh Tuna Salad (No Mayo)
Seafood
Quickest Tuna Rice Bowl
Salads
Classic Tuna Macaroni Salad Recipe
Loved this recipe? Share your thoughts below!