
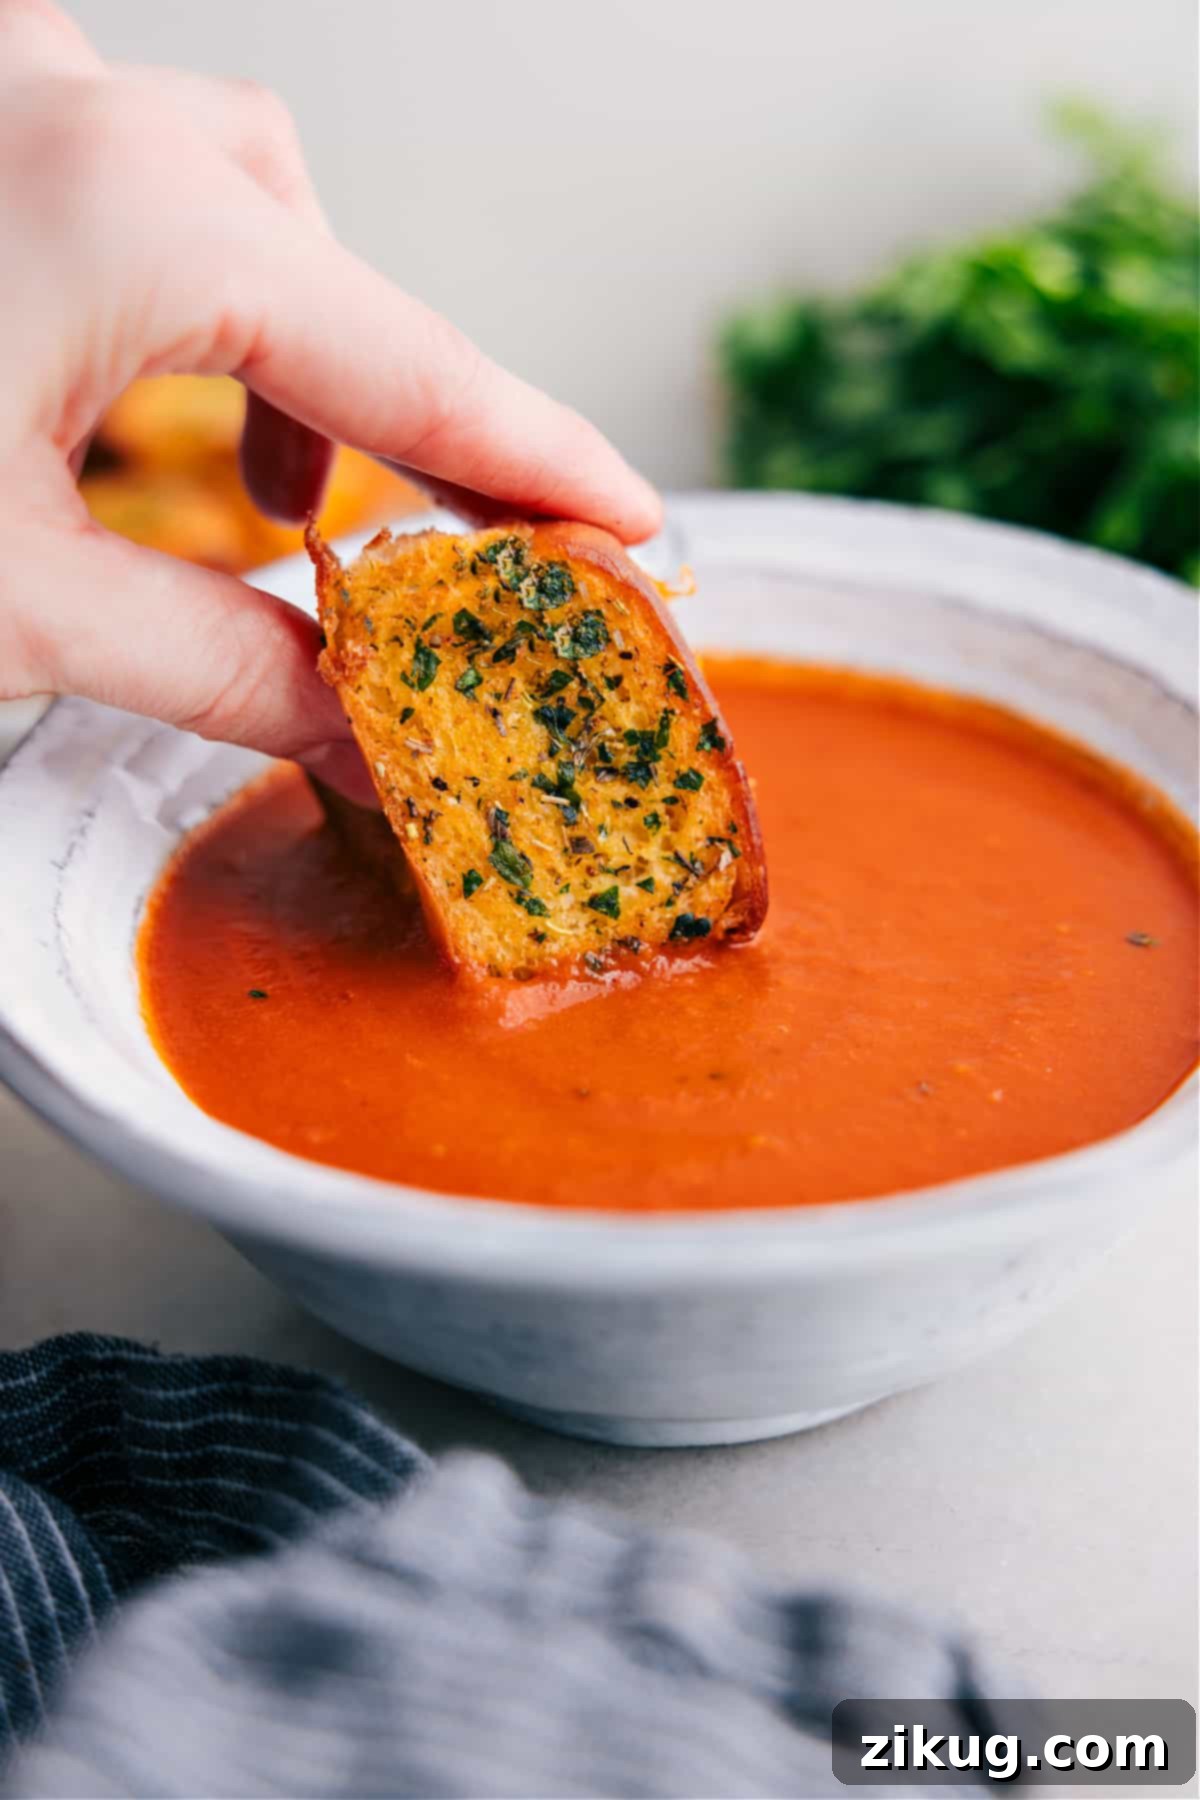
Mini Grilled Cheese Sandwiches aren’t just for kids; they’re a delightful, easy-to-make classic that elevates any soup night or party spread. Forget the fuss of individual pan-frying—this recipe simplifies everything: just slice, generously butter, layer with cheese, and bake to golden perfection. It’s a remarkably effortless way to prepare a batch of perfectly crispy, gooey grilled cheese that everyone will adore!
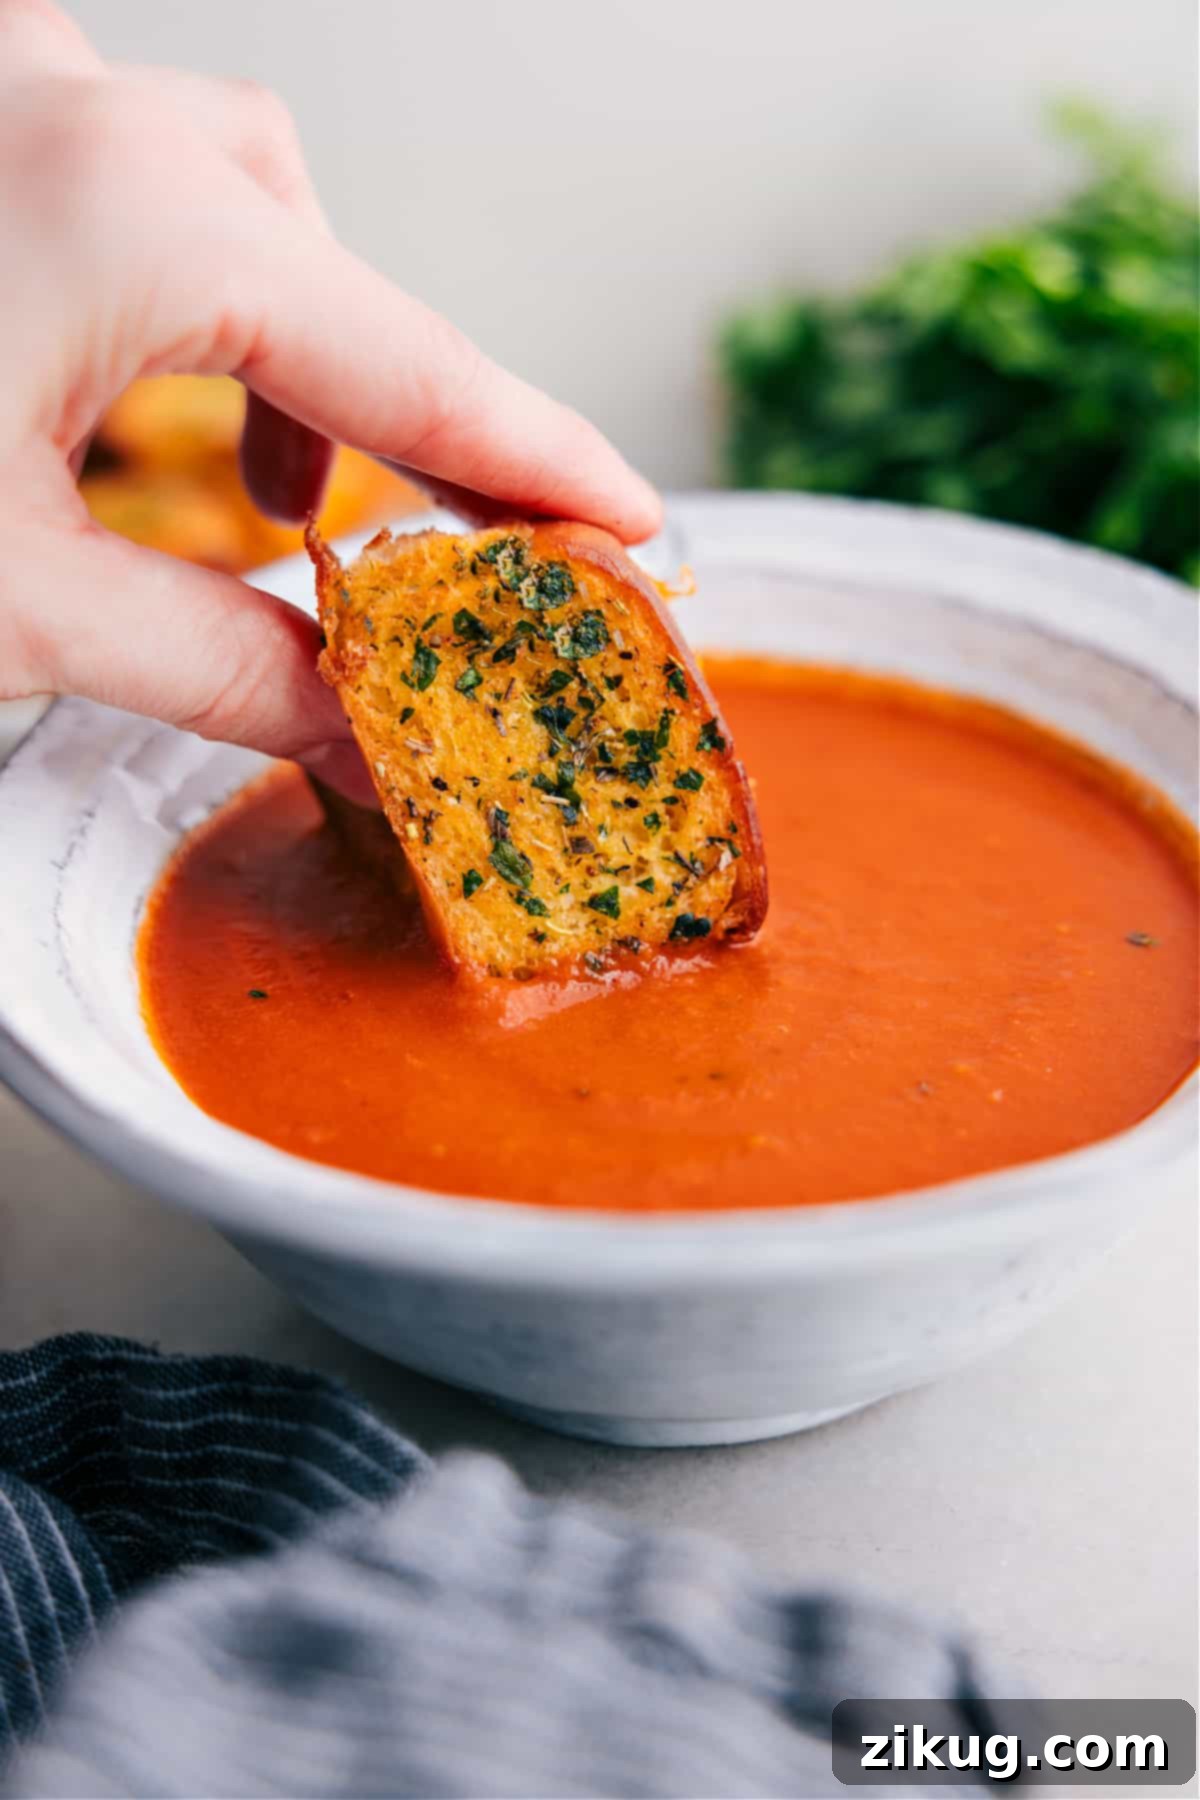
Irresistible Mini Grilled Cheese Sandwiches: The Ultimate Soup Companion and Party Appetizer
I am absolutely thrilled to share this particular recipe with you, as it has quickly become a firm favorite and a staple in my kitchen. Inspired by the delightful sweetness and soft texture of King’s Hawaiian rolls, I’ve refined the original concept to create what I believe is the ultimate version of mini grilled cheese. My secret? A significantly more generous, savory garlic herb butter blend that takes these small bites from simple to sensational.
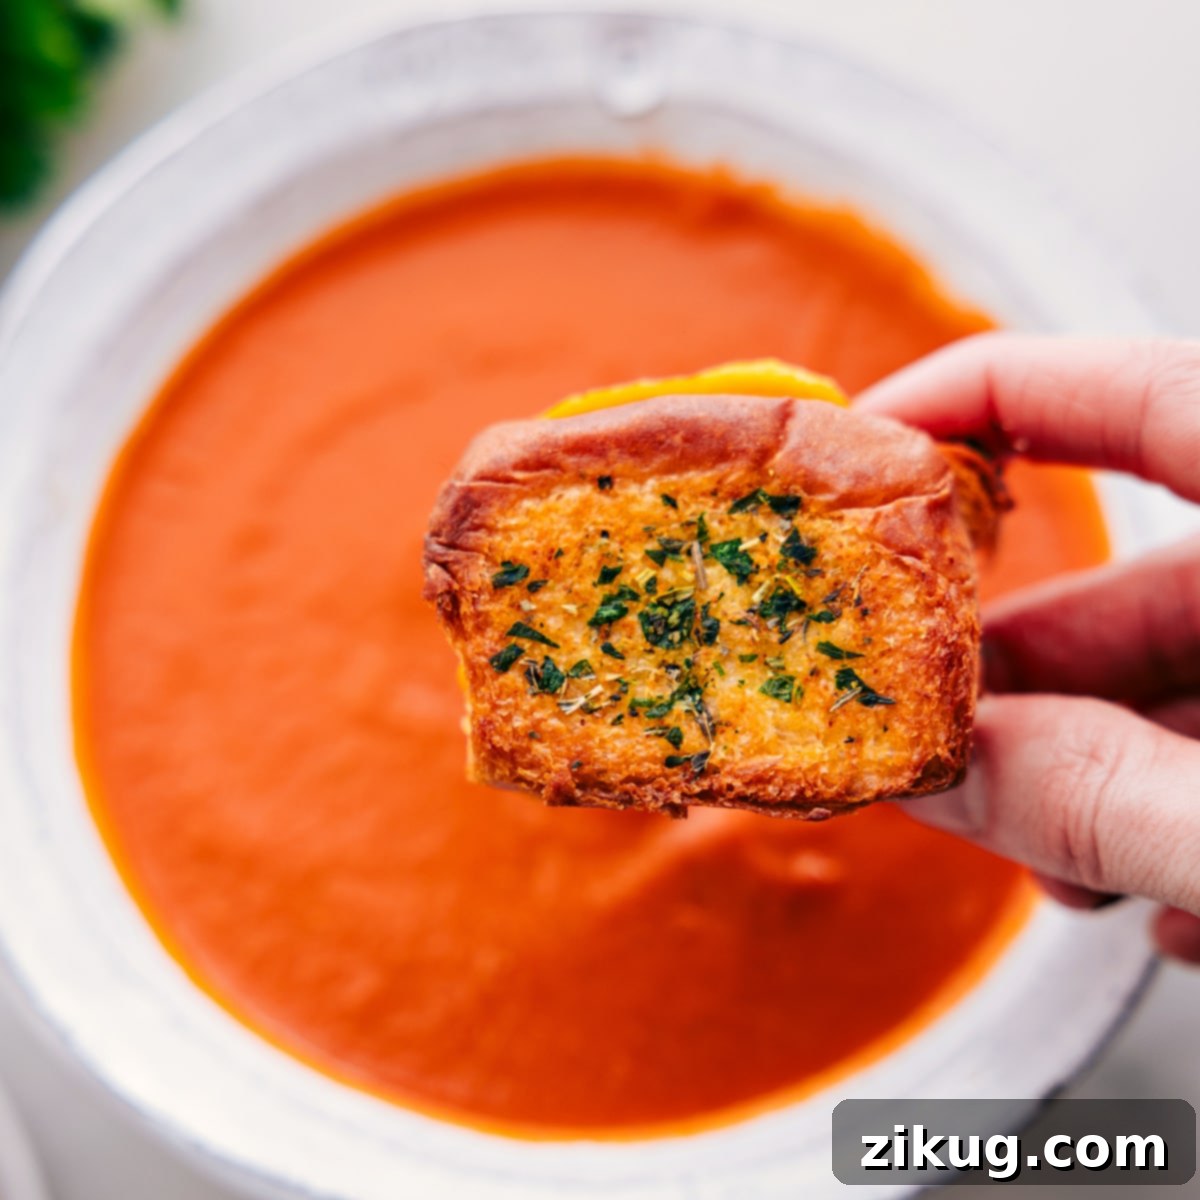
These adorable, perfectly portioned grilled cheese sandwiches are an absolute game-changer for your weekly soup night. The beauty of this recipe lies in its simplicity and efficiency: you can prepare an entire batch on a single sheet pan, effortlessly baking them all at once. This method is infinitely faster and far less demanding than standing over a stove or air fryer, making individual sandwiches one by one. Trust me, the convenience alone is enough to convert you! My kids are completely obsessed with them, and I’ll openly admit, so am I. There’s an undeniable joy in dipping these warm, cheesy bites into a steaming bowl of homemade soup.
Beyond family dinners, these mini grilled cheese sandwiches shine as a fantastic appetizer or party food. Hosting a gathering? Simply load up a few sheet pans with these cheesy delights, and your guests will have an abundance of delicious, easy-to-grab snacks perfect for dipping or enjoying on their own. They vanish quickly, so consider making an extra batch!
Why You’ll Love This Easy Sheet Pan Recipe
What makes these mini grilled cheese sandwiches so special? Let’s dive into the irresistible reasons they deserve a spot in your recipe rotation:
- Effortless Batch Cooking: Say goodbye to flipping individual sandwiches. This recipe allows you to bake a large quantity at once, freeing you up to enjoy your meal or mingle with guests. It’s the ultimate time-saver for busy weeknights or larger gatherings.
- Perfectly Portioned & Dippable: Their mini size makes them ideal for dipping into soups, stews, or even a side of marinara. They’re also wonderfully suited for little hands, making them a top choice for kid-friendly meals and snacks.
- Crowd-Pleasing Flavor: The unique combination of sweet, soft Hawaiian rolls with sharp cheddar cheese and a savory garlic herb butter creates a harmonious, addictive flavor profile that appeals to all ages and palates. It’s a gourmet twist on a classic comfort food.
- Versatile for Any Occasion: From a cozy family soup night to a lively party appetizer, a delightful school lunchbox addition, or a quick snack, these sandwiches fit seamlessly into various settings.
- Minimal Cleanup: Baking these beauties on a single sheet pan means significantly less mess and quicker cleanup compared to traditional stovetop methods, giving you more time to savor your culinary creation.
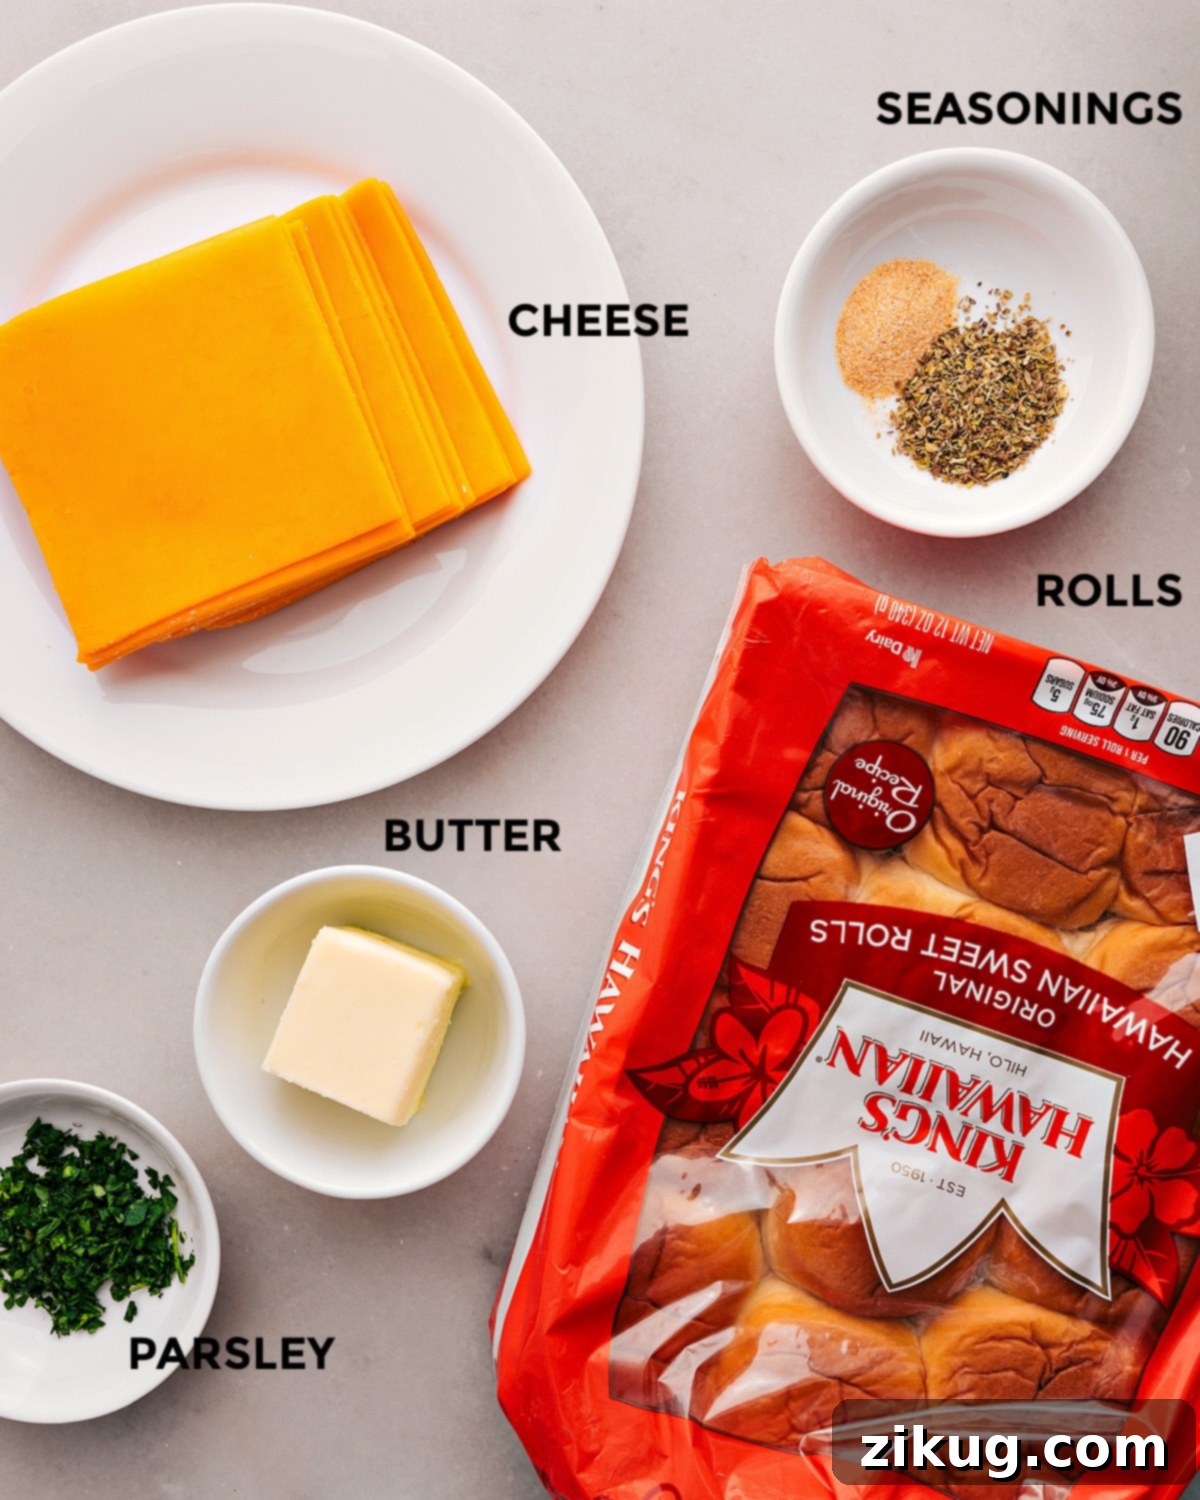
Essential Ingredients for Your Mini Grilled Cheese Masterpiece
Crafting these delectable mini grilled cheese sandwiches requires just a handful of simple, readily available ingredients. Here’s a closer look at what you’ll need and why each component is key to achieving perfect flavor and texture:
- Sweet Hawaiian Rolls: These incredibly soft, slightly sweet dinner rolls are the essential foundation of our mini sandwiches. Their delicate sweetness perfectly complements the sharp cheddar, creating a balanced and incredibly satisfying flavor. The individual roll format also makes them naturally portioned for mini sandwiches, simplifying the prep work and making assembly a breeze.
- Sharp Cheddar Cheese: A robust, sharp cheddar is crucial here. Its bold, tangy flavor stands up beautifully against the sweet rolls and savory butter, providing that classic, irresistible grilled cheese taste. Pre-sliced cheddar can save you valuable time, but you can also slice a block of high-quality cheddar for a fresher, more intense flavor. Other excellent melting cheeses like Gruyere, Monterey Jack, or even a blend of your favorite cheeses would also work wonderfully.
- Unsalted Butter (Softened): Softened butter is key for creating our aromatic herb spread. Unlike melted butter, softened butter blends effortlessly with the herbs and spices, allowing for a thick, even coating on every surface of the rolls. This ensures maximum flavor penetration and helps achieve a gorgeous, uniformly golden and crispy crust when baked.
- Italian Seasoning: This versatile blend of dried herbs (typically oregano, basil, thyme, rosemary, and marjoram) adds a complex, aromatic depth to the butter. It’s a simple yet effective way to infuse classic Mediterranean flavors without the need for individual herbs, making your prep even easier.
- Garlic Powder: A staple in any savory dish, garlic powder provides a mild yet distinct garlic flavor that permeates the butter and enhances the overall savory profile of the sandwiches. It’s an easy way to add a delicious garlic kick without the texture or potential intensity of fresh minced garlic.
- Fresh Parsley (Finely Diced): Fresh parsley brings a bright, herbaceous note and a delightful pop of vibrant green color to our butter mixture. Finely dicing it ensures it distributes evenly and doesn’t overwhelm the texture. If fresh isn’t available, a smaller amount of dried parsley (about half the quantity) can be used, though fresh is highly recommended for the best flavor and visual appeal.
- Salt and Black Pepper: Essential for seasoning the herb butter, these simple additions enhance all the other flavors, bringing out the best in the cheese and bread while ensuring a well-rounded taste profile.
Equipment You’ll Need
- Standard Baking Sheet (15″ x 10″ or similar): This is crucial for baking a batch of these mini sandwiches evenly and efficiently. Using a rimmed sheet pan is recommended to prevent any melted butter or cheese from dripping off and making a mess in your oven.
- Small Mixing Bowl: A small bowl is perfect for effortlessly combining the softened butter with your selected herbs and spices to create the savory spread.
- Sharp Knife or Serrated Knife: Essential for cleanly and precisely slicing the sweet rolls horizontally into their desired three parts. A serrated knife often works best for soft bread.
- Spatula or Butter Knife: For spreading the aromatic herb butter generously and evenly onto all cut sides of the rolls.
- Metal Spatula: A sturdy metal spatula is incredibly useful for gently flipping the sandwiches during baking and for pressing them down slightly to achieve optimal crispiness.
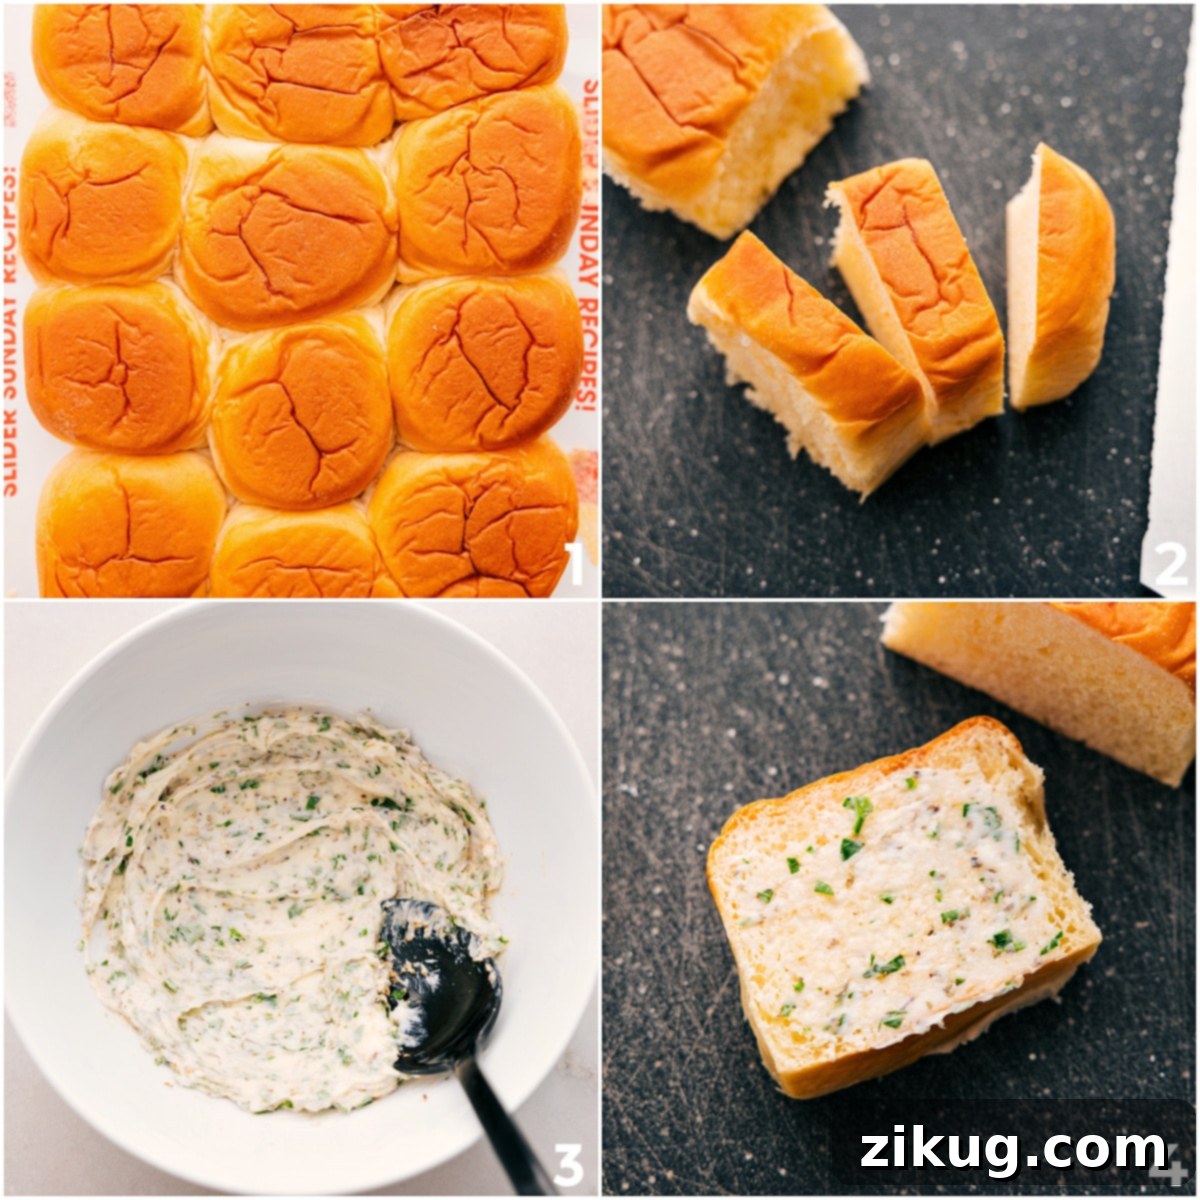
Simple Steps to Crafting Perfect Mini Grilled Cheese Sandwiches
Preparing these delightful mini grilled cheese sandwiches is incredibly straightforward and guarantees a batch of golden, cheesy perfection. Follow these easy, step-by-step instructions:
- Preheat Oven & Slice Rolls: Begin by preheating your oven to 350°F (175°C). While the oven heats, carefully separate each sweet roll from its package. Using a sharp serrated knife, slice each roll horizontally into three equal parts. This means you’ll have a top, middle, and bottom slice for each original roll, creating more surface area for that delicious butter and cheese!
- Prepare the Herb Butter: In a small mixing bowl, combine the softened unsalted butter with the Italian seasoning, garlic powder, finely diced fresh parsley, and a pinch of salt and black pepper. Mix thoroughly until all ingredients are well incorporated and you have a fragrant, uniformly spreadable herb butter.
- Butter the Rolls Generously: Take each individual slice of your prepared rolls and generously coat both cut sides with the herb butter mixture. Ensure you cover all surfaces evenly; this butter is essential for maximizing flavor and achieving that desirable crispy crust. Don’t be shy – aim to use up all the butter mixture for optimal results!
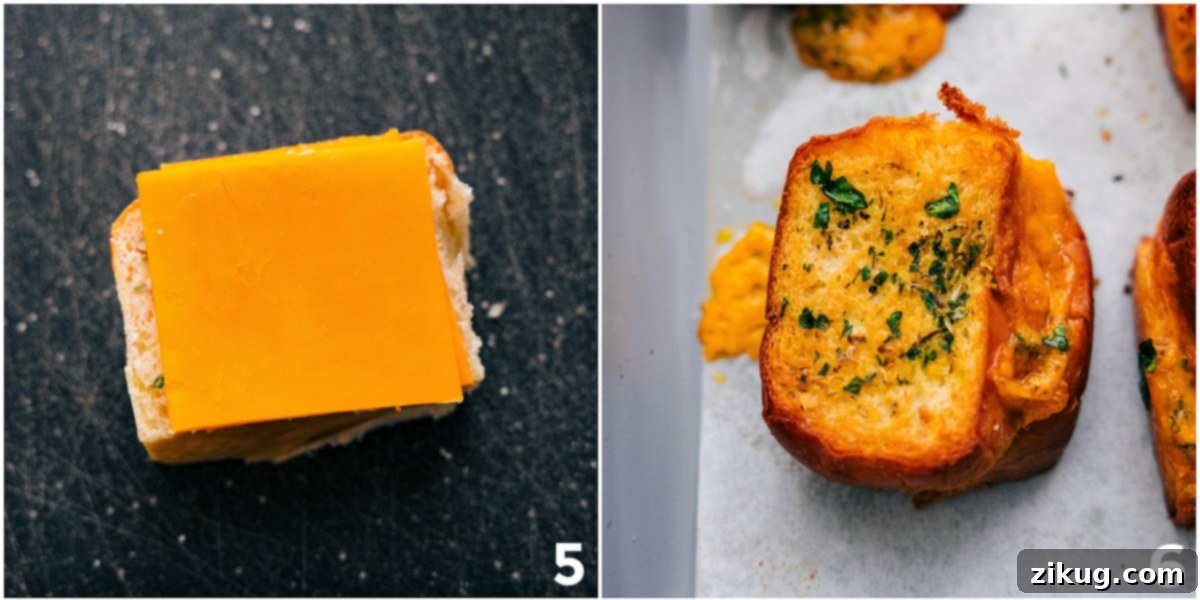
- Assemble the Sandwiches: On a baking sheet (preferably lined with parchment paper for easy cleanup), arrange half of the buttered roll slices. These will form your bottom sandwich pieces. Next, cut your sharp cheddar slices into smaller squares or pieces that fit neatly onto the rolls. Place two pieces of cheddar onto the center of each bottom roll slice. Then, carefully place the remaining buttered roll slices on top, completing your mini sandwiches.
- Initial Bake to Golden Perfection: Place the baking sheet with the assembled sandwiches into the preheated oven. Bake for an initial 5-7 minutes. During this stage, the cheese will begin to melt, and the bottom of the rolls will start to lightly toast and turn golden.
- Flip & Finish Baking for Crispiness: After the initial bake, carefully remove the baking sheet from the oven. Using a metal spatula, gently flip each mini sandwich. Lightly press down on each sandwich with the back of the spatula; this crucial step helps ensure even contact with the hot pan and promotes an extra-crispy, satisfying crust. Return the baking sheet to the oven and bake for an additional 5-7 minutes, or until the sandwiches are beautifully golden brown and crispy on both sides, and the cheese is thoroughly melted and delightfully gooey.
- Serve Warm & Enjoy: Immediately remove the mini grilled cheese sandwiches from the oven. They are best enjoyed warm, fresh from the oven, especially when paired with your favorite hearty soup for dipping!
Expert Tips for the Best Mini Grilled Cheese
Achieving perfectly crispy and flavorful mini grilled cheese sandwiches is easy with a few insider tips and tricks:
- Butter Consistency is Key: Ensure your butter is truly softened, not melted. Softened butter creates a thicker, more even coating that helps the rolls crisp up beautifully and absorb the herb flavors. Melted butter can soak into the bread too quickly, potentially leading to soggy spots rather than a crispy crust.
- Don’t Skimp on the Butter: Generosity with the garlic herb butter is precisely what makes these sandwiches shine. It’s the secret to that coveted golden, crispy exterior and rich, savory flavor. The more butter, the better the crust!
- Quality Cheese Matters: While sharp cheddar is highly recommended for its robust flavor, always choose a good quality cheese that is known for melting well. Shredded cheese can be used, but pre-sliced offers convenience and ensures even distribution. Don’t hesitate to experiment with different types like provolone, Swiss, or a Colby Jack blend for varied and exciting flavors.
- Even Slicing: Try your best to slice the rolls into roughly equal thirds. This ensures they cook evenly in the oven and prevents having super thin pieces that might burn or thicker pieces that remain uncooked or doughy in the center.
- Press for Perfection: The slight press with a metal spatula during the second bake is a crucial step. It helps flatten the sandwiches, ensuring maximum contact with the hot baking sheet for an extra-crispy crust. It also helps compact the cheese for a more satisfying, gooey bite.
- Watch Your Oven: Remember that oven temperatures can vary significantly. Keep a close eye on your sandwiches, especially during the last few minutes of baking, to prevent them from over-browning or burning. They should be a beautiful golden color, not dark brown.
- Serve Immediately: Grilled cheese is always, without exception, best enjoyed fresh from the oven. The warmth ensures irresistibly gooey, melted cheese and a perfectly crisp exterior. While they can be reheated, the texture is rarely quite the same as when they are piping hot.
Creative Variations to Try
Once you’ve mastered the classic mini grilled cheese, feel free to unleash your culinary creativity with these delicious variations:
- Deluxe Cheese Blend: Elevate the cheese factor by mixing sharp cheddar with a touch of nutty Gruyere for added depth, or incorporate some mozzarella for extra stretchiness and a milder flavor.
- Spicy Kick: For those who love a bit of heat, incorporate a pinch of red pepper flakes directly into your herb butter, or opt for a zesty pepper jack cheese instead of plain cheddar.
- Mini Ham & Cheese: Transform these into a heartier snack or light meal by adding a very thin slice of deli ham or turkey alongside the cheese. The sweetness of the rolls pairs beautifully with savory meats.
- Sweet & Savory: For a delightful contrast, drizzle a tiny bit of honey or maple syrup on the inside of the rolls before assembling and baking, especially if you’re using a milder cheese.
- Everything Bagel Seasoning: For a unique and flavorful twist, generously sprinkle some everything bagel seasoning on the buttered exterior of the rolls before baking. It adds a fantastic crunch and savory punch.
What to Serve with Your Delectable Mini Grilled Cheese Sandwiches
Mini grilled cheese sandwiches are incredibly versatile and pair beautifully with a variety of dishes, transforming a simple meal into something special. While they are famously the perfect companion for soup, don’t limit yourself! Here are some fantastic ideas to complete your meal or appetizer spread:
- Classic Creamy Tomato Soup: This is the quintessential pairing, a timeless duo that offers ultimate comfort. The rich, slightly acidic tomato soup is the ideal counterpoint to the savory, cheesy sandwiches, making for an unbeatable comfort food experience that warms you from the inside out.
- Hearty Broccoli Cheddar Soup: For a more substantial and equally satisfying meal, a creamy, cheesy broccoli cheddar soup complements these mini sandwiches perfectly, enhancing the cheddar notes and adding a boost of vegetables.
- Crisp Caesar Salad: Nothing quite beats the classic trio of soup, salad, and grilled cheese! The refreshing crunch and tangy dressing of a Caesar salad provide a wonderful, palate-cleansing balance to the warm, rich, and indulgent sandwiches.
- Tangy Pickles: The bright, briny flavor of dill pickles cuts through the richness of the cheese, offering a delightful palate cleanser and a satisfying crunch. Serve them on the side for a simple, yet incredibly effective pairing that brings out the best in the cheese.
- Roasted Vegetables: Add a healthy, colorful, and flavorful element to your meal with simply roasted vegetables. Roasted carrots offer a natural sweetness that beautifully complements the sweet rolls, while roasted broccoli provides a slight bitterness and earthy flavor that pairs well with sharp cheddar.
- Fresh Fruit Salad: For a lighter and more refreshing side, a simple fruit salad featuring seasonal berries, juicy grapes, or sweet melon can add a delightful sweetness and a refreshing contrast to the savory sandwiches.
- Creamy Coleslaw: A crisp, creamy, or vinaigrette-based coleslaw can offer a refreshing crunch and a tangy contrast, making for a well-rounded and enjoyable meal.
Storage and Reheating Advice
These mini grilled cheese sandwiches are undeniably at their peak when served fresh from the oven, with the cheese perfectly gooey and the crust ideally crisp. For the absolute best experience, we highly recommend baking them only when you’re ready to enjoy them immediately.
However, if you happen to have any delightful leftovers, you can certainly save them for later. Store the cooled sandwiches in an airtight container in the refrigerator for up to 2 days. To bring back some of that irresistible crispiness and melty goodness, reheat them on a baking sheet in an oven preheated to 350°F (175°C) for a few minutes until warmed through and the cheese has softened again. We strongly advise against using the microwave, as it will unfortunately make them soggy and detract from their wonderful texture.
Explore More Delicious Soups Perfect for Dipping
If you’re looking for more incredible soup recipes to pair with your mini grilled cheese, look no further! These recipes are tried-and-true favorites that promise a comforting and satisfying meal, perfect for a cozy night in or a delightful gathering:
- Creamy Butternut Squash Soup: A famously delicious restaurant-quality recipe that’s surprisingly easy to make at home, offering a naturally sweet and velvety smooth experience.
- Hearty Homemade Chicken Noodle Soup: Nothing says comfort quite like a rich, made-from-scratch chicken noodle soup, brimming with tender chicken, vegetables, and savory broth – perfect for a chilly evening or when you need a little pick-me-up.
- Savory Artichoke Soup with Mushrooms: An elegant and flavorful soup featuring earthy mushrooms and tender artichoke hearts, creating a uniquely sophisticated taste that will impress.
- Slow Cooker Chicken Stew with Loads of Veggies: A comforting and wholesome stew packed with tender chicken and an abundance of garden vegetables, all made effortlessly in your crockpot for a fuss-free, hearty meal.
- Easy Pumpkin Soup using Canned Pumpkin: A quick and delightful pumpkin soup recipe that makes the most of convenient canned pumpkin for a rich, flavorful result that’s perfect for autumn or any time of year.
Mini Grilled Cheese Recipe
These baked mini grilled cheese sandwiches are quick, easy, and absolutely perfect for dipping into your favorite soup or serving as a crowd-pleasing appetizer. Made with sweet Hawaiian rolls and savory herb butter, they’re a delicious twist on a classic!
Yields: 18 mini sandwiches
Prep Time: 15 minutes
Cook Time: 10-14 minutes
Total Time: 25-29 minutes
Ingredients:
- 1 package (12-count) Hawaiian sweet dinner rolls
- 12 slices sharp Cheddar cheese
- 8 tablespoons (1 stick) unsalted butter, softened
- 2 teaspoons Italian seasoning
- 1 teaspoon garlic powder
- 1 tablespoon finely chopped fresh parsley
- Pinch of salt and black pepper, to taste
Equipment:
- Sheet pan (15″ x 10″ or similar, preferably rimmed)
- Small mixing bowl
- Sharp serrated knife
- Butter knife or small spatula
- Metal spatula
Instructions:
- Preheat Oven & Slice Rolls: Preheat your oven to 350°F (175°C). Separate each roll from the package. Using a sharp serrated knife, slice each roll horizontally into three equal parts (top, middle, and bottom).
- Prepare Herb Butter: In a small bowl, combine the softened unsalted butter, Italian seasoning, garlic powder, finely chopped fresh parsley, salt, and pepper. Mix thoroughly until a uniform, fragrant herb butter forms.
- Butter Rolls: Generously spread the garlic herb butter on both cut sides of each roll piece. Ensure all surfaces are evenly coated; use up all the butter mixture.
- Assemble Sandwiches: Cut the sharp cheddar slices into squares or pieces that will fit nicely onto the rolls. Arrange half of the buttered roll pieces on a baking sheet (optionally lined with parchment paper) to form the bottom layer. Place 2 pieces of cheddar cheese onto the center of each bottom roll slice.
- Top & Initial Bake: Carefully top each with the remaining buttered roll slices, completing your mini sandwiches. Bake for 5-7 minutes, or until the cheese begins to melt and the bottom is lightly golden.
- Flip & Finish Baking: Remove the baking sheet from the oven. Gently flip each mini sandwich. Using the back of a metal spatula, press down slightly on each sandwich. Return to the oven and bake for an additional 5-7 minutes, or until both sides are golden brown and crispy, and the cheese is fully melted and gooey.
- Serve: Serve immediately and enjoy warm, perhaps with a side of your favorite tomato soup for dipping!
Recipe Notes:
- Storage: These sandwiches are truly best enjoyed fresh from the oven. If you have any leftovers, store them in an airtight container in the refrigerator for up to 2 days.
- Reheating: To reheat, place leftovers on a baking sheet and warm in an oven preheated to 350°F (175°C) for a few minutes until crispy and heated through. Avoid microwaving to prevent sogginess.
Nutrition Information:
Serving: 1 mini sandwich | Calories: 204kcal | Carbohydrates: 15.5g | Protein: 7.2g | Fat: 12.5g | Cholesterol: 32mg | Sodium: 267.8mg | Fiber: 0.6g | Sugar: 2.2g
Nutrition information is an approximation calculated automatically and should be used as a general guide. Individual results may vary based on specific ingredients and preparation.
We hope you love these Mini Grilled Cheese Sandwiches as much as we do! Don’t forget to leave a comment below and let us know your favorite way to enjoy them. Happy cooking!