
Candy Corn Krispie Treats: The Ultimate Fall Celebration Dessert
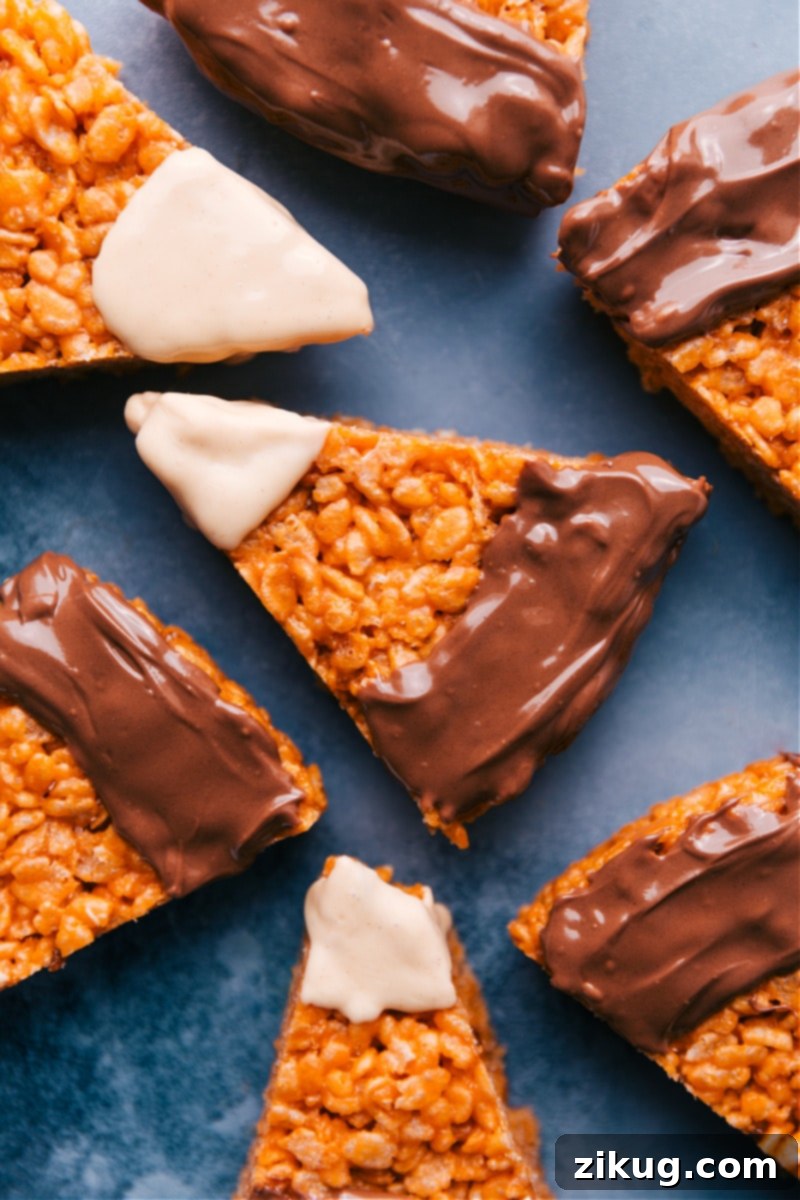
Candy Corn Krispie Treats are more than just a snack; they’re the quintessential fall party showstopper! Imagine classic peanut butter Rice Krispies® reimagined with a vibrant candy corn aesthetic and a luscious double chocolate drizzle. This irresistible no-bake dessert brings a festive flair to any autumn gathering or Halloween celebration.

Author’s Note
The Trick to Winning Over Candy Corn Haters (Like Me!)
When it comes to traditional candy corn, I’ve always been firmly in the ‘pass’ camp. Its unique waxy texture and overly sweet flavor just never appealed to me. However, my kids and husband have a different opinion – they’re absolutely obsessed! Every October, the familiar plea for a giant bag of candy corn echoes through our home.
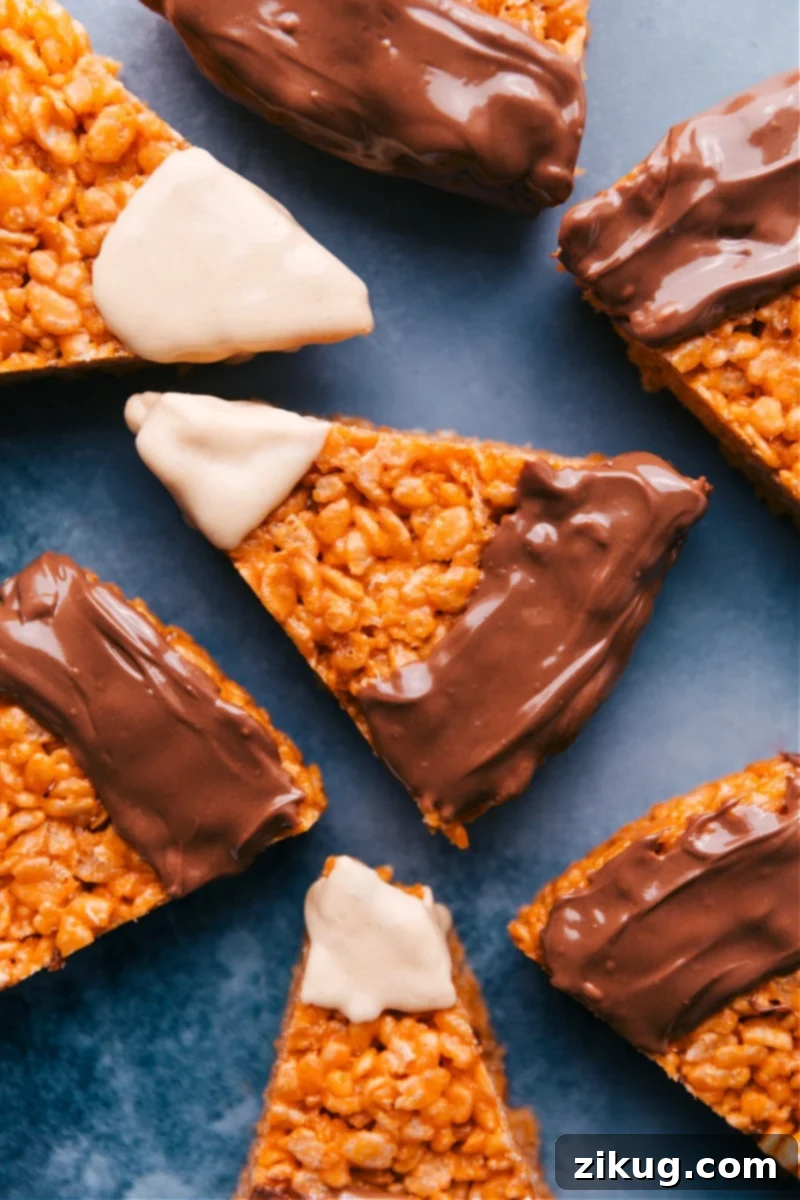
Instead of resisting, I decided to embrace their enthusiasm and channel it into creating a fall treat that we could all enjoy. That’s how these innovative Candy Corn Krispie Treats were born! They perfectly capture the iconic look of candy corn, but here’s the best part: there isn’t a single piece of actual candy corn in them. What you get instead are soft, delightfully chewy, and incredibly flavorful peanut butter Rice Krispie treats, artfully shaped and decorated to mimic the beloved autumnal candy.
And here’s the truly surprising confession from a lifelong candy corn skeptic: I couldn’t stop sneaking bites of these! The rich, buttery peanut butter base instantly reminded me of classic Scotcheroos, while the two types of chocolate on top elevate them to an utterly irresistible level. It’s a harmonious blend of textures and flavors that makes them far more enjoyable than their inspiration.
Now, these Candy Corn Krispie Treats have become a cherished tradition in our household, right alongside carving pumpkins and whipping up a batch of Monster Munch. They’re proof that sometimes, the best way to enjoy a classic is with a creative and delicious twist!
Craving More Krispie Treat Fun?
If you’re as big a fan of Krispie Treats as I am, you’ll love exploring these other exciting variations! Perfect for any occasion, these recipes offer a delightful twist on the original classic:
- Classic Rice Krispie Treats: The timeless, simple favorite.
- Rich Peanut Butter Rice Krispie Treats: For peanut butter lovers.
- Playful Fruity Pebble Rice Krispies Treats: A colorful, fruity delight.
- Minty Peppermint Rice Krispie Treats: Perfect for the holiday season.
- Indulgent Chocolate Rice Krispie Treats: For the ultimate chocolate fix.
Essential Ingredients for Your Candy Corn Krispie Treats
Crafting these festive treats requires a few simple ingredients, many of which you likely already have in your pantry. Opting for quality ingredients ensures the best flavor and texture. Here’s what you’ll need:
| Ingredient | Tips for Best Results |
|---|---|
| Rice Krispies® cereal | Freshness is key! Always use a crisp, fresh box of cereal. Stale cereal will result in flat, less appealing bars. Store-brand crisp rice cereal works just as well. |
| Marshmallows | Mini marshmallows melt more quickly and evenly, ensuring a smoother base. Crucially, avoid using old or sticky marshmallows, which can make your treats hard and difficult to work with. Fresh marshmallows ensure that perfect soft, chewy texture. |
| Peanut butter | Creamy peanut butter is ideal for a smooth consistency. If you need a nut-free option, almond butter or sunflower seed butter (like SunButter) are excellent alternatives. Ensure they are well-stirred if using natural varieties. |
| Food coloring | For that authentic candy corn orange, neon orange gel food coloring is highly recommended. Gel colors provide a vibrant hue without thinning the mixture. If you don’t have neon orange, you can mix red and yellow food coloring to achieve the desired shade. |
| Milk + white chocolate | The quality of your chocolate makes a significant difference in both melting consistency and taste. We suggest using high-quality brands like Ghirardelli® chocolate chips for a superior finish and richer flavor. |
| Unsalted butter | Essential for the rich, buttery base. Using unsalted butter allows you to control the overall saltiness of the treats. |
| Brown sugar | Lightly packed brown sugar adds depth and a lovely caramel-like sweetness to the peanut butter base. |
| Heavy cream | Contributes to the richness and smooth texture of the melted mixture, making it more pliable and delicious. |
| Salt | A small pinch of salt perfectly balances the sweetness and enhances all the flavors in the treat. |
| Vanilla extract | Pure vanilla extract adds a warm, aromatic note that complements the peanut butter and chocolate beautifully. |
Step-by-Step Guide: How to Craft Your Own Candy Corn Krispie Treats
Making these festive Krispie treats is a fun and straightforward process. Follow these detailed steps to create perfectly shaped and delicious candy corn look-alikes:
- Prepare Your Pan: Begin by thoroughly greasing a 9-inch round springform pan or a regular cake pan of the same size with cooking spray. This crucial step prevents sticking and ensures easy removal of your treats.
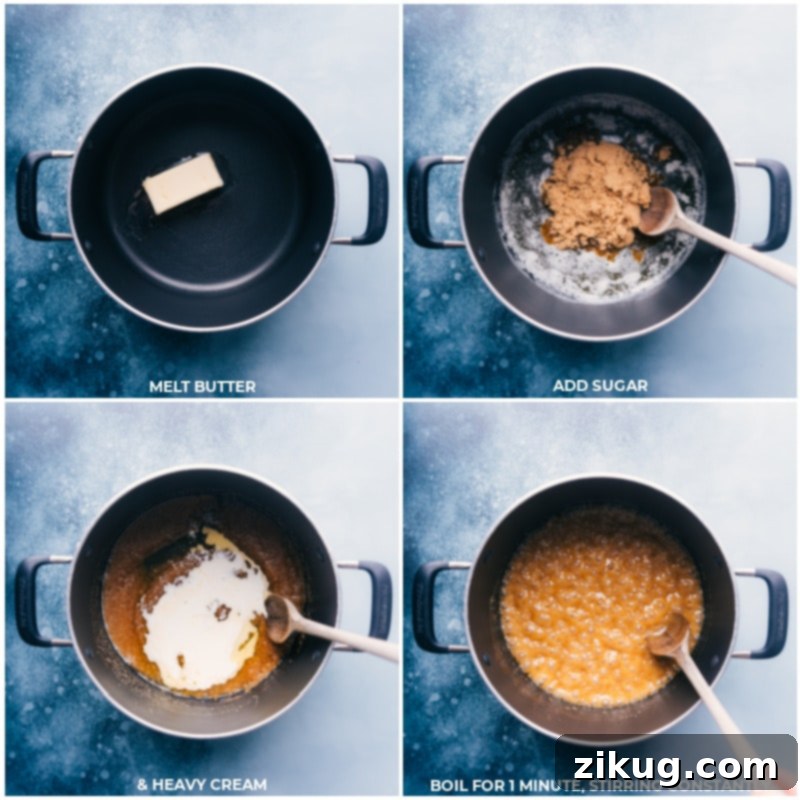
- Melt & Mix the Base: In a medium pot, melt the unsalted butter over medium-high heat. Once fully melted, stir in the brown sugar until it completely dissolves, which should take about 1-2 minutes. Next, pour in the heavy cream and bring the mixture to a gentle boil, stirring continuously. Let it boil for exactly 1 minute, then immediately reduce the heat to low.
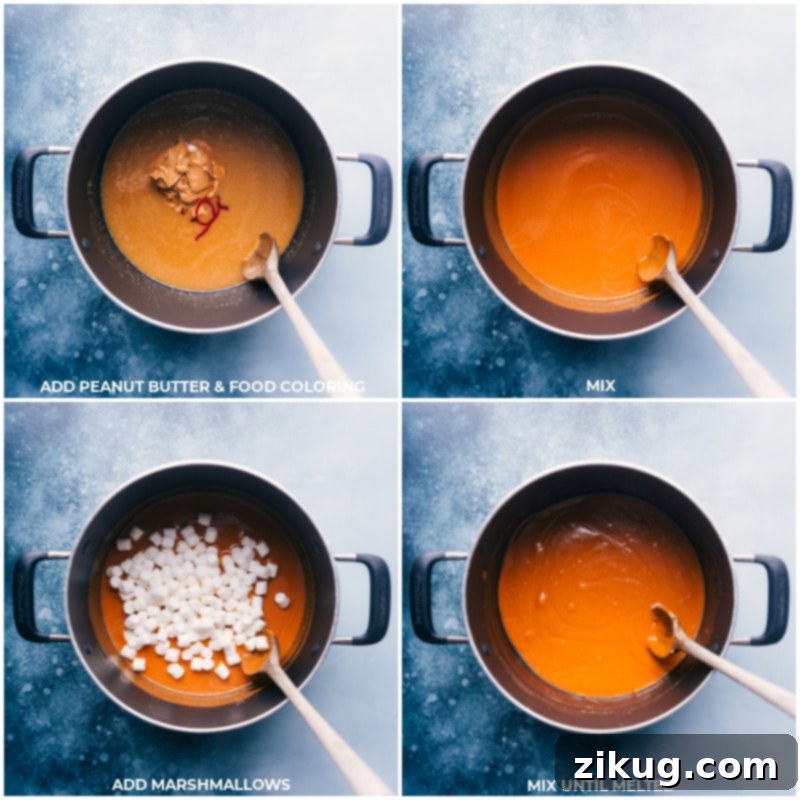
- Incorporate Peanut Butter & Color: Add 1/3 cup of the creamy peanut butter along with your neon orange food coloring to the pot. Stir well until the color is evenly distributed and the peanut butter is fully combined. Then, add the miniature marshmallows (ensuring they are fresh for the best texture) and stir constantly over low heat until they are completely melted and smooth. This low heat is essential to prevent the marshmallows from becoming hard.
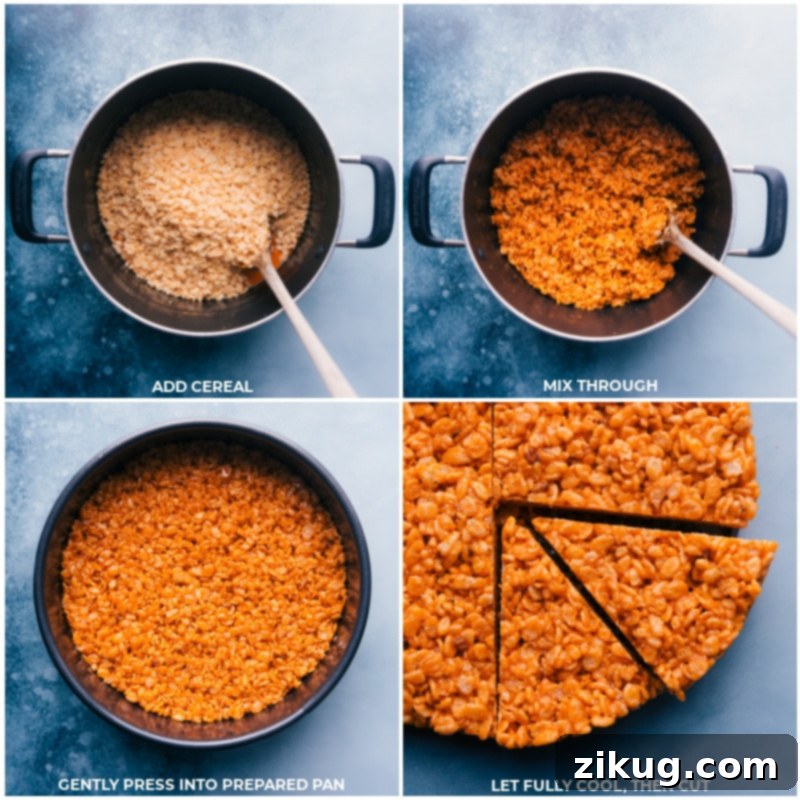
- Fold in Cereal: Remove the pot from the heat. Stir in the vanilla extract, then gently fold in the Rice Krispies® cereal until every flake is thoroughly coated with the vibrant orange marshmallow mixture. Be careful not to overmix, as this can crush the cereal.
- Shape the Treats: Transfer the warm mixture into your prepared springform or cake pan. Lightly and gently press the mixture into an even layer. The key here is to compress it just enough to hold its shape, but not so much that the treats become overly dense or hard. For an easier and less sticky process, lightly spray your hands with cooking spray before pressing.
- Cool & Slice: Allow the treats to set at room temperature for approximately one hour, or until they are firm enough to handle. Once set, remove the treats from the pan. If using a springform pan, simply release the sides. If using a regular cake pan, carefully invert it onto a cutting board. Using a sharp knife, cut the large round treat like a pizza into 8 equal triangle wedges, perfectly mimicking the classic candy corn shape.
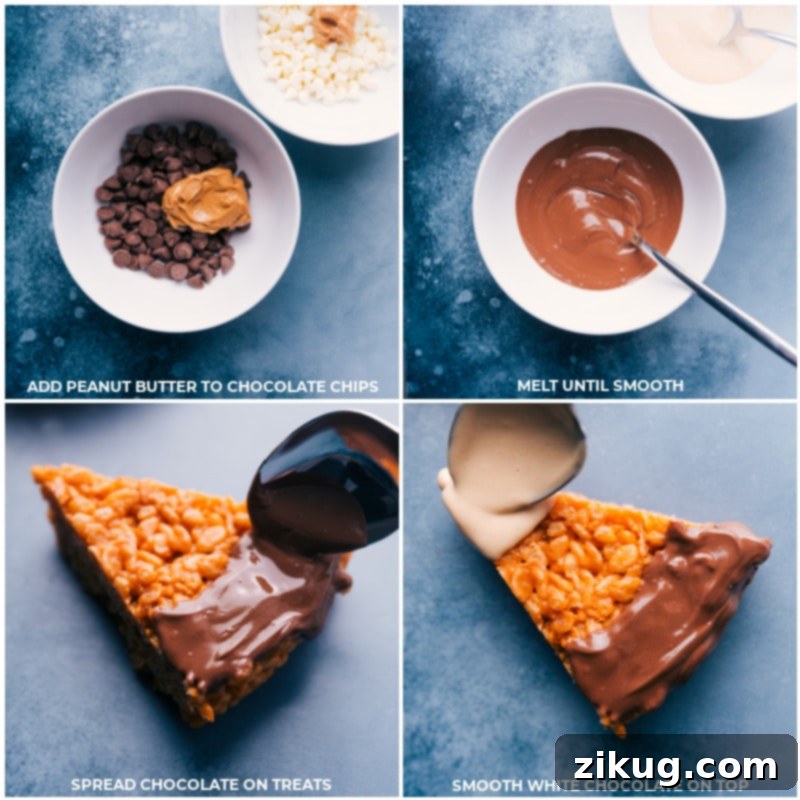
- Melt & Prepare Chocolates: Grab two separate microwave-safe bowls. In the first bowl, combine the milk chocolate chips with 2 tablespoons of peanut butter. In the second bowl, combine the white chocolate chips with 1 tablespoon of peanut butter. Melt each chocolate mixture in the microwave in short bursts of 15-20 seconds, stirring for 20 seconds between each burst, until both chocolates are completely smooth and melted.
- Dip & Decorate: Carefully spoon the melted milk chocolate mixture over the widest end of each triangle, creating the bottom segment of the candy corn. Then, spoon the melted white chocolate mixture over the pointed tip of each triangle, forming the white top segment. Alternatively, you can lightly dip the ends for a cleaner line. Allow the decorated treats to set at room temperature until the chocolate hardens. These treats are at their absolute best when enjoyed on the same day they are made, while still wonderfully fresh and soft.
Expert Tips for Perfect Candy Corn Krispie Treats
Achieving the ideal texture and appearance for your Candy Corn Krispie Treats is easy with these helpful tips:
- Choose the Right Pan: A springform pan is highly recommended for this recipe. Its removable sides make slicing and maintaining the perfect triangle shape significantly easier, resulting in neat, professional-looking treats.
- Master Low Heat Melting: When melting marshmallows, patience is a virtue. Always use low heat and stir constantly. Rushing the process with high heat will cause the marshmallows to cook too quickly, resulting in tough, hard Krispie treats instead of soft, chewy ones.
- Gentle Compression is Key: After adding the cereal, gently press the mixture into the pan. Avoid packing it down too firmly. Light compression helps the bars hold their shape while retaining that coveted soft and tender texture. Over-compressing can lead to dense, hard treats.
- Spoon, Don’t Dip, for Decorating: While dipping might seem quicker, spooning the melted chocolate onto the ends of your triangle treats often yields better results. It creates a cleaner finish, is less messy, and prevents any loose Krispies from falling into your precious melted chocolate.
- Room Temperature Setting for Chocolate: Always allow the chocolate to set at room temperature. Refrigerating the treats can cause the chocolate to streak or develop a cloudy appearance, and it can also make the Krispie treats themselves become overly hard.
Foolproof Tips for Melting Chocolate
Melting chocolate can be tricky, but these tips will ensure a smooth, glossy finish every time for your Candy Corn Krispie Treats:
- Microwave in Short Bursts: The best way to melt chocolate in the microwave is gradually. Heat the chocolate for 20 to 30 seconds at a time, then remove and stir thoroughly. Repeat this process until the chocolate is fully melted and smooth. This prevents scorching.
- Prioritize High-Quality Chocolate: The quality of your chocolate directly impacts the final result. Premium chocolate melts more smoothly, has a better sheen, and offers a superior taste. It’s worth the small splurge for a better treat.
- Keep Water Away: Chocolate and water are enemies when melting! Even a single drop of water or steam can cause chocolate to “seize,” turning it into a thick, gritty, unusable paste. Ensure your bowls and utensils are completely dry.
- Stir Off the Heat: Chocolate retains heat exceptionally well. After microwaving, even if there are a few small lumps, continue stirring the chocolate off the heat. The residual warmth will often melt the remaining pieces, resulting in a perfectly smooth consistency.
Storage Solutions for Your Candy Corn Krispie Treats
Proper storage ensures your delightful treats remain fresh and delicious for as long as possible:
- Room Temperature Storage: These treats are best enjoyed within the first 2 days for optimal freshness and texture. Store them in an airtight container at room temperature to prevent them from drying out or becoming too hard.
- Freezer Storage: For longer storage, you can freeze these treats! Once the chocolate has fully set, individually wrap each triangular wedge tightly in wax paper, followed by a layer of plastic wrap. Place the wrapped treats in a freezer-safe bag or airtight container. They can be stored in the freezer for up to 6 months.
- Thawing Instructions: To enjoy frozen treats, simply remove them from the freezer and let them sit at room temperature for about 15-20 minutes. Don’t be alarmed if the chocolate appears slightly streaky after thawing; this is normal and won’t affect the amazing taste!
Explore More Festive Fall Treats!
Ready to continue your fall baking adventure? Here are some more delightful and easy-to-make recipes perfect for autumn celebrations:
Desserts
Easy Caramel Apple Bites
Quick And Easy
Charming Acorn Donut Holes
Snacks
Delightful Pumpkin Spice Snack Mix
Desserts
Homemade Pumpkin Whoopie Pie Recipe

Print Recipe
Candy Corn Krispie Treats
Chelsea Lords
10 minutes
1 hour
1 hour 10 minutes
8 candy corn treats
Recipe Video Guide
Equipment You’ll Need
-
Springform pan or cake pan, 9-inch
-
Medium pot
Ingredients List
- 8 tablespoons unsalted butter
- 2/3 cup brown sugar lightly packed
- 1/3 cup heavy cream
- 1/8 teaspoon salt
- 1/3 cup + 3 tablespoons creamy peanut butter divided
- 1/2 tablespoon vanilla extract
- 2 cups miniature marshmallows see note 1 below
- Orange food coloring neon gel for best color
- 5 cups Rice Krispies cereal
- 3/4 cup milk chocolate chips
- 1/3 cup white chocolate chips
Detailed Instructions
-
1. Prepare Pan: Generously spray a 9-inch round springform pan or a similarly sized cake pan with cooking spray. This will ensure your treats don’t stick and are easy to remove later. Set aside.
-
2. Cook Base: In a medium pot, melt the butter over medium-high heat. Once melted, add the brown sugar and stir until it completely dissolves, which should take approximately 1-2 minutes. Stir in the heavy cream and bring the mixture to a boil, stirring continuously. Let it boil for 1 full minute, then immediately reduce the heat to low.
-
3. Add Flavor & Color: Stir in 1/3 cup of the creamy peanut butter and the orange food coloring until thoroughly combined and the color is vibrant. Add the miniature marshmallows (refer to note 2 for marshmallow tips) and continue stirring constantly over low heat until they are fully melted and smooth. Ensure the heat remains low to maintain the desired chewy texture.
-
4. Combine with Cereal: Remove the pot from the heat. Stir in the vanilla extract, then gently fold in the Rice Krispies cereal until every piece is evenly coated with the rich peanut butter marshmallow mixture. Avoid overmixing to keep the cereal intact.
-
5. Press into Pan: Transfer the warm Krispie mixture into your prepared pan. Gently and lightly press the mixture into an even layer. To avoid sticking, lightly spray your hands with cooking spray before pressing. The goal is to lightly compress them without making them overly dense. Allow the treats to set at room temperature for about an hour, or until they are firm enough to easily handle and slice.
-
6. Slice into Triangles: Once firm, carefully remove the treats from the pan. If using a springform, simply unlatch and lift the sides. If using a standard cake pan, invert it onto a clean cutting surface. Using a sharp knife, cut the round treat into 8 equal triangular wedges, just like you would slice a pizza. Gently separate the triangles.
-
7. Melt Chocolates: Prepare two small, separate bowls. In one, combine the milk chocolate chips with the remaining 2 tablespoons of peanut butter. In the second bowl, combine the white chocolate chips with the remaining 1 tablespoon of peanut butter. Melt each chocolate mixture in the microwave in short bursts of 15-20 seconds, stirring for at least 20 seconds between each burst, until both chocolates are completely smooth and melted.
-
8. Decorate & Set: Spoon the melted milk chocolate mixture over the widest base of each triangular Krispie treat, forming the “milk chocolate” layer of your candy corn. Then, spoon the melted white chocolate mixture onto the narrow, pointed top of each triangle to create the “white” tip. Allow the chocolate to set completely at room temperature. For the best flavor and texture, these delightful treats are most enjoyable on the same day they are prepared.
Recipe Notes & Expert Advice
Note 2: Melting Marshmallows Correctly: The secret to perfectly soft Krispie treats lies in how you melt your marshmallows. Always melt them over very low heat, stirring continuously. High heat will cause the sugars to caramelize too quickly and can result in hard, brittle treats. Patience truly pays off here for the best possible texture!
Storage Tips: For optimal enjoyment, consume your Candy Corn Krispie Treats within a few days of making them. Store them in an airtight container at room temperature to maintain their freshness and prevent them from drying out. To extend their shelf life, you can freeze them! After the chocolate has fully set, individually wrap each cut bar tightly in wax paper, then in plastic wrap. Store these double-wrapped treats in a freezer-safe bag for up to 6 months. When ready to enjoy, thaw them at room temperature for 15-20 minutes. Don’t worry if the chocolate appears slightly streaky after thawing – this is completely normal and won’t impact the delicious taste or texture of your treat!
Nutritional Information
Nutrition information is automatically calculated, so should only be used as an approximation.
Love This Recipe? Share Your Thoughts Below!