
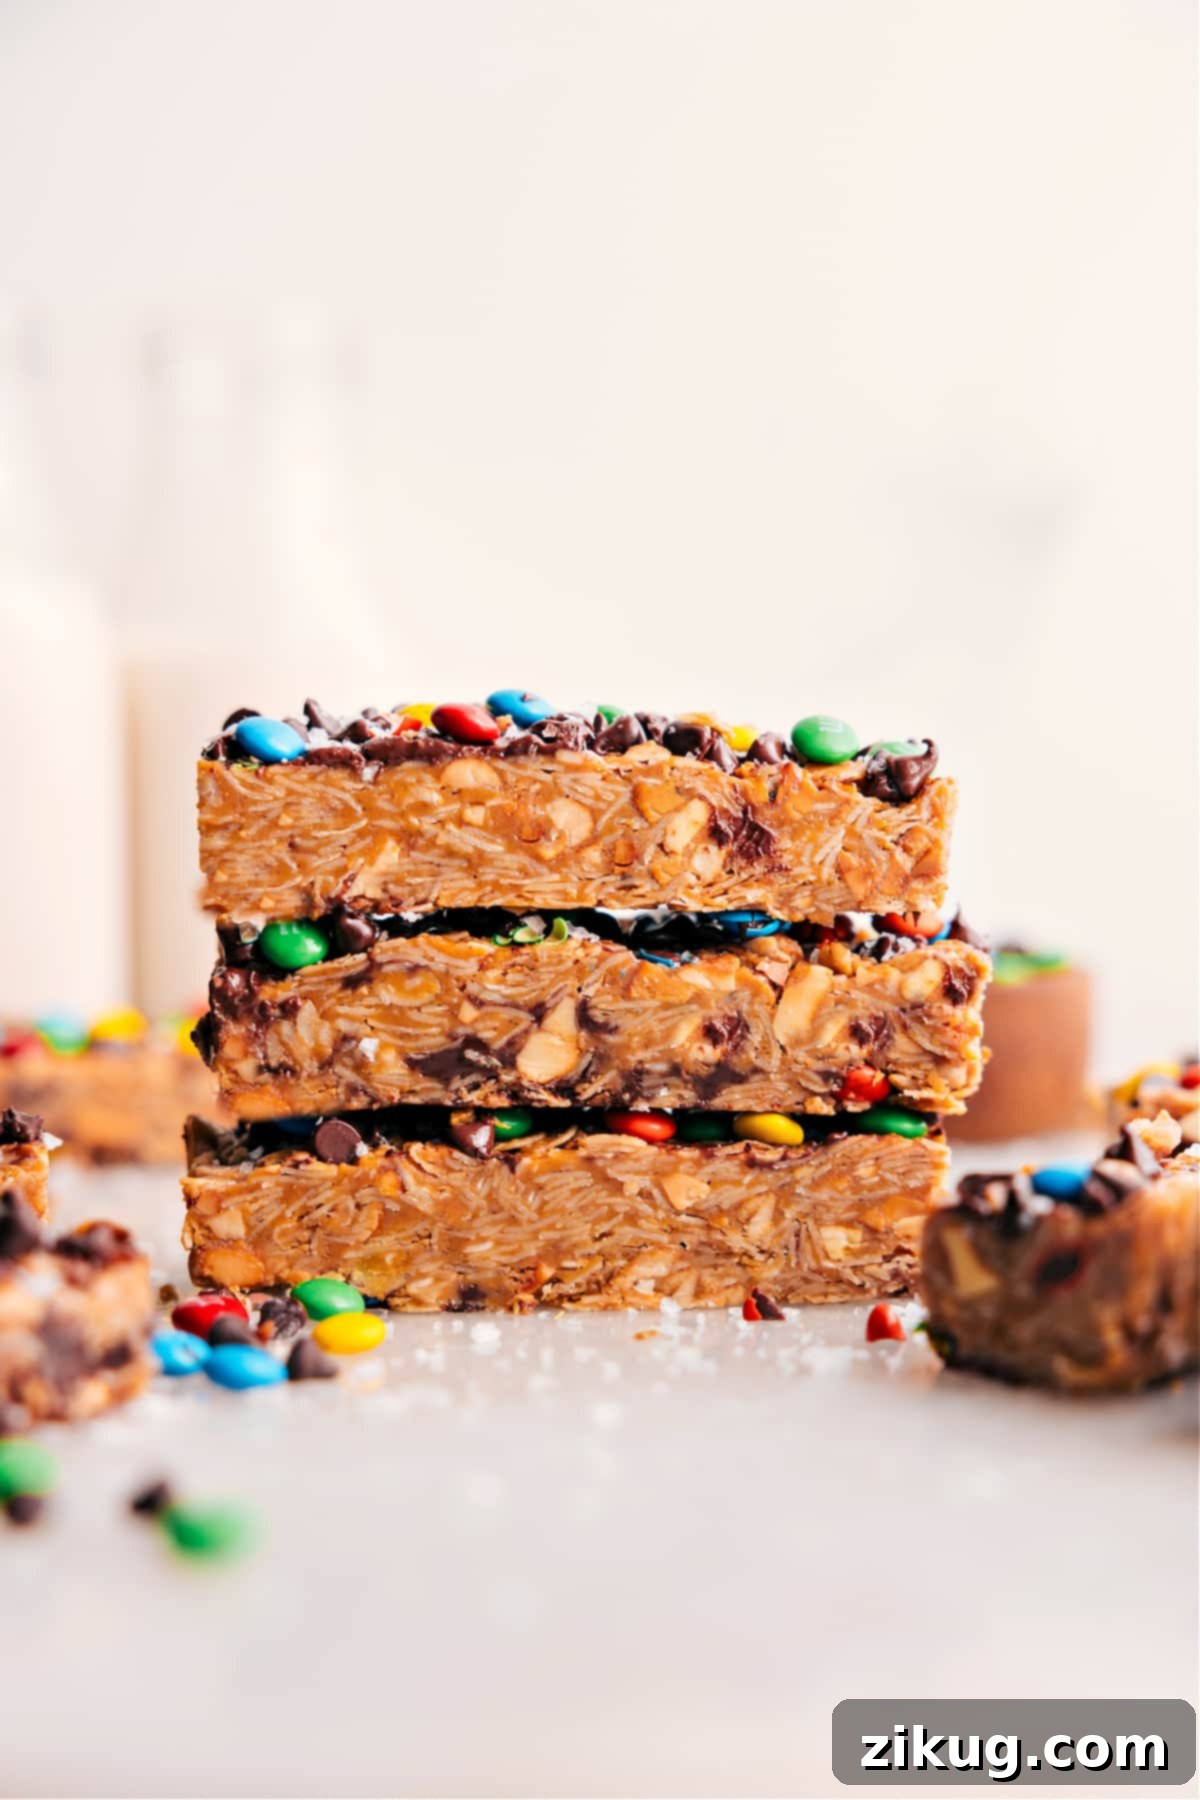
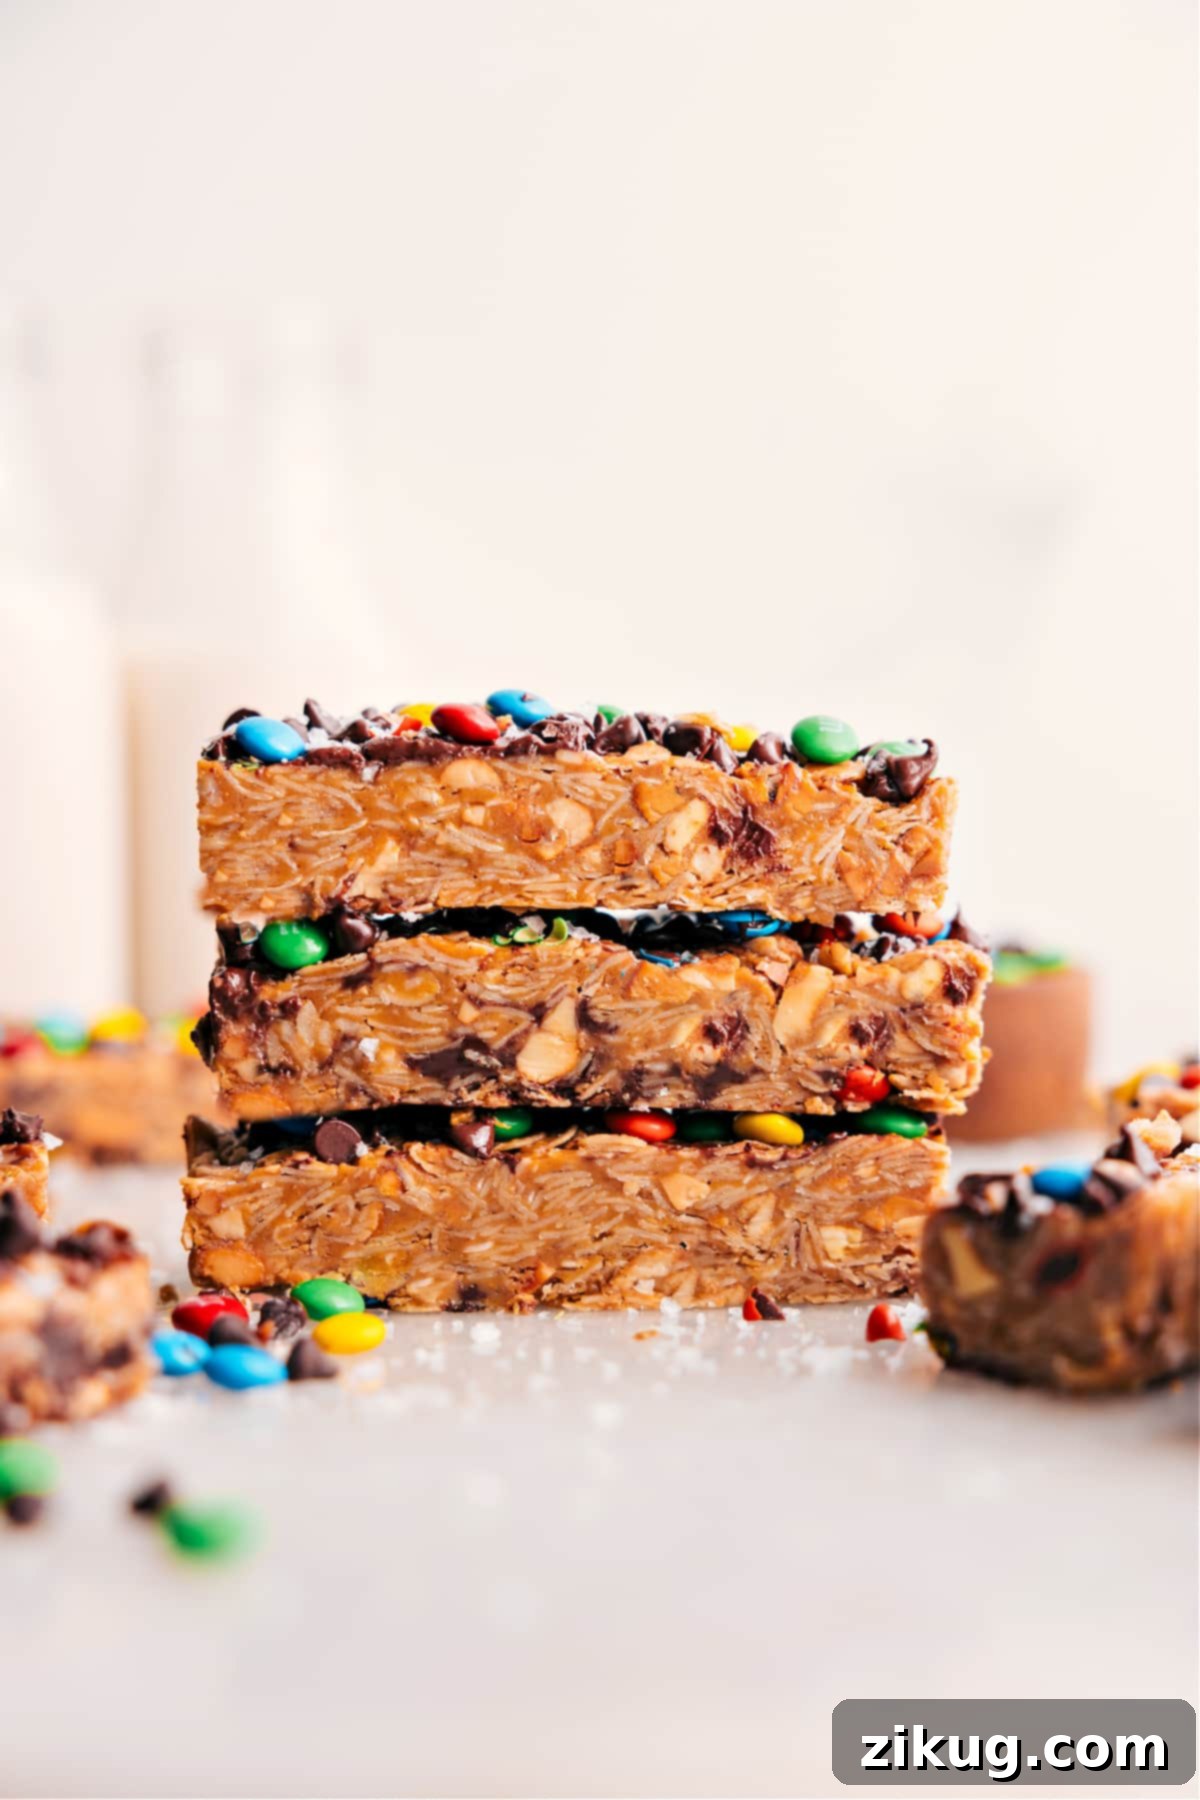
Unleash your inner baker with this **ultimate no-bake Chewy Granola Bar Recipe**! Forget bland store-bought options; this delightful homemade creation is bursting with wholesome oats, rich cashews, golden honey, creamy peanut butter, vibrant M&M’s, and decadent chocolate chips. It’s an incredibly satisfying treat that’s surprisingly easy to prepare, requires no oven, and is loved by all ages – making it the perfect customizable snack for any time of day.

Author’s Insight
Why These Granola Bars Become an Instant Family Favorite
Homemade granola bars have always been a staple in my kitchen, a go-to for quick snacks and breakfast on the run. Yet, they almost always vanish as quickly as I make them! The inspiration for this particular recipe, a true game-changer, came one unforgettable afternoon when my oldest son returned from school, practically buzzing with excitement. He’d experienced the thrill of a lunch swap, gushing about a granola bar he’d tried that was loaded with M&M’s. His eyes, full of innocent wonder, looked up at me as he asked, “Mom, why don’t you ever add M&M’s to *our* granola bars?”
Challenge accepted! I took our tried-and-true chewy granola bar base – a recipe already cherished for its simplicity and satisfying texture – and elevated it. Keeping the core recipe fuss-free, I generously loaded it up with vibrant, mini M&M’s and extra chocolate chips. The result? An absolute sensation that exceeded all expectations! Both boys couldn’t get enough, declaring these the “best granola bars ever” and even confidently stating they were “way better than the store-bought kind.” That’s a win in my book, especially when it comes to creating nutritious, satisfying, and genuinely beloved homemade snacks.
This recipe isn’t just about satisfying a sweet craving; it’s about crafting wholesome, customizable treats that you can feel good about serving your family. Whether packed in school lunches, grabbed as a quick breakfast bite, or enjoyed as an afternoon energy boost, these chewy granola bars with M&Ms are guaranteed to be an undeniable hit. Get ready to bake a batch that will disappear almost as fast as you make them!
Quick Snack Inspiration & Other Granola Bar Delights
If you’re a fan of the natural sweetness and rich texture dates provide, you’ll absolutely love exploring these amazing dark chocolate pistachio granola bars. And for those who simply can’t get enough chocolate, these intensely rich and indulgent fudgy chocolate granola bars are an absolute must-try for your next baking adventure! Discover a world of homemade goodness.
Crafting the Perfect Chewy Granola Bars: Understanding Your Key Ingredients
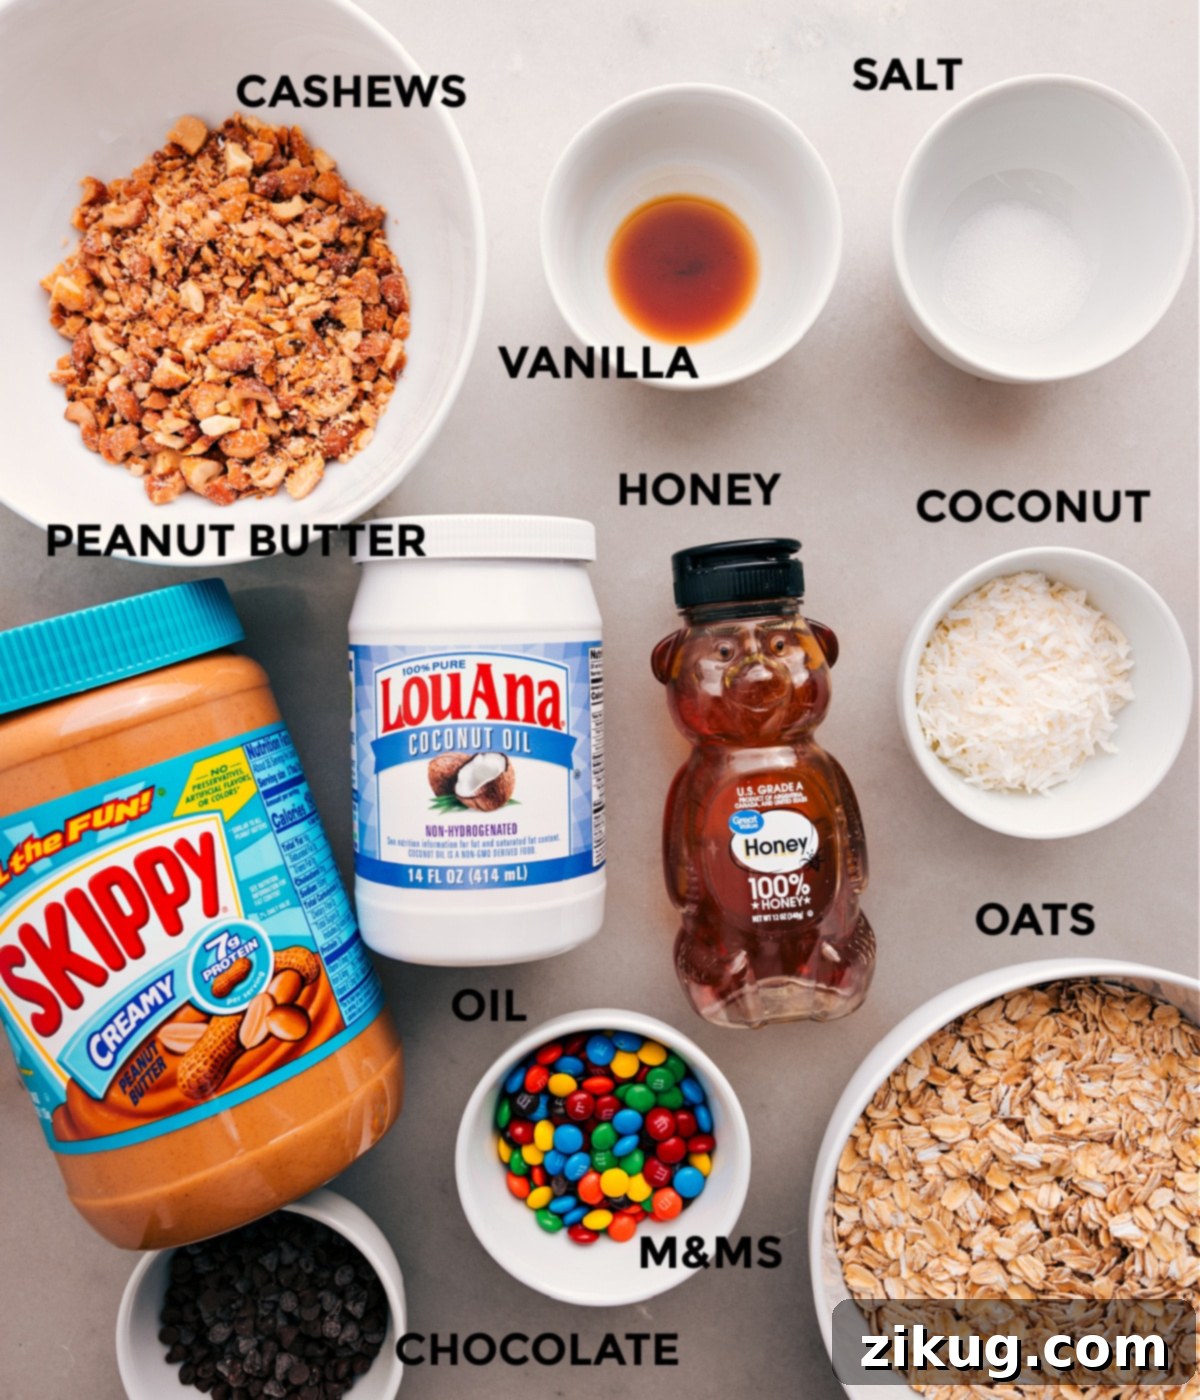
Creating truly delicious, perfectly chewy granola bars from scratch begins with selecting the right ingredients and understanding their role. Each component plays a vital part in achieving that satisfying texture and incredible, balanced flavor. Here’s a closer look at what you’ll need for this no-bake masterpiece, ensuring your homemade granola bars are a resounding success:
- Peanut Butter: The cornerstone of this recipe’s chewy texture and rich flavor. We recommend using creamy peanut butter for the best binding and smoothest consistency throughout the bars. If you opt for natural peanut butter, ensure it’s well-stirred to prevent oil separation, which can affect the final texture and how well the bars hold together.
- Honey: This golden, natural sweetener not only provides a wonderful depth of flavor but also acts as a crucial binding agent, helping to hold all the dry ingredients together in a cohesive, chewy mass. For easy measuring and to avoid sticky situations, lightly coat your measuring cup with a quick spray of cooking oil before pouring in the honey – it will slide right out!
- Coconut Oil: Essential for achieving that perfect, firm-but-chewy consistency that defines a great granola bar. Coconut oil contributes to the overall structure and adds a subtle, pleasant richness. It’s important to measure it while it’s in its solid state to ensure you get the precise amount needed before melting it down.
- Oats: Old-fashioned rolled oats are absolutely non-negotiable for this recipe. Their robust, thicker texture holds up beautifully, providing the signature chewiness we crave. Steer clear of quick oats, which can become mushy, and steel-cut oats, which simply won’t absorb liquids or bind in the same way, leading to a crumbly result.
- Salt: A small but mighty ingredient, a pinch of salt is vital for enhancing all the other flavors, balancing the sweetness from the honey and M&M’s, and truly bringing out the nutty notes of the peanut butter and cashews. Remember to taste and adjust the amount if your nuts or peanut butter are already salted to avoid over-seasoning.
- Shredded Coconut: This ingredient adds a delightful textural element and a hint of natural, tropical sweetness. While optional, taking a few minutes to lightly toast the shredded coconut beforehand can significantly deepen its flavor, adding an extra layer of deliciousness and aroma to your chewy granola bars.
- Cashews: For the best flavor and texture, roasted and salted cashews are highly recommended. Their buttery, slightly salty crunch elevates the entire bar. For optimal binding and to prevent crumbling, ensure they are coarsely chopped into smaller, more uniform pieces, allowing the sticky binder mixture to coat them thoroughly.
- Chocolate Chips and M&M’s: These are the fun, colorful, and utterly irresistible additions that make these homemade granola bars a standout! Mini chocolate chips and miniature M&M’s integrate best, ensuring a bit of sweetness in every bite. Feel free to unleash your creativity here: swap them with chopped dark chocolate, white chocolate chips, other small candy pieces, various dried fruits (like cranberries, raisins, or chopped apricots), or even different types of nuts.
- Vanilla Extract: A crucial finishing touch, a good quality vanilla extract rounds out all the flavors, adding warmth, depth, and a subtle aromatic complexity to the overall profile of your homemade granola bars.
Mastering the Hold: Essential Tips to Prevent Homemade Granola Bars From Falling Apart
One of the most common frustrations with homemade granola bars is when they crumble into a messy heap instead of holding their perfectly neat, chewy shape. Achieving perfectly firm yet delightfully chewy bars is entirely possible with a few key techniques and a little patience. Follow these essential tips diligently to ensure your no-bake granola bars stay wonderfully intact and deliver that satisfying bite every time:
- Precise Syrup Measurement is Your Foundation: The binding agents – honey, peanut butter, and coconut oil – are quite literally the glue of your granola bars. It is absolutely crucial to use the full, exact amounts specified in the recipe. Make sure to scrape every last bit of these sticky ingredients into the pot when mixing; even a small deficit can significantly impact the final consistency and structural integrity of your bars, leading to a crumbly outcome.
- Chop Cashews (or Any Nuts) Into Smaller Pieces: While large, chunky pieces of nuts can be visually appealing, they tend to create weak points and air pockets within the bars, making them far more prone to crumbling. For optimal cohesion and a uniform chew, coarsely chop your cashews (or any other nuts you decide to use) into smaller, more uniform pieces. This allows the sticky binder mixture to fully coat and surround each piece, creating a much stronger and more stable matrix.
- Press the Mixture Down Very Firmly: This step cannot be overstated – it’s arguably the most critical for preventing crumbling. Once the granola mixture is transferred into your prepared pan, you need to compress it as tightly and evenly as possible. Use the flat bottom of a sturdy measuring cup, a robust spatula, or even your hands (protected by parchment paper for cleanliness) to exert significant, consistent pressure across the entire surface. The more firmly you pack the mixture, the less air will be trapped, leading to denser, more cohesive bars that hold their shape beautifully.
- Allow Bars to Cool Completely and Set Thoroughly: Patience is indeed a virtue, especially when making no-bake treats! Cutting warm or even slightly warm granola bars is a guaranteed way to have them fall apart or smudge. The binding ingredients need sufficient time to cool down and solidify completely, which typically requires at least an hour in the refrigerator. Resist the urge to cut them until they are entirely firm and cool to the touch throughout.
- Utilize a Sharp, Clean Knife for Cutting: Once your bars are perfectly chilled and fully set, the right tool makes all the difference. Use a very sharp knife to make clean, precise cuts. A dull knife will drag and tear at the mixture, causing breakage, uneven edges, and potential crumbling. For even cleaner slices, a chef’s trick is to warm your knife under hot water, wipe it completely dry, and then slice. Re-warm and clean the knife periodically if the mixture begins to stick to the blade.
Creative Variations for Your Chewy Granola Bars
This chewy granola bar recipe is wonderfully versatile, making it incredibly easy to customize according to your personal taste preferences, dietary needs, or simply what ingredients you have readily available. Feel empowered to experiment with different mix-ins and base ingredients to create your own unique no-bake granola bar masterpieces that perfectly suit your palate!
Personalize Your Granola Bar Creation! Endless Possibilities Await
- Nut Substitutions: While cashews provide a delightful richness and texture, feel completely free to substitute them with any other chopped nuts you love. Almonds, pistachios, pecans, walnuts, or peanuts would all be delicious additions, each contributing its own distinct flavor profile and satisfying crunch to your chewy granola bars.
- Skip the M&M’s (or Other Candies): If you prefer less sugar in your snacks or simply don’t have M&M’s on hand, you can easily omit them without needing to make any other adjustments to the base recipe. The bars will still be incredibly flavorful and satisfying, letting the other ingredients shine.
- Adjusting Pan Size for Desired Thickness: The pan size impacts the final thickness and texture. For thinner, slightly crispier bars that offer a delicate bite, use a 9×9-inch baking pan. If you love a thicker, more substantial and extra-chewy granola bar, an 8×8-inch pan will deliver perfectly robust results.
- Alternative Nut Butters: To completely change the flavor profile, swap out peanut butter for almond butter, cashew butter, or even sunflower seed butter (for a great nut-free option). Be mindful that different nut butters have varying consistencies; if the mixture seems a bit dry after the swap, add an extra tablespoon or two of your chosen nut butter until the desired sticky, cohesive consistency is achieved.
- Oil Substitutions: If coconut oil isn’t available or preferred, you can use unsalted butter as a direct 1:1 substitute. This will slightly alter the flavor, potentially adding a richer, buttery note, but will still provide the necessary binding and richness for the bars.
- Gluten-Free Option: Excellent news for those with sensitivities! The core ingredients of this recipe are naturally gluten-free. However, it is always crucial to double-check the labels on your oats, peanut butter, and any other packaged components to ensure they are certified gluten-free and have not been subjected to cross-contamination, especially for individuals with severe gluten sensitivities.
- Dried Fruit Power-Up: Introduce finely chopped dried fruits such as cranberries, apricots, raisins, or chopped dates for added natural sweetness, chewiness, and a boost of fiber. They pair wonderfully with nuts and chocolate, adding complexity.
- Seed Boost for Extra Nutrition: For an extra nutritional punch and healthy fats, consider adding a tablespoon or two of chia seeds, flax seeds, or hemp hearts to the mixture. They blend in seamlessly and provide additional texture without overpowering the main flavors.
Storing Your Chewy Granola Bar Delights for Maximum Freshness
Proper storage is absolutely essential to keep your homemade chewy granola bars fresh, delicious, and perfectly chewy for as long as possible. Whether you plan to enjoy them within a week or save them for future cravings, here’s how to best store your batch:
Maximizing Freshness: Optimal Storage for Your Chewy Granola Bars
- Refrigerator Storage for Short-Term Freshness: For immediate enjoyment and short-term freshness, individually wrap each cooled granola bar tightly in plastic wrap. This prevents them from drying out and sticking together. Then, place the wrapped bars in an airtight container or a large freezer bag. Stored this way, they will stay wonderfully fresh and delightfully chewy in the refrigerator for up to one week.
- Freezer Storage for Longer Enjoyment: These chewy granola bars freeze exceptionally well, making them an ideal candidate for meal prepping healthy, grab-and-go snacks. To freeze, first arrange the cut bars on a baking sheet lined with parchment paper and place them in the freezer for 1-2 hours, or until they are completely firm. Once solid, individually wrap each bar tightly in plastic wrap (this prevents freezer burn), then transfer them to a sturdy freezer-safe bag or airtight container. They will maintain their quality and deliciousness in the freezer for up to 6 months.
- Effortless Thawing Instructions: When you’re ready to enjoy a frozen granola bar, simply take it out of the freezer and let it sit at room temperature for about 30 minutes to thaw naturally. If you’re in a hurry and prefer a slightly warm, softer bar, you can quickly microwave it for just 10-15 seconds until it’s just softened to your liking.
Explore More Delicious & Easy Snack Recipes:
Breakfast & Snacks
Wholesome Blueberry Oatmeal Bars
Healthy Bites
Simple Oatmeal Energy Balls
Breakfast & Drinks
Creamy Peanut Butter Protein Shake
Snacks & Cereals
Delicious Homemade Peanut Butter Granola
Print Recipe
Classic Chewy Granola Bars
Chelsea Lords
35
3
1
1 38
12 bars
Recipe Video (Visual Guide)
A visual guide demonstrating the step-by-step process of making these delicious granola bars would appear here, making the recipe even easier to follow.
Equipment
-
9 x 9-inch baking pan or 8 x 8-inch for thicker bars
-
Medium pot
Ingredients
- 3/4 cup creamy peanut butter
- 1/2 cup honey
- 2 tablespoons coconut oil (measured while solid)
- 1/2 teaspoon salt (see note for adjustment)
- 1-1/2 teaspoons vanilla extract
- 2 cups old-fashioned oats
- 1/4 cup shredded coconut
- 3/4 cup roasted and salted cashews, coarsely chopped
- 6 tablespoons mini chocolate chips (divided)
- 6 tablespoons miniature M&M’s (divided)
Instructions
-
Prepare your pan: Line an 8×8-inch or 9×9-inch baking pan with parchment paper, ensuring there’s an overhang on all sides. This creates convenient “handles” that will make it easy to lift the set bars out of the pan later.
-
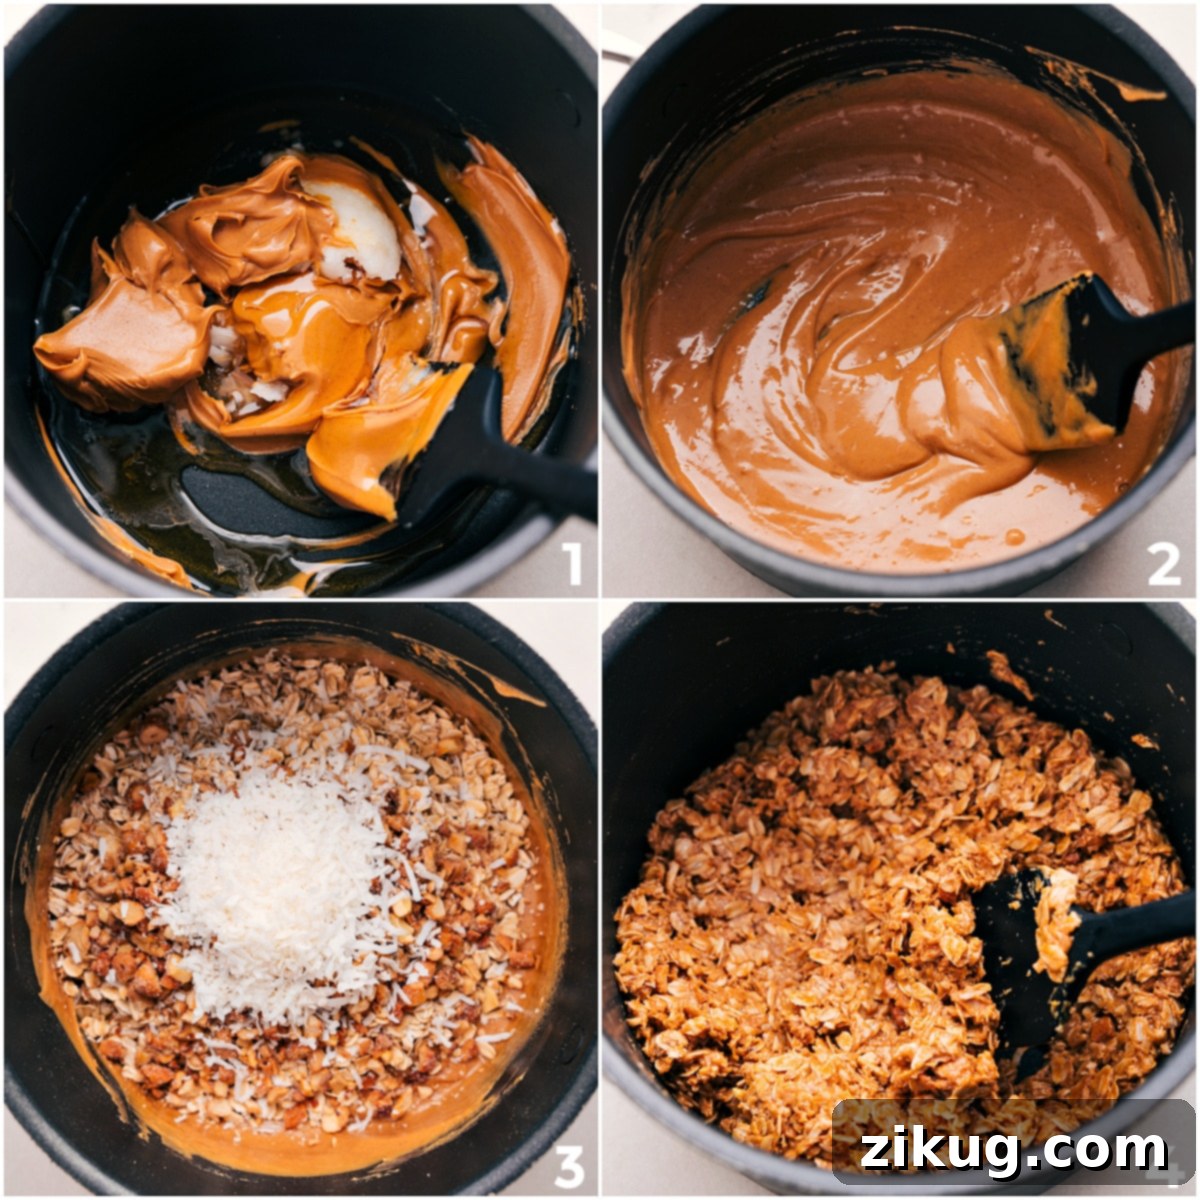
Create the binding mixture: In a medium-sized pot, combine the creamy peanut butter, golden honey, and solid coconut oil. Heat this mixture over medium heat, stirring continuously until everything is fully melted and smoothly combined. Bring the mixture to a gentle simmer and let it cook for exactly 1 minute, still stirring constantly. This crucial simmering step helps to create a stronger, more stable bond for your bars. Remove the pot from the heat and allow it to cool for approximately 3 minutes. Then, stir in the salt and vanilla extract until well combined, ensuring flavors are evenly distributed.
-
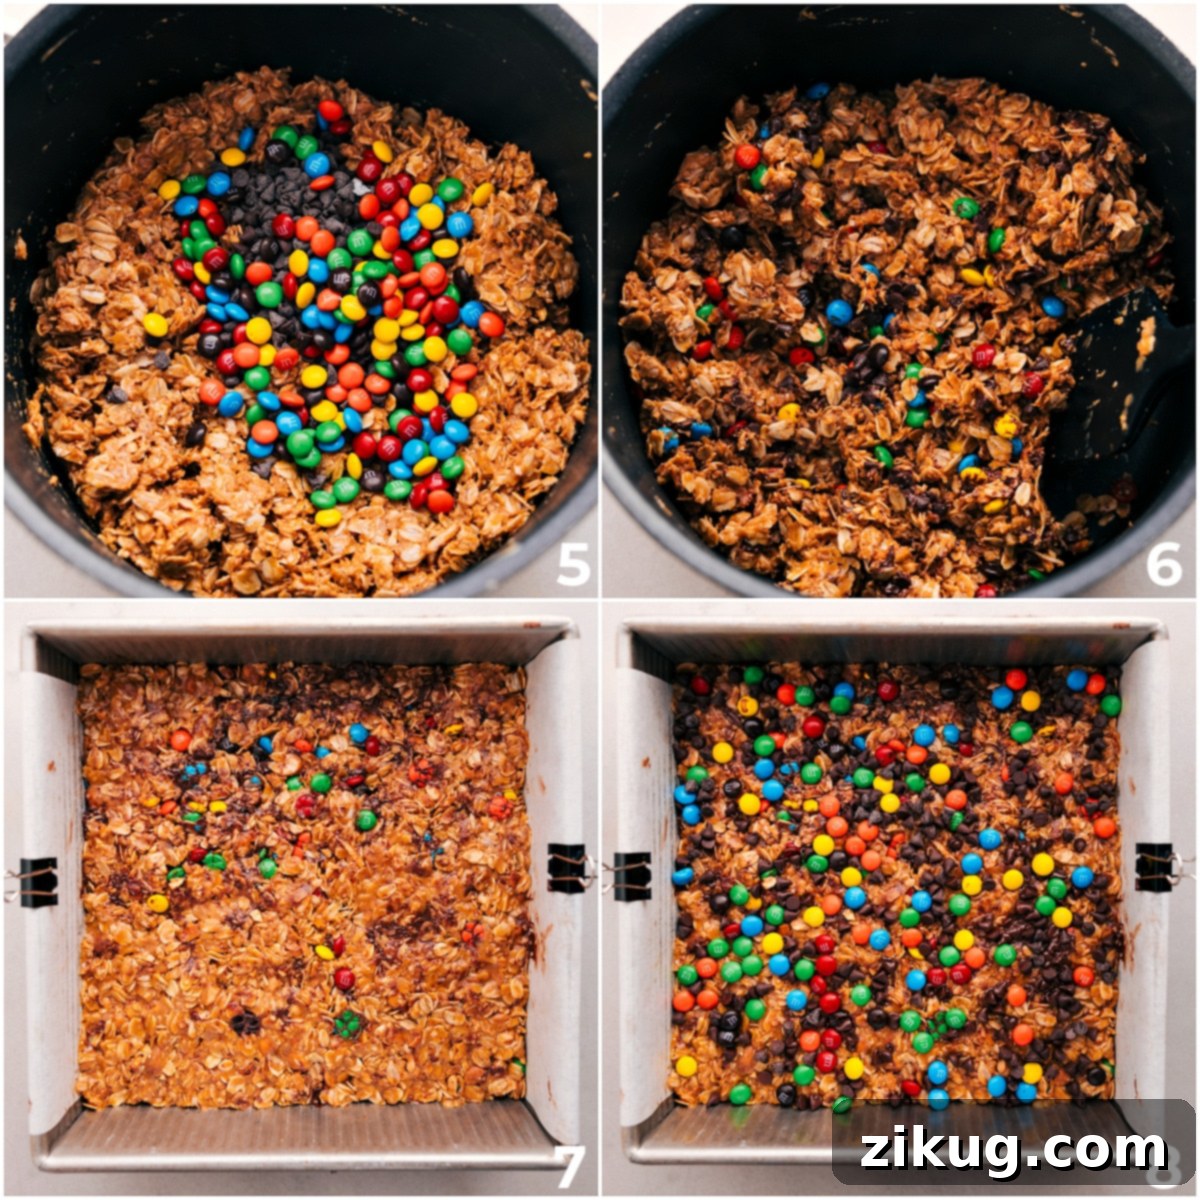
Combine with dry ingredients: While the binding mixture cools slightly, coarsely chop your roasted cashews. Add the chopped cashews to the pot, along with the old-fashioned oats and shredded coconut. Stir everything thoroughly until the dry ingredients are completely coated by the sticky peanut butter mixture. It’s important to ensure everything is well-mixed for uniform bars. Let this mixture cool slightly further for 15-25 minutes, or until it is just warm to the touch. Once cooled enough, gently fold in 1/4 cup each of the mini chocolate chips and miniature M&M’s.
-
Press and chill: Transfer the entire granola bar mixture into your prepared baking pan. Using the flat base of a sturdy measuring cup, a spatula, or even your hands (lightly moistened or protected by parchment paper), press the mixture down very firmly and evenly into the pan. The firmer you press, the denser and better the bars will hold together. Sprinkle the remaining 2 tablespoons of chocolate chips and M&M’s over the top, and gently press them into the surface to adhere. Cover the pan with plastic wrap and refrigerate for at least 1 hour, or until the bars are completely firm and set.
-
Cut and serve: Once fully chilled and firm, use the parchment paper overhang to carefully lift the entire slab of granola bars out of the pan. Place it on a clean cutting board. Using a very sharp knife (warmed under hot water and dried for even cleaner cuts), carefully cut the slab into 12 even bars. Serve immediately, or store as directed for later enjoyment. Enjoy your delicious homemade chewy granola bars!
Expert Recipe Notes & Troubleshooting Tips for Success
Key Tips for Achieving Perfect Chewy Granola Bars Every Time:
- Press Firmly for Structural Integrity: This is perhaps the most crucial tip for preventing crumbly bars. The more tightly and evenly you pack the granola mixture into the pan, the denser and more cohesive your bars will be. Don’t be shy – really lean into it with a heavy hand or a sturdy tool!
- Utilize a Sharp Knife for Clean Cuts: For perfectly neat and tidy slices, always use a very sharp knife. A dull knife will drag, tear at the mixture, and cause messy edges or even breakage. For an even smoother cut, a chef’s trick is to warm your knife under hot water, wipe it completely dry, and then make your slices. Re-warm and clean the knife periodically if the mixture starts to stick to the blade.
- Troubleshooting Granola Bar Texture:
- If the Mixture Feels Too Wet or Loose: Don’t panic! This usually indicates that the oats haven’t absorbed enough liquid. Allow the mixture to sit for an additional 10-15 minutes to give the oats more time to soak up the binder. If it’s still too wet after resting, gradually add a tablespoon or two more of old-fashioned oats, mixing well after each addition, until the mixture reaches a manageable, sticky, and cohesive consistency.
- If the Mixture Seems Too Dry or Crumbly: If your granola mixture isn’t coming together well and feels too dry, it likely needs more binding liquid. Add 1 tablespoon each of creamy peanut butter and honey at a time, mixing thoroughly after each addition, until the mixture is cohesive enough to hold together firmly when pressed.
Storage Best Practices: For optimal freshness, individually wrap each cooled granola bar tightly in plastic wrap. Store these wrapped bars in an airtight container or bag in the refrigerator for up to 1 week. For longer preservation, freeze the individually wrapped bars on a tray until solid, then transfer them to a freezer-safe container or bag for up to 6 months. To enjoy from frozen, simply let them thaw at room temperature for 30 minutes, or microwave for a quick 10–15 seconds for a soft, warm treat.
Nutrition Information
Calories: 448kcal |
Carbohydrates: 52g |
Protein: 12g |
Fat: 23g |
Saturated Fat: 8g |
Trans Fat: 1g |
Cholesterol: 1mg |
Sodium: 282mg |
Potassium: 345mg |
Fiber: 6g |
Sugar: 19g |
Vitamin A: 22IU |
Vitamin C: 1mg |
Calcium: 46mg |
Iron: 3mg
Disclaimer: Nutrition information provided is an estimate based on standard ingredient values and may vary based on specific brands, preparation methods, and any substitutions made. It should be used as an approximation.
Love this recipe? Leave a comment below!