
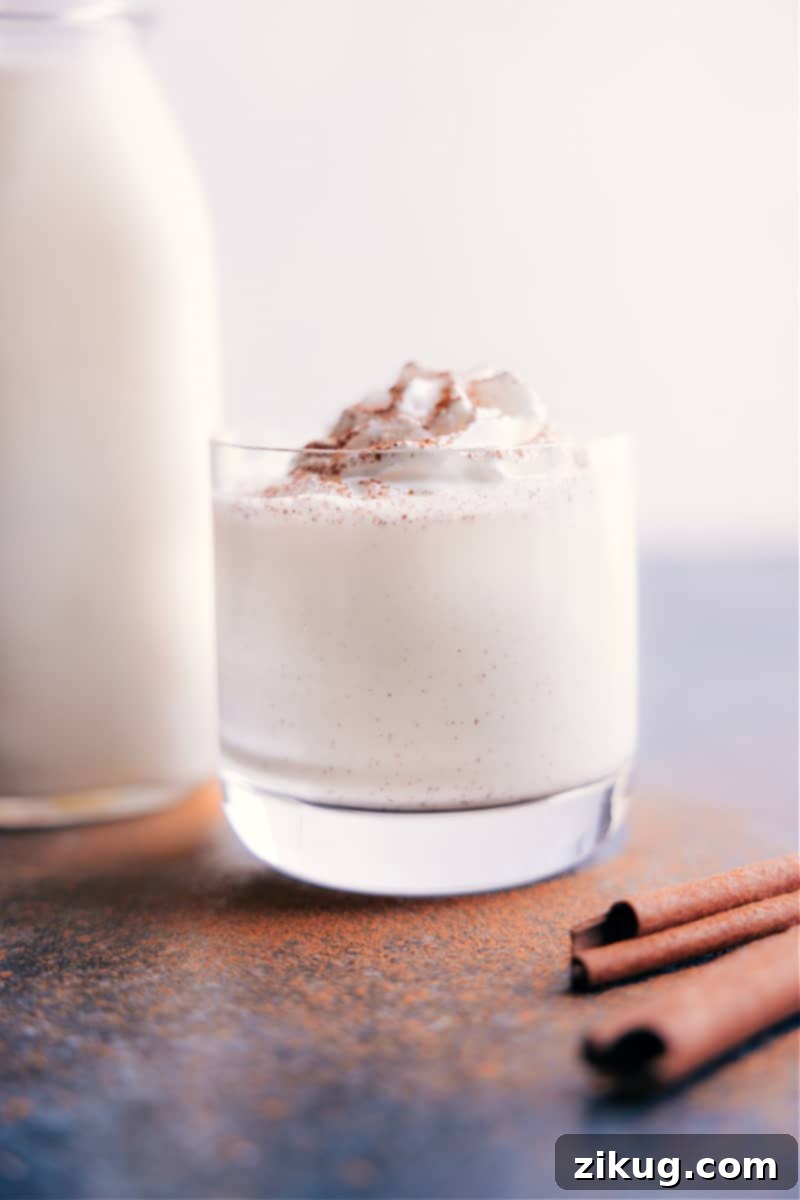
Experience the ultimate taste of the holidays with this homemade Eggnog recipe. Blending rich milk, heavy cream, fresh egg yolks, fine granulated sugar, aromatic nutmeg, and fragrant vanilla extract, this irresistible beverage is a staple for festive gatherings. Nothing captures the spirit of the season quite like a perfectly crafted glass of creamy eggnog.
Looking for delightful accompaniments? Explore my curated list of the top 50 cookie recipes, perfect for serving alongside this cherished holiday drink!
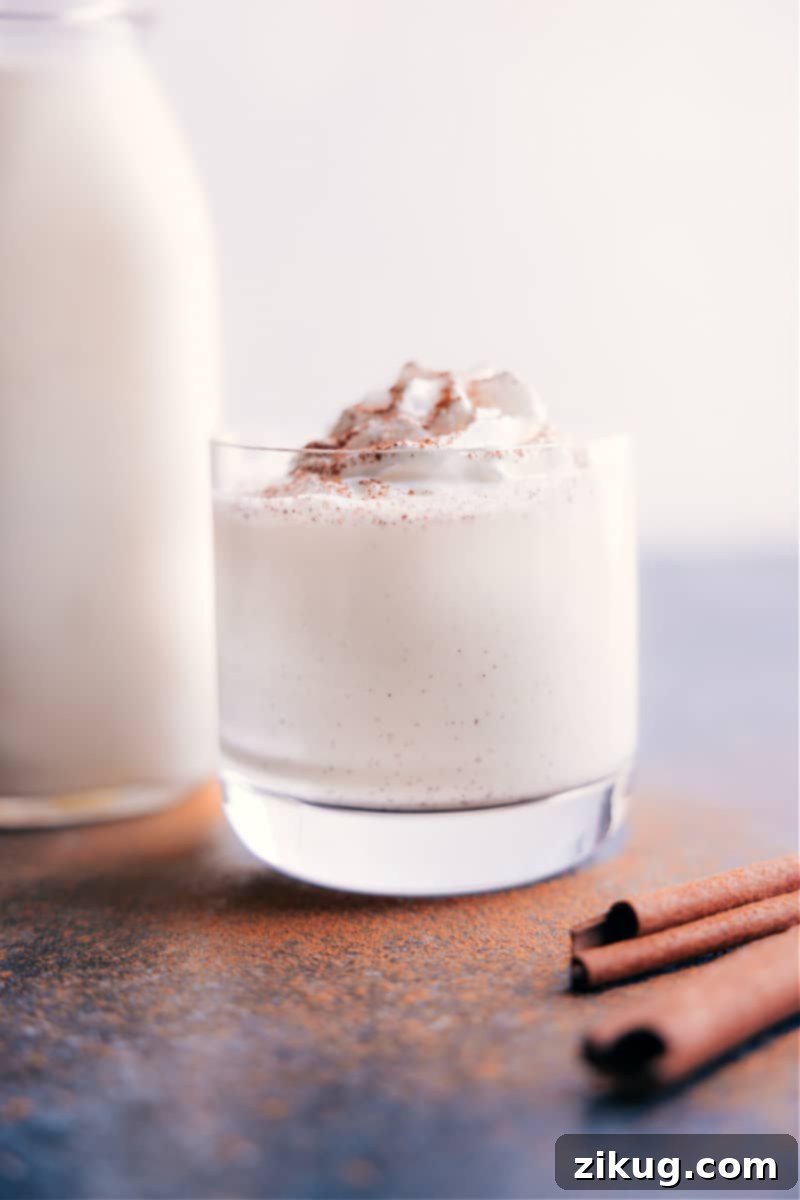
The Irresistible Allure of Homemade Eggnog: A Cherished Holiday Tradition!
There’s a special magic that homemade eggnog brings to the holiday season. For years, I approached store-bought eggnog with a certain reluctance, often finding it overly sweet, too thin, or simply lacking genuine depth. My entire perspective shifted a few years back at a memorable holiday party. A friend, known for her culinary prowess, offered me a cup of her homemade creation. Skeptical but polite, I took a sip. That single taste was a revelation! The rich, velvety texture and perfectly balanced sweet and spicy notes instantly captivated me. I savored every drop, even “borrowing” a few sips from my husband’s glass, realizing then and there that this was a holiday tradition I absolutely had to bring into my own home.
Truly, nothing compares to the freshness and superior flavor of a homemade beverage, and this holds especially true for eggnog. When prepared from scratch, it transforms from a mere drink into a luxurious, comforting experience, far surpassing anything you can find on supermarket shelves. This recipe not only promises the best homemade eggnog you’ll ever taste but also invites you to create new, cherished holiday memories with every sip. It’s an embodiment of festive warmth, perfect for sharing with family and friends.
What Exactly is Eggnog? A Rich Culinary History Explained
Eggnog, often affectionately referred to as “milk punch,” is a decadent, sweet, and creamy drink cherished worldwide, particularly during the festive season. At its core, it’s a luscious blend of milk, cream, sugar, and egg yolks, traditionally spiced with aromatic nutmeg. This particular recipe enhances that classic profile by incorporating fragrant vanilla extract and a hint of cinnamon, alongside a small pinch of salt to perfectly balance the sweetness and deepen the overall flavor. Importantly, this version is crafted to be alcohol-free, ensuring it’s a delightful treat that everyone, including children, can enjoy!
The history of eggnog is as rich and complex as its flavor, with roots tracing back to medieval Europe, where it evolved from a warm, milky drink known as “posset.” This soothing beverage, often made with hot milk curdled with wine or ale, was considered a luxury item, primarily enjoyed by the aristocracy and monks. Over centuries, as dairy and eggs became more accessible, posset transformed, eventually making its way to America with European colonists. It was in the New World that rum, a readily available and affordable spirit, became a popular addition, giving birth to the spirited holiday drink we recognize today. While its origins might be ancient, eggnog remains a timeless symbol of holiday cheer, indulgence, and convivial gatherings.
Essential Ingredients for Crafting the Perfect Homemade Eggnog
Crafting the perfect, velvety eggnog requires a careful selection of fresh, high-quality ingredients. Each component plays a vital role in achieving that signature creamy texture and comforting holiday flavor. Here’s a closer look at what you’ll need to create this festive beverage:
- Whole Milk: The primary liquid base of our eggnog. For unparalleled richness, a full-bodied flavor, and a luxuriously thick consistency, whole milk is highly recommended. Its higher fat content contributes significantly to the body and creaminess of the final drink. While 2% milk can be used as an alternative, be aware that it will result in a slightly lighter texture and flavor.
- Heavy Cream: This is where true indulgence comes in. Heavy cream adds an extra layer of decadence, making your eggnog incredibly thick, velvety, and sumptuously rich. It’s crucial for achieving that characteristic mouthfeel that homemade eggnog is famous for, transforming it into a truly decadent holiday treat.
- Egg Yolks: The quintessential “egg” in eggnog, and arguably the most crucial ingredient for both flavor and texture! Egg yolks serve multiple purposes: they impart a beautiful, inviting golden hue, contribute significantly to the unique, custardy flavor, and, most importantly, act as a natural thickening and emulsifying agent. When properly tempered and cooked, they create a silky-smooth base that defines the classic eggnog experience.
- Granulated Sugar: Provides the perfect amount of sweetness, beautifully balancing the richness of the dairy and eggs. It dissolves smoothly into the mixture, ensuring a consistent and evenly sweet beverage without any graininess.
- Nutmeg, Cinnamon, and Vanilla Extract: These aromatic spices are the heart of eggnog’s cozy, festive flavor profile. Freshly grated nutmeg offers the most potent and delightful aroma, elevating the drink, though pre-ground nutmeg works wonderfully too. Cinnamon adds a complementary warmth and depth, while pure vanilla extract enhances all the flavors, tying them together with its sweet, inviting notes. Together, these spices evoke the very essence of the holiday season.
- Salt: A small, almost imperceptible pinch of fine salt is a secret weapon in this recipe. It doesn’t make the eggnog salty; instead, it acts as a powerful flavor enhancer, balancing the sweetness, cutting through the richness, and intensifying the overall taste of the dairy and spices. It ensures the eggnog isn’t just sweet, but truly flavorful and complex.
To Spike or Not to Spike? Exploring Alcohol in Eggnog
Historically, eggnog has often been a spirited beverage, traditionally infused with a choice of potent alcohols. The most common spirits found in classic eggnog recipes include aged rum (especially dark rum), warming brandy, or robust bourbon. These spirits not only add a delightful kick but also contribute to the complexity of the flavor profile, often cutting through the richness of the dairy and offering a warming sensation.
However, this specific recipe is thoughtfully crafted to be alcohol-free. This ensures that it’s a versatile and family-friendly treat, perfect for holiday gatherings where guests of all ages—from young children to adults—can safely enjoy its creamy goodness. If you’re preparing this for an adults-only occasion, or if you simply prefer a spiked version, feel free to add your choice of alcohol. A good rule of thumb is to add it after the eggnog has been cooked and chilled, just before serving, to preserve the alcohol’s distinctive flavor and avoid cooking it off. Remember, the higher the alcohol content, the more it will subtly reduce the perceived sweetness of the drink, creating a more balanced and sophisticated profile for some palates. Experiment with small amounts to find your preferred balance, typically adding 1-2 ounces per serving.
Crafting Creamy Perfection: Step-by-Step Homemade Eggnog
Making homemade eggnog is a rewarding process that yields incredibly delicious results. Follow these steps carefully to ensure a perfectly smooth, rich, and flavorful beverage that will impress everyone:
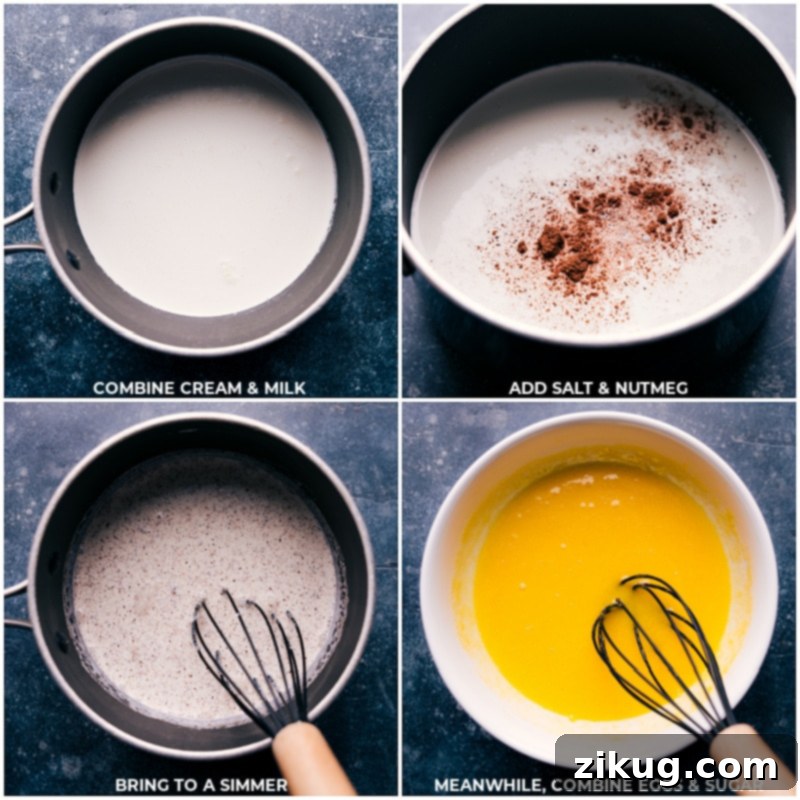
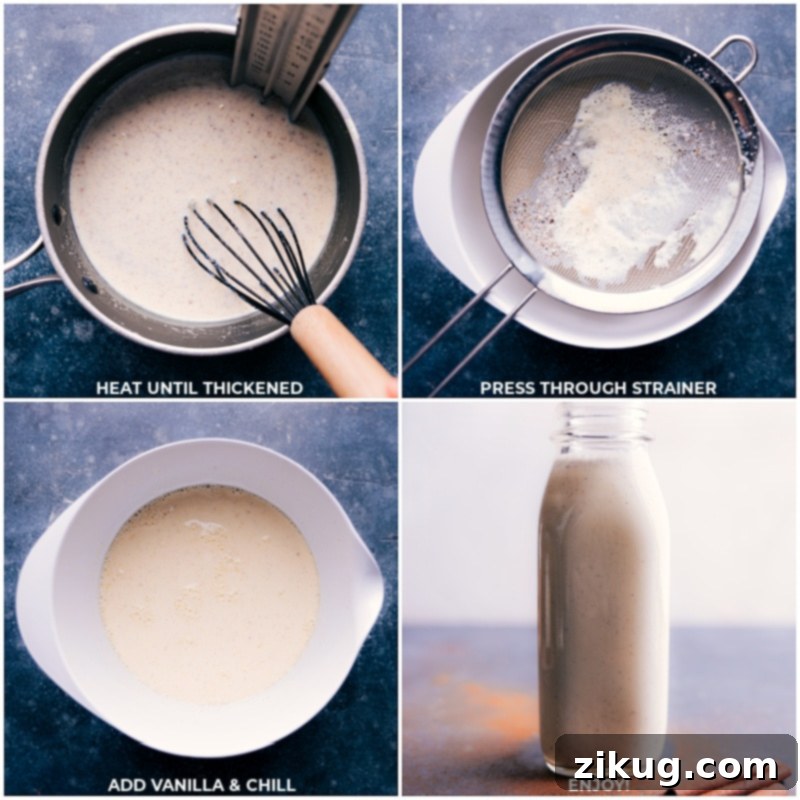
- Gently Heat the Dairy & Spices: In a large, heavy-bottomed nonstick pot, combine the heavy cream, whole milk, ground nutmeg, and salt. Place the pot over medium-high heat. Stir the mixture frequently with a whisk or spoon to prevent any scorching or sticking to the bottom, allowing it to warm gradually. Watch for small bubbles to form around the edges of the pot, indicating it has reached a gentle simmer. It is absolutely crucial *not* to let the mixture come to a rolling boil, as this can negatively impact the texture and potentially curdle the dairy. Remove the pot from the heat as soon as it simmers.
- Whisk Egg Yolks with Sugar: While the dairy mixture is heating, separate your egg yolks into a large, heat-safe bowl. Carefully discard the whites or save them for another recipe (see Note 1). Add the granulated sugar to the egg yolks. Using a sturdy whisk, vigorously whisk the egg yolks and sugar together until the mixture becomes pale yellow, thickens slightly, and looks creamy. This step is important for breaking down the sugar crystals and preparing the yolks for the tempering process.
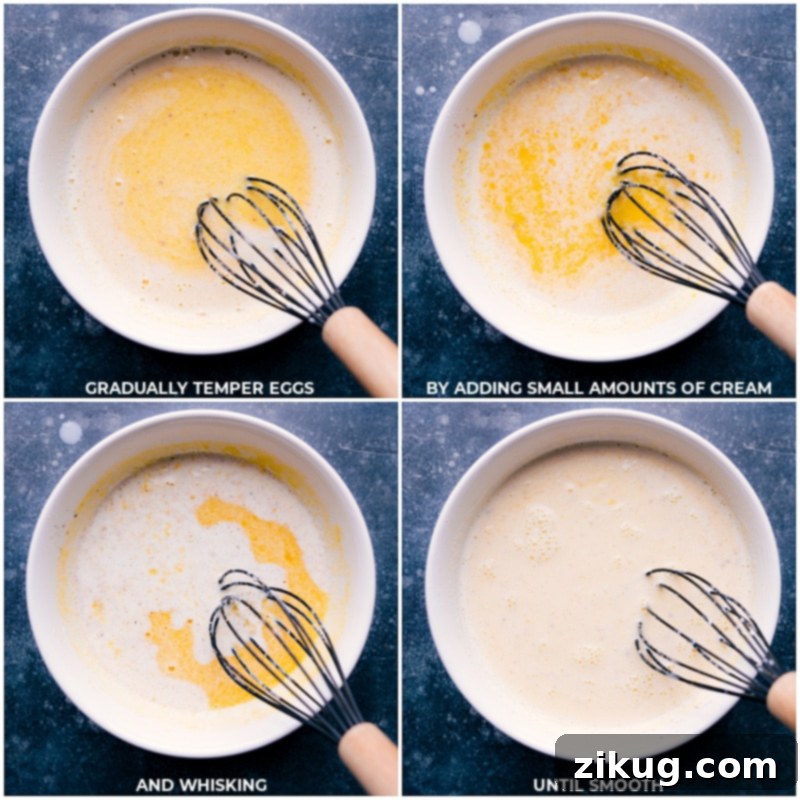
- Temper the Eggs Carefully: This is the most critical step to prevent the eggs from scrambling. Slowly and very gradually, while continuously and vigorously whisking the egg yolk mixture, pour about 1/2 cup of the hot cream mixture into the eggs. Continue whisking constantly for about 30 seconds to fully incorporate. Repeat this process, adding another 1/2 cup of hot cream into the eggs (gradually while whisking constantly) until thoroughly blended. Repeat one more time, adding a total of approximately 1 cup of the hot cream mixture to the eggs. This gradual addition slowly raises the temperature of the egg yolks, preventing them from cooking abruptly and ensuring a smooth custard base.
- Combine & Thicken: Once the eggs are properly tempered and warmed, slowly and gradually pour the entire egg mixture back into the pot containing the remaining hot cream on the stove. Place the pot back over medium heat. Whisk constantly and thoroughly for several minutes. You will notice the mixture beginning to thicken slightly as it heats, coating the back of a spoon. If you have a kitchen thermometer, aim for a temperature of 160°F (71°C) to ensure the eggs are safely cooked and the mixture reaches optimal thickness. Do not worry if it doesn’t seem extremely thick yet; the eggnog will continue to thicken significantly as it chills in the refrigerator.
- Add Vanilla & Chill: Immediately remove the pot from the heat. Stir in the vanilla extract. If you plan to add alcohol (for adult servings), now is the time to mix it in thoroughly. To achieve the smoothest possible texture, place a fine-mesh strainer over a clean pitcher or another airtight container. Carefully pour the eggnog through the strainer to catch any small bits of cooked egg, spice particles, or any lumps, ensuring a perfectly silky beverage. Cover the container tightly with plastic wrap or an airtight lid and refrigerate for at least 3 hours, or preferably overnight, until thoroughly chilled and beautifully thickened.
- Serve & Enjoy: Once thoroughly chilled, give the eggnog a good stir before serving, as it may separate slightly. Pour it into small glasses – remember, it’s a rich drink, so smaller portions are often preferred! Garnish each serving with a light sprinkle of ground cinnamon, freshly grated nutmeg, or a generous dollop of homemade whipped cream, perhaps with an additional dusting of spice. Serve cold and savor the incomparable taste of this delicious homemade holiday beverage!
Expert Tips for Crafting the Best Homemade Eggnog
Achieving the perfect, creamy eggnog is easier with a few key techniques and careful attention to detail. Keep these expert tips in mind to ensure your holiday beverage is a resounding success and tastes absolutely divine:
- Master the Art of Tempering Eggs: This is arguably the most crucial step for a smooth eggnog. Tempering involves gradually raising the temperature of your egg yolks by slowly introducing small amounts of the hot dairy mixture while whisking vigorously. The goal is to bring the yolks up to a safe temperature without shocking them and causing them to scramble into lumps. Pouring the hot liquid too quickly or not whisking enough will result in cooked egg bits, which can ruin the desired smooth texture. Take your time with this step, pour slowly, and stir constantly for a consistently smooth result. You can learn more about the science and technique of tempering eggs here.
- Utilize a Thermometer for Precision: For both food safety and optimal thickness, it is highly recommended to use a kitchen thermometer. Aim to heat your eggnog mixture to precisely 160°F (71°C) after combining the tempered eggs with the remaining dairy. This temperature ensures that the eggs are thoroughly cooked, eliminating any health concerns, without overcooking them, which could lead to a grainy or rubbery texture. A reliable kitchen thermometer is an invaluable tool for this, guaranteeing perfect results every time. Once you’ve mastered this, why not try making my favorite Buttercrunch Candy or Honeycomb Candy?
- Strain for Unmatched Smoothness: After cooking and before chilling, always pour your eggnog mixture through a fine-mesh strainer. This simple yet essential step is vital for achieving that signature velvety, lump-free texture. The strainer will effectively catch any tiny bits of cooked egg or stray spice particles, leaving you with a perfectly smooth, luxurious, and professional-looking drink.
- Chill Thoroughly Before Serving: Eggnog tastes absolutely best when deeply chilled. Refrigerating it for at least 3 hours, or ideally overnight, allows the flavors to fully meld and deepen, and the consistency to thicken beautifully into that iconic creamy texture. A warm or even lukewarm eggnog simply doesn’t deliver the same refreshing and rich experience. Patience in chilling is key to perfection.
Storage & Shelf Life
Storing Leftover Homemade Eggnog Safely
Homemade eggnog, when prepared with very fresh ingredients and handled properly throughout the cooking process, can be a delightful treat for several days. To maintain its freshness and safety, store any leftover eggnog in a clean, airtight container immediately after it has chilled. Keep it in the coldest part of your refrigerator. Typically, it will last safely for up to a week. Always trust your senses: if the eggnog develops an “off” smell (sour or unusual), or if its texture or appearance seems unusual, it’s best to err on the side of caution and discard it. Freshness and proper storage are paramount for both delightful flavor and food safety.
Delightful Pairings & More Seasonal Favorites
While homemade eggnog is an absolute star on its own, it truly shines when thoughtfully paired with other festive treats. Consider serving it alongside classic holiday sugar cookies, gingerbread men, or shortbread. Beyond cookies, explore these other wonderful seasonal delights from my collection that complement the rich flavor of eggnog beautifully:
- Christmas Snack Mix: A delightful blend of sweet and salty components, generously coated in white chocolate, perfect for festive munching and entertaining.
- Super Simple Christmas Punch: An incredibly easy-to-make, vibrant, and refreshing non-alcoholic beverage that’s ideal for any holiday gathering, big or small.
- Microwave Fudge Recipe: Indulge in decadent, rich, and creamy fudge that comes together quickly and effortlessly, right in your microwave.
- Easy 30-Minute Cinnamon Roll Skillet Cake: A warm, comforting, and irresistibly gooey cake that bakes up in just 30 minutes or less, perfect for a cozy breakfast or dessert.
- Melted Snowman Cookies: These adorable and delicious peanut butter cookies are a joy to make and decorate, especially with kids, adding a whimsical touch to your holiday dessert spread.
Pin
Homemade Holiday Eggnog
Video
Equipment
-
Large nonstick pot
-
Large bowl
-
Whisk
-
Fine-mesh strainer
-
Kitchen thermometer (optional, but recommended)
Ingredients
- 9 large egg yolks (see note 1 below for whites)
- 3/4 cup granulated sugar
- 1-1/2 cups heavy cream
- 3 cups whole milk
- 3/4 teaspoon ground nutmeg
- 1/8 teaspoon salt
- 1/2 teaspoon vanilla extract
- Ground cinnamon (optional, for topping)
- Whipped cream (optional, for topping)
- Desired alcohol (rum, brandy, or bourbon) (optional, for adult servings only)
Instructions
-
1. Heat Dairy: In a large nonstick pot set over medium-high heat, combine the heavy cream, whole milk, ground nutmeg, and salt. Stir the mixture often to prevent it from sticking to the bottom, allowing it to gently warm until it reaches a simmer (you’ll see small bubbles forming around the edges). Do not allow it to boil vigorously. Remove the pot from the heat as soon as it simmers.
-
2. Prepare Egg Yolks: Meanwhile, in a large, separate bowl, add only the egg yolks (you can save the whites for another recipe or discard them—see note 1). Add the granulated sugar to the egg yolks. Using a whisk, vigorously whisk the egg yolks and sugar together until the mixture is well combined, pale yellow, and slightly thick.
-
3. Temper the Eggs: This step is crucial. While continuously and vigorously whisking the egg mixture, slowly pour in about 1/2 cup of the hot cream mixture into the eggs. Continue whisking constantly. Repeat this process, adding another 1/2 cup of hot cream into the eggs (gradually while whisking constantly) until thoroughly incorporated. Repeat one more time, adding a total of approximately 1 cup of the hot cream mixture to the eggs. This gradual addition prevents the eggs from scrambling.
-
4. Thicken the Eggnog: Once the eggs are tempered, slowly and gradually pour the entire egg mixture back into the pot with the remaining hot cream on the stove. Place the pot back over medium heat. Whisk constantly for several minutes until you can feel the mixture slightly thicken. If you have a kitchen thermometer, heat the mixture until it reaches 160°F (71°C). Do not worry if it doesn’t seem very thick yet; it will continue to thicken significantly as it cools.
-
5. Add Vanilla & Chill: Remove the pot from the heat. Stir in the vanilla extract. If you are adding alcohol (for adult servings), incorporate it now. Place a fine-mesh strainer over a clean pitcher or another airtight container. Carefully pour the eggnog through the strainer to ensure a perfectly smooth and creamy texture, removing any small cooked bits or spices. Cover the container tightly with plastic wrap and chill in the refrigerator until fully cooled and thickened, which will take at least 3 hours, but ideally overnight.
-
6. Serve Cold: Once thoroughly chilled, give the eggnog a good stir before serving. Pour into small glasses (as it is quite rich!) and garnish each serving with a sprinkle of ground cinnamon or freshly grated nutmeg. A dollop of whipped cream on top, with an extra sprinkle of spice, also makes a wonderful presentation. Enjoy this delicious homemade holiday beverage cold!
Recipe Notes
Note 2 – Alcohol Options: A traditional eggnog recipe is typically made with spirits such as rum, brandy, or bourbon. This homemade Eggnog recipe is non-alcoholic, making it suitable for all ages. However, if you are serving adults only, feel free to personalize it by adding your preferred alcohol. Adding alcohol tends to cut through some of the sweetness, creating a different flavor balance. Add it when the eggnog is cool, or to individual servings.
Note 3 – Storage: Store any leftover homemade eggnog in an airtight container in the refrigerator for up to 1 week. Ensure ingredients are fresh when starting.
Nutrition
Nutrition information is automatically calculated, so should only be used as an approximation.