
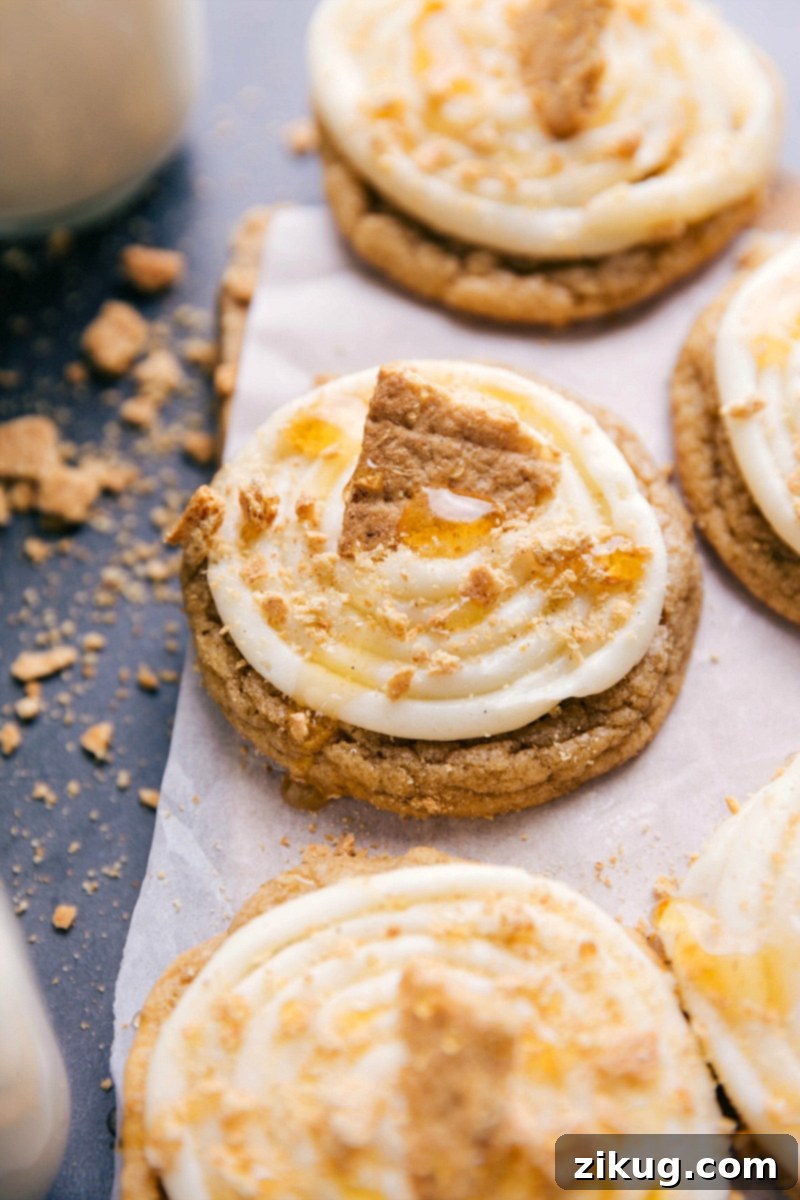
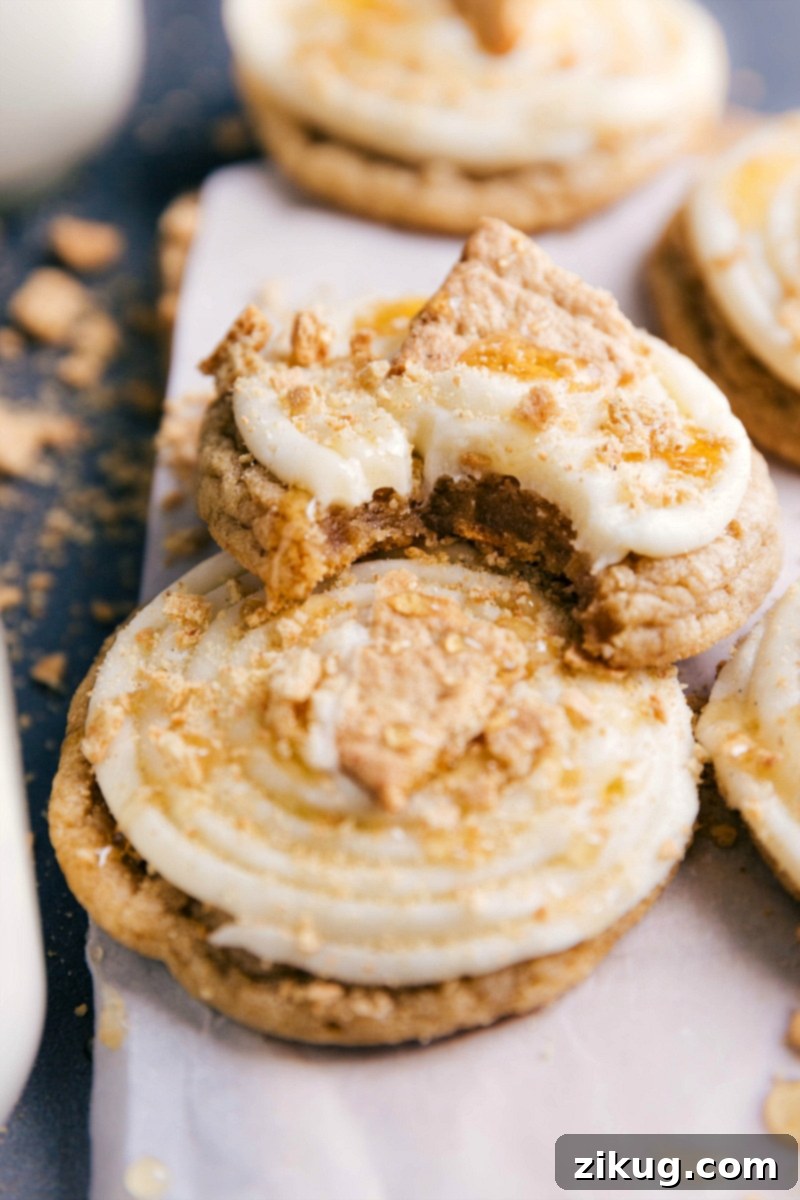
Frosted Honey Graham Cookies are a delightful homemade treat, featuring a soft, incredibly chewy, and wonderfully sweet graham cracker-infused cookie base. Each cookie is generously adorned with a rich, tangy cream cheese frosting, a sprinkle of crunchy crushed graham crackers, and a delicate drizzle of golden honey. Prepare for a new family favorite!
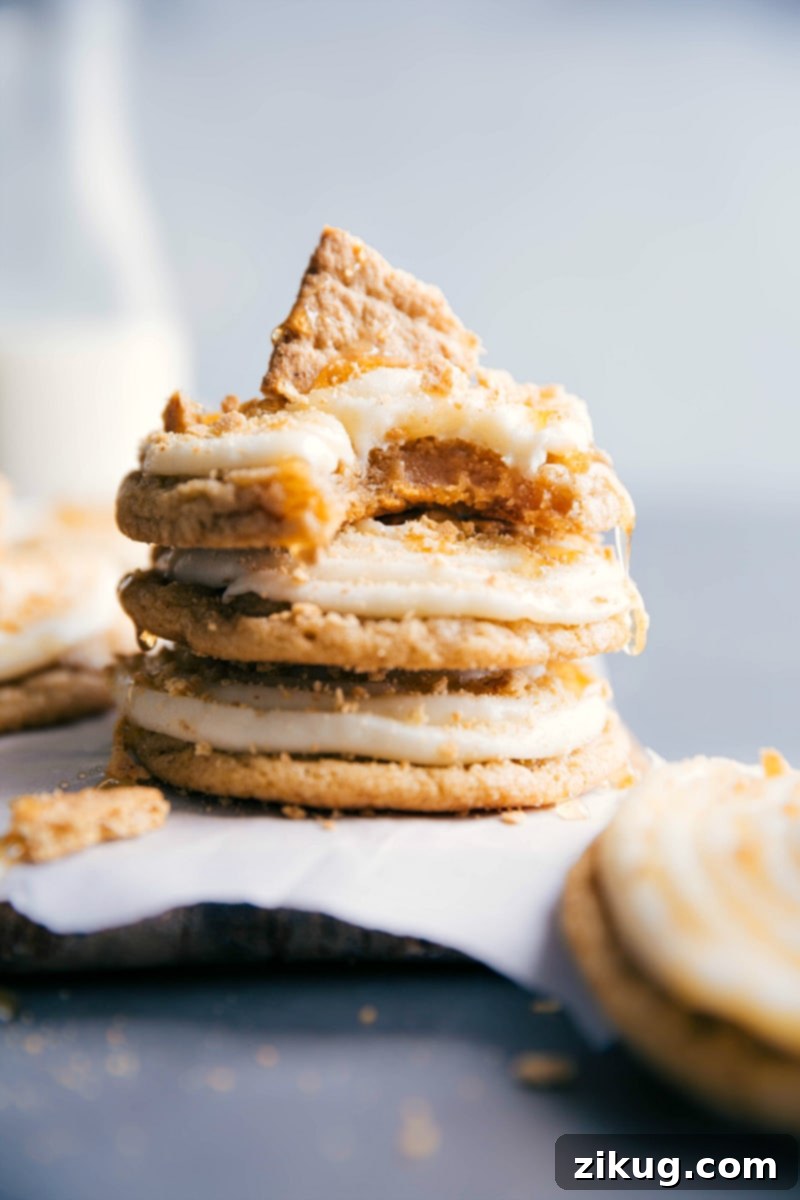
Indulge in Homemade Frosted Honey Graham Cookies
There’s nothing quite like the comforting taste of a perfectly baked cookie, and these Frosted Honey Graham Cookies are no exception. Inspired by a seasonal sensation from a beloved local bakery, these cookies capture that unique blend of warmth, sweetness, and distinct graham cracker flavor that we simply couldn’t get enough of. When our favorite bakery treat wasn’t consistently available, my boys and I embarked on a mission to recreate this magic in our own kitchen. The result? A homemade version that we believe surpasses the original, cementing its place as a cherished family favorite. This recipe delivers a soft, chewy texture and an unmistakable graham flavor, all crowned with a creamy frosting and a hint of honey.
 The Secret to Authentic Graham Cracker Flavor
 The Secret to Authentic Graham Cracker Flavor
The foundation of these exceptional cookies lies in the generous inclusion of actual graham crackers directly into the dough. This isn’t just a subtle hint; it’s a bold statement that ensures a profound graham presence and flavor in every bite. Beyond taste, the graham cracker crumbs contribute significantly to the cookies’ characteristic softness and delightful sweetness.
To achieve the perfect texture and flavor, pay close attention to how you prepare your graham crackers:
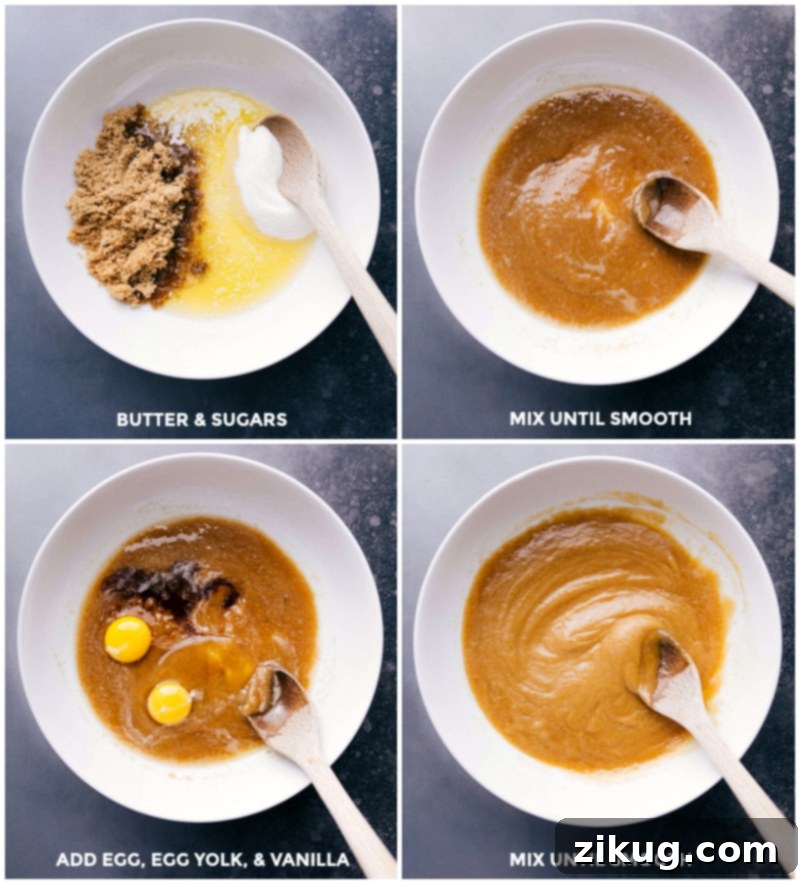
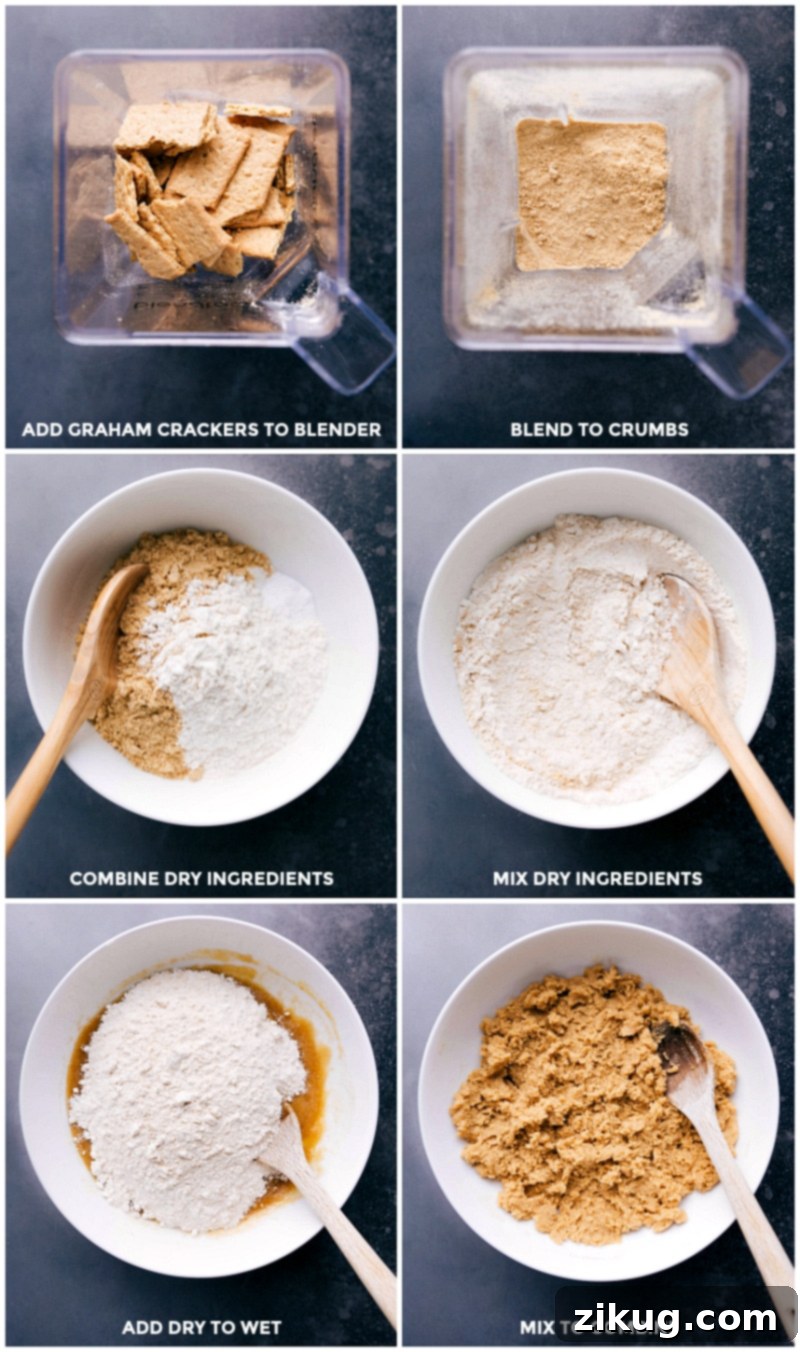
- Thoroughly crush the graham crackers: While a Ziploc bag and a rolling pin can work in a pinch, for consistently fine crumbs, we highly recommend using a high-powered blender or a food processor. The goal is to achieve uniform, fine crumbs throughout the entire measured cup. Any larger, un-crushed chunks will compromise the delicate texture of your cookies, potentially leading to an uneven bake and a less enjoyable eating experience.
- Accurate measurement is key: Once your graham crackers are finely crushed, it’s time to measure them precisely. Spoon the crushed crumbs gently into your measuring cup, ensuring it’s filled completely to the top. Then, use the flat back of a table knife to level off the surface. While the crumbs don’t need to be tightly packed, making sure the cup is full but not overly compressed will guarantee you have the exact amount needed for optimal cookie structure and flavor.
The Magic of an Extra Egg Yolk
This recipe thoughtfully calls for one large whole egg and an additional egg yolk. This isn’t a mere oversight; the extra egg yolk plays a crucial role in enhancing both the flavor and texture of these cookies. It imparts a richer, deeper taste and contributes to an incredibly soft, tender crumb that melts in your mouth. Don’t let the leftover egg white go to waste! It can be easily saved and incorporated into your breakfast the following morning, perhaps in a savory country breakfast egg skillet or a delicious spinach and feta egg wrap.
Essential Baking Tips for Perfect Honey Graham Cookies
Achieving bakery-quality Frosted Honey Graham Cookies at home is simple with these crucial tips:
- Allow melted butter to cool completely: After melting your butter, it is absolutely essential to let it cool back down to room temperature. Introducing hot butter into your sugar mixture will cause the sugars to melt prematurely, leading to a greasy cookie texture and a less appealing final product. Patience here will be rewarded with a superior cookie.
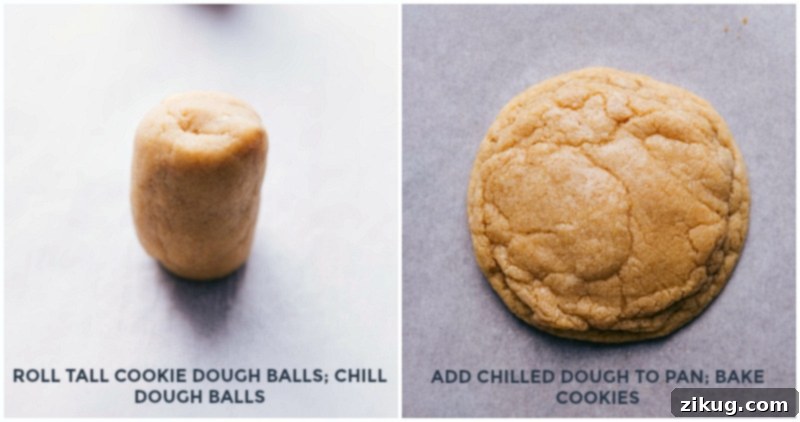
- The importance of chilling the dough: Since this recipe begins with melted butter, the dough requires adequate chilling time. This period allows the butter to re-solidify, which is vital for preventing the cookies from spreading too much during baking. Rushing this step will likely result in thin, pancake-flat cookies that lack the desired chewiness. Conversely, over-chilling the dough can cause it to dry out and hinder proper spreading, so aim for the recommended 1 to 4 hours.
- Precise flour measurement is paramount: In baking, accuracy is everything, especially when it comes to flour. Incorrectly measuring flour is a common pitfall. If you simply scoop a measuring cup directly into a bag of flour, you’re likely packing in far too much, which will yield dense, dry, and less flavorful cookies. The correct method is to gently spoon the flour into your measuring cup until it overflows, then level off the excess with the flat back of a table knife. This ensures you have the precise amount of flour for a tender, perfectly textured cookie.
Advanced Techniques for Flawless Frosted Honey Graham Cookies
Elevate your cookie game with these additional baking insights:
- Bake on a Silpat® liner or parchment paper: For consistent results and effortless cleanup, always line your baking sheets. A Silpat® silicone baking mat or parchment paper provides a non-stick surface that promotes even baking, preventing the bottoms of your cookies from browning too quickly or burning. This also ensures your precious cookies lift off the tray beautifully once baked.
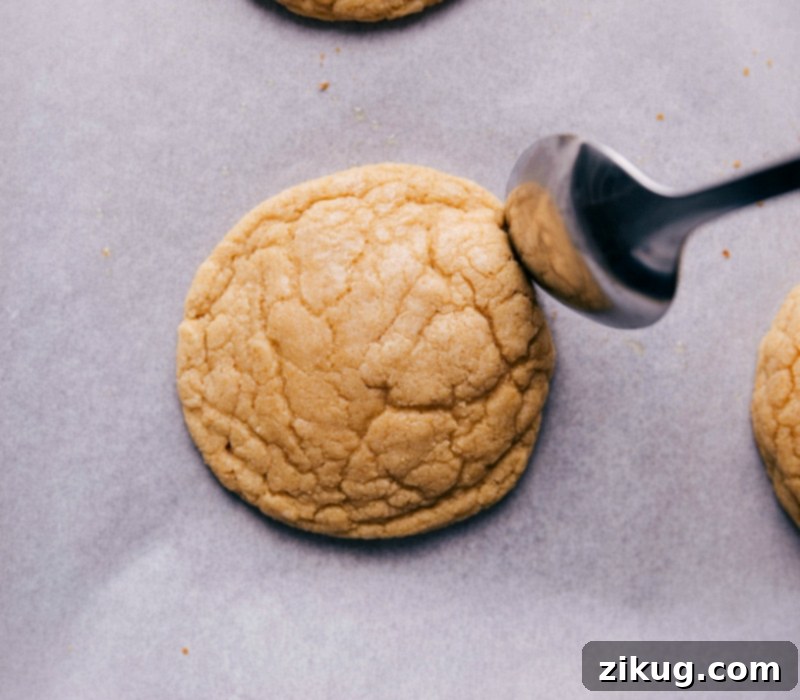
- Shape the cookie edges immediately after baking: This unique technique is a game-changer for texture. As soon as the cookies emerge from the oven, while they are still warm and pliable, use the back of a large spoon to gently press the edges of each cookie inwards towards the center. You’ll need to work quickly, as the cookies set up rapidly after a minute or two. This swift action creates wonderfully crispy edges while preserving a soft, chewy center, offering a delightful contrast in every bite. (Refer to the instructional photos or video for a clear visual guide on this step!)
- Bake at 325 degrees F (162°C): Unlike many cookie recipes that call for 350°F, these Frosted Honey Graham Cookies thrive at a slightly lower temperature of 325°F (162°C). This seemingly small adjustment is crucial for achieving their signature softness and preventing them from becoming overly crisp. Don’t overlook this detail; it makes a significant difference in the final texture of your cookies.
The Perfect Complement: Creamy Cream Cheese Frosting
When developing this recipe, we experimented with several frosting options, including honey-butter frosting and traditional buttercream. While delicious in their own right, these proved to be overwhelmingly sweet when paired with our already sweet graham cracker cookie base – a rare complaint from even the most dedicated sweets enthusiast! Our quest for balance led us back to our tried-and-true cream cheese frosting recipe, which offers the ideal tangy counterpoint to the rich, sweet cookies.
To ensure your cream cheese frosting is flawlessly smooth and creamy, keep these tips in mind:
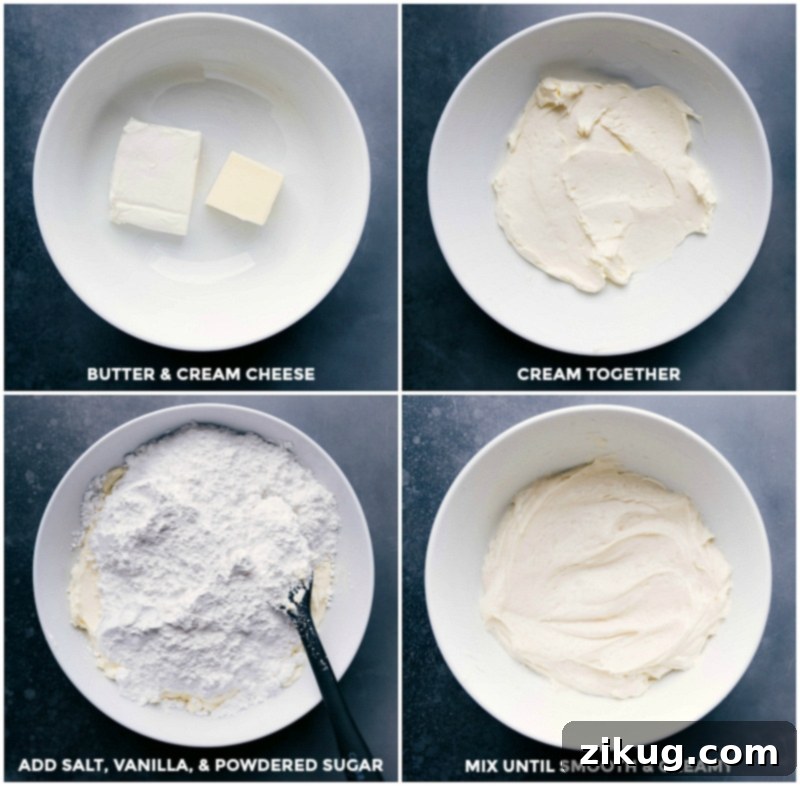
- Ensure butter and cream cheese are at room temperature: This is a non-negotiable step for a velvety smooth frosting. Take your butter and cream cheese out of the fridge at least an hour before you plan to start baking. If these ingredients are cold, they will not emulsify properly, leading to a lumpy frosting with unwelcome cream cheese chunks. For those short on time, there are several quick methods to bring butter and cream cheese to room temperature efficiently.
- Don’t skip the flavor enhancers: A pinch of salt and a dash of vanilla extract are not optional in this frosting; they are transformative. Salt plays a critical role in intensifying the flavors and balancing the sweetness, preventing the frosting from being cloyingly sweet. Vanilla extract, on the other hand, adds depth and complexity, contributing to an overall superior flavor profile.
- Gradually add powdered sugar to taste: The amount of powdered sugar can be adjusted to achieve your desired sweetness and consistency. Begin by adding the powdered sugar slowly, mixing until just combined. If you prefer a sweeter, firmer frosting, gradually add a bit more. For a tangier, softer consistency, you can use slightly less. Remember, you can always add more, but you can’t easily take it away!
- Wait for cookies to cool completely before frosting: Patience is a virtue when it comes to frosting. Ensure your cookies are entirely cooled and firm before applying the frosting. While you could use a table knife for spreading, these cookies are exceptionally soft. Piping the frosting with a pastry bag (or a makeshift plastic bag) will provide better structural support and a more professional, aesthetically pleasing finish.
To frost these delightful cookies, simply fill a sturdy plastic bag with your prepared cream cheese frosting. Snip a small corner off one tip of the bag. Holding a cooled cookie in one hand, gently swirl the frosting from the center outwards, creating an elegant and generous layer. This method helps maintain the cookie’s integrity and gives a beautiful presentation.
The Finishing Touches: Irresistible Cookie Toppings
The toppings are where these Frosted Honey Graham Cookies truly come alive, adding layers of texture, flavor, and visual appeal:
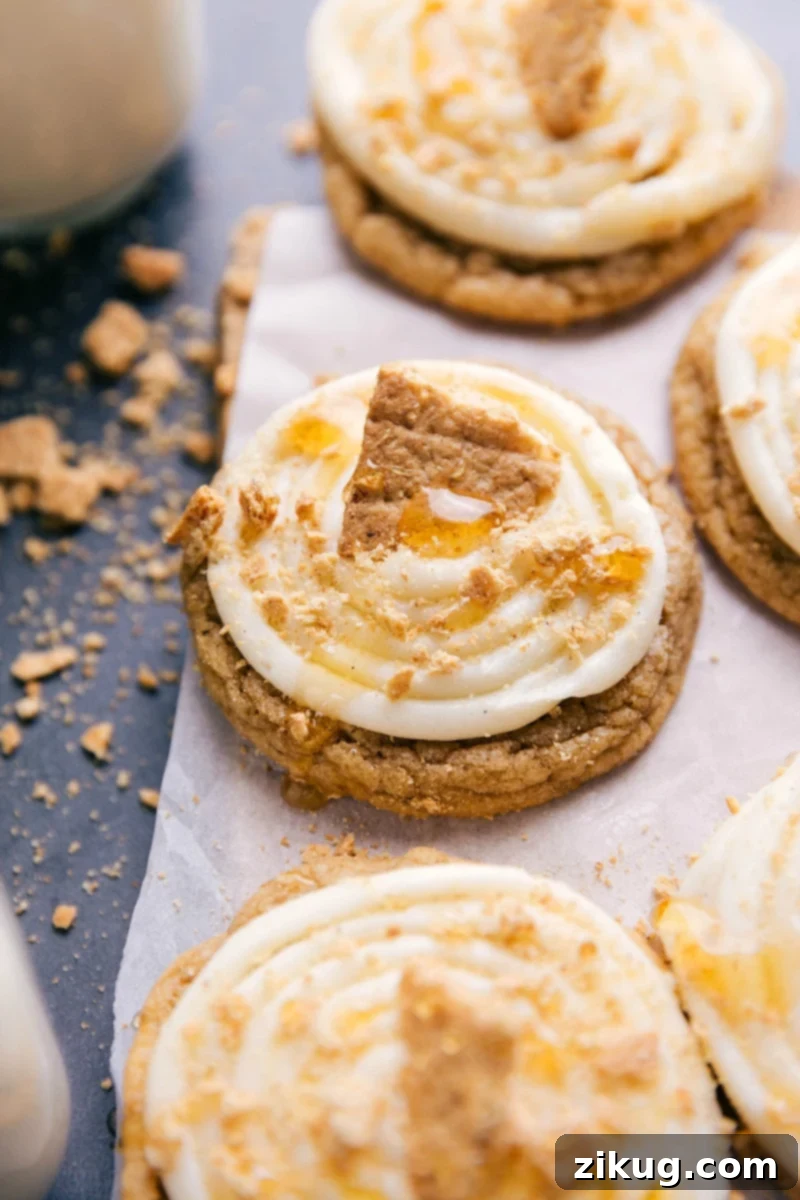
- Additional graham cracker crumbs: If you had any leftover crumbs from preparing the cookie base, this is their moment to shine! Sprinkle them generously over the freshly frosted cookies. If not, simply crush a few extra graham crackers directly over your cookies. Don’t worry too much about uniform crumb size here; a delightful variety of textures, from fine dust to slightly larger pieces, adds to the rustic charm and enhances the graham flavor.
- Broken graham cracker pieces: For that coveted bakery-style aesthetic, consider placing a larger, strategically broken piece of graham cracker right in the center of each cookie. This step is entirely optional, but it provides a beautiful focal point and hints at the delicious graham flavor within.
- A delicate drizzle of honey: This is where the “honey” in Frosted Honey Graham Cookies truly makes its presence known. Just before serving, gently warm a small amount of honey until it becomes easily pourable. Then, using a spoon or a small squeeze bottle, artfully drizzle it over each frosted cookie. Exercise caution with the honey; a little goes a long way, and too much can easily overpower the delicate balance of flavors in the cookie and frosting. The goal is a subtle sweetness and aromatic hint.
Proper Storage for Optimal Freshness
Due to the cream cheese frosting, these cookies require specific storage to maintain their freshness. Once frosted, they do not store or freeze well. If you anticipate having extra cookies that won’t be enjoyed on the same day, we highly recommend storing the frosting and the unfrosted cookies separately, only combining them right before serving. The cream cheese frosting should be stored in an airtight container in the refrigerator. The unfrosted cookies, on the other hand, are best kept at room temperature in an airtight container to preserve their soft texture. Before frosting, allow the refrigerated frosting to soften and come to room temperature for approximately 30 minutes; it will be quite stiff directly out of the fridge, making it difficult to spread or pipe.
More Delightful Cookie Recipes to Try
If you’ve fallen in love with these Frosted Honey Graham Cookies, you’ll surely enjoy exploring our other popular cookie creations:
- Cinnamon Roll Cookies with a sweet cinnamon-sugar topping
- Soft Pumpkin Cookies with warm spices and abundant chocolate chips
- Edible Cookie Dough a safe-to-eat, irresistible treat for raw dough lovers
- Lemon Cheesecake Cookies zesty and creamy with a vibrant lemon glaze
- Avalanche Cookies a no-bake sensation, perfect for quick cravings!
Recipe: Honey Graham Frosted Cookies
These Frosted Honey Graham Cookies are soft, chewy, and packed with graham cracker flavor. Topped with creamy frosting, crushed grahams, and a honey drizzle for the perfect sweet treat!
Prep Time: 30 minutes
Cook Time: 10 minutes
Chilling Time: 1 hour
Total Time: 1 hour 40 minutes
Servings: 16 cookies
Equipment
- Blender or food processor
- Sheet pan (15″ x 10″)
- Parchment paper or silicone baking mat
- Cooling rack
- Stand mixer or hand mixer
Ingredients
Cookies
- 12 tablespoons unsalted butter (3/4 cup, melted)
- 1/2 cup granulated sugar
- 3/4 cup light brown sugar (lightly packed)
- 1 large egg yolk (discard or save the white)
- 1 large egg
- 1/2 tablespoon vanilla extract
- 1-3/4 cups all-purpose flour (measured correctly, see note 1)
- 1 teaspoon baking soda
- 1/2 teaspoon salt
- 1 cup graham cracker crumbs (lightly packed, about 9 full sheets)
Cream Cheese Frosting
- 4 ounces cream cheese (the block cream cheese, not spreadable; softened, not melted)
- 4 tablespoons unsalted butter (softened, not melted)
- 2 cups powdered sugar
- 1/8 teaspoon salt
- 1 teaspoon vanilla extract
Instructions
- Melt the butter in a microwave-safe bowl. Set aside and let it cool completely to room temperature, which typically takes about 5 minutes. (Using hot butter will melt the sugars and result in greasy cookies.) Once cooled, pour the melted butter into a large mixing bowl. Add both the light brown sugar and granulated sugar. Stir vigorously until the mixture is fully incorporated and smooth.
- Add the one whole large egg and the additional egg yolk (the extra white can be discarded or saved for another recipe). Stir in the vanilla extract until the mixture is smooth and evenly combined.
- In a separate bowl, whisk together the all-purpose flour, baking soda, and salt. Next, take whole graham crackers and crush them in a blender or food processor until you have exactly 1 cup of very fine crumbs (measure by gently packing the crumbs into the measuring cup). Add these fine graham cracker crumbs to your dry ingredients. Stir thoroughly to ensure everything is well combined.
- Gradually add the dry ingredient mixture to the wet ingredients. Mix until just combined, being careful to avoid overmixing the dough, which can lead to tough cookies.
- Using a tablespoon measuring spoon, portion out approximately 2 tablespoons of dough for each cookie (if using a food scale, aim for 45g per cookie). Roll the dough into tall, rather than perfectly round, balls. Place these dough balls on a plate lined with parchment paper, cover tightly with plastic wrap, and chill in the refrigerator for at least 1 hour, and up to 4 hours.
- Preheat your oven to 325°F (162°C) and line a sheet pan with parchment paper or a silicone baking liner. Arrange no more than 6 cookies per baking sheet, as they will spread significantly during baking. Bake for 10–14 minutes, or until the edges are lightly browned.
- Remove the baking sheet from the oven. Immediately, and working quickly, use the back of a large spoon to gently press the edges of each cookie inwards toward the center. This technique creates a delightful crispy edge while maintaining a chewy center. Act fast, as the cookies will firm up quickly after about a minute or two. Let the cookies cool on the baking sheet for an additional 4 minutes, then carefully transfer them to a wire cooling rack using a spatula. Allow them to cool completely before proceeding to frost them.
- While the cookies are cooling, prepare the cream cheese frosting: In the bowl of a stand mixer fitted with the whisk attachment (or using a large bowl and a hand mixer), beat the softened (not melted) cream cheese and unsalted butter together until the mixture is light and creamy, which should take approximately 2 minutes at medium-high speed. Add the powdered sugar, salt, and vanilla extract. Continue to beat until the frosting is soft, smooth, and creamy. Be careful not to overbeat, as this can lead to a whipped, airy texture rather than a creamy one. (If the frosting appears too thin, gradually add a bit more powdered sugar; if it’s too thick, a touch of milk or cream can be added.)
- Transfer the prepared frosting to a sturdy plastic bag and snip a small tip off one corner of the bag. Pipe the frosting in a swirl design around each completely cooled cookie. For extra garnish, crush a few additional graham crackers and sprinkle the crumbs over the frosted cookies. Optionally, for a bakery-style touch, place a larger broken piece of graham cracker in the center of each cookie. Finally, and with a light hand, drizzle a small amount of warm honey over each cookie right before serving; remember, a little goes a long way to avoid overpowering the other flavors. Enjoy your homemade Frosted Honey Graham Cookies!
Recipe Notes
- Note 1 on Flour Measurement: To accurately measure flour, avoid pressing the measuring cup directly into the flour bag, as this compacts too much flour. Instead, use a spoon to scoop the flour into the measuring cup, then level the top with the flat back of a table knife.
- Storage: For best results, we recommend storing the frosting and unfrosted cookies separately. Keep the cream cheese frosting in an airtight container in the refrigerator. Store the unfrosted cookies at room temperature in an airtight container. Before frosting, allow the chilled frosting to soften at room temperature for about 30 minutes, as it will be quite stiff when first removed from the fridge.
Nutrition
Calories: 483kcal | Carbohydrates: 79g | Protein: 5g | Fat: 17g | Saturated Fat: 9g | Cholesterol: 63mg | Sodium: 290mg | Potassium: 85mg | Fiber: 1g | Sugar: 51g | Vitamin A: 497IU | Calcium: 38mg | Iron: 2mg
Nutrition information is automatically calculated, so should only be used as an approximation.
Like this recipe? Leave a comment below and share your thoughts!