
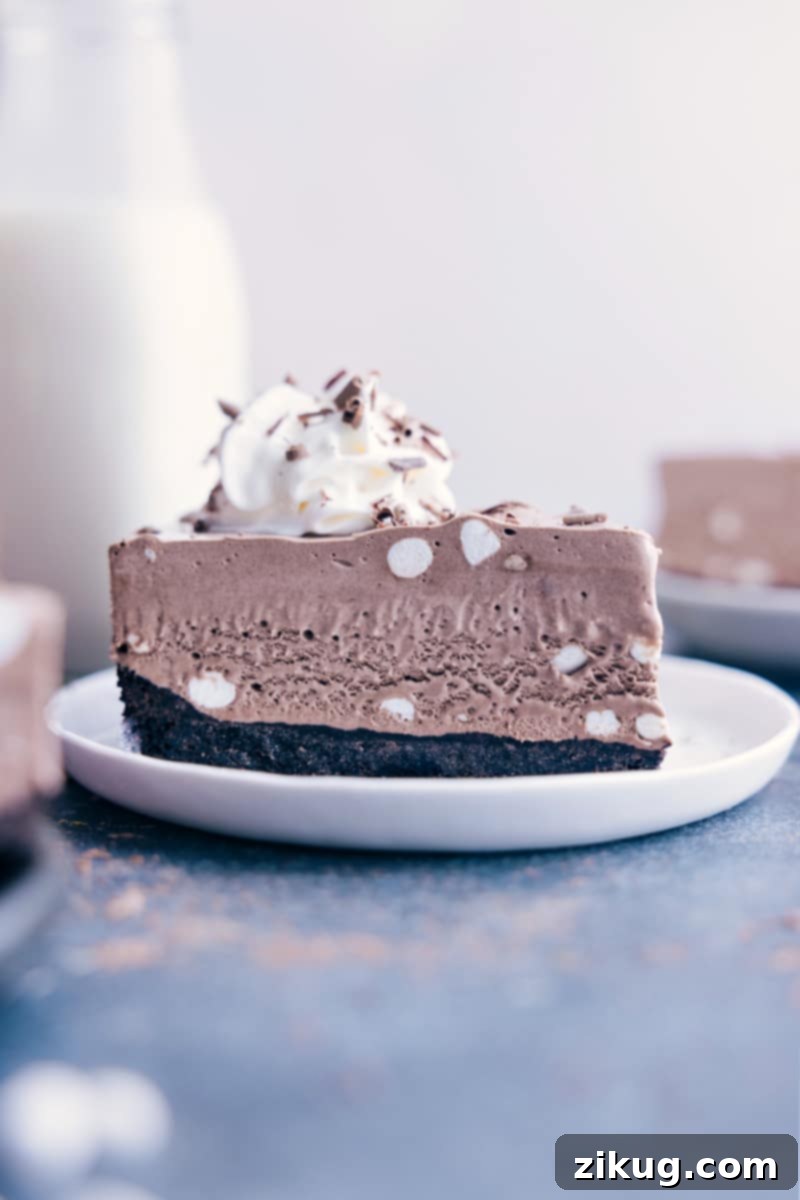
Frozen Hot Chocolate Cheesecake is a heavenly dessert that combines the rich, comforting flavors of hot chocolate with the creamy texture of a cheesecake, all set into a refreshing frozen pie. Featuring a delightful Oreo crust and charming swirls of marshmallows, this recipe is surprisingly easy to create, making it a perfect treat for any occasion.
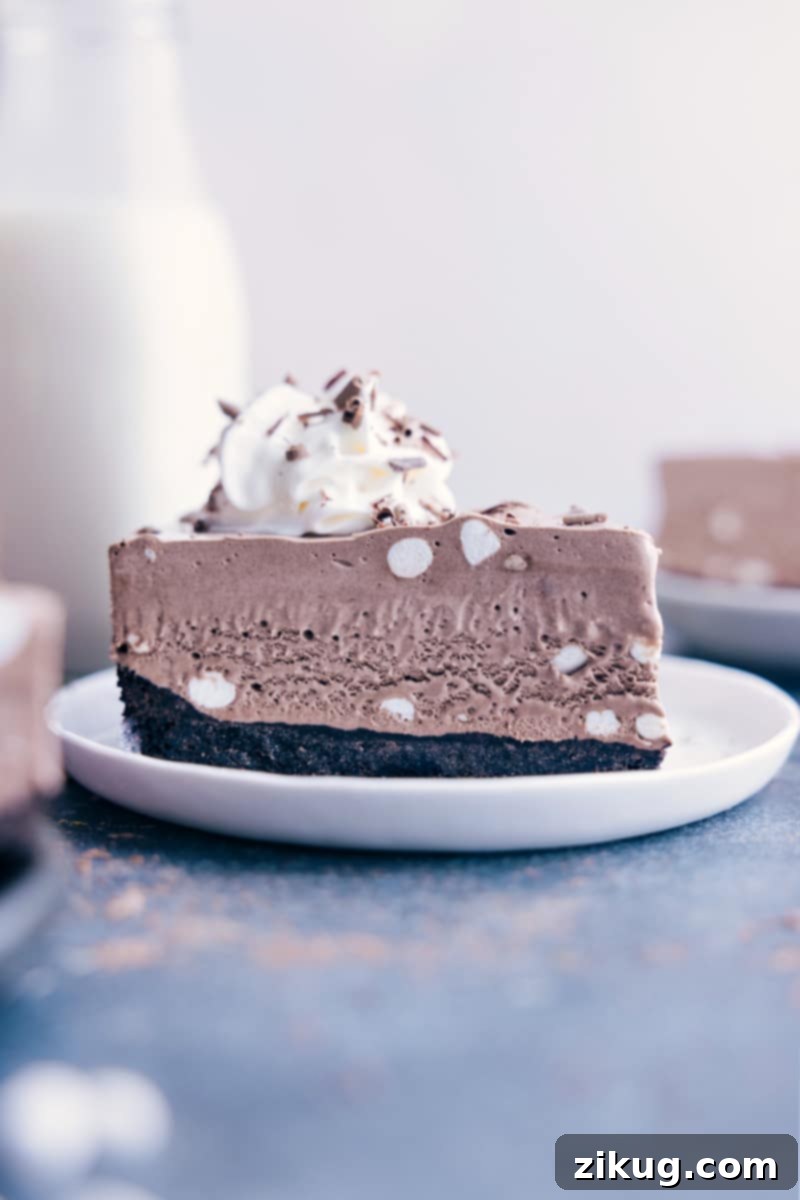
Indulge in the Best Frozen Hot Chocolate Cheesecake
Do you remember the rave reviews for my Frozen Pumpkin Pie Cheesecake? It quickly became the most celebrated recipe on the blog, and undoubtedly one of my personal favorite desserts. Even my husband, who generally steers clear of pumpkin, enthusiastically devoured his share of that pie. When a recipe wins over even the skeptics, you know you’ve hit culinary gold!
Well, I’m thrilled to share even more exciting news! I’ve taken that winning concept and crafted another sensational frozen cheesecake creation. This version is especially perfect for the festive December holidays and beyond – it’s infused with everyone’s favorite winter beverage: hot chocolate! Imagine creamy cheesecake bliss, dotted with tiny marshmallows and elegant swirls of marshmallow through the filling. This Frozen Hot Chocolate Cheesecake is destined to be a crowd-pleaser and a staple in your dessert repertoire.
Just like its pumpkin predecessor, this pie boasts remarkable simplicity. The process involves just a few straightforward steps: combine the ingredients, gently fold in the whipped topping, and then let your freezer do the rest. The most challenging part, honestly, is the waiting game while it sets to perfection.
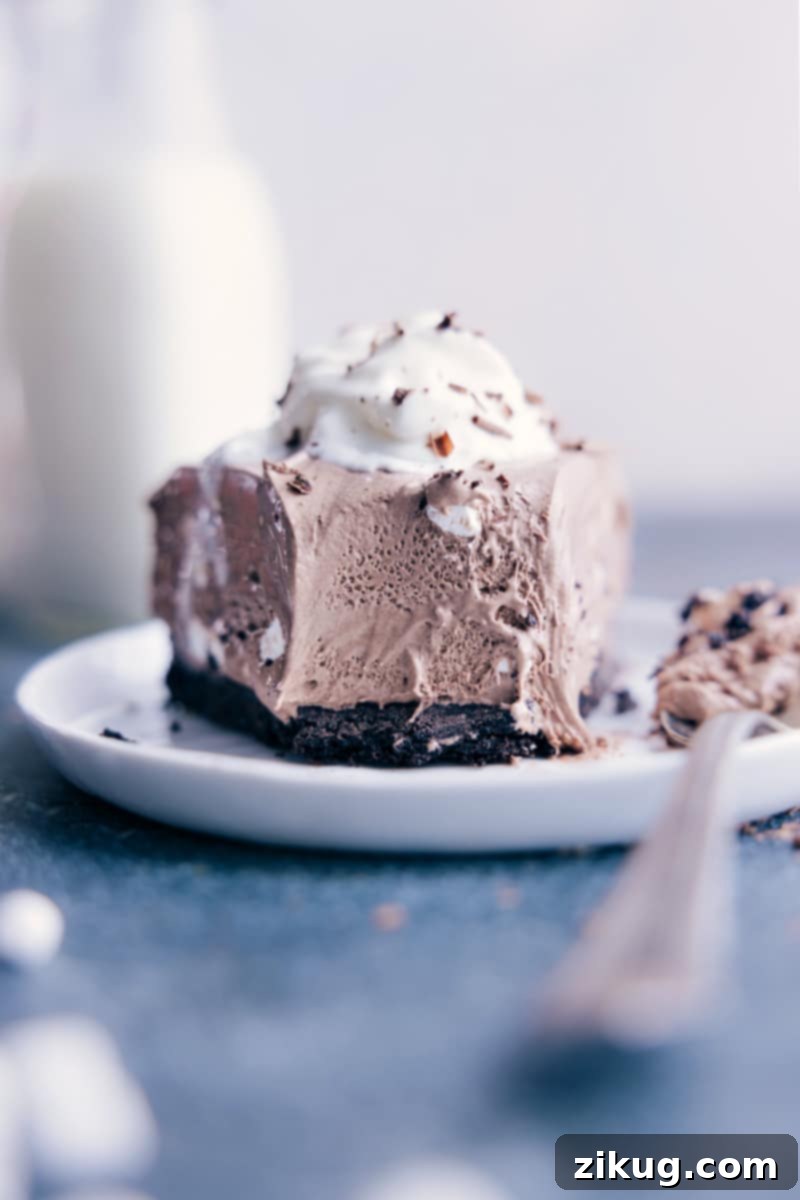
This dessert truly stands out for its unique blend of textures and temperatures. It delivers the comforting taste of hot cocoa in a refreshing, chilled form, making it a versatile option for both cool evenings and warm-weather gatherings. The interplay of the crisp Oreo crust, the smooth, rich chocolate-cheesecake filling, and the soft pockets of marshmallow creates a multi-layered sensory experience that’s simply unforgettable. Whether you’re looking for an impressive holiday centerpiece or a simple, indulgent treat, this frozen hot chocolate cheesecake promises a delightful escape into dessert heaven.
Crafting the Perfect Oreo Crust
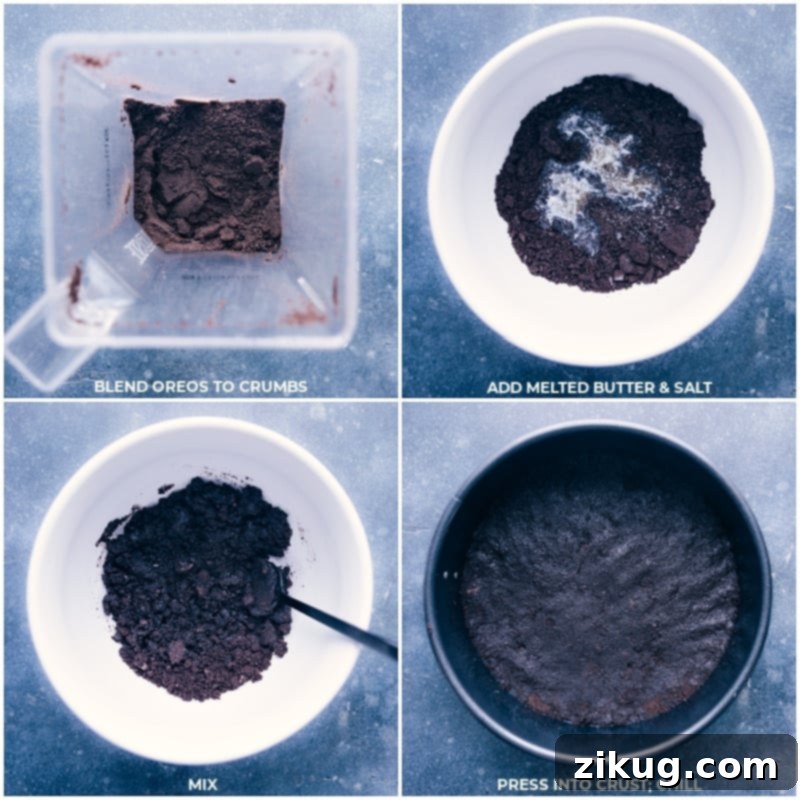
The foundation of any great cheesecake begins with an exceptional crust, and for this Frozen Hot Chocolate Cheesecake, an Oreo crust is simply unparalleled. Its rich chocolate flavor and satisfying crunch complement the creamy filling beautifully. Here are some essential tips for achieving a flawless Oreo crust:
- Crush the Oreos® thoroughly: The key to a smooth, evenly textured crust that cuts cleanly is to ensure your Oreo cookies are reduced to very fine crumbs. While larger pieces will still taste delicious, they can make slicing and serving more challenging, resulting in a less polished presentation. I highly recommend using a blender or food processor for this task, as they quickly achieve a uniform, fine crumb texture. Alternatively, if you don’t have these appliances, you can place the cookies in a large, sturdy plastic bag, remove as much air as possible, and use a rolling pin or a meat mallet to break them down into fine crumbs. Persistence is key here!
- Don’t add hot butter to the crushed Oreos: This might seem like a small detail, but it’s crucial for the crust’s quality. Allowing the melted butter to cool slightly before mixing it with the Oreo crumbs prevents a greasy, crumbly crust. Hot butter can dissolve some of the sugar in the cookies, leading to a less stable and overly oily texture. A slightly cooled, but still liquid, butter will bind the crumbs perfectly without making the crust slick.
- Leave the creme filling: There’s absolutely no need to painstakingly separate the creme filling from the chocolate cookies. The creme is your secret weapon, contributing both structure and an extra layer of sweetness to the crust. It helps bind the crumbs together, ensuring a firm, stable base that holds up well when sliced. This saves time and adds to the overall flavor complexity.
- Don’t add extra sugar: Many pie crust recipes, particularly those made with graham crackers (like in this Creamy Lemon Pie), call for additional granulated sugar. However, with an Oreo crust, the generous amount of sweetness already present in the cookie’s creme filling is more than sufficient. Adding more sugar would likely make the crust excessively sweet and could even affect its texture. Trust the Oreos to provide all the sweetness needed for a perfectly balanced crust.
- Press firmly for a solid base: Once your buttered crumbs are in the pan, use the bottom of a flat measuring cup or a glass to press them down very firmly. This compression is vital for creating a compact, sturdy crust that won’t fall apart when you cut into your frozen cheesecake.
Essential Tips for Frozen Hot Chocolate Cheesecake Success
Crafting this irresistible Frozen Hot Chocolate Cheesecake is straightforward, but a few key techniques will elevate your dessert from good to absolutely spectacular. Follow these tips to ensure a perfectly creamy, well-set, and beautifully sliceable cheesecake every time:
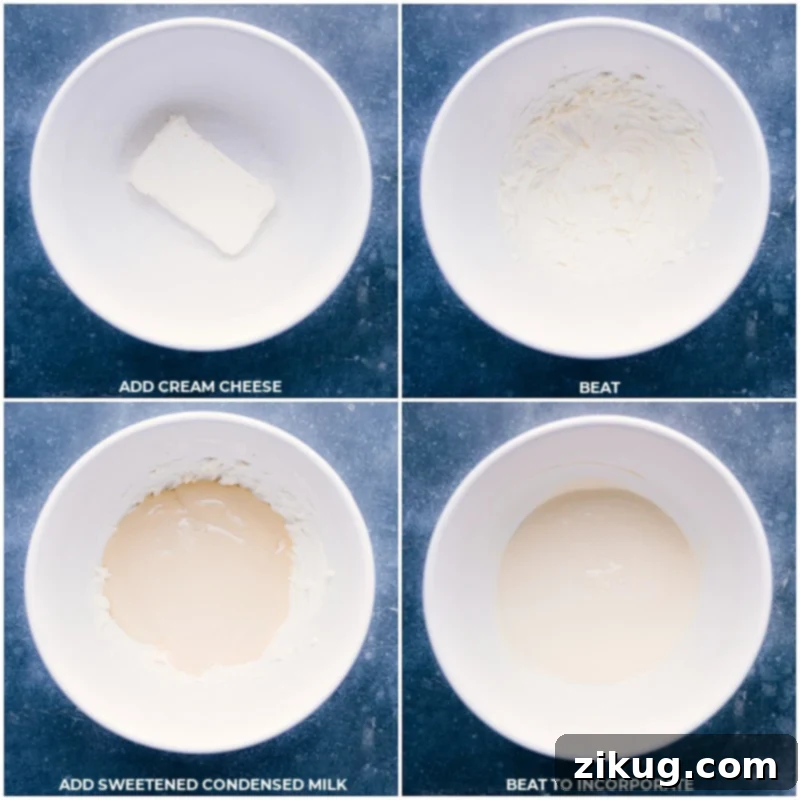
- Allow cream cheese ample time to reach room temperature: This is arguably the most crucial step for a silky-smooth cheesecake filling. If you attempt to use cold cream cheese, or try to rush the softening process by microwaving it, you will almost certainly end up with stubborn, unpleasant chunks in your cheesecake mixture. These lumps will not blend out, even with extensive beating. For best results, plan ahead and let your cream cheese sit out on the counter for at least an hour, or even longer if your kitchen is cool, until it’s perfectly soft and pliable. This ensures it creams beautifully and incorporates smoothly with the other ingredients.
- Grant plenty of time for the filling to set up: Patience is a virtue when making frozen desserts. The creamy filling requires a minimum of eight hours in the freezer to become completely firm and fully frozen. Do not be tempted to rush this crucial setting period. An under-frozen cheesecake will be difficult to slice and may not hold its shape. Additionally, once served, any leftover slices must be returned to the freezer promptly. This cheesecake begins to soften quite quickly at room temperature, losing its delightful frozen consistency.
- Cover the cheesecake tightly in the freezer: To prevent the dreaded freezer burn, which can compromise both the taste and texture of your dessert, it’s essential to cover the cheesecake properly. Once the filling is smoothed into the crust, cover the entire pan tightly with a layer of plastic wrap, pressing it directly onto the surface of the cheesecake to minimize air exposure. Then, add a second protective layer of aluminum foil. This dual barrier will safeguard your cheesecake, keeping it fresh and delicious for longer.
- Use a sharp, warm knife for clean slices: Achieving neat, attractive slices of this firm, frozen cheesecake requires a simple yet effective technique. Before each cut, run a sharp knife under very hot water, then quickly wipe it dry. The warmth from the blade will momentarily melt the surface of the cheesecake, allowing the knife to glide through smoothly and create a clean, precise slice. Repeat this warming and drying process for every cut; this cheesecake is wonderfully sticky and firm! Investing in a good quality set of sharp kitchen knives will make tasks like this much easier and more enjoyable.
- Opt for full-fat dairy products: For the ideal texture, richness, and proper setting of this frozen cheesecake, it’s highly recommended to use full-fat versions of cream cheese and sweetened condensed milk. Similarly, choose regular Cool Whip or homemade whipped topping made with heavy cream. Reduced-fat cream cheese, light versions of whipped topping, or evaporated milk will contain more water and less fat, which can lead to a wet, icy, and melty cheesecake that may not set up properly or achieve the desired creamy consistency. The full-fat ingredients are essential for that luxurious, indulgent cheesecake experience.
A Note on Cool Whip
While Cool Whip is traditionally known as a frozen non-dairy dessert topping, this particular recipe, due to ingredients like full-fat cream cheese and sweetened condensed milk, is not dairy-free. If you have specific dietary restrictions, please keep this in mind. For a potentially healthier or more controlled alternative, consider making your own whipped topping from scratch as detailed below.
Whip Up Your Own Homemade Topping
This Frozen Hot Chocolate Cheesecake recipe typically calls for one 8-ounce container of thawed Cool Whip®. If you’re seeking an alternative, perhaps a fresher option or one with fewer processed ingredients, you might consider TruWhip®. Alternatively, for those who prefer to make everything from scratch or desire a richer, dairy-based whipped topping, here’s a simple recipe to create your own homemade version. Just remember, while store-bought Cool Whip is a non-dairy product, our homemade whipped topping will, of course, be dairy-based.
Homemade Whipped Topping Ingredients:
- 1 cup heavy cream
- 1/2 cup powdered sugar
- 1/2 teaspoon vanilla extract
Instructions for Homemade Whipped Topping:
In a large mixing bowl, preferably chilled, or the bowl of a stand mixer fitted with a whisk attachment, combine the 1 cup of cold heavy cream, 1/2 cup of powdered sugar, and 1/2 teaspoon of pure vanilla extract. Begin by beating the ingredients on low speed to gently combine them. Once mixed, increase the speed to high and continue to whip until firm peaks form. This usually takes about 2 to 4 minutes, depending on your mixer and the temperature of your cream. Be careful not to overbeat, as it can quickly turn into butter! Once you achieve stiff, stable peaks, you’ve got freshly made whipped topping ready to be incorporated into this luscious Frozen Hot Chocolate Cheesecake.
More Delicious Desserts to Explore
If you loved this Frozen Hot Chocolate Cheesecake, you’re in for a treat! Here are more fantastic dessert ideas from the blog that are sure to satisfy your sweet tooth:
- Twix Cheesecake Bars
- Cheesecake Filled Raspberries
- Chocolate Pudding Pie
- Mini Blueberry Cheesecakes
- Mini Cheesecakes
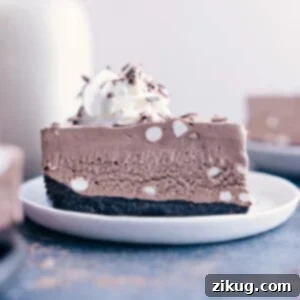
Frozen Hot Chocolate Cheesecake
Equipment
-
9-inch springform pan or 9-inch pie pan
-
Blender or food processor
-
Large mixing bowls
-
Electric mixer (handheld or stand mixer)
-
Spatula
Ingredients
- Cooking spray
- 4 tablespoons unsalted butter melted and cooled slightly
- 1-3/4 cups Oreo crumbs (from about 24 whole cookies, no need to remove creme)
- 1/16 teaspoon salt
- 1 (8-ounce) package cream cheese full-fat, softened to room temperature
- 1 (14-ounce) can sweetened condensed milk full-fat, see Note 1 below
- 3 milk chocolate flavored hot cocoa mixes with marshmallows, see Note 2 below
- 1/4 cup Dutch process cocoa powder (special dark preferred), see Note 3 below
- 1 (8-ounce) container frozen whipped topping like Cool Whip, completely thawed (or homemade whipped topping)
- 1/2 cup dehydrated marshmallows optional, see Note 4 below
- Whipped cream optional garnish
Instructions
-
Lightly grease a 9-inch springform pan or pie pan with cooking spray. Melt the butter in a microwave-safe bowl, then set it aside to cool for at least 5 minutes. (Using hot butter can result in a greasy crust.) In a blender or food processor, pulse the whole Oreo cookies (no need to separate the creme from the cookie) until they are all transformed into fine crumbs. Measure out 1-3/4 cups of these fine crumbs and transfer them to a large mixing bowl. Add the salt to the crumbs. Pour in all the cooled melted butter and mix thoroughly with a spatula until the crumbs are evenly moistened and well combined.
-
Empty the buttered crumb mixture into your prepared pan. Using your fingers, press the crumbs firmly and evenly into the bottom of the pan. If you’re using a pie pan, gently press some crumbs up the sides as well to form a complete crust. For a truly compact and firm crust, use the bottom of a flat 1-cup measuring cup to compress the crumbs thoroughly. This step is essential for a crust that holds its shape when sliced. Place the prepared crust in the freezer to chill while you prepare the cheesecake filling.
-
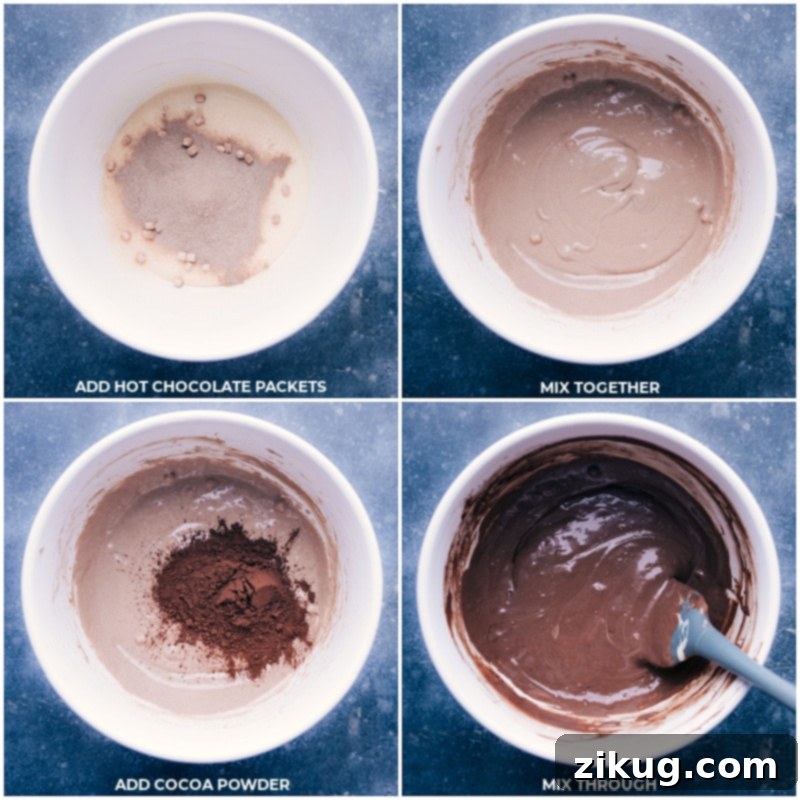
In a large mixing bowl, add the softened (room temperature) cream cheese and beat it with an electric mixer for about 45 seconds, or until it becomes light and creamy with no lumps. Pour in the sweetened condensed milk and continue to beat until the mixture is completely combined and smooth, scraping down the sides of your bowl with a spatula as needed to ensure everything is incorporated. Add the contents of the hot cocoa mixes and beat again until well combined. Finally, beat in the Dutch process cocoa powder until it is fully integrated, creating a uniformly chocolate-colored base.
-
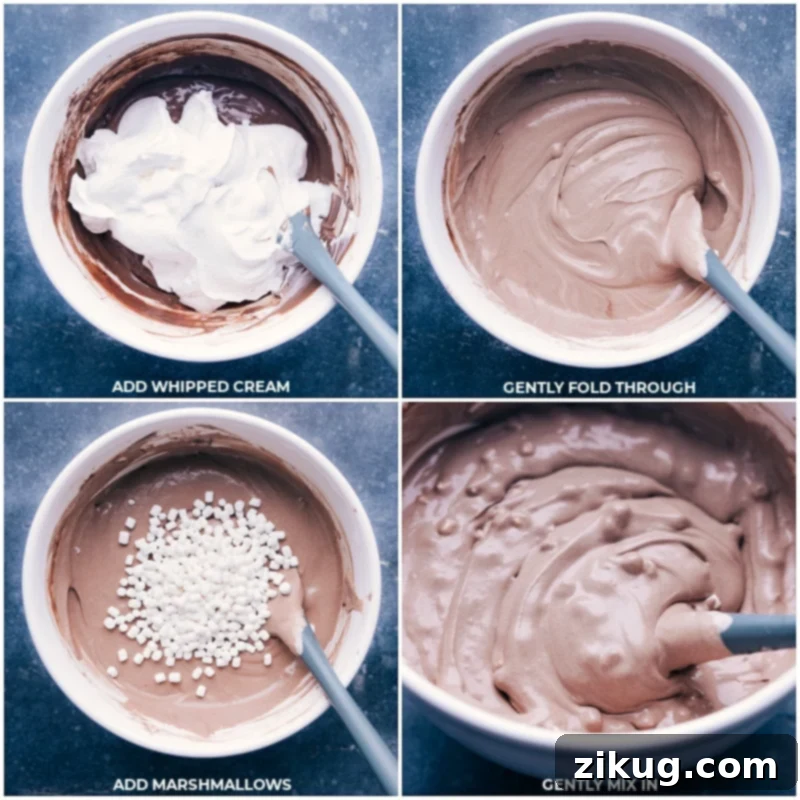
Gently add the completely thawed whipped topping (or your homemade whipped topping) to the chocolate-cheesecake mixture. Using a spatula, carefully fold the whipped topping into the mixture until it is fully integrated. Be sure to avoid overmixing, but ensure there are no dark streaks of the chocolate mixture remaining; the filling should be an even, light brown color. The goal is to keep the mixture airy. If using, now is the time to add the dehydrated marshmallows; gently fold them through the filling until evenly distributed.
-
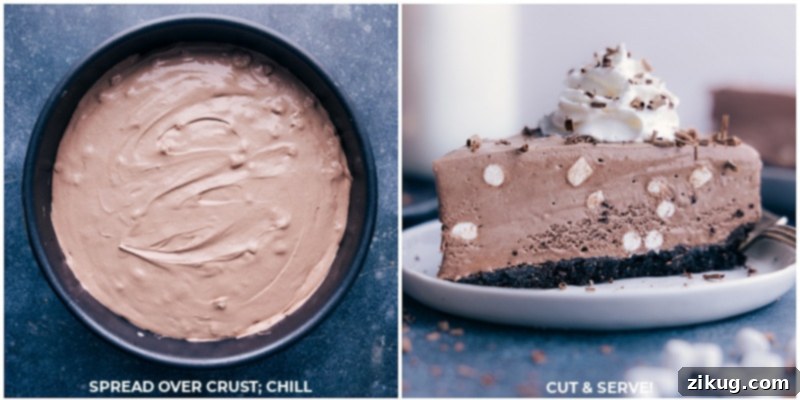
Pour the creamy hot chocolate filling over the chilled Oreo crust in the pan. Use a spatula to gently smooth the top surface of the cheesecake. Cover the pan tightly with plastic wrap and then foil to prevent freezer burn. Transfer the cheesecake to the freezer and allow it to freeze overnight, or for a minimum of 8 hours, until it is completely firm. When you are ready to serve, remove the cheesecake from the freezer and use a sharp knife (see Note 5 below for cutting tips) to cut it into individual slices. If desired, garnish each slice with additional whipped cream and a sprinkle of cocoa powder or mini marshmallows for an extra festive touch.
Recipe Notes
Note 2: Hot Cocoa Mixes: For this recipe, we’re specifically looking for packets of instant hot cocoa mix that typically include marshmallows. These add an authentic hot chocolate flavor and a subtle marshmallow swirl.
Note 3: Dutch Process Cocoa Powder: There are generally two types of cocoa powder: natural and Dutch-process. Dutch-process cocoa (often labeled “special dark”) has been treated with an alkali, giving it a darker color and a milder, less acidic, deeper chocolate flavor. I recommend using this type for a richer, more intense hot chocolate taste.
Note 4: Dehydrated Marshmallows: Ensure you purchase dehydrated marshmallows, which are small, crunchy, and often found in hot cocoa packets or cereals like Lucky Charms®. These are different from the soft, chewy jet-puffed marshmallows. Dehydrated marshmallows hold their shape and provide a delightful textural contrast in the frozen cheesecake. They are usually available near regular marshmallows or can be easily found online.
Note 5: Cutting and Serving Tips: To achieve clean slices, run a sharp knife under hot water, quickly dry it, and then make your cut. Repeat this process for each slice. This cheesecake is wonderfully firm when frozen and can be a bit sticky, so a warm knife helps immensely. Serve immediately or return promptly to the freezer.
Storage: Any leftover cheesecake slices should be covered tightly with plastic wrap and foil and returned to the freezer as quickly as possible to maintain their texture and prevent freezer burn.
Nutrition
Calories: 400kcal |
Carbohydrates: 58g |
Protein: 8g |
Fat: 17g |
Saturated Fat: 10g |
Polyunsaturated Fat: 1g |
Monounsaturated Fat: 4g |
Trans Fat: 0.2g |
Cholesterol: 24mg |
Sodium: 443mg |
Potassium: 277mg |
Fiber: 2g |
Sugar: 46g |
Vitamin A: 231IU |
Vitamin C: 1mg |
Calcium: 201mg |
Iron: 4mg
Nutrition information is automatically calculated and should only be used as an approximation. Individual results may vary based on specific ingredients and preparation methods.
Loved this recipe? Share your thoughts in the comments below!
Your feedback helps us create more delicious content.