

Indulge in Perfection: The Ultimate Small Batch Chocolate Chip Cookies
Small Batch Chocolate Chip Cookies are a dream come true for anyone craving warm, homemade goodness without the commitment of a full-sized recipe. These cookies are wonderfully soft and chewy, boasting delightful pockets of melty chocolate in every single bite. Designed for convenience, they come together quickly using just nine simple ingredients, and best of all, there’s no electric mixer needed. This recipe is your ticket to instant cookie gratification, ensuring you can enjoy freshly baked treats whenever the mood strikes, whether it’s for a cozy night in or a spontaneous sweet craving.
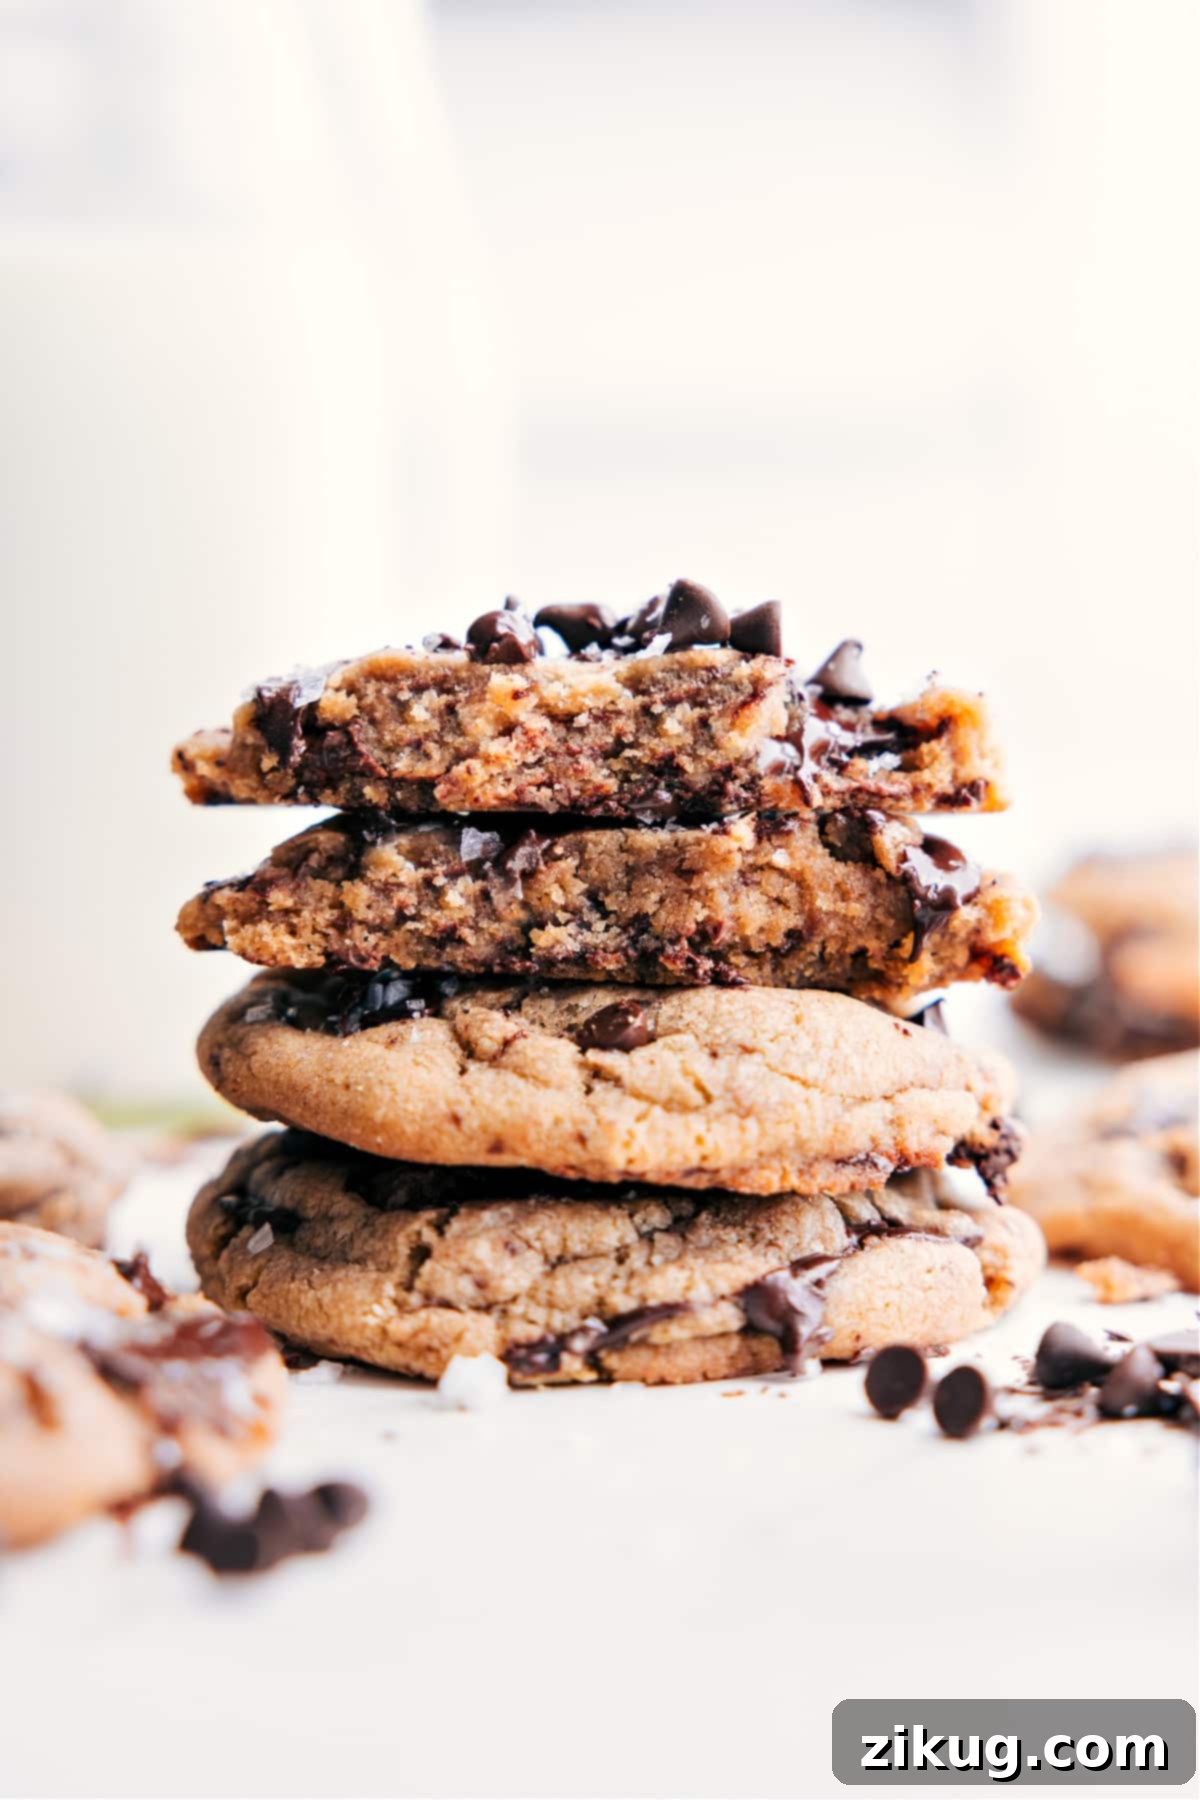

Author’s Notes
Built-In Portion Control (And Pure Joy!)
If you’ve been a regular visitor here, you’ll know my deep affection for cookies. They’re undeniably my favorite treat, and over the years, I’ve had the pleasure of sharing a multitude of cookie recipes, from classic favorites to inventive new delights. What I’ve consistently heard from you, my wonderful readers, is a desire for smaller batch sizes. There’s a real need for something quick and easy for those moments when a cookie craving hits unexpectedly, but you don’t necessarily need dozens upon dozens of cookies.
Whether it’s a sudden late-night urge for something sweet, or you’re simply baking a few special treats – perhaps for Santa on Christmas Eve, or just a small gathering – I truly understand! This recipe is crafted precisely for those moments. I’ve already shared some popular single-serving options, like my highly-rated Single-Serve Chocolate Chip Cookie (a consistent reader favorite!) and my personal go-to, the Single-Serve Double Chocolate Cookie. But this new small batch recipe offers something unique: nine perfectly sized cookies. It’s more than a solitary treat but less than a daunting two dozen. This quantity is just right for sharing with a close friend or two, or, let’s be honest, keeping all to yourself. 😉 It strikes the ideal balance, providing fresh, warm cookies without the temptation of having too many leftovers, making every cookie an enjoyable indulgence.
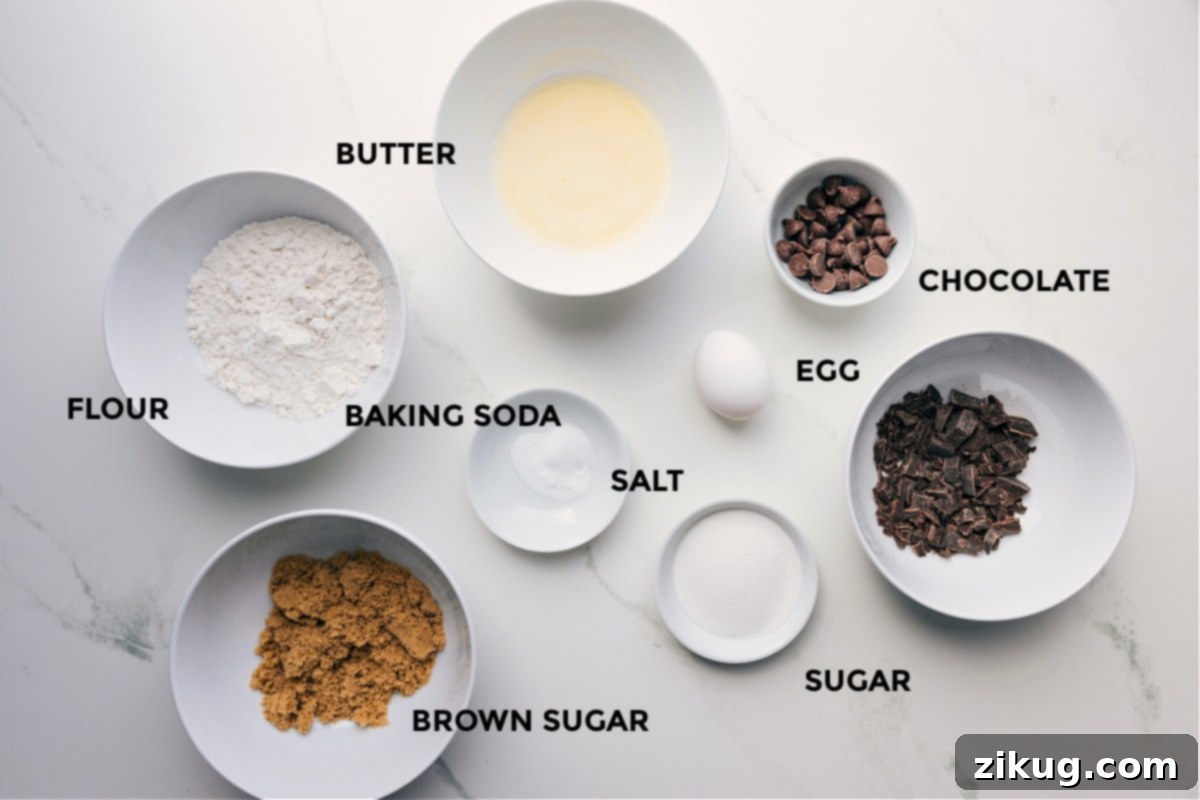
Key Ingredients for Small Batch Chocolate Chip Cookies
Crafting the perfect small batch chocolate chip cookie begins with understanding the role each ingredient plays. Here’s a closer look at what goes into these delectable treats, along with crucial tips to ensure your success:
- Butter: For the best texture, always melt your butter first, then allow it to cool completely before incorporating it into the batter. This step is vital because hot butter can lead to greasy, overly spread-out, and flat cookies. Cooled melted butter, on the other hand, helps create a dough that comes together beautifully and yields cookies with that coveted perfectly chewy texture. It aids in emulsification with the sugars, resulting in a richer, more uniform dough.
- Brown and White Sugar: The combination of both sugars is key to achieving a complex flavor and ideal texture. Brown sugar, with its molasses content, is responsible for adding significant moisture and contributing to the desirable chewiness of the cookies. Granulated (white) sugar, conversely, helps the cookies to spread evenly and contributes to those delightful, slightly crisp edges. Using both in harmony ensures you get the best of both worlds: a cookie that is both tender and has a pleasant structural integrity. Always ensure your brown sugar is fresh and soft for optimal results.
- Baking Soda: This leavening agent is critical for giving your cookies the proper rise and ensuring they spread just enough to create that classic chocolate chip cookie shape. To verify your baking soda is fresh and active, simply add a small amount to a bowl of boiling water. If it fizzes vigorously, it’s good to go! An active leavening agent is fundamental for light, airy cookies that aren’t too dense.
- Egg Yolk: This recipe specifically calls for only the egg yolk, a deliberate choice for small batch baking. The yolk acts as an excellent binder, holding the dough together, while adding richness and contributing to the cookie’s soft, chewy consistency. By omitting the egg white, we prevent adding too much moisture or excess protein, which is ideal for keeping the batch small and the texture just right. Don’t waste the egg whites—they’re perfect for an omelet, an egg skillet, or a quick egg wrap!
- All-Purpose Flour: Correctly measuring flour is paramount. Never pack the flour into your measuring cup; instead, use the “spoon and level” method (spoon flour into the cup, then level off with a straight edge). Over-packed flour will result in a dough that is too dry, leading to cookies that bake up cakey and crumbly rather than soft and chewy. Just enough flour ensures the perfect structure.
- Chocolate: For an exceptional chocolate experience, I highly recommend using a mix of chopped dark chocolate bar and milk chocolate chips. The chopped chocolate bar melts beautifully, creating luscious, gooey puddles throughout the cookie. The chocolate chips, on the other hand, tend to hold their shape better, providing delightful textural contrast. Feel free to customize this based on your preference: milk, dark, or semi-sweet chocolate, or any combination, will work wonderfully. Using high-quality chocolate elevates the flavor significantly.
Featured Comment
“This is the best chocolate chip recipe out there. I have made this dozens of time. It is consistently fabulous. Perfect thickness, buttery, not too sweet, chocolatey. A half batch doesn’t last more than a day in my house!”
– Janet
How to Make the Best Small Batch Chocolate Chip Cookies
Making these cookies is incredibly straightforward, perfect for bakers of all skill levels. With no fancy equipment required, you can whip up a batch whenever a craving hits.
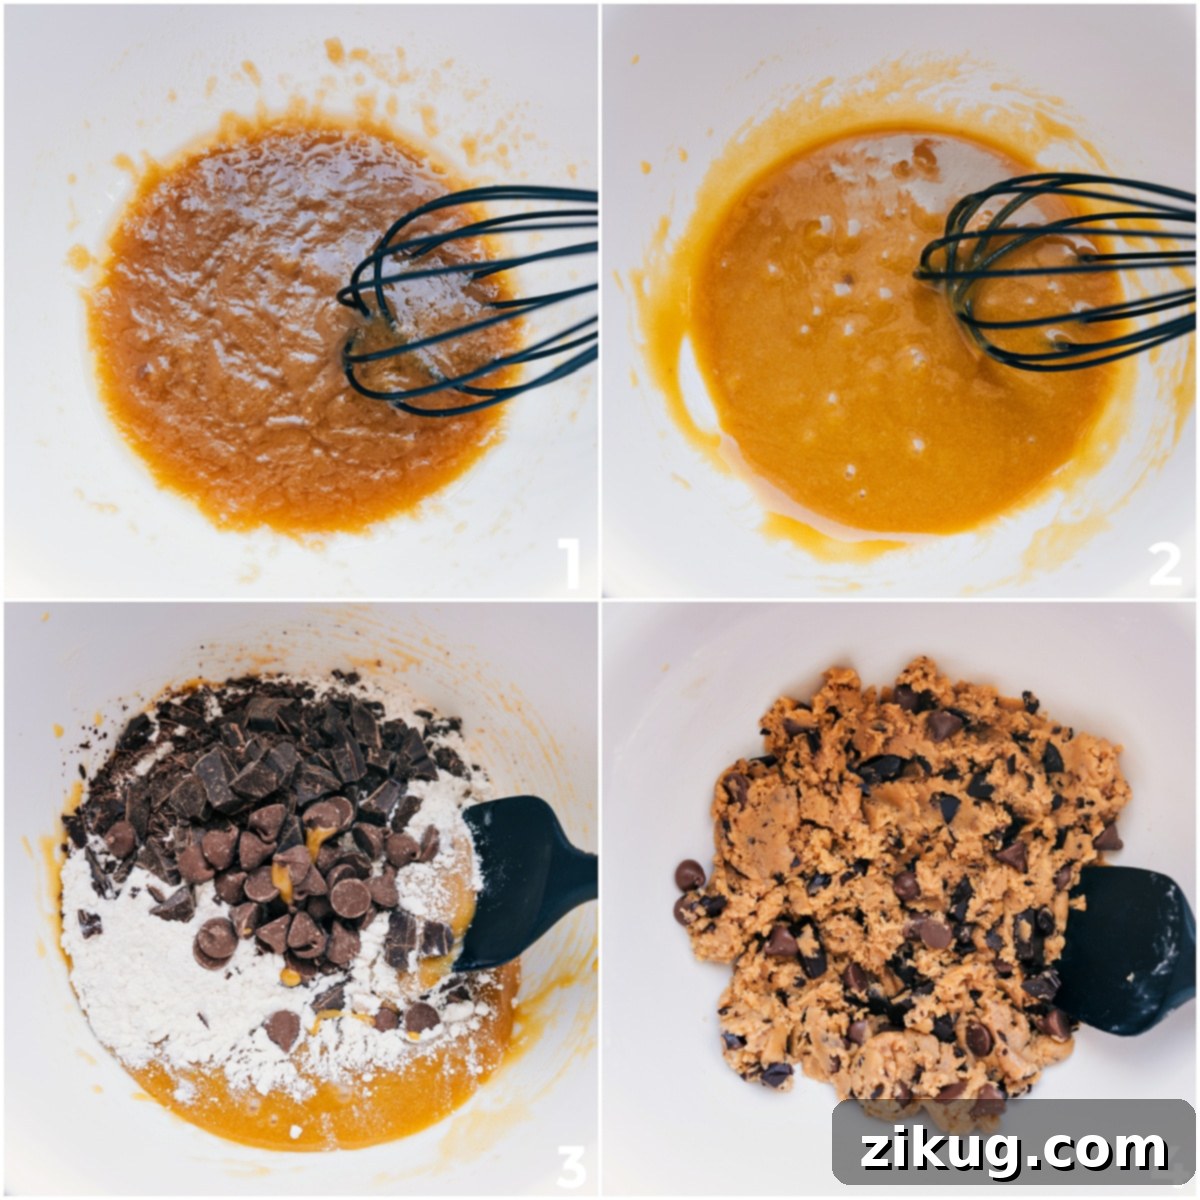
- Melt and Cool Butter: Start by melting the butter in a microwave-safe bowl. This creates the foundational richness. Crucially, allow this melted butter to cool completely to room temperature. This step is non-negotiable for achieving that ideal chewy texture and preventing your cookies from spreading too much during baking.
- Combine Wet Ingredients: Once the butter is cooled, whisk in both brown and granulated sugars. The brown sugar brings moisture and chewiness, while granulated sugar ensures crispy edges. Add vanilla extract for flavor depth and the single egg yolk, which acts as a powerful binder, contributing to the cookies’ tender crumb without making the batch too large. Whisk until the mixture is smooth, creamy, and beautifully emulsified.
- Incorporate Dry Ingredients: Next, whisk in the baking soda and salt. Baking soda provides the necessary lift, and salt balances the sweetness, enhancing all the flavors. Switch to a wooden spoon and gently fold in the all-purpose flour. Mix just until no dry streaks of flour remain. Be careful not to overmix, as this can develop the gluten too much, leading to tough cookies.
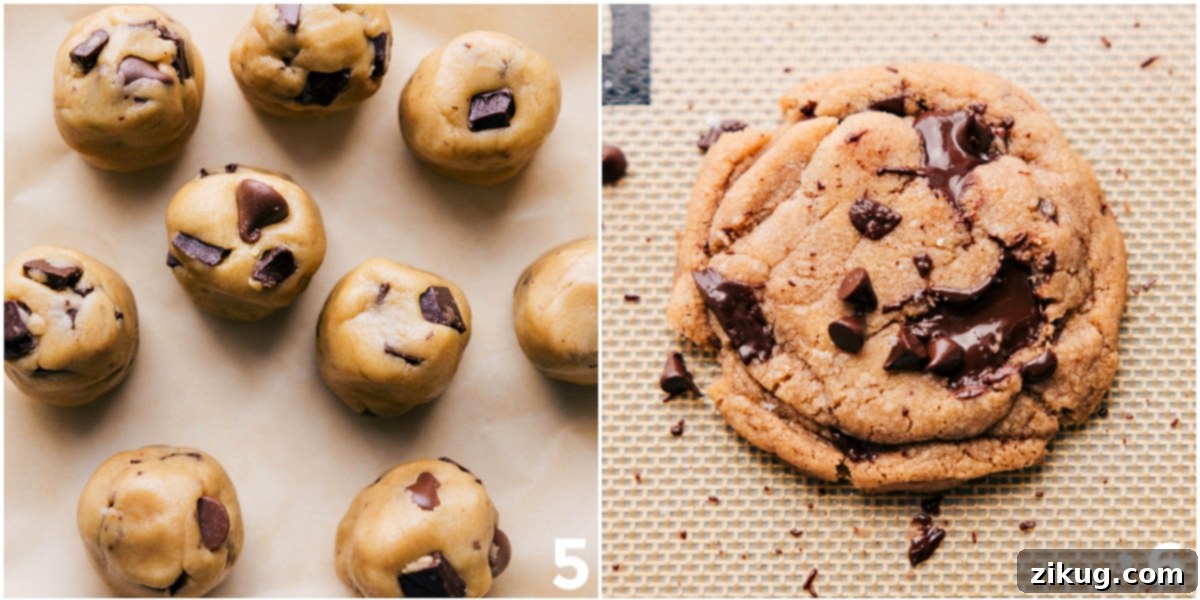
- Add Chocolate & Shape: Stir in your chosen chopped chocolate and chocolate chips. If needed, a gentle knead with your hands can help evenly distribute the chocolate throughout the dough. Divide the dough into nine equal portions. For thick, chewy cookies, roll each portion into a ball that is taller rather than wide, resembling a mini cylinder. This shape promotes a beautiful rise and prevents excessive spreading.
- Chill the Dough: This step is key for optimal flavor and texture. Place the dough balls on a parchment-lined sheet pan, cover, and refrigerate for at least 30 minutes, and up to 1 hour. Chilling allows the butter to solidify and the flavors to meld, resulting in thicker, chewier cookies with a richer taste.
- Bake to Perfection: Preheat your oven to 325°F (160°C). Arrange six dough balls on a silicone-lined baking sheet, ensuring ample space between them for even baking. Bake for 8–12 minutes, or until the edges are lightly golden and the tops appear set but not glossy. Remember, cookies continue to bake slightly after being removed from the oven, so avoid overbaking to maintain a soft, gooey center.
- Finishing Touches: Immediately after removing the cookies from the oven, use a metal spatula to gently press any uneven edges inward towards the center. This creates that desirable round, bakery-style shape. For an extra chocolatey flourish and a professional look, press a few additional chocolate chips onto the warm cookies. Let them cool on the baking sheet for 5 minutes before transferring them to a wire rack to cool completely. This cooling period on the hot pan allows them to firm up without losing their chewiness.
Storage Solutions for Your Small Batch Cookies
Ensuring your delicious cookies stay fresh and enjoyable for as long as possible is important. Here are the best ways to store both baked cookies and unbaked dough:
- Room Temperature: Once fully cooled, store your baked small batch chocolate chip cookies in an airtight container at room temperature. They will retain their delightful soft and chewy texture for up to 4 days. For optimal freshness, a piece of bread placed in the container can help keep them soft.
- Freeze Baked Cookies: For longer storage, baked cookies freeze beautifully. Once completely cool, place them in a freezer-safe bag or container, using parchment paper between layers to prevent sticking. Thaw them at room temperature when you’re ready to enjoy them, or gently warm in the microwave for a “fresh from the oven” experience.
- Freeze Unbaked Dough: You can also prepare the dough balls ahead of time and freeze them. Scoop the dough into individual balls and place them on a parchment-lined tray. Freeze until solid, then transfer the frozen dough balls to a freezer-safe bag. When a craving strikes, simply bake directly from frozen, adding an extra 1-2 minutes to the bake time. This is a fantastic way to always have fresh cookies on hand with minimal fuss.
More Irresistible Cookie Recipes You’ll Love:
If you’re as passionate about cookies as I am, you’ll be thrilled to explore these other fantastic recipes from my kitchen. Each one offers a unique twist on classic favorites, guaranteed to satisfy any cookie craving.
Desserts
Bakery Style Chocolate Chip Cookies
Desserts
Gluten Free Monster Cookies
Desserts
Coconut Oil Chocolate Chip Cookies
Desserts
Bakery Style Chocolate Cookies
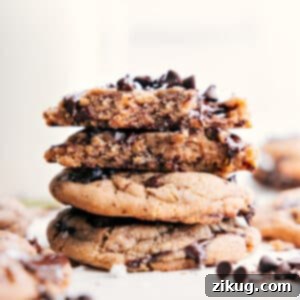
Small Batch Chocolate Chip Cookies
Chelsea Lords
10 minutes
10 minutes
1 hour
1 hour
20 minutes
9
cookies
Equipment
-
Sheet pan (15″ x 10″)
-
Silicone baking mat
-
Cooling rack
Ingredients
-
1/3 cup unsalted butter -
1/3 cup light brown sugar firmly packed -
3 tablespoons granulated sugar -
1/2 teaspoon vanilla extract -
1 large egg yolk see note 1 -
1/4 teaspoon salt -
1/4 teaspoon baking soda -
3/4 cup all-purpose flour -
1/3 cup chopped chocolate bar see note 2 -
2 tablespoons chocolate chips
Instructions
-
1. Melt the butter in a large microwave-safe bowl. Let it cool completely to room temperature. Do NOT add sugars while the butter is still hot, as this can result in greasy cookies that spread too much.
-
2. Once the butter has cooled, add both brown and granulated sugars. Use a whisk to briskly mix until well combined. Stir in the vanilla extract and the egg yolk. Continue whisking until the mixture is smooth, creamy, and emulsified.
-
3. Whisk in the baking soda and salt. Then, switch to a wooden spoon and stir in the all-purpose flour. Mix just until no dry streaks of flour remain in the dough. Avoid overmixing.
-
4. Add the chopped chocolate bar and chocolate chips. Mix them into the dough until evenly distributed. If necessary, gently knead the chocolate into the dough with your hands. Divide the dough into 9 equal portions, each weighing approximately 2 tablespoons or 38 grams. Roll each portion into a ball, shaping it to be taller rather than wide (like a mini cylinder).
-
5. Place the shaped dough balls on a parchment-lined sheet pan. Cover the pan and refrigerate the dough for at least 30 minutes, and up to 1 hour. This chilling process helps prevent spreading and enhances flavor.
-
6. Preheat your oven to 325°F (160°C). Arrange 6 of the chilled dough balls on a silicone-lined or parchment-lined baking sheet, ensuring there’s plenty of space between each cookie to allow for spreading. Bake for 8–12 minutes, or until the edges are just golden brown and the tops look set (they should not appear glossy). It’s crucial not to overbake for a soft, chewy interior.
-
7. Remove the cookies from the oven. While they are still hot, use a metal spatula to gently press any uneven edges in towards the center to create a perfectly round shape. If desired, press a few extra chocolate chips on top of each cookie for an enhanced bakery-style look. Let the cookies cool on the baking pan for 5 minutes before carefully transferring them to a wire rack to cool completely.
Recipe Notes
Note 2: I personally enjoy using a combination of chopped dark chocolate bars and milk chocolate chips for a balanced flavor and texture contrast. However, you are welcome to use all chocolate chips if that’s your preference. For the best cookie flavor, always opt for high-quality chocolate. You can use any type of chocolate you like best: milk, semi-sweet, dark, or even white chocolate.
Storage: Once baked and fully cooled, store cookies in an airtight container at room temperature for up to 4 days. To freeze: Scoop raw dough into balls and place them on a lined sheet until solid. Transfer them to a freezer-safe bag for long-term storage. When ready to bake, simply bake from frozen, adding an extra minute or two to the bake time.
Nutrition
Serving:
1
cookie
|
Calories:
168
kcal
|
Carbohydrates:
21.9
g
|
Protein:
1.6
g
|
Fat:
8.3
g
|
Sodium:
57.6
mg
|
Fiber:
0.5
g
|
Sugar:
13.5
g
Nutrition information is automatically calculated, so should only be used as an approximation.
Like this? Leave a comment below!
Your feedback helps others discover delicious recipes!
Expert Tips for Perfect Small Batch Chocolate Chip Cookies Every Time
Achieving bakery-quality results in a small batch is surprisingly simple when you follow these key tips:
- Chill the Dough: This isn’t just a suggestion; it’s a game-changer! Chilling the dough allows the butter to re-solidify, which significantly helps prevent the cookies from spreading too much during baking. More importantly, it gives the flavors time to meld and deepen, resulting in a more complex and satisfying taste. A well-chilled dough also contributes to a chewier texture.
- Shape the Dough Tall: Instead of rolling flat, wide discs, aim for taller, cylindrical dough balls. This strategic shaping encourages the cookies to spread less horizontally and rise more vertically, creating those coveted thick, chewy centers with beautifully crisp edges. It’s a small detail that makes a big difference in the final cookie architecture.
- Add Extra Chips After Baking: For that irresistible, bakery-style aesthetic and an extra burst of chocolate in every bite, gently press a few additional chocolate chips onto the warm cookies immediately after they come out of the oven. The residual heat will slightly melt them, creating luscious chocolate puddles on the surface.
- Watch the Bake Time Closely: Overbaking is the enemy of a soft, chewy cookie. Keep a close eye on your cookies during the last few minutes of baking. They should look set around the edges and slightly pale in the center. Remember, cookies continue to set and firm up as they cool on the hot baking sheet, so pulling them out a minute early is often better than a minute too late.
- Use Fresh Ingredients and Calibrate Your Oven: The quality of your ingredients directly impacts the flavor of your cookies. Ensure your baking soda is fresh and your butter is good quality. Additionally, oven temperatures can vary significantly. Consider checking your oven’s calibration with an oven thermometer to ensure consistent and accurate baking results.
- Don’t Overmix the Dough: Once you add the flour, mix just until the dry streaks disappear. Overmixing develops gluten, which can lead to tough, dense cookies rather than light and tender ones. Gentle folding is key.
- Parchment Paper or Silicone Mat: Always bake on a baking sheet lined with parchment paper or a silicone baking mat. This prevents sticking, ensures even heat distribution, and makes cleanup a breeze.
Small Batch Chocolate Chip Cookies: Your Questions Answered
While it’s tempting to skip this step for immediate gratification, chilling the dough is highly recommended. It serves several important purposes: it helps the butter solidify, which controls cookie spread for a thicker result, and it allows the flavors to deepen, enhancing the overall taste and chewiness. If you’re truly in a rush, you can skip it, but be prepared for cookies that spread more and might be slightly flatter. Also, watch the bake time closely, as unchilled dough will bake faster.
Absolutely! This recipe scales up beautifully. Simply double all the ingredient quantities, and you’ll yield approximately 18 delicious cookies. This is a perfect amount for a slightly larger gathering, or if you want to make a small freezer stash without committing to a massive batch.
Yes, freezing the dough is an excellent option for meal prepping your desserts! Scoop the prepared dough into individual balls and arrange them on a tray lined with parchment paper. Freeze until the dough balls are solid, then transfer them to a freezer-safe, airtight bag. When you’re ready for fresh cookies, simply bake them straight from frozen – just add an extra 1–2 minutes to the suggested bake time.
You certainly can! While I personally love the textural contrast and melty puddles created by using a mix of chopped chocolate bar and chocolate chips, using only chocolate chips will still result in a fantastic cookie. Feel free to use your preferred type and brand of chocolate chips, whether milk, semi-sweet, or dark.
Flat cookies are often caused by warm butter, insufficient flour, or not chilling the dough. Ensure your melted butter is completely cooled to room temperature. Double-check your flour measurement to ensure it’s not under-measured (use the spoon and level method). And most importantly, always chill your dough for at least 30 minutes; this helps the butter solidify and prevents excessive spreading.
For an extra chewy cookie, make sure to use fresh, firmly packed brown sugar, as it contributes significant moisture. Also, ensure you don’t overbake; pulling the cookies from the oven when the edges are just set and the centers are still slightly soft will result in a chewier final product once cooled.
Reader’s Notes & Tips
Tips & Variations from Chelsea’s Messy Apron’s Community
Don’t just take my word for it! Here’s what other passionate bakers and readers are saying about these incredibly popular Small Batch Chocolate Chip Cookies:
- Jennifer couldn’t stop at one batch, making them 3 times in a single week and declaring she’s “never going back to full batches.”
- Anna hailed them as “the best chocolate chip cookies she’s ever made,” a true testament to their deliciousness.
- Shannon perfectly summarized their appeal, calling them “the perfect half-batch to satisfy a craving” without overdoing it.
- Tatiana loved them so much she doubled the recipe because the first batch “disappeared in 10 minutes,” proving they’re truly irresistible.
- Lisa O adored the convenience, loving that they’re “one bowl and no mixer,” meaning “cookies can happen anytime!”
- Renee even made them overseas without specialized equipment and confirmed they are “her new go-to” recipe.
- Martrese experimented successfully by using whole wheat flour and Heath bar bits, reporting they “still turned out perfect.”
- Victoria confessed to eating “the whole half batch in two days” and confidently declared them “the perfect cookie.”
- Karen simply stated they were “the best cookies she’s ever had,” high praise indeed!
- Miranda announced she’s “tossing her old recipe” because “this one’s her new favorite,” highlighting its superior quality.
- LeAnn praised their simplicity and taste, saying they were “easy, tasted great, and were the best recipe she’s tried.”
- Kathy expressed her disbelief at “how good they were” and immediately “added them to her go-to list.”
These testimonials underscore the widespread appeal and success of this small batch recipe. It’s not just a recipe; it’s a community favorite for a reason!