
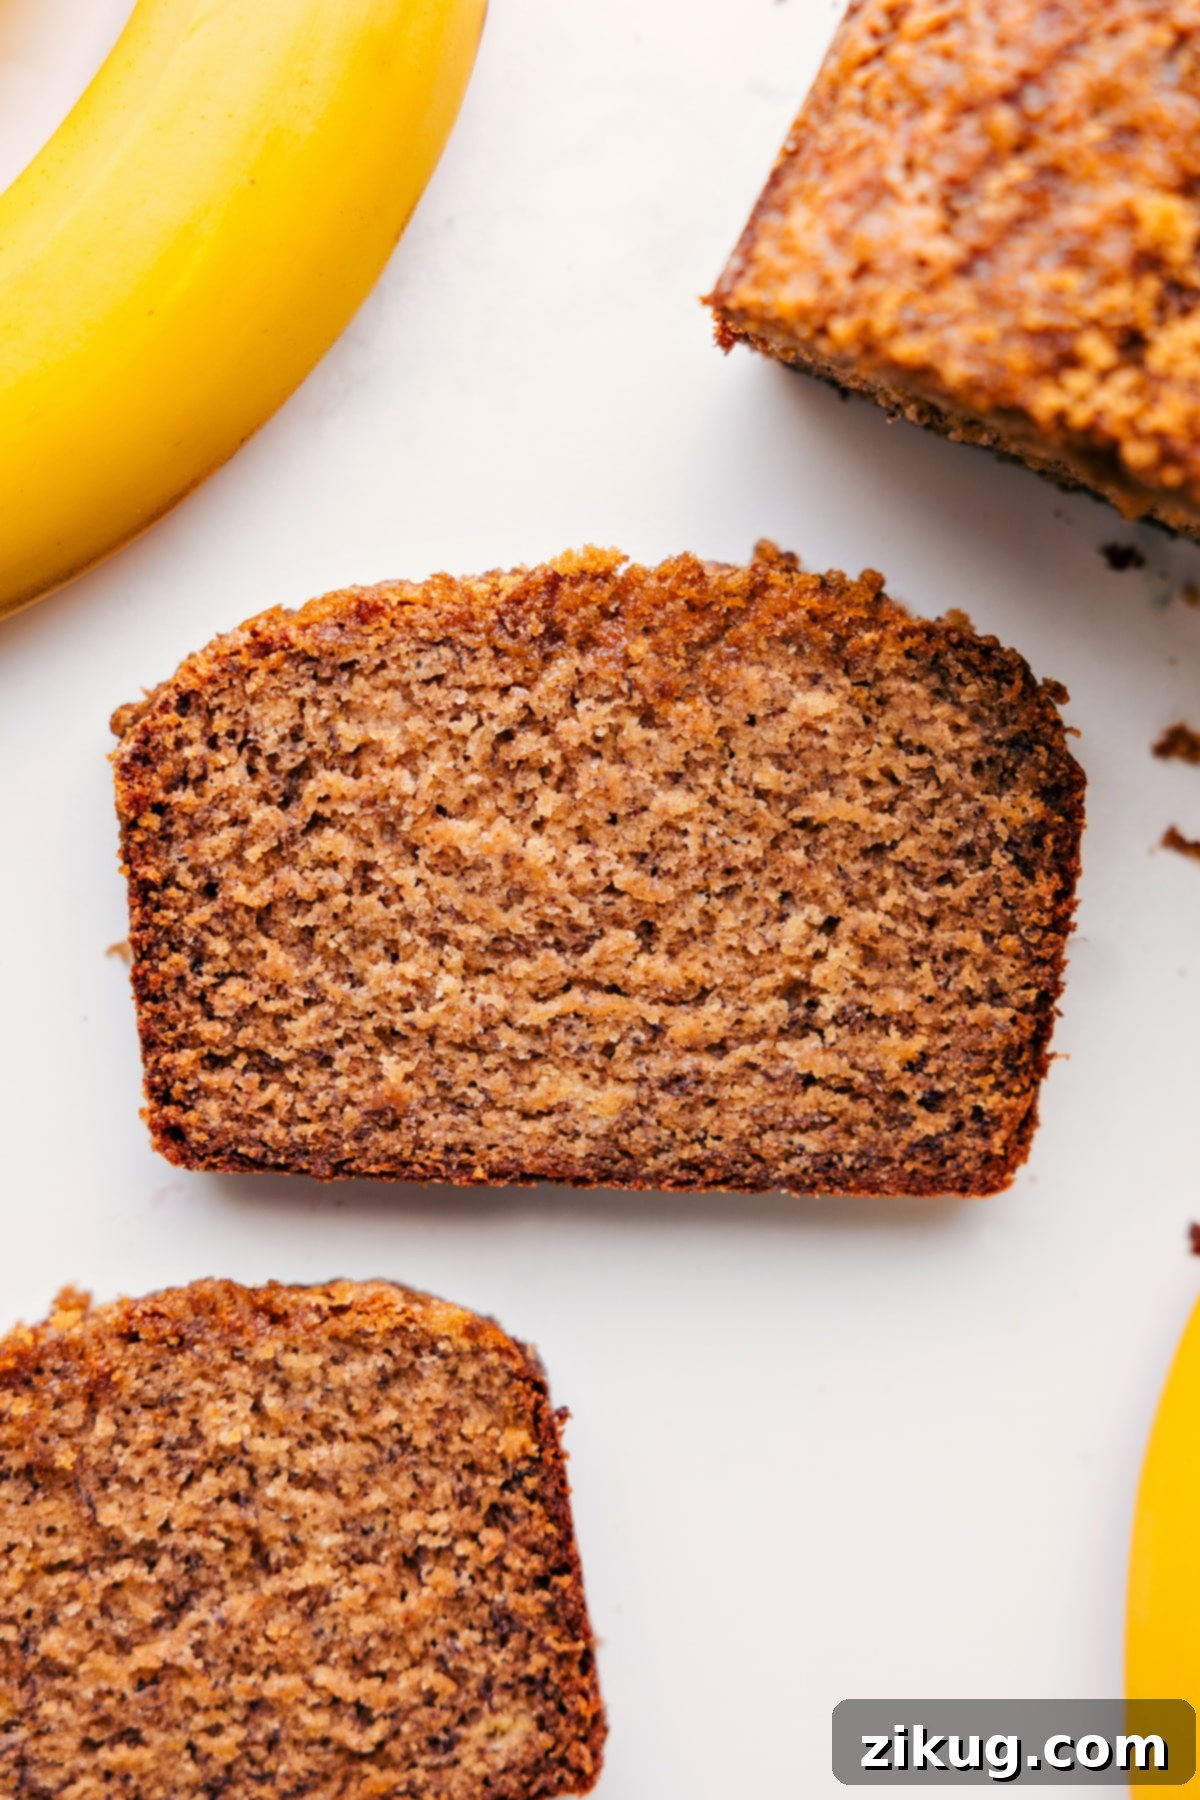
The Ultimate Greek Yogurt Banana Bread: Incredibly Moist & Irresistible
Welcome to your new go-to banana bread recipe! This **Greek Yogurt Banana Bread** is truly unparalleled. It’s exceptionally rich, perfectly sweet, and features an incredibly tender crumb that simply melts in your mouth. Whether you prefer it plain, spread with butter, or generously loaded with your favorite mix-ins like chocolate chips or nuts, every slice promises a perfect harmony of comfort and flavor. Prepare to elevate your banana bread experience, all thanks to one brilliant secret ingredient: Greek yogurt.
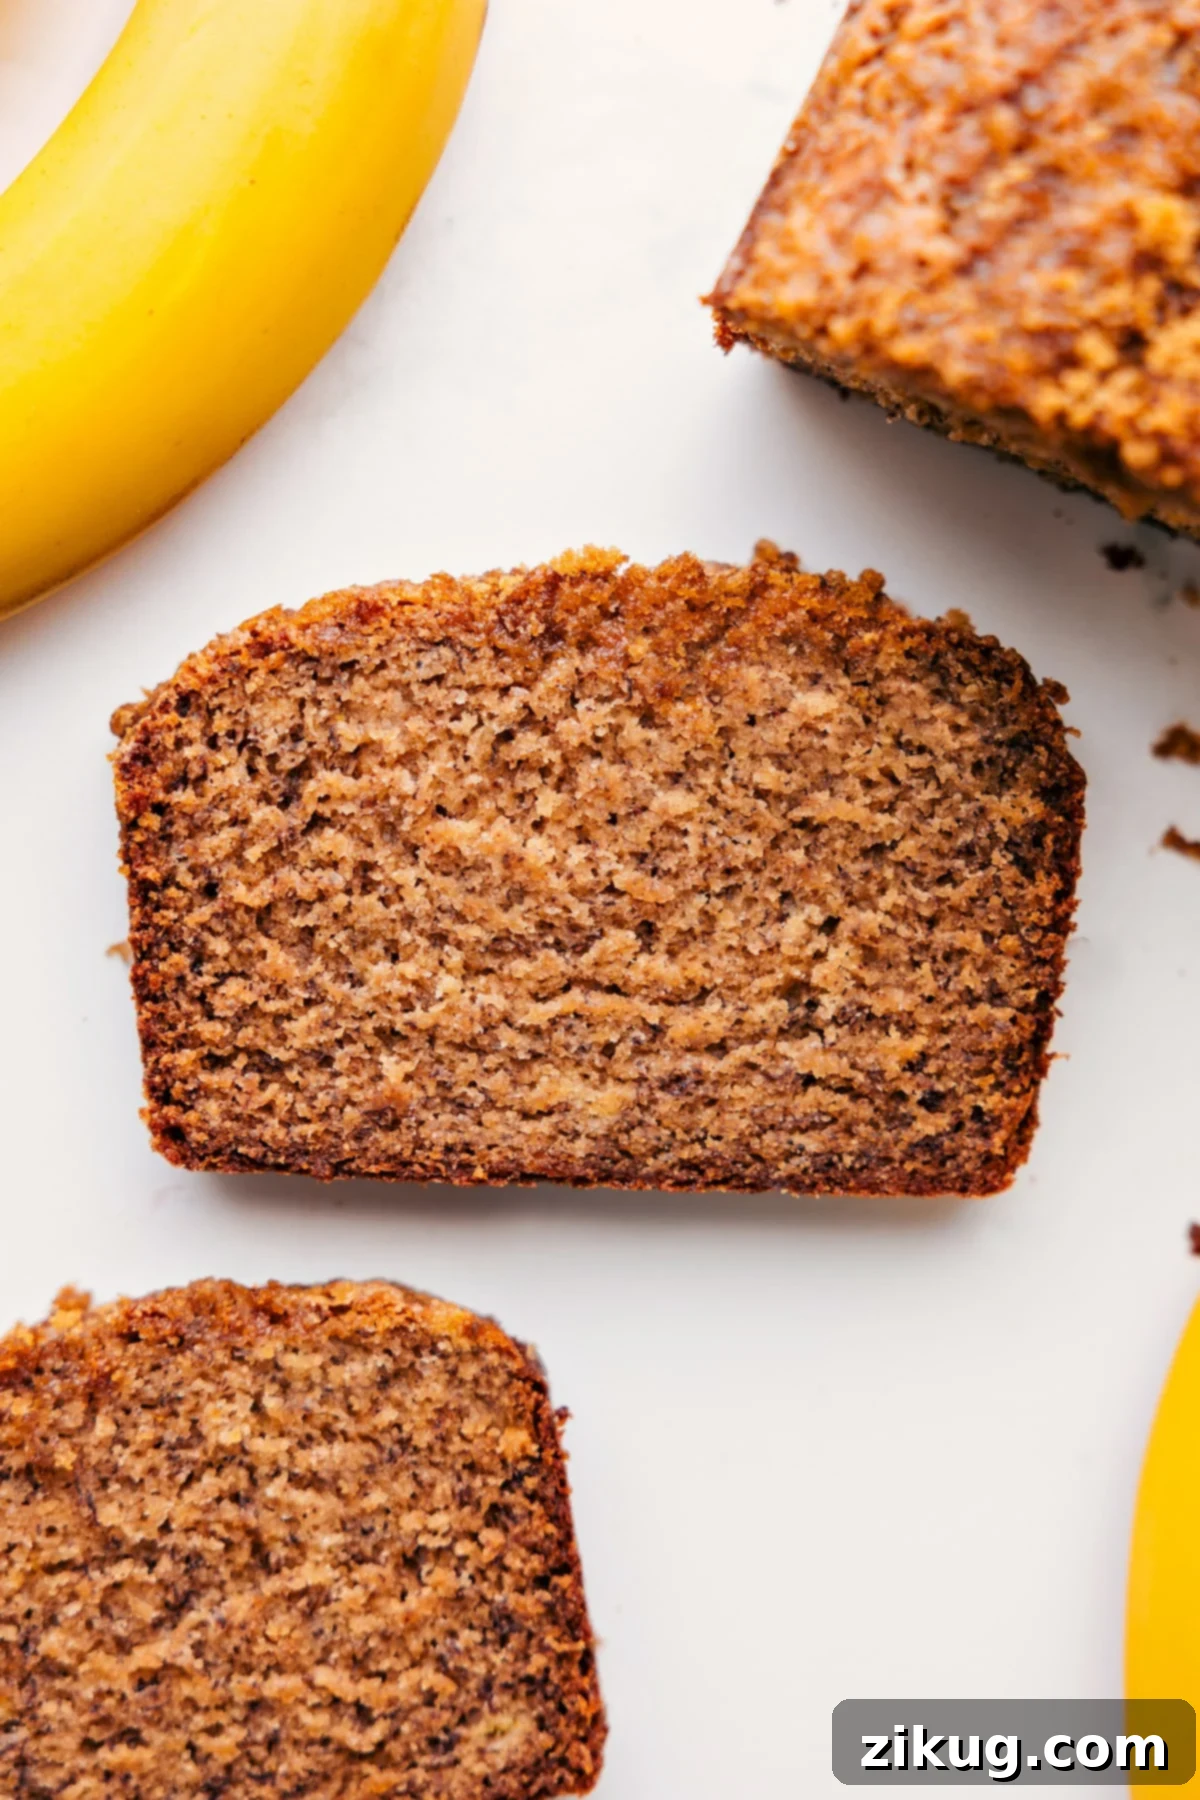

A Personal Note from the Author: Why This Recipe is a True Winner
The Secret’s in the Yogurt!
I’ve had the pleasure of developing numerous banana bread recipes for my site, but this particular **Greek Yogurt Banana Bread** recipe truly stands out. It possesses an undeniable quality that sets it apart. The magic lies in the Greek yogurt, which imbues the bread with an extraordinary richness and a texture so tender it’s almost cake-like. Each bite feels like a luxurious treat, making it an instant favorite.
This is my ultimate reliable recipe—the one I reach for when I need a guaranteed success. It’s consistently flavorful, delivers every single time, and I can assure you, it disappears incredibly fast. The best part? You don’t need any fancy, hard-to-find ingredients. Just a few very ripe bananas and standard pantry staples are all it takes to create this magnificent loaf. Feel free to customize it with a handful of chocolate chips, a sprinkle of nuts, or simply enjoy its pure, delightful flavor. It’s a win, every single time!
P.S. If you adore this recipe, you absolutely must try these Healthy Banana Muffins next!
Why Greek Yogurt is the Secret to the Best Banana Bread
The star of this recipe, Greek yogurt, plays a pivotal role in transforming ordinary banana bread into an exceptional culinary experience. Its inclusion delivers a host of benefits that ensure your loaf is nothing short of perfect. Here’s a deeper look into why Greek yogurt is a game-changer for banana bread:
- Unparalleled Moisture Retention: Greek yogurt is incredibly rich in moisture, which it infuses directly into the bread batter. This ensures a supremely soft and hydrated crumb, preventing the bread from drying out too quickly and keeping it fresh and delicious for days.
- Enhances Tender Texture: The natural acidity found in Greek yogurt beautifully interacts with baking soda, our primary leavening agent. This reaction creates a light and airy texture by helping the bread rise and preventing it from becoming overly dense or heavy. The acidity also gently breaks down gluten in the flour, contributing to a more tender and less tough final product.
- Adds Depth of Flavor and Subtle Tang: While not overpowering, the delicate tang of Greek yogurt provides a wonderful counterpoint to the sweetness of ripe bananas and brown sugar. This subtle acidity doesn’t make the bread taste sour; instead, it adds a nuanced layer of complexity to the flavor profile, creating a more balanced and sophisticated taste.
- Boosts Nutritional Value: Beyond its textural and flavor contributions, Greek yogurt also offers a healthy dose of protein. This makes your homemade banana bread a slightly more wholesome and satisfying option compared to traditional recipes, keeping you feeling fuller for longer.
- Creates a Rich, Velvety Mouthfeel: The inherent thickness and creaminess of full-fat Greek yogurt contribute to a wonderfully rich and velvety mouthfeel, elevating the overall indulgence of each slice.
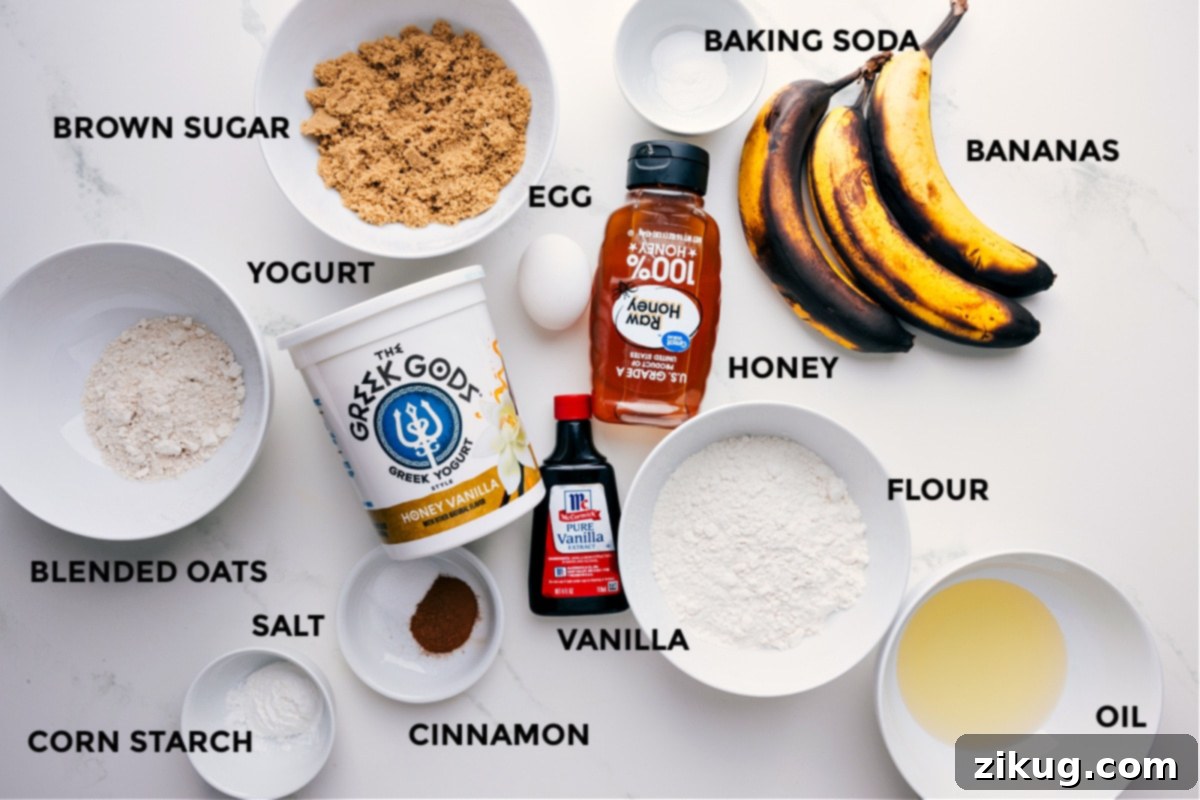
Essential Ingredients for Your Greek Yogurt Banana Bread
The foundation of any outstanding baked good lies in the quality and proper preparation of its ingredients. Here’s an in-depth look at what you’ll need and important considerations for each:
- Very Ripe Bananas: The most crucial ingredient for profound banana flavor and natural sweetness. Prioritize bananas with extensive brown spots or even entirely black skins. As bananas ripen, their starch converts into sugar, intensifying their sweetness and making them easier to mash. You’ll need approximately 2-3 medium-sized bananas to yield 1 cup of mashed banana.
- Full-Fat Vanilla Greek Yogurt: For optimal results, select a thick, full-fat Greek yogurt. The higher fat content is vital for contributing exceptional richness and moisture to the bread. A vanilla-flavored Greek yogurt, such as Greek God’s honey vanilla, enhances the aromatic profile and adds a subtle sweetness without requiring additional vanilla extract. If you opt for plain Greek yogurt, consider adding an extra splash of vanilla.
- Melted Coconut Oil: Coconut oil contributes a delicate, unique flavor and ensures a moist, tender crumb. It’s imperative to melt the coconut oil completely before measuring for precise quantities. Crucially, allow it to cool to room temperature before incorporating it into the batter; hot oil can prematurely cook the egg, leading to an undesirable texture.
- Light Brown Sugar: Brown sugar serves a dual purpose: it sweetens the bread and infuses it with additional moisture, along with a delectable caramel-like undertone. Ensure your brown sugar is soft and fresh; hardened sugar will be difficult to mix smoothly and can compromise the bread’s texture. Measure it lightly packed.
- Oat Flour (Homemade or Store-Bought): Oat flour imparts a wonderfully soft, slightly nutty flavor and a desirable tender texture. You can effortlessly make your own by blending old-fashioned or quick oats in a high-powered blender until they achieve a fine, flour-like consistency. This also lends a wholesome, hearty character to the bread.
- All-Purpose Flour: This forms the primary structural base of your banana bread. While oat flour adds distinct qualities, all-purpose flour provides the necessary gluten development for a well-risen, stable loaf.
- Large Egg: The egg acts as a crucial binder, helping to hold all the ingredients together and contributing to the bread’s overall structure, richness, and slight lift. Always ensure your egg is at room temperature for better emulsification and smoother incorporation into the batter.
- Honey: A small amount of honey not only boosts the sweetness but also adds another layer of complex, floral flavor that beautifully complements the bananas.
- Vanilla Extract: Pure vanilla extract is a flavor enhancer that ties all the other ingredients together, adding warmth and depth. Use a good quality extract for the best results.
- Baking Soda: This powerful leavening agent is essential for creating the bread’s lift. It reacts with the acidic components in the Greek yogurt and brown sugar, producing carbon dioxide bubbles that help the bread rise, resulting in a lighter, airier texture.
- Salt: A pinch of salt is vital for balancing the sweetness and intensifying the overall flavors, preventing the bread from tasting bland or one-dimensional.
- Cinnamon & Cornstarch: Cinnamon adds a classic, warm, and inviting spice that pairs perfectly with banana. Cornstarch is a secret weapon that helps to tenderize the crumb even further and gives the bread a subtle lightness.
Quick Tip: The Right Baking Pan Makes All the Difference!
Using the correct size loaf pan is fundamental for achieving a beautifully shaped and uniformly baked banana bread. My absolute favorite is an 8.5 x 4.5-inch loaf pan. These dimensions allow the bread to cook through consistently without the edges or top over-browning before the center is done. Proper pan preparation is also key to a clean release.
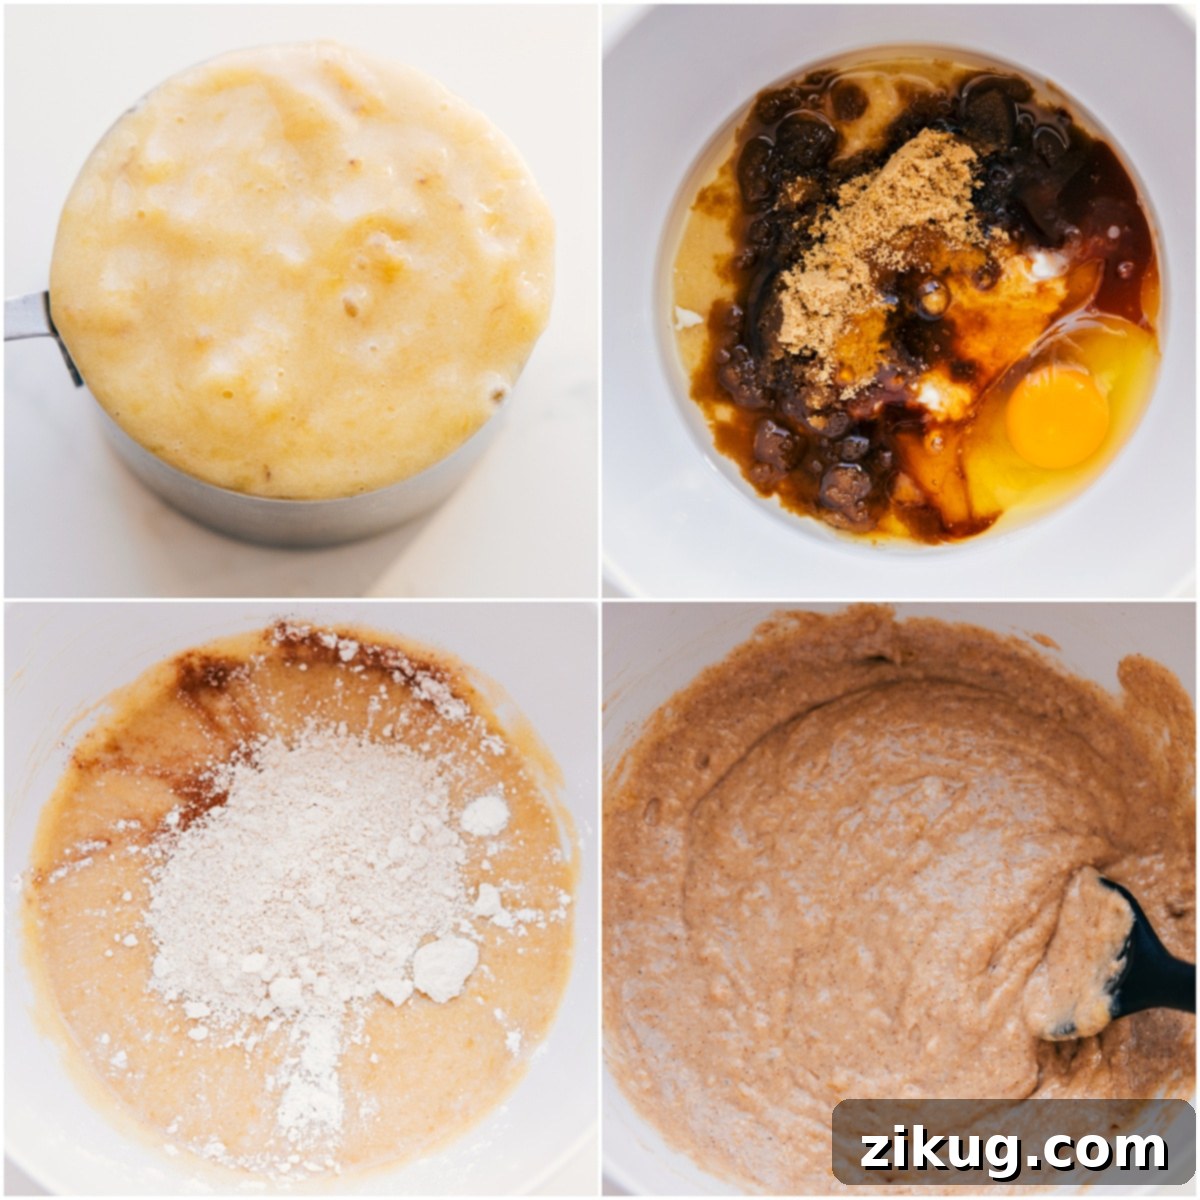
Baking Perfection: A Step-by-Step Guide to Greek Yogurt Banana Bread
Follow these detailed instructions to craft a truly irresistible loaf of Greek Yogurt Banana Bread:
-
Prepare Your Pan and Preheat Oven: Start by preheating your oven to 350°F (175°C). Liberally grease an 8.5 x 4.5-inch loaf pan with cooking spray or butter, then lightly dust it with flour, tapping out any excess. This crucial step ensures your bread releases easily after baking.
-
Mash the Bananas Thoroughly: Peel your very ripe bananas and place them in a large mixing bowl. Using an electric hand mixer (or a fork for a chunkier texture), beat them until they are completely smooth, resembling the consistency of applesauce. Ensure there are no large lumps, as this contributes to a more uniform bread texture. Measure out exactly 1 cup of this mashed banana, leveling off the top for precision.
-
Prepare Oat Flour (if homemade): If you’re making your own oat flour, add a heaping ⅓ cup of old-fashioned or quick oats to a high-powered blender. Blend until they are ground into a fine, flour-like powder. Once blended, carefully measure out a level ⅓ cup of the freshly made oat flour.
-
Combine Wet Ingredients (Temperature is Key!): In a separate large bowl, whisk together the mashed banana, Greek yogurt, large egg, vanilla extract, melted coconut oil (which must be cooled to room temperature, not hot!), honey, and light brown sugar. It’s vital that all wet ingredients are at room temperature to prevent the mixture from clumping and to ensure smooth emulsification. Whisk until the mixture is completely uniform and smooth.
-
Incorporate Dry Ingredients: Sprinkle the baking soda, salt, cinnamon, and cornstarch directly over the wet mixture. Whisk these dry ingredients in until they are just combined. Next, add the all-purpose flour and your prepared oat flour to the bowl. Switch from a whisk to an electric hand mixer on low speed (or use a sturdy spatula if mixing by hand) and mix *just* until the dry ingredients are fully incorporated into the wet. The golden rule here is **do not overmix**. Overmixing develops the gluten in the flour too much, which can result in a dense, tough bread instead of the desired tender, moist texture. A few small streaks of flour are perfectly acceptable.
-
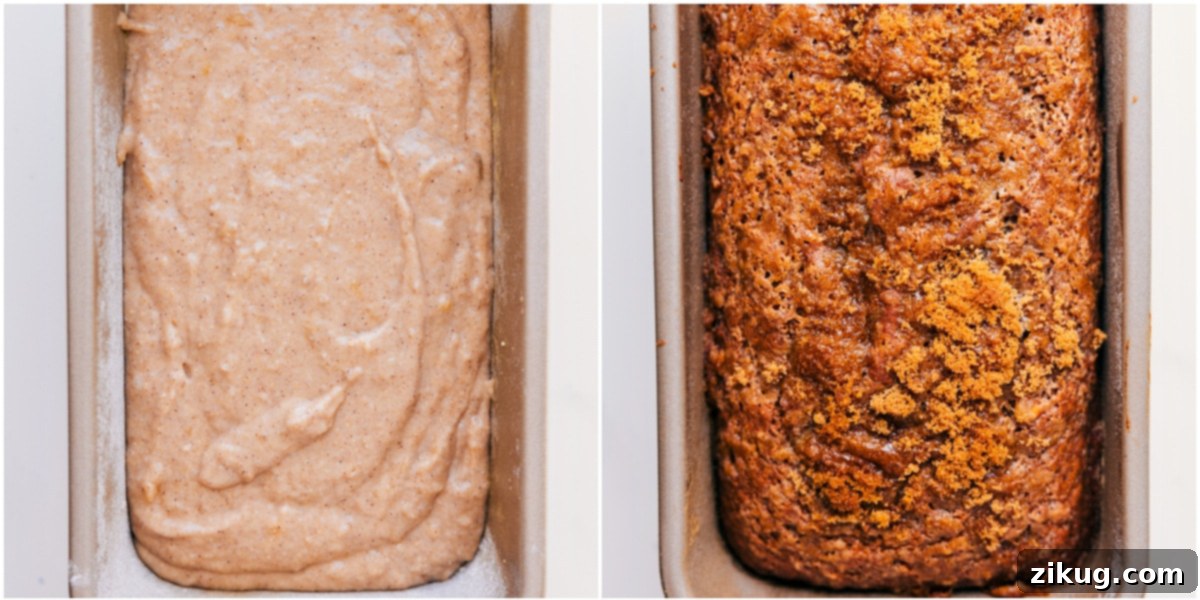
Pour Batter and Bake: Gently pour the finished batter into your meticulously prepared loaf pan. For an extra touch of sweetness and a beautifully caramelized crust, you have the option to sprinkle about 2 tablespoons of light brown sugar evenly over the top of the batter. Place the pan in your preheated oven and bake for 45–60 minutes. Baking times can fluctuate based on your oven’s calibration, so monitor it closely.
-
Cooling Process: Once baked, let the bread cool in the pan on a wire rack for at least 10 minutes. This allows the loaf to firm up slightly and prevents it from breaking apart when you remove it. After 10 minutes, carefully lift the bread out of the pan and transfer it directly to the wire rack to cool completely before slicing and serving. Cooling completely ensures the best texture and prevents a gummy interior.
How to Tell When Your Greek Yogurt Banana Bread Is Perfectly Baked
Achieving the perfect bake is critical for a truly moist and delicious banana bread. Here are the key indicators to look for, ensuring your loaf is cooked through without being overbaked:
- The Toothpick Test: This is the most reliable method. Insert a wooden toothpick, thin skewer, or a clean knife into the very center of the loaf. If it comes out clean, or with only a few moist crumbs attached, your bread is done. If you see wet batter, continue baking for another 5-10 minutes and test again.
- Golden Brown Top with Light Cracks: The top of the bread should display a beautiful, rich golden-brown hue, typically accompanied by some natural cracks. These cracks are a sign that the bread has risen properly and is baking through.
- Pulling Away from the Edges: As the banana bread finishes baking, you’ll observe it slightly pulling away from the sides of the loaf pan. This is an excellent visual cue indicating it’s cooked through and ready to be removed from the oven.
- Internal Temperature (For Precision): For absolute accuracy, use a digital thermometer. When inserted into the center of the loaf, it should register an internal temperature between 200°F and 205°F (93°C and 96°C).
- Foil Tenting to Prevent Over-Browning: If you notice the top crust is browning too rapidly before the center of the loaf is fully cooked, loosely tent the pan with a piece of aluminum foil for the remainder of the baking time. This will prevent the top from burning while allowing the interior to finish baking evenly.
Quick Tip: Need Ripe Bananas in a Pinch?
Don’t have overly ripe bananas but a sudden craving for banana bread strikes? Don’t fret! You can expedite the ripening process. Place unpeeled bananas on a baking sheet and bake them at 325°F (160°C) for about 15-20 minutes, flipping them halfway through. Their skins will turn completely black, and the insides will become wonderfully soft and sweet, mimicking naturally overripe bananas. Let them cool completely before peeling and mashing. This trick is a lifesaver for instant banana bread gratification!
Customizing Your Loaf: Delicious Variations and Add-ins
While this Greek Yogurt Banana Bread is absolutely divine on its own, its versatile base makes it an excellent canvas for personalization. Feel free to unleash your creativity with these delightful additions:
- Classic Chocolate Chips: A universally loved choice! Fold in ¾ to 1 cup of semi-sweet, dark, or milk chocolate chips into the batter before baking for pockets of melty sweetness.
- Crunchy Nuts: Toasted walnuts or pecans introduce a delightful crunch and an earthy, nutty flavor that complements the banana beautifully. Roughly chop ¾ to 1 cup and gently fold them into the batter.
- Chewy Dried Fruits: For a different texture and burst of sweetness, consider adding dried cranberries (craisins), finely chopped dates, or plump golden raisins.
- Aromatic Spices: Enhance the warm, comforting profile with a pinch of freshly grated nutmeg, a dash of allspice, or a touch of aromatic cardamom, all of which pair wonderfully with banana.
- Decadent Glazes or Toppings: Elevate your banana bread into a more indulgent dessert with a simple cream cheese glaze, a crunchy streusel topping, or a light dusting of powdered sugar just before serving.
- Alternative Yogurts: While thick, full-fat Greek yogurt is highly recommended, you can experiment with other full-fat yogurts (such as plain, or even sour cream) for a slight variation in tang and texture. Keep in mind the consistency might vary, and some thinner yogurts might require a slightly adjusted bake time.
- Shredded Coconut: For a tropical twist, add ½ cup of shredded unsweetened coconut to the batter.
- Lemon Zest: A tablespoon of fresh lemon zest can brighten the flavors and add a lovely aromatic note.
Delightful Serving Suggestions
This versatile Greek Yogurt Banana Bread is a fantastic treat at any time of day. Here are a few irresistible ways to enjoy your freshly baked loaf:
- Morning Bliss: Enjoy a warm slice alongside your morning coffee, tea, or a glass of milk for a comforting start to the day.
- Elevated Snack: A perfect mid-day pick-me-up that satisfies sweet cravings and provides a little energy boost.
- Decadent Dessert: Serve it slightly warmed with a generous scoop of vanilla bean ice cream or a dollop of freshly whipped cream for an indulgent dessert.
- With Spreads: Enhance its flavor and texture with a smear of softened butter, a dollop of cream cheese, a drizzle of honey, or a spread of your favorite nut butter.
- French Toast Style: For an adventurous breakfast, slice and dip in an egg wash, then pan-fry until golden for an incredible banana bread French toast!
Make Ahead And Storage Instructions
Keeping your delectable Greek Yogurt Banana Bread fresh and delicious is simple with these effective storage methods:
- Room Temperature: For short-term enjoyment (within 1-2 days), allow the banana bread to cool completely. Then, wrap it tightly in plastic wrap or store it in an airtight container at room temperature. This helps maintain its moistness.
- Refrigerator: To extend its freshness, place the completely cooled bread in an airtight container and store it in the refrigerator for up to 5 days. Chilling effectively preserves its moisture and prevents spoilage, especially if your kitchen is warm.
- Freezer (For Long-Term Freshness): Banana bread freezes exceptionally well, making it perfect for meal prep or enjoying a slice whenever a craving hits. Once the loaf has completely cooled, you can freeze it whole or in individual slices.
- For Whole Loaf: Wrap the entire loaf tightly in plastic wrap, followed by a layer of aluminum foil.
- For Slices: Wrap individual slices tightly in plastic wrap, then place them in a freezer-safe bag or airtight container.
Store in the freezer for up to 3 months. To enjoy, thaw frozen slices at room temperature for about an hour, or microwave them for 15–20 seconds (or slightly longer for a whole loaf) until warm and soft. Freezing in individual slices is particularly convenient for quick, portion-controlled indulgence!
Frequently Asked Questions (FAQ) About Greek Yogurt Banana Bread
Can I use regular yogurt instead of Greek yogurt?
While Greek yogurt is highly recommended for its thicker consistency and higher protein content, you can substitute it with regular plain yogurt. However, regular yogurt is thinner and contains more water, which might slightly alter the bread’s texture, potentially making it a little less dense or requiring a slightly longer baking time. For optimal results, if using regular yogurt, consider straining it through a coffee filter set over a sieve for about 30 minutes to remove excess moisture before adding it to the batter.
What if my bananas aren’t ripe enough?
No ripe bananas? No problem at all! As highlighted in the quick tip above, you can quickly ripen bananas. Place unpeeled bananas on a baking sheet and bake them at 325°F (160°C) for 15-20 minutes, ensuring you flip them halfway through. Their skins will turn entirely black, and the bananas inside will become wonderfully soft and sweet. Allow them to cool completely before peeling and mashing. This technique yields a flavor remarkably similar to naturally overripe bananas, perfect for your bread.
Why is my banana bread dense or dry?
Several factors can lead to a dense or dry banana bread. The most common culprit is overmixing the batter after adding the dry ingredients. Once you introduce the flour, mix *just* until everything is combined. Overmixing develops the gluten in the flour too much, resulting in a tough, dense texture. Other reasons can include using too much flour (always spoon and level your flour, don’t scoop directly from the bag), not enough leavening agent (baking soda), or baking the bread for too long.
Can I make this recipe gluten-free?
Yes, absolutely! To make this recipe gluten-free, simply replace the all-purpose flour with a high-quality 1:1 gluten-free baking flour blend that already contains xanthan gum. Additionally, ensure that your oat flour is certified gluten-free, as oats can sometimes be cross-contaminated during processing. The texture might be subtly different from the original, but it will still be incredibly delicious and moist.
Can I reduce the sugar in this recipe?
You can try reducing the sugar slightly, but remember that sugar not only adds sweetness but also contributes to the bread’s moisture and tenderness. Bananas already provide a lot of natural sweetness, especially very ripe ones. If you reduce the sugar too much, the texture might change, and the bread might be less moist. I recommend starting by reducing it by ¼ cup and seeing if you like the result.
Explore More Delightful Banana Recipes:
Craving More Banana Goodness?
Desserts
Chocolate Banana Muffins
Desserts
Healthy Banana Muffins
Snacks
Banana Bites (2 Ways!)
Beverages
Easy Banana Smoothie
Greek Yogurt Banana Bread
Chelsea Lords
15 minutes
45 minutes
1 hour
2 hours
10 thick slices of bread
Video
Equipment
-
8.5 x 4.5-inch bread pan
Ingredients
- 1 cup mashed banana (from 2 to 3 very ripe bananas)
- 1/2 cup vanilla Greek yogurt
- 1 large egg
- 1-1/2 teaspoons vanilla extract
- 5 tablespoons coconut oil (melted and cooled)
- 2 tablespoons honey
- 1/2 cup light brown sugar (lightly packed)
- 1 teaspoon baking soda
- 1/4 teaspoon salt
- 1 teaspoon cinnamon
- 1 tablespoon cornstarch
- 1 cup all-purpose flour
- 1/3 cup oat flour (from old-fashioned or quick oats)
Instructions
-
Preheat oven to 350°F (175°C). Grease and lightly flour an 8.5 x 4.5-inch bread pan; set aside.
-
Peel bananas and mash them thoroughly in a large bowl with an electric hand mixer until smooth, similar to applesauce consistency. Measure out 1 cup and level off the top.
-
If making oat flour, add a heaping ⅓ cup of old-fashioned or quick oats to a high-powered blender and blend until fine. Measure out a leveled ⅓ cup.
-
In a large bowl, whisk together the mashed banana, Greek yogurt, egg, vanilla extract, melted (but not hot) coconut oil, honey, and light brown sugar until smooth. Ensure all wet ingredients are at room temperature to prevent clumping.
-
Add baking soda, salt, cinnamon, and cornstarch on top of the wet mixture and whisk until combined. Then, add the all-purpose flour and oat flour. Switch to an electric hand mixer and beat *just* until combined, taking care not to overmix.
-
Pour the batter into the prepared pan. Optionally, sprinkle 2 tablespoons of brown sugar on top for a sweet crust. Bake for 45–60 minutes, or until a toothpick inserted in the center comes out clean or with a few moist crumbs, and the bread pulls away from the edges. If the top browns too quickly, tent with foil.
-
Once baked, let the bread cool in the pan for 10 minutes before carefully lifting it out onto a wire rack to cool completely. This crucial step helps prevent it from breaking apart and ensures the perfect texture.
Recipe Notes
Storage: Store the completely cooled bread in an airtight container in the fridge for up to 5 days. For longer storage, wrap individual slices tightly in plastic wrap and then aluminum foil, and freeze for up to 3 months. Microwave frozen slices for 15-20 seconds to thaw and warm for a quick treat.
Nutrition
Calories: 182kcal |
Carbohydrates: 26g |
Protein: 2.8g |
Fat: 7.5g |
Cholesterol: 19mg |
Sodium: 199.3mg |
Fiber: 1.1g |
Sugar: 12.4g
Nutrition information is automatically calculated and should only be used as an approximation. Actual values may vary based on specific ingredients and preparation methods.
Conclusion: Bake the Best Banana Bread Today!
There you have it – the ultimate recipe for Greek Yogurt Banana Bread that promises to deliver unparalleled moisture, tenderness, and flavor with every single slice. This recipe is designed to be a foolproof favorite, perfect for seasoned bakers and beginners alike. The unique touch of Greek yogurt elevates it far beyond a standard loaf, making it a truly unforgettable treat. So, gather your perfectly ripe bananas, whisk up this delightful batter, and get ready to experience a banana bread that will undoubtedly become a staple in your home. Happy baking!
Loved this recipe? Share your thoughts below!