

Unwrap the magic of the holidays with these four delightful, easy, and foolproof Christmas treats that are perfect for involving the kids! Whether you’re looking for homemade gift ideas, festive desserts for your family gatherings, or just a sweet way to celebrate, these recipes for Peppermint Bark Cookies, Toffee Cashew Clusters, Microwave Fudge, and Rudolph Bites are sure to become new holiday favorites. Get ready to create lasting memories and enjoy delicious sweets!

Irresistible Peppermint Bark Cookies
Embrace the festive spirit with these incredibly simple yet utterly delicious Peppermint Bark Cookies. Combining the classic crunch of chocolate cookies with a smooth, refreshing peppermint white chocolate coating, these treats are a visual delight and a taste sensation. They’re perfect for holiday parties, cookie exchanges, or as thoughtful homemade gifts. Best of all, they come together in minutes, making them an ideal project for busy bakers and little helpers alike.
A Few Quick Tips for Perfect Peppermint Bark Cookies:
- For the most exquisite flavor and the smoothest melt, I wholeheartedly recommend using a high-quality white chocolate. Brands like Guittard or Ghirardelli consistently deliver superior results, ensuring your cookies are not only beautiful but also wonderfully creamy. Cheaper white chocolates can sometimes seize or not melt as evenly, compromising the final texture.
- Always line your baking pan with parchment paper. This simple step is a game-changer for easy removal, preventing sticking and making cleanup a breeze. It also helps the peppermint bark set smoothly and ensures your cookies look professionally made.
Recommended Products to Make Your Baking Easier:
- Grasshopper Cookies: The perfect base for that delightful chocolatey crunch.
- Food Processor: Essential for crushing candy canes into fine, festive sprinkles.
- Peppermint Candy Canes: For that iconic holiday flavor and vibrant visual appeal.

Saved
Pin
Peppermint Bark Cookies
Video Tutorial
Equipment
-
Blender or food processor for crushing candy canes.
-
Large sheet pan (approximately 15″ x 21″)
-
Parchment paper
Ingredients
Gather these simple ingredients to create your festive peppermint bark cookies:
- 1 (10-ounce) package Grasshopper Cookies
- 1 (11-ounce) bag white chocolate chips see note 1
- 2 teaspoons vegetable oil
- 1/2 teaspoon peppermint extract optional, not mint, for extra flavor.
- 7 full-sized candy canes
Instructions
Follow these simple steps to create delightful peppermint bark cookies:
-
To begin, place the Grasshopper cookies in the fridge. This keeps them firm while you prepare the other components. Next, crush the candy canes into fine crumbs using a blender or food processor – aim for a texture similar to coarse sand. Line a large sheet pan with parchment paper, which will prevent the cookies from sticking and make transfer easy.
-
Pour the white chocolate chips into a large, microwave-safe bowl. Add the vegetable oil and, if you desire an extra punch of minty flavor, the peppermint extract (ensure it’s peppermint, not spearmint). Mix all these ingredients well until thoroughly combined.
-
Microwave the chocolate mixture in short bursts of 20 seconds. After each burst, stir the chocolate for approximately 10-15 seconds. Continue this process until the chocolate is completely melted and smooth. Patience is key here; slow melting prevents burning and ensures a beautiful, glossy finish.
-
Melting the chocolate patiently and slowly is crucial to prevent it from burning or seizing. The ingredients continue to heat even after being removed from the microwave, so thorough stirring between bursts is vital. For larger quantities, consider separating the white chocolate into two batches and melting them one at a time to maintain better control.
-
Remove the chilled cookies from the freezer (or fridge). One by one, place each cookie on a fork and hold it over the bowl of melted white chocolate. Use a spoon to generously pour and coat the cookie with the warm chocolate.
-
Gently tap the fork on the side of the bowl to allow any excess chocolate to drip off, ensuring a smooth and even coating without thick puddles.
-
Carefully transfer the dipped cookie onto the prepared sheet pan, leaving a little space between each cookie.
-
Immediately after placing each cookie on the pan, sprinkle the crushed candy canes over the top before the chocolate sets. This ensures the peppermint pieces adhere beautifully. Repeat this process for all remaining cookies.
-
For an extra touch of fun and variety, consider dipping only half of some cookies in the melted chocolate. This creates a charming visual contrast and offers a different bite.
-
Allow the decorated cookies to harden completely at room temperature. This can take about 30-60 minutes, depending on the warmth of your kitchen. Once firm, they are ready to be enjoyed or packaged for gifting!
Recipe Notes
Storage: To maintain their freshness and crispness, store any leftover Peppermint Bark Cookies in an airtight container at room temperature for up to one week. For slightly longer preservation, you can refrigerate them. When storing, arrange them in a single layer or separate layers with parchment paper to prevent them from sticking together.
Nutrition Information
Nutrition information is automatically calculated and should only be used as an approximation.
Foolproof Microwave Fudge: Easy Holiday Delight
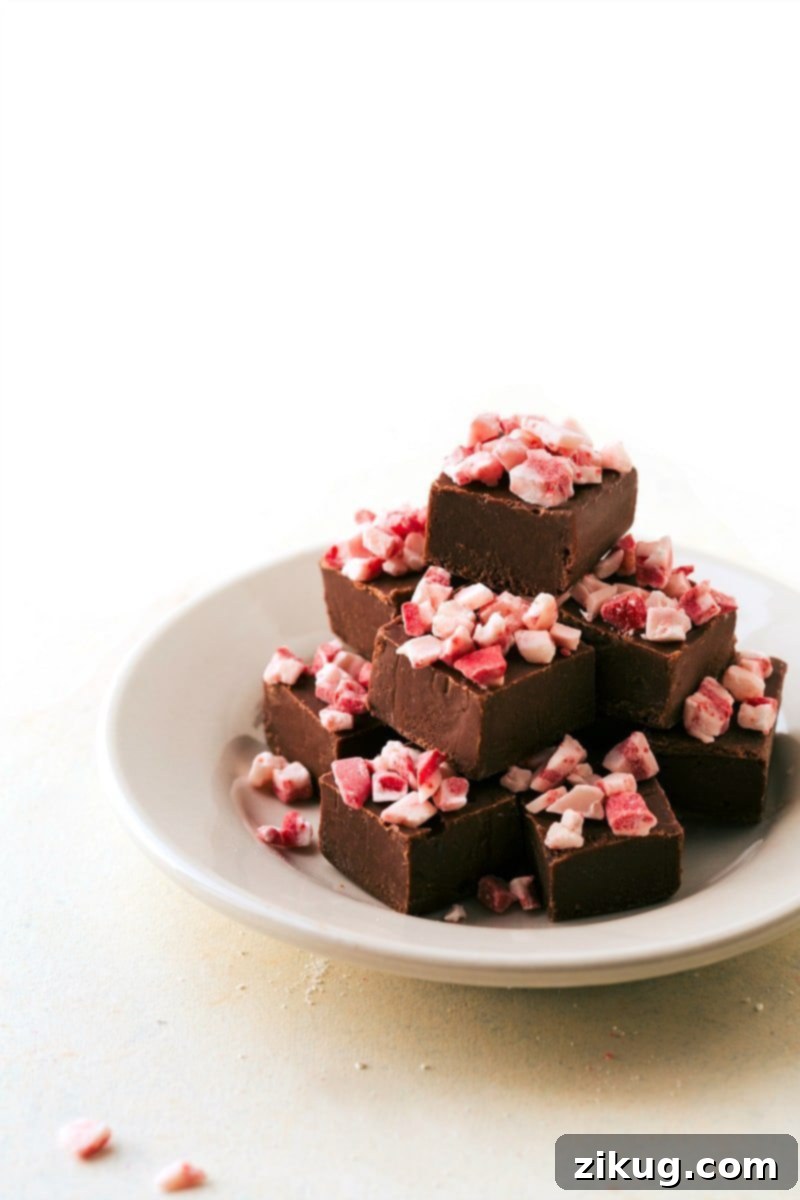
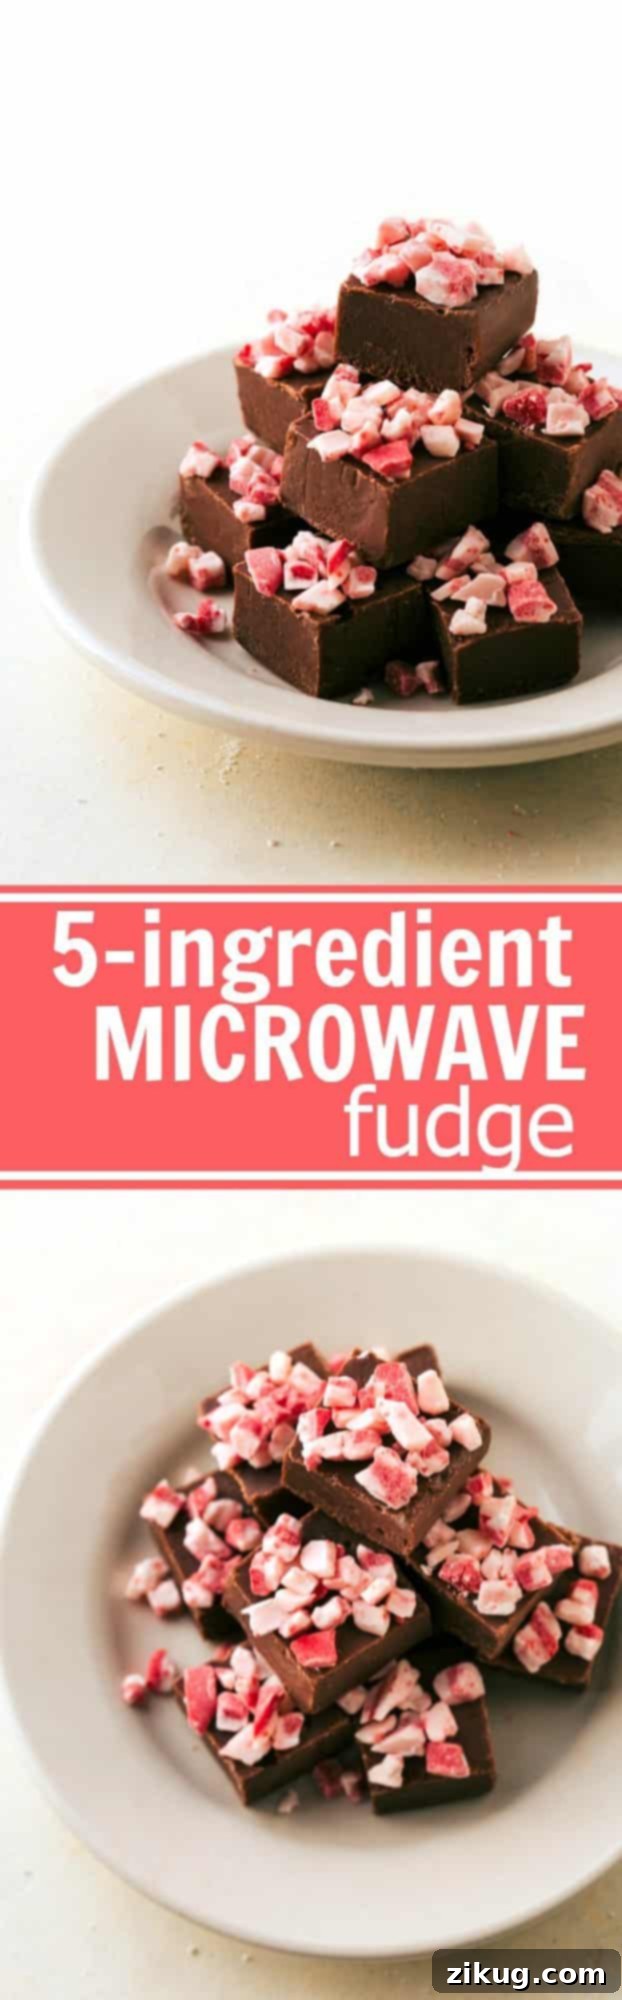
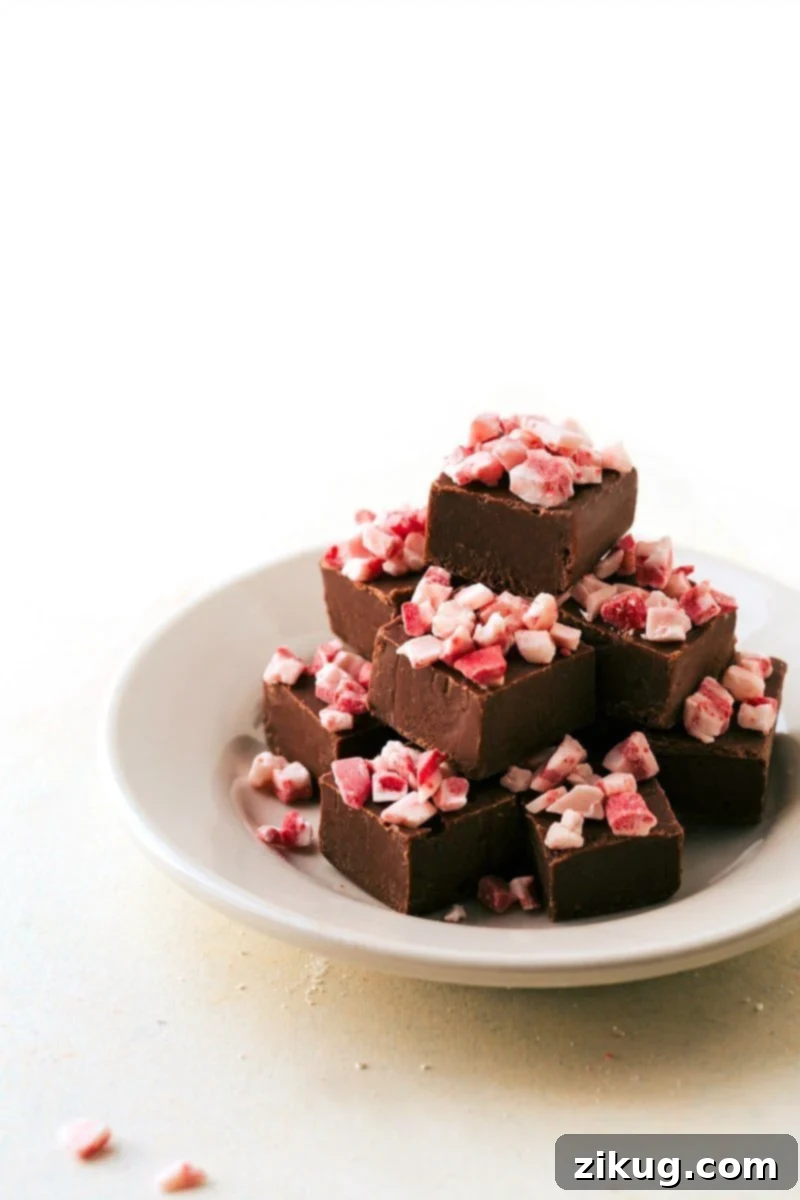
Say goodbye to candy thermometers and complicated steps! This Foolproof Microwave Fudge recipe promises rich, creamy, and decadent fudge with minimal effort, making it one of the easiest Christmas treats you’ll ever make. Perfect for those last-minute dessert needs or for getting the kids involved in holiday baking, this fudge is a guaranteed crowd-pleaser. With its smooth texture and vibrant peppermint crunch topping, it’s a festive addition to any holiday platter or gift box.
A Few Quick Tips for Perfect Microwave Fudge:
- Always prioritize high-quality chocolate chips. My personal favorites are Ghirardelli® and Guittard® (this is not a sponsored recommendation, just genuine preference!). The better the quality of your chocolate, the more flavorful, rich, and smooth your finished fudge will be. Quality chocolate melts more evenly and results in a superior texture.
- To prevent scorching and ensure perfectly melted chocolate, microwave the mixture in short bursts of 30 seconds at a time. Crucially, stir the mixture vigorously for at least 20-25 seconds between each microwave interval. Remember, the ingredients continue to cook and heat up even after they’ve been removed from the microwave, so constant stirring helps distribute the heat and prevent burning.
- Line your baking pan with parchment paper or foil. This essential step ensures the fudge can be easily lifted out of the pan once set, making slicing and serving much simpler and clean-up almost effortless.
Recommended Products for Your Fudge:
- Andes Peppermint Crunch Chips: For that signature minty crunch on top!
Saved
Pin
Foolproof Microwave Fudge
Equipment
-
8 x 8-inch baking pan
-
Parchment paper
Ingredients
To whip up this effortless microwave fudge, you’ll need these common pantry staples:
- 4 tablespoons salted butter melted
- 1 (14-ounce) can sweetened condensed milk see note 1
- 3 cups milk chocolate chips
- 1 teaspoon vanilla extract or peppermint extract for a festive twist
- 1 cup Andes peppermint crunch chips or freshly crushed peppermint candies
Instructions
Follow these quick and easy steps to create your delicious microwave fudge:
-
First, line an 8×8 inch baking pan with parchment paper, allowing an overhang on the sides for easy lifting later. Set this prepared pan aside.
-
In a large, microwave-safe bowl, add the salted butter and melt it completely in the microwave. This usually takes about 20-30 seconds.
-
Pour the entire can of sweetened condensed milk directly over the melted butter. Whisk the two ingredients together thoroughly until they are well combined and smooth.
-
Now, add the milk chocolate chips to the butter and condensed milk mixture. Stir them well with a spatula to ensure they are coated by the liquid ingredients.
-
Microwave the chocolate mixture in 15-second bursts. After each burst, remove the bowl and stir for about 10 seconds. Continue this cycle until all the chocolate chips are fully melted and the mixture is smooth and glossy. Remember to stir thoroughly to prevent burning.
-
Once the chocolate is melted and smooth, remove the bowl from the microwave and stir in the vanilla extract (or peppermint extract for a minty fudge). Mix until the extract is fully incorporated.
-
Carefully spoon the warm fudge mixture into your prepared 8×8 inch pan. Use a spatula or the back of a spoon to smooth the top, ensuring an even layer across the entire pan.
-
Immediately sprinkle the Andes peppermint crunch chips or crushed peppermint over the top of the warm fudge. This will allow them to adhere perfectly as the fudge cools.
-
Cover the pan with plastic wrap or foil and place it in the fridge for approximately 2-3 hours, or until the fudge is completely set and firm. Once set, lift the fudge out using the parchment paper overhang, slice into desired pieces, and enjoy!
Recipe Notes
Storage: Store any leftover microwave fudge in an airtight container to keep it fresh. It will last for up to 2 weeks in the fridge, or you can freeze it for up to 3 months. If frozen, allow the fudge to sit at room temperature for a few minutes before eating to soften slightly for the best texture.
Nutrition Information
Nutrition information is automatically calculated and should only be used as an approximation.

Sweet & Salty Toffee Cashew Clusters
For those who adore the combination of sweet and salty with a satisfying crunch, these Toffee Cashew Clusters are an absolute must-make for your Christmas treats list. They’re incredibly simple to assemble, requiring just a few ingredients and minimal hands-on time, yet they deliver a rich, decadent flavor profile that tastes gourmet. Roasted cashews provide a buttery, nutty base, perfectly complemented by the chewy, caramel notes of toffee bits, all enveloped in smooth, melted chocolate. These clusters are fantastic for gifting, sharing at holiday gatherings, or simply enjoying as a delightful personal indulgence.
A Few Quick Tips for Perfect Toffee Cashew Clusters:
- Similar to our other chocolate recipes, the quality of your chocolate makes a huge difference. Opt for high-quality chocolate chips or baking bars from brands like Ghirardelli® or Guittard®. These melt more smoothly and offer a richer flavor profile, which is essential when chocolate is a primary ingredient. While chocolate chips work, baking bars are often preferred for their melting consistency and sometimes contain fewer stabilizers.
- Always line your baking pan with parchment paper. This simple step is vital for easy clean-up and ensures that your beautiful toffee cashew clusters can be easily removed once they’ve set, without any sticking or breakage.
Recommended Products to Enhance Your Clusters:
- Roasted and Salted Cashews: The ideal balance of savory and nutty for your clusters.
- Toffee Bits: For that signature crunchy, caramel goodness.

Saved
Pin
Toffee Cashew Clusters
Equipment
-
Large sheet pan (approximately 15″ x 21″)
-
Parchment paper
-
Large saucepan
Ingredients
Gather these components to create your delightfully crunchy toffee cashew clusters:
- 16 ounces white baking chocolate chopped, see note 1
- 14 ounces milk chocolate chopped
- 4 cups roasted and salted cashews
- 1-1/4 cups toffee bits
- Vegetable oil optional, for thinning chocolate if needed
Instructions
Follow these simple steps for perfectly formed toffee cashew clusters:
-
Begin by preparing a large sheet pan with parchment paper. This will ensure your clusters don’t stick and are easy to remove once set. Set it aside for later use.
-
Roughly chop both the white and milk baking chocolates into small, uniform pieces using a serrated knife. Smaller pieces will melt more evenly and quickly. Place the chopped chocolate in the bottom of a metal or glass heat-proof bowl.
-
Meanwhile, fill a large saucepan with about an inch of water and bring it to a gentle simmer over low heat. You’re creating a double-boiler setup to melt your chocolate evenly without burning.
-
Carefully place the bowl of chopped chocolates over the simmering water. It’s crucial that the bottom of the bowl does not touch the water; the steam alone should be sufficient to melt the chocolate. This indirect heat method ensures a smooth, tempered chocolate.
-
Continuously stir the chocolate as it gradually softens and melts. Once only a few small chunks of chocolate remain, remove the bowl from the heat. The residual heat will continue to melt the last pieces as you stir, resulting in a perfectly smooth and glossy chocolate mixture.
-
If you find the melted chocolate mixture to be too thick for coating, you can add a few teaspoons of vegetable oil to thin it out slightly. Add the oil slowly, one teaspoon at a time, stirring continuously until it’s well mixed in and achieves your desired consistency.
-
Once your chocolate is perfectly melted, add the roasted and salted cashews and the toffee bits to the bowl. Stir everything thoroughly until the nuts and toffee are completely coated in the luscious chocolate.
-
Using a tablespoon or a small cookie scoop, drop individual portions of the chocolate-cashew-toffee mixture onto your prepared sheet pan. Space them out slightly to prevent them from merging as they set.
-
Place the sheet pan in the refrigerator for 10-15 minutes, or until the clusters are completely set and firm to the touch. Once solid, they are ready to be enjoyed! Store any remaining clusters in an airtight container at room temperature to maintain their freshness.
Recipe Notes

Adorable Rudolph Bites: A Festive Treat for Kids!
Bring a smile to everyone’s face this holiday season with these unbelievably cute and easy Rudolph Bites! These charming little reindeer-themed treats are perfect for getting children involved in the kitchen and make a delightful addition to any Christmas party, school event, or homemade gift basket. With just a few simple ingredients and a dash of creativity, you can transform ordinary Reese’s Cups into the most famous reindeer of all. They’re sweet, salty, and guaranteed to be a festive favorite!
A Few Quick Tips for Crafting Perfect Rudolph Bites:
- While the recipe uses peanut butter to attach the eyes and nose, you can also use melted chocolate piped into a small bag (or a frosting bag with a fine tip) or even a small amount of pre-made frosting. This provides a clean and precise way to apply the smaller details, giving your Rudolph Bites a polished look.
Recommended Products to Create Your Rudolph Bites:
- Red Hot Candies: An excellent alternative if you can’t find mini M&M’s for Rudolph’s bright red nose.
- Mini M&Ms: Essential for those iconic red noses.
- Edible Candy Eyes: The easiest way to give your Rudolphs personality.
- Pretzel Twists: Perfect for creating adorable reindeer antlers.

Saved
Pin
Rudolph Bites
Ingredients
To create these festive and fun Rudolph Bites, you’ll need the following:
- 3 to 4 tablespoons creamy peanut butter
- 20 Miniature Reese’s Cups
- 1 bag pretzel twists
- 20 Miniature Red M&M’s
- 40 edible candy eyeballs
Instructions
Let’s craft these adorable Rudolph Bites together:
-
Carefully break the pretzel twists in half. Then, gently break off smaller pieces from these halves to form shapes that resemble reindeer antlers. This process might require breaking a few pretzels before you get the hang of it, so don’t be discouraged! With a little practice, it becomes much easier.
-
Unwrap the miniature Reese’s Cups. Locate the softer spot on the top or side of each Reese’s (it’s usually where the peanut butter filling is slightly visible or softer to the touch). Gently press two pretzel antlers into this soft spot, one on each side, to create Rudolph’s headpiece.
-
Take one miniature red M&M. Spread a small amount of creamy peanut butter on the back of the M&M, then carefully attach it to the front of the Reese’s Cup to form Rudolph’s iconic red nose. The peanut butter acts as a delicious edible glue.
-
Similarly, spread a tiny bit more peanut butter on the back of two edible candy eyeballs. Attach these above the M&M nose, positioning them to give your Rudolph bites a whimsical and friendly expression.
-
Once all the pieces are in place, gently press and secure any components that might feel loose. Allow the Rudolph Bites to sit for a few minutes to ensure everything adheres firmly. Now, they are ready to be admired and enjoyed by all!
Recipe Notes
Nutrition Information
Nutrition information is automatically calculated and should only be used as an approximation.
More Festive Christmas Treat Ideas
Looking for even more inspiration to fill your holiday dessert table or gift baskets? Here are some additional delicious Christmas treats to explore, each offering unique flavors and textures to delight everyone:
- Peppermint Sugar Cookies: A classic holiday cookie with a refreshing minty twist, perfect for decorating.
- 5-Ingredient Microwave Caramel Chocolate Fudge: Another incredibly simple fudge recipe featuring a delightful caramel and chocolate combination.
- Homemade Candied Walnuts: Sweet, crunchy, and versatile—great for snacking, salads, or topping desserts.
- Easy Turtle Bark: A quick recipe for a rich chocolate bark loaded with pecans and caramel.
- S’mores Fudge: All the campfire goodness of s’mores packed into a convenient fudge form.
We hope these easy and delicious Christmas treat recipes bring extra joy and sweetness to your holiday celebrations. From quick no-bake options to fun projects for the whole family, there’s something here for everyone to enjoy. Happy baking and happy holidays!