
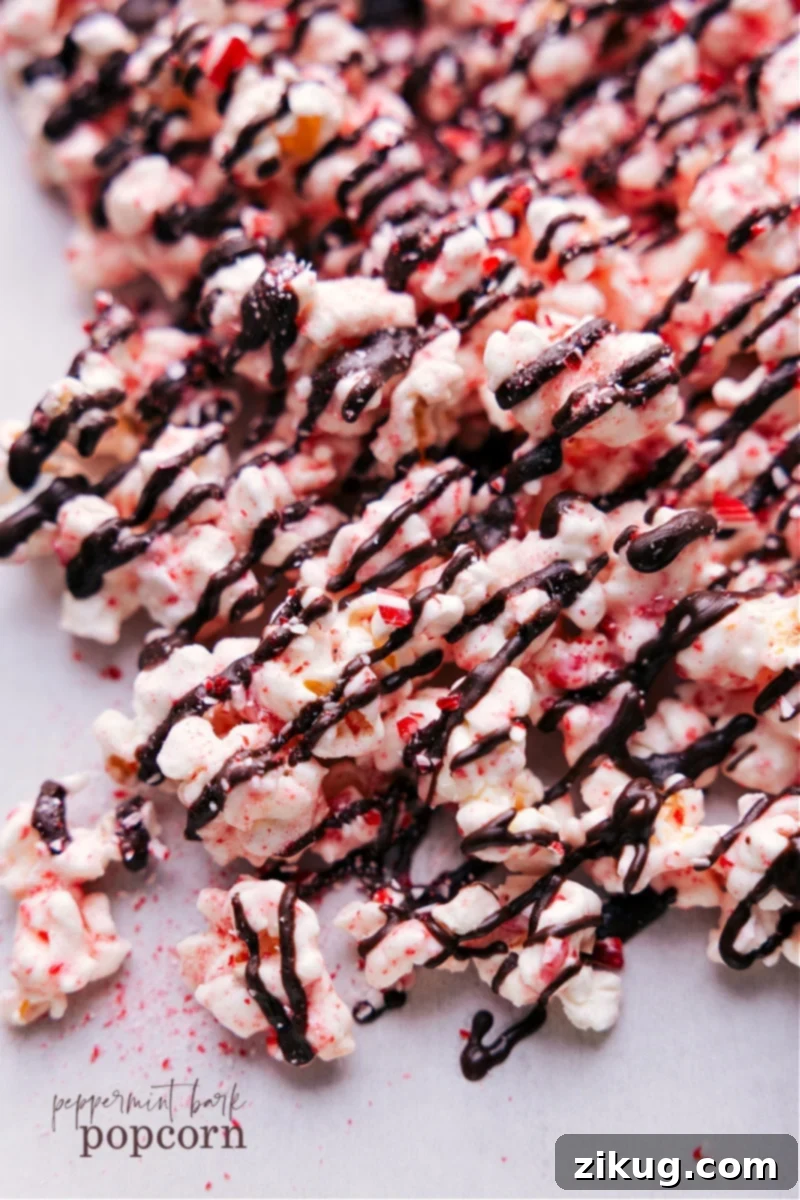
Peppermint Popcorn is an absolute essential for the holiday season! This festive snack combines fluffy popcorn with a luxurious white chocolate coating, vibrant crushed peppermint, and a decadent dark chocolate drizzle, creating the ultimate sweet and crunchy treat. It’s perfect for gifting, parties, or simply enjoying a cozy evening by the fire.
For more delightful holiday snack mixes, explore these favorites: Christmas Popcorn, Reindeer Chow, and Christmas Snack Mix.
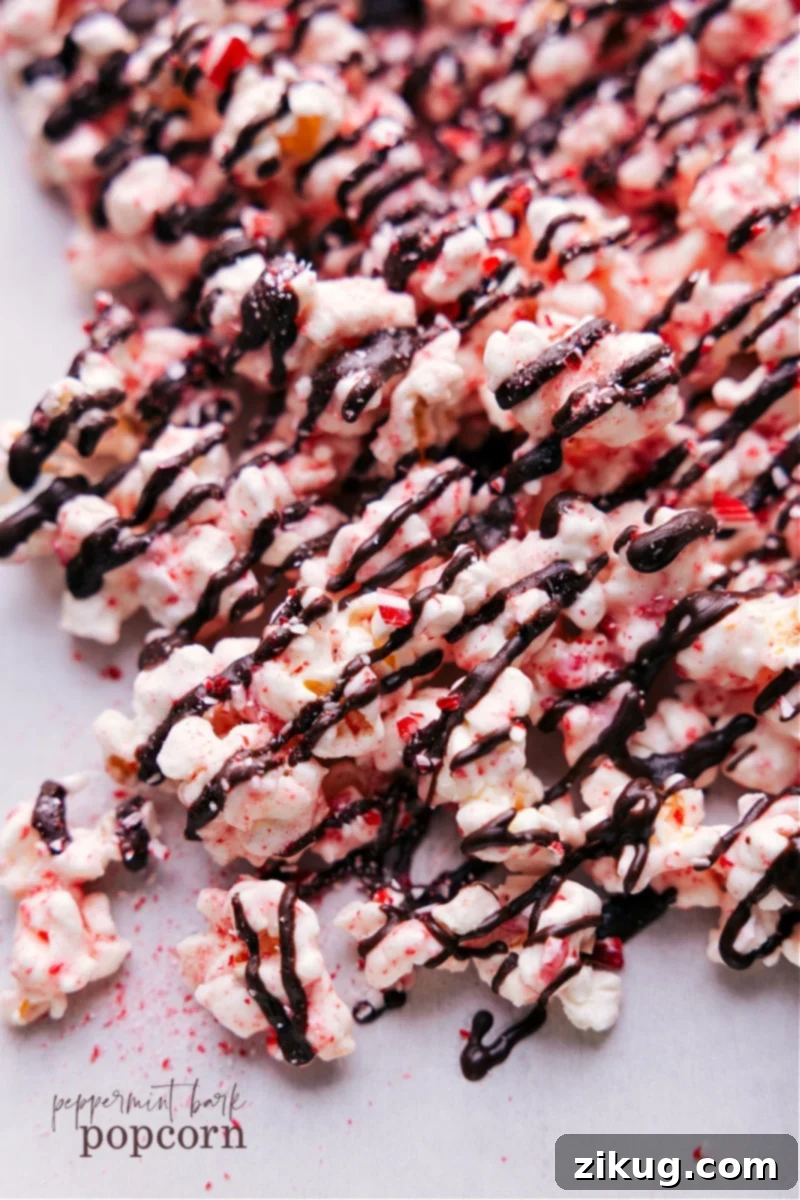
White Chocolate Peppermint Popcorn: The Ultimate Holiday Indulgence
The holidays, for many, simply aren’t complete without the iconic flavors of peppermint and chocolate. While Peppermint Bark holds a special place in my heart, often made batch after batch with my kids, the irresistible essence of peppermint has found its way into another beloved treat in our kitchen: popcorn! This White Chocolate Peppermint Popcorn transforms a classic movie snack into an extraordinary festive delight.
This recipe brilliantly combines the satisfying crunch of popcorn with the creamy richness of white chocolate, the refreshing coolness of peppermint, and the delightful bitterness of a dark chocolate drizzle. The result is a sweet, minty, and utterly addictive treat that hits all the right notes for a holiday gathering. It’s the perfect solution for anyone craving the quintessential taste of peppermint, white chocolate, and dark chocolate all in one harmonious, hard-to-resist bite.
While some gourmet popcorn recipes can be time-consuming, requiring extensive preparation, this Peppermint Popcorn stands out for its simplicity and speed. In the hustle and bustle of December, quick and easy recipes are invaluable. This snack requires only a handful of readily available ingredients and minimal prep time, yet it delivers a flavor and texture that rivals any specialty popcorn. It’s proof that you don’t need elaborate steps to create something truly spectacular and holiday-worthy.
Why This Peppermint Popcorn is a Holiday Must-Have
- Effortlessly Festive: This recipe screams “holiday season” with its vibrant colors and iconic flavors. It’s an instant mood booster and a beautiful addition to any holiday table.
- Quick & Easy: Forget complicated baking projects. This popcorn comes together in under an hour, including chilling time, making it perfect for last-minute gatherings or when you need a speedy treat.
- Irresistibly Delicious: The combination of sweet white chocolate, cool peppermint, and a hint of rich dark chocolate creates a flavor profile that is truly addicting. You’ll find yourself reaching for “just one more piece.”
- Customizable Fun: Easily adapt the recipe to your preferences! Use different types of chocolate, add sprinkles, or mix in other holiday candies for a personalized touch.
- Perfect for Gifting: Pack this festive popcorn into decorative bags or tins for a thoughtful, homemade holiday gift that friends, family, and neighbors will adore.
- Crowd-Pleaser: From kids to adults, everyone loves popcorn, and when it’s dressed up for the holidays, it becomes an instant hit at parties and events.
Essential Ingredients for Your Peppermint Popcorn
Crafting the perfect Peppermint Popcorn starts with selecting quality ingredients. Each component plays a vital role in achieving that delightful balance of sweet, minty, and crunchy. Here’s a closer look at what you’ll need and why:
- Kettle Corn or Plain Popcorn: While using pre-popped kettle corn significantly speeds up the process, it might come with a slightly higher cost. Kettle corn offers a delightful sweet and salty base that beautifully complements the peppermint and chocolate. If you prefer to pop your own, plain popcorn works just as well—whether you use microwave packets, an air popper, or stovetop kernels. Just remember to add a pinch of salt to plain popcorn to enhance its flavor and balance the sweetness of the toppings.
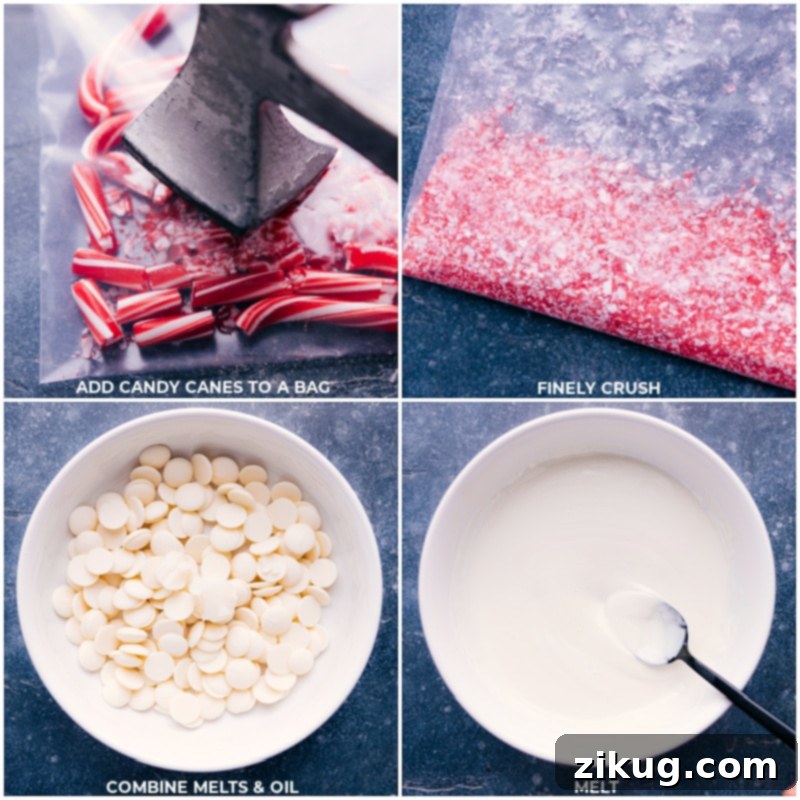
- Peppermint Candy Canes: The star of the show! Regular sized candy canes are ideal for crushing. I personally love the bright, festive colors and classic minty flavor of Brach’s® candy canes, which add both visual appeal and a refreshing burst of mint. You’ll want to crush them finely to ensure an even distribution and pleasant texture throughout the popcorn.
- White Chocolate Melting Wafers: For the smoothest, easiest coating, melting wafers are highly recommended. These are specifically formulated to melt evenly and set beautifully without tempering, giving your popcorn a professional finish. Regular white chocolate chips can be used but may require a bit more care to melt smoothly.
- Coconut Oil (or Vegetable Oil): A small amount of oil is crucial for achieving a perfectly smooth, pourable consistency for your melted chocolate. It helps the chocolate coat the popcorn evenly and prevents it from seizing or becoming too thick. Both coconut oil and neutral vegetable oil work effectively.
- Chocolate Melting Wafers (Milk, Semi-Sweet, or Dark): For the final drizzle, stick with melting wafers for their superior melting properties and flavor. The choice of milk, semi-sweet, or dark chocolate is entirely up to your personal preference. This allows for delightful customization, ensuring everyone can enjoy their favorite chocolate accent.
Quick Tip: Customize Your Chocolate!
This Peppermint Popcorn recipe is wonderfully versatile. Don’t hesitate to personalize it by choosing your favorite type of chocolate for the drizzle. My kids absolutely love the creamy sweetness of milk chocolate, while I often opt for the rich intensity of dark chocolate to balance the sweetness. Feel free to use semi-sweet for a classic compromise—it’s all about what you enjoy most!
Crafting Your Delicious Peppermint Popcorn: Step-by-Step Guide
Making this festive Peppermint Popcorn is surprisingly simple and quick. Follow these straightforward steps to create a show-stopping holiday snack:
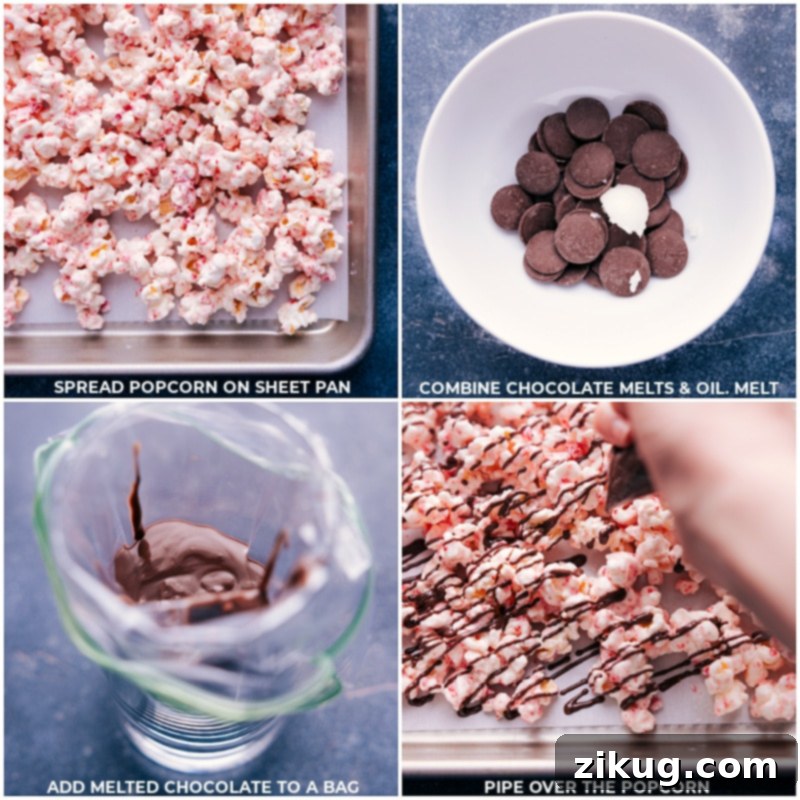
- Prepare Your Workspace: First, ensure a smooth process by lining a large sheet pan (approximately 15″ x 21″) with parchment paper or aluminum foil. This prevents sticking and makes cleanup a breeze. Set this prepared pan aside for later.
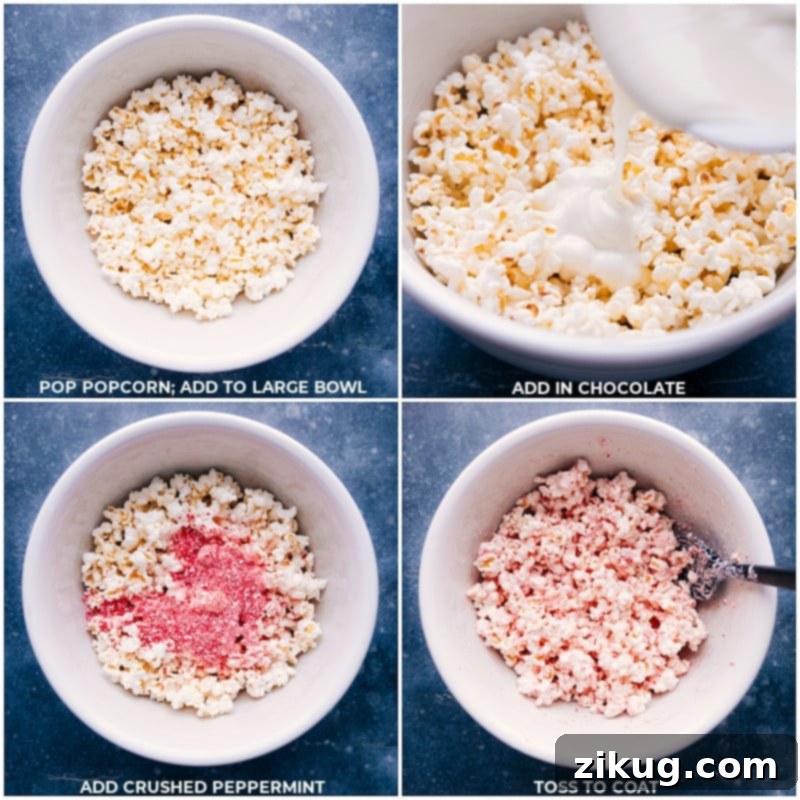
- Pop the Popcorn: If you’re not using pre-popped popcorn, follow the package directions to pop your kernels. Once popped, carefully remove any unpopped kernels to ensure a pleasant eating experience. Transfer all the fluffy popped popcorn into a very large mixing bowl. A spacious bowl is key for even coating.
- Crush the Peppermint: Place the unwrapped candy canes into a sturdy, resealable plastic bag. You might want to use two bags to prevent rips as you crush them. Seal the bag, removing as much air as possible, then use a rolling pin or a meat mallet to crush the candy canes into fine crumbs. Set aside about 1 tablespoon of these crushed peppermint crumbs for a decorative topping later. Add the remaining crushed peppermint directly over the popcorn in the large bowl.
- Coat with White Chocolate: In a microwave-safe bowl, combine the white chocolate melting wafers with 1½ teaspoons of coconut or vegetable oil. Microwave in short 15-second intervals, stirring thoroughly for at least 15 seconds after each burst, until the chocolate is completely smooth and melted. Be careful not to overheat the chocolate, as this can cause it to seize. Pour the melted white chocolate over the popcorn and crushed peppermint in the large bowl. Using a spatula, gently but thoroughly stir until every piece of popcorn is evenly coated with the white chocolate and peppermint mixture. Once coated, spread the popcorn in a single, even layer onto your prepared sheet pan.
- Drizzle with Dark Chocolate: Clean the microwave-safe bowl (or use a fresh one). Combine your chosen chocolate melting wafers (milk, semi-sweet, or dark) with the remaining ½ teaspoon of coconut or vegetable oil. Melt this chocolate in the microwave using the same short bursts and stirring technique until it’s perfectly smooth. Transfer the melted chocolate to a small plastic bag (like a Ziploc sandwich bag). Seal the bag, ensuring no air is trapped, then snip off a tiny corner of the bag to create a small opening. Drizzle the chocolate artfully all over the popcorn on the sheet pan.
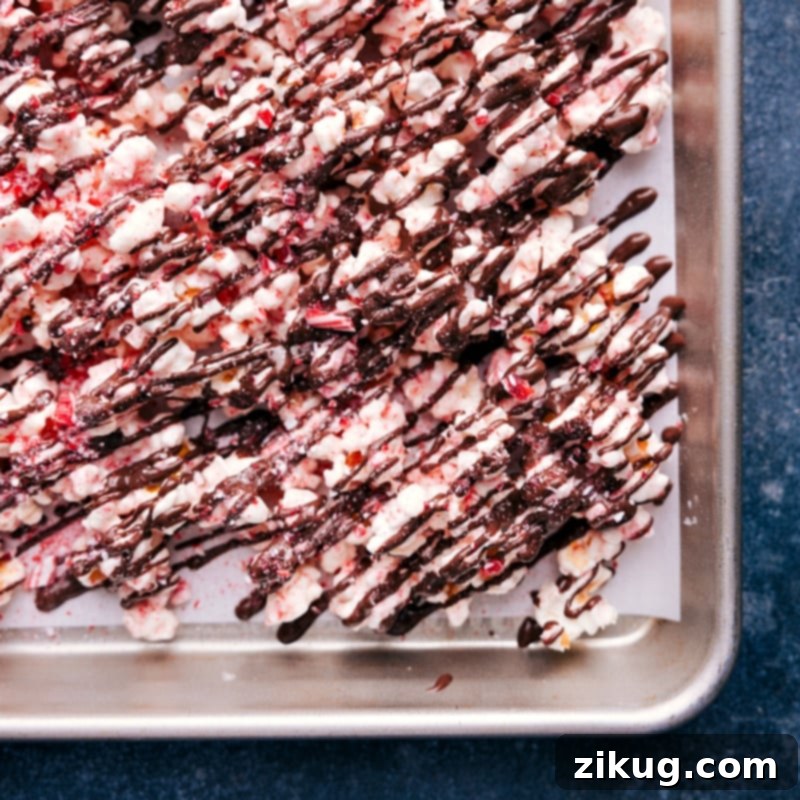
- Add Final Peppermint Topping & Set: Immediately sprinkle the reserved 1 tablespoon of crushed peppermint over the drizzled chocolate. This adds an extra pop of color and minty flavor. Allow the popcorn to set at room temperature until the chocolate has completely hardened. If you’re short on time, you can carefully place the pan in the refrigerator for about 15-20 minutes to speed up the setting process.
- Break and Enjoy: Once the chocolate is firm, gently break the Peppermint Popcorn into desired bite-sized pieces. Serve immediately and enjoy your homemade holiday masterpiece!
Expert Tips for Perfect Peppermint Popcorn Every Time
Achieving bakery-quality Peppermint Popcorn is easy with a few simple tricks. These tips will help you create a beautifully coated, perfectly crunchy, and undeniably delicious holiday snack:
- Always Line Your Pan: This step is non-negotiable! Using parchment paper or aluminum foil on your sheet pan prevents the coated popcorn from sticking, making it incredibly easy to remove once hardened. It also simplifies cleanup significantly.
- Use a Generously Sized Bowl for Tossing: When mixing the popcorn with melted chocolate and crushed peppermint, a very large bowl is your best friend. This allows ample space to toss and stir the popcorn without spillage, ensuring every kernel gets a thorough and even coating. If your batch is particularly large, consider splitting it into two bowls for easier mixing.
- Keep Your Chocolate Dry and Don’t Overheat: This is perhaps the most crucial tip when working with melting chocolate. Even a tiny drop of water or excessive heat can cause chocolate to “seize,” turning it into a thick, clumpy, unusable mess.
- Melting Method: When melting chocolate in the microwave, always do so in short bursts (15-20 seconds at a time) and stir vigorously for at least 15 seconds between each burst. Chocolate continues to melt from residual heat, so it’s important to remove it from the microwave before it’s fully smooth. Stirring will finish the job.
- Low and Slow: Never get the chocolate too hot. You want it melted but as close to room temperature as possible for the best consistency and to prevent it from scorching.
- Double Boiler (Optional but Effective): If you prefer, you can also melt chocolate over a double boiler, ensuring the bowl with chocolate doesn’t touch the simmering water below and no steam enters the chocolate.
- Finely Crush Peppermint: For the best texture and visual appeal, aim for fine peppermint crumbs. Larger chunks can be too hard to bite into. A food processor can make this task even easier if you have one.
- Work Quickly Once Chocolate is Melted: Melted chocolate sets relatively fast, especially white chocolate. Have your popcorn and crushed peppermint ready to go as soon as your chocolate is smooth to ensure you can coat everything evenly before it begins to harden.
- Even Spreading: After coating, spread the popcorn mixture into a thin, even layer on your prepared sheet pan. This helps it cool and harden uniformly and makes breaking it into pieces much easier.
Storage Solutions for Your Peppermint Popcorn
Keeping Your Holiday Treat Fresh
- Room Temperature Storage: To keep your Peppermint Popcorn at its best, transfer any leftovers to a large, airtight resealable plastic bag or container. Ensure as much air as possible is removed from the bag before sealing. Store it in a cool, dry, and dark area, away from direct sunlight or any heat sources, which could cause the chocolate to melt.
- Enjoy Promptly: This delightful snack is best enjoyed within 3–5 days of preparation. Even when stored perfectly, the popcorn can begin to soften or become slightly stale over time, losing its ideal crunch.
- Freezer-Friendly Option: For extended freshness and a unique eating experience, store leftovers in the freezer! Place the popcorn in an airtight, freezer-safe container or bag. It’s incredibly delicious when eaten directly from the freezer—no defrosting needed. The frozen treat offers an extra delightful crunch and an intensified cool mint flavor, making it a fantastic option to enjoy long after the holidays.
Creative Variations & Customizations
While the classic White Chocolate Peppermint Popcorn is delightful on its own, feel free to get creative and customize it to your heart’s content! Here are some ideas to inspire you:
- Different Chocolate Bases: Instead of white chocolate for the main coating, try milk chocolate for a richer, creamier flavor, or dark chocolate for an intensely bittersweet contrast.
- Colorful Sprinkles: Add some festive holiday sprinkles along with the crushed peppermint for extra visual appeal and a fun texture. Nonpareils or jimmies in red, green, and white would be perfect.
- Nutty Addition: For an added crunch and flavor, toss in some chopped toasted almonds, pecans, or walnuts along with the popcorn before coating.
- Mini Marshmallows: Lightly coat mini marshmallows with the white chocolate mixture for a chewy surprise throughout the popcorn.
- Toasted Coconut: A sprinkle of toasted coconut flakes can add a unique tropical twist and another layer of texture.
- Caramel Drizzle: For an extra decadent treat, add a fine drizzle of caramel sauce over the chocolate layers once they’ve set slightly.
- Spiced Peppermint: Experiment with a tiny pinch of cinnamon or a dash of nutmeg in the white chocolate for a warm, spiced undertone.
Serving & Gifting Ideas
Peppermint Popcorn is as versatile in presentation as it is delicious. Here’s how to serve and share this wonderful holiday treat:
- Holiday Party Platter: Arrange the broken popcorn pieces artfully on a large platter for a stunning centerpiece at your holiday gathering. Its vibrant colors are naturally decorative.
- Individual Servings: Scoop portions into festive paper cups or small bowls for easy grabbing at a party.
- Movie Night Upgrade: Elevate your family movie night with this special holiday edition popcorn.
- Thoughtful Gifts: Package the cooled and hardened Peppermint Popcorn in clear cellophane bags tied with a festive ribbon, or in decorative tins. It makes a wonderful homemade gift for teachers, neighbors, co-workers, or as a host/hostess gift.
- Dessert Bar Addition: Include it as part of a larger holiday dessert buffet alongside cookies, brownies, and other confections.
Frequently Asked Questions (FAQ) About Peppermint Popcorn
- Can I make this Peppermint Popcorn ahead of time?
- Absolutely! This recipe is fantastic for making in advance. Once the chocolate has fully hardened, store it in an airtight container at room temperature for up to 3-5 days. For longer storage, freeze it. Making it a day or two before your event can save you valuable time during the busy holiday season.
- What’s the best way to crush candy canes?
- The easiest way is to place unwrapped candy canes in a sturdy, resealable plastic bag (or double-bag it to prevent tears). Then, use a rolling pin, a meat mallet, or even the bottom of a heavy pan to crush them into fine pieces. For an even finer powder, a food processor can be used, but be careful not to over-process into a paste if it gets too warm.
- Can I use chocolate chips instead of melting wafers?
- While melting wafers are recommended for their smooth consistency and ease of use without tempering, you can use high-quality chocolate chips. If using chocolate chips, you might need to add a bit more coconut oil (start with an extra ½ teaspoon) and melt them very slowly and carefully to prevent them from seizing. They may not result in quite as glossy or firm a coating as melting wafers.
- My chocolate seized and became clumpy. What went wrong?
- Chocolate seizes primarily due to exposure to even a tiny amount of water (steam, condensation, or liquid ingredients) or overheating. To prevent this, ensure all your bowls and utensils are perfectly dry, and follow the low and slow microwave melting method, stirring frequently. Unfortunately, once chocolate seizes, it’s very difficult to salvage for coating purposes.
- Is this recipe gluten-free?
- Yes, this recipe is naturally gluten-free, assuming all your ingredients (popcorn, chocolate, candy canes) are certified gluten-free. Always check ingredient labels for hidden gluten if catering to specific dietary needs.
More Peppermint Desserts to Delight Your Palate
If you’ve fallen in love with the invigorating taste of peppermint, here are more festive recipes to satisfy your cravings:
- Easy Peppermint Cookies made with just three simple ingredients for a quick and impressive treat.
- Peppermint Bark Pretzels, a delightful blend of salty and sweet, topped with creamy peppermint candy kisses.
- No-Bake Peppermint Cheesecake with an irresistible Oreo crust, perfect for a chilled, decadent dessert.
- Rich Peppermint Brownies generously topped with a luscious chocolate ganache for true chocolate-mint lovers.
- Festive Peppermint Rice Krispie Treats, a chewy classic elevated with a touch of mint and a beautiful chocolate drizzle.
Embrace the Holiday Spirit with Peppermint Popcorn
As the holiday season draws near, there’s nothing quite like a simple yet spectacular treat to capture the festive spirit. This White Chocolate Peppermint Popcorn delivers on all fronts: ease of preparation, stunning visual appeal, and an utterly addictive combination of sweet, minty, and crunchy textures. Whether you’re whipping up a batch for a holiday party, preparing thoughtful homemade gifts, or simply indulging in a cozy evening snack, this recipe is guaranteed to bring smiles and satisfy cravings. So, gather your ingredients, pop that corn, and let the magic of peppermint and chocolate transform your holiday snacking experience. It’s more than just popcorn; it’s a taste of pure holiday joy.

Peppermint Popcorn
Chelsea Lords
20
30
50
10
servings
Equipment
-
Large sheet pan (15″ x 21″)
-
Parchment paper or aluminum foil
Ingredients
- 8 to 9 cups popped kettle corn or plain popcorn—see note 1
- 1 (10-ounce) package white chocolate melting wafers
- 2 teaspoons coconut oil or vegetable oil, divided
- 5 regular candy canes crushed
- 1/2 cup chocolate melting wafers milk, semi-sweet, or dark—whichever you prefer
Instructions
-
Line a large sheet pan with parchment paper or foil. Set aside.
-
Pop popcorn according to package directions. Remove any un-popped popcorn kernels and dump all the popped popcorn into a very large bowl. Alternatively, you can use purchased pre-popped popcorn.
-
Add unwrapped candy canes to a large resealable plastic bag (or 2; the peppermint has a tendency to rip through plastic bags as it is crushed). Seal the bag without air, then crush with a rolling pin or meat mallet until fine crumbs are formed. Remove 1 tablespoon of crumbs and set aside. Add the rest of the crushed peppermint on top of the popcorn.
-
Combine white chocolate melts with 1-1/2 tsp oil and melt in the microwave until completely smooth (see note 3). Pour melted chocolate over popcorn and peppermint and stir with a spatula until well combined and evenly coated. Pour coated popcorn on prepared sheet pan and spread in an even layer.
-
Combine milk or dark chocolate melts with remaining 1/2 tsp oil and melt in the microwave until completely smooth. Transfer to a plastic bag and seal without air. Cut off the tip of the bag and pipe chocolate all over the popcorn. Sprinkle the reserved 1 tablespoon peppermint on top. Let set at room temperature (or pop in the fridge) until hardened.
-
Gently break into pieces and enjoy!
Recipe Notes
Note 2: I recommend chocolate made for melting like melting wafers (found in the baking aisle). I like to add a touch of oil or shortening to the chocolate to help it to smooth out and make coating the popcorn in chocolate easier.
Note 3: To avoid scorching the chocolate, microwave for 15 seconds at a time and stir for at least 15 seconds between each microwave burst. Remember, the chocolate is still melting from residual heat out of the microwave. It’s important the chocolate never gets too hot! You want it melted but as close to room temperature as possible.
Storage: Transfer any leftover popcorn to a large zip-top plastic bag. Remove as much air as possible from the bag and then store it in a dry, cool, dark area. Keep out of heat and sunlight to avoid melting the chocolate. Best enjoyed within 3–5 days; even when stored properly it begins to soften or become stale.
Nutrition
Nutrition information is automatically calculated, so should only be used as an approximation.
Like this? Leave a comment below!