
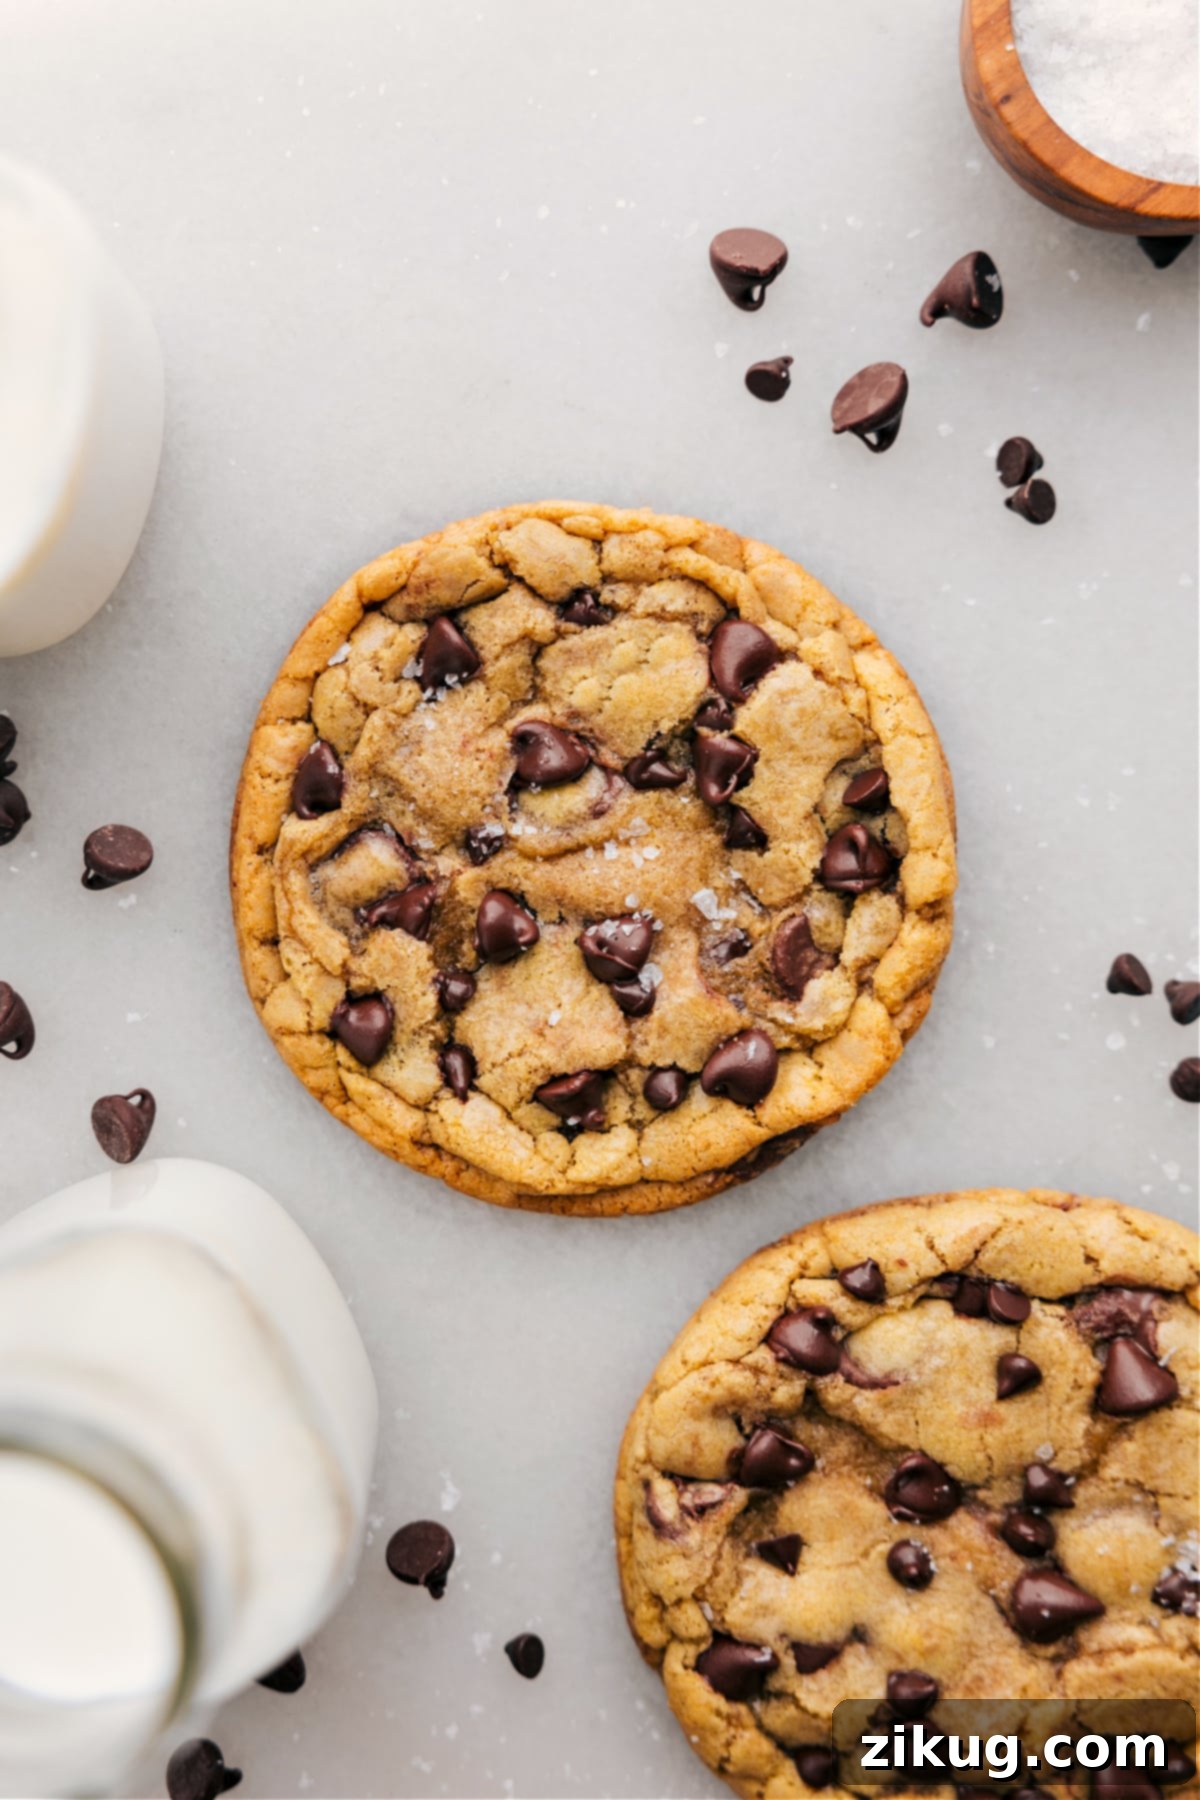
Indulge in the ultimate sweet escape with this incredible **Single Serve Chocolate Chip Cookie** recipe. It’s my absolute favorite when a craving strikes, delivering the perfect balance of crisp, golden edges, a sumptuously soft and gooey center, and generous pockets of rich chocolate in every single bite. This isn’t just a cookie; it’s a perfectly portioned, deeply satisfying dessert designed to bring joy without the fuss of a full batch.
What Defines a Single Serve Chocolate Chip Cookie?
A single serve chocolate chip cookie recipe is specifically crafted to yield just a few cookies, typically one to three, making it ideal for individual indulgence or sharing a small, fresh batch with a loved one. It’s the perfect solution for those moments when you desire a freshly baked treat without an overwhelming quantity of leftovers or the commitment of a large baking project.
Unlike many traditional cookie recipes that demand extensive chilling times to achieve optimal texture, this recipe is designed for instant gratification. You can mix, bake, and enjoy these delightful cookies in under 20 minutes, satisfying your sweet tooth almost immediately. This convenience makes it a true game-changer for anyone who loves homemade cookies but wants to avoid excess.
If you’re a devoted chocolate lover and crave an even richer experience, be sure to explore our Single Serve Double Chocolate Cookie recipe for an extra cocoa punch!
The Ultimate Single Serve Chocolate Chip Cookie Experience
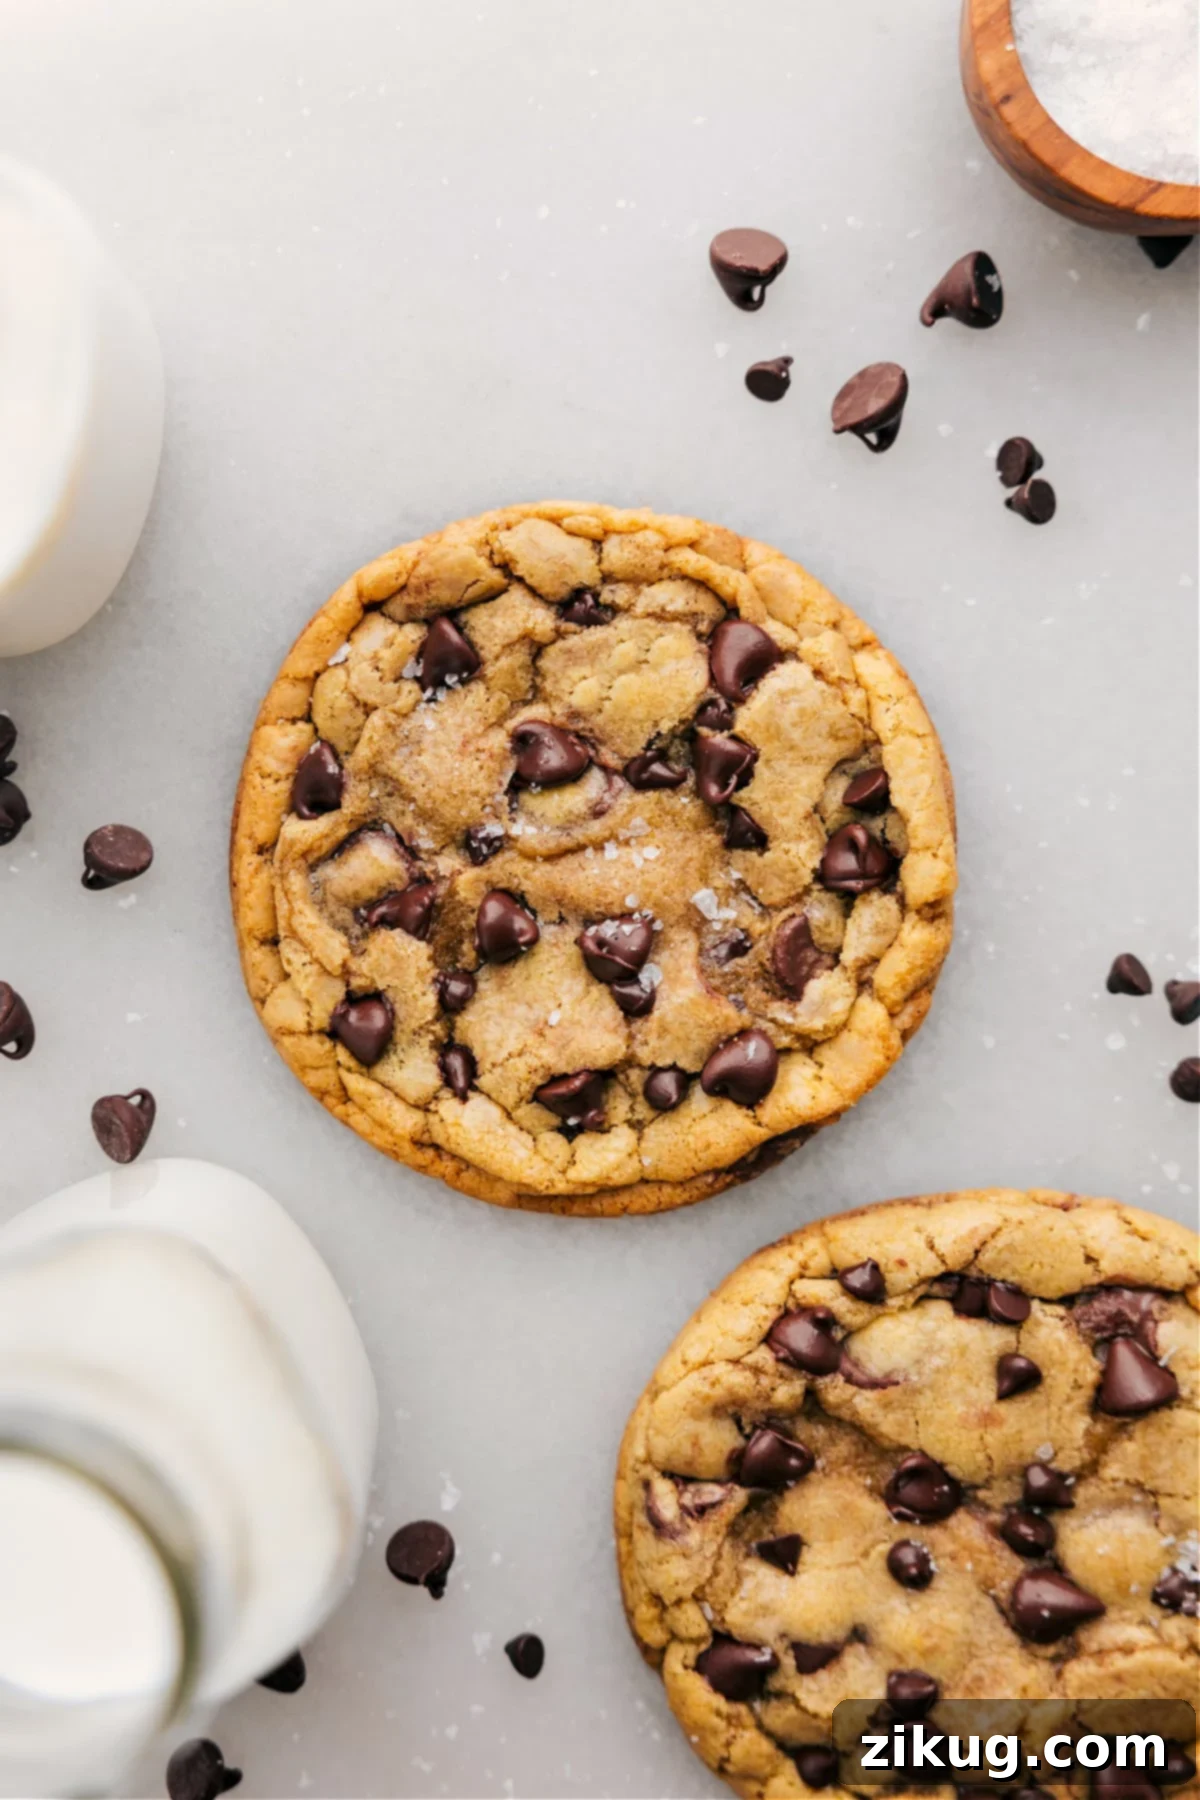
There are times when you simply crave a substantial, unbelievably delicious chocolate chip cookie – but not an entire dozen, or even a small-batch of six. That’s precisely where this single-serving chocolate chip cookie recipe shines. It delivers that coveted bakery-style taste and texture in a manageable quantity, ensuring every cookie is savored at its peak freshness.
These cookies are more than just delicious; they are a testament to how precise measurements can transform simple ingredients into something extraordinary. With careful attention to detail, you will be rewarded with **decadent, sweet, buttery, and perfectly chewy cookies** that boast irresistibly soft interiors and delightfully crisp edges. This isn’t just *a* single serve cookie; it truly is the BEST single serve chocolate chip cookie you’ll ever bake!
Having shared countless recipes over the past decade, this particular single-serve chocolate chip cookie creation is one I consistently return to, refining it to absolute perfection. Its reliability and incredible flavor profile have made it a staple in my kitchen, and it’s sure to become one in yours too.
Key Lessons for Single Serve Cookie Perfection:
Through countless iterations and a decade of baking experience, I’ve distilled the essential techniques that make this single serve chocolate chip cookie truly exceptional. These insights are crucial for achieving consistent, mouthwatering results every time:
- No Hour-Long Chilling Required: While I appreciate the enhanced flavor and texture that chilling can impart on some cookie doughs, when a craving for a single-serving, small-batch cookie hits, I want it *now*. And I’m sure you do too! This recipe is engineered for efficiency, allowing you to bypass lengthy refrigeration without compromising on quality, meaning fresh cookies in minutes.
- Embracing Melted Butter: My original recipe called for softened butter, but after extensive testing and revisions, I’ve made the switch to melted butter. The trick lies in letting it cool completely before mixing, and the results are phenomenal! Melted butter integrates more easily into the dough, leading to a smoother mixture and, surprisingly, an even better, chewier texture in the final cookie. This minor adjustment simplifies the process while elevating the end product.
- Accurate Flour Measurement is Paramount: Precision with flour is the most critical factor for the ideal cookie texture. Too much flour will result in a dry, cake-like cookie that lacks the desired chewiness. Conversely, too little flour will cause the cookies to spread excessively, becoming thin and overly crisp. Using a food scale for accuracy is highly recommended, or at least employing the spoon-and-level method when using measuring cups.
Featured Comment
“If I could give this recipe 10/5 stars, I would. I’ve tried many other chocolate chip cookie recipes and they just didn’t taste great. THIS IS THE BEST RECIPE I’ve ever used. Everyone I’ve given one of these cookies to absolutely LOVES them. I’ve made this recipe dozens of times now, I even memorized it! I just simply LOVE it!!!! THANK YOU!”
– Alexa
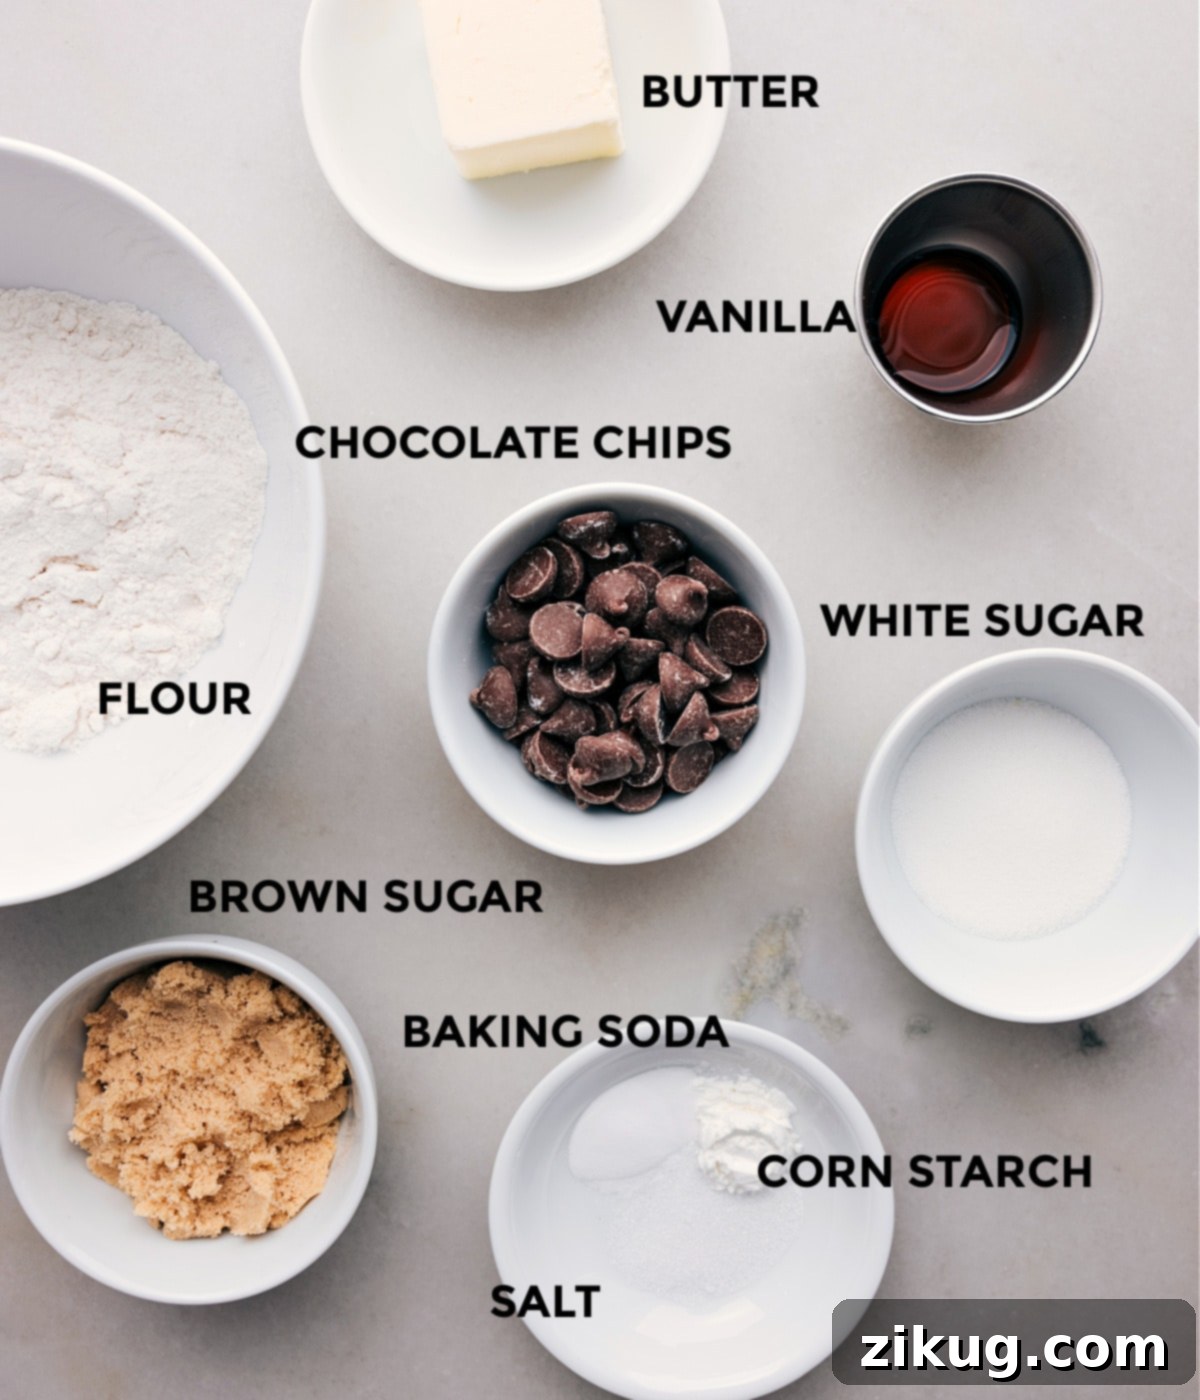
Essential Ingredients for Your Single Serving Chocolate Chip Cookie
Crafting the perfect single serve chocolate chip cookie begins with understanding the role of each ingredient. Here’s a detailed breakdown to ensure your cookies turn out flawlessly:
- Salted or Unsalted Butter: Butter is the foundation of flavor and texture. If opting for unsalted butter, remember to add a heaping 1/8 teaspoon of salt to the dough to enhance the overall taste and balance the sweetness. For an elevated finish and a touch of gourmet flair, a sprinkle of flaky sea salt on top before or after baking makes a significant difference.
- Light Brown Sugar and White Granulated Sugar: This combination is crucial for achieving the desired chewy texture and depth of flavor. Brown sugar contributes moisture and a caramel-like note, while white sugar provides crispness and sweetness. Ensure your brown sugar is fresh, soft, and free of clumps; pack it tightly into your measuring spoons and level it off accurately. Remember, 1/2 tablespoon is equivalent to 1 and 1/2 teaspoons for precise measurement.
- Vanilla Extract: While listed as optional, a good quality vanilla extract significantly deepens and rounds out the cookie’s flavor profile, adding a warm, aromatic dimension that truly makes it taste homemade and special. Don’t skip it if you want the best possible flavor.
- Egg Yolk: This is a key ingredient for richness and structure in a small-batch cookie. Using only the yolk (and not the white) contributes to a more tender, chewier cookie with a beautiful golden hue. It acts as an emulsifier, binding the dough effectively. Be diligent in separating the yolk, ensuring no egg whites are present, and gently pinch off the stringy chalaza (the cord-like structure that anchors the yolk) for a smoother texture. You can find more about the chalaza here.
- Baking Soda: This leavening agent reacts with the acidic brown sugar to create carbon dioxide bubbles, which helps the cookies spread and become tender. Always ensure your baking soda is fresh for optimal results. If you notice any clumps, sift it through a fine mesh strainer before adding it to the mixture.
- Cornstarch: This is an optional but highly recommended addition. A small amount of cornstarch helps to keep the cookies exceptionally soft and chewy, preventing them from becoming too crisp or dry. It’s a secret ingredient many professional bakers use for superior texture.
- All-Purpose Flour: As previously mentioned, accurate flour measurement is critical. The “spoon and level” method (spooning flour into the measuring cup and leveling off with a straight edge) or, even better, using a food scale to weigh the flour, will prevent over-measurement, which leads to dense, cakey cookies.
- Chocolate Chips: The star of the show! Feel free to choose your favorite type – milk, semi-sweet, or dark chocolate chips all work wonderfully. For a dynamic flavor experience, consider mixing different varieties, such as a combination of milk and semi-sweet chocolate, to add complexity and interest to every bite.
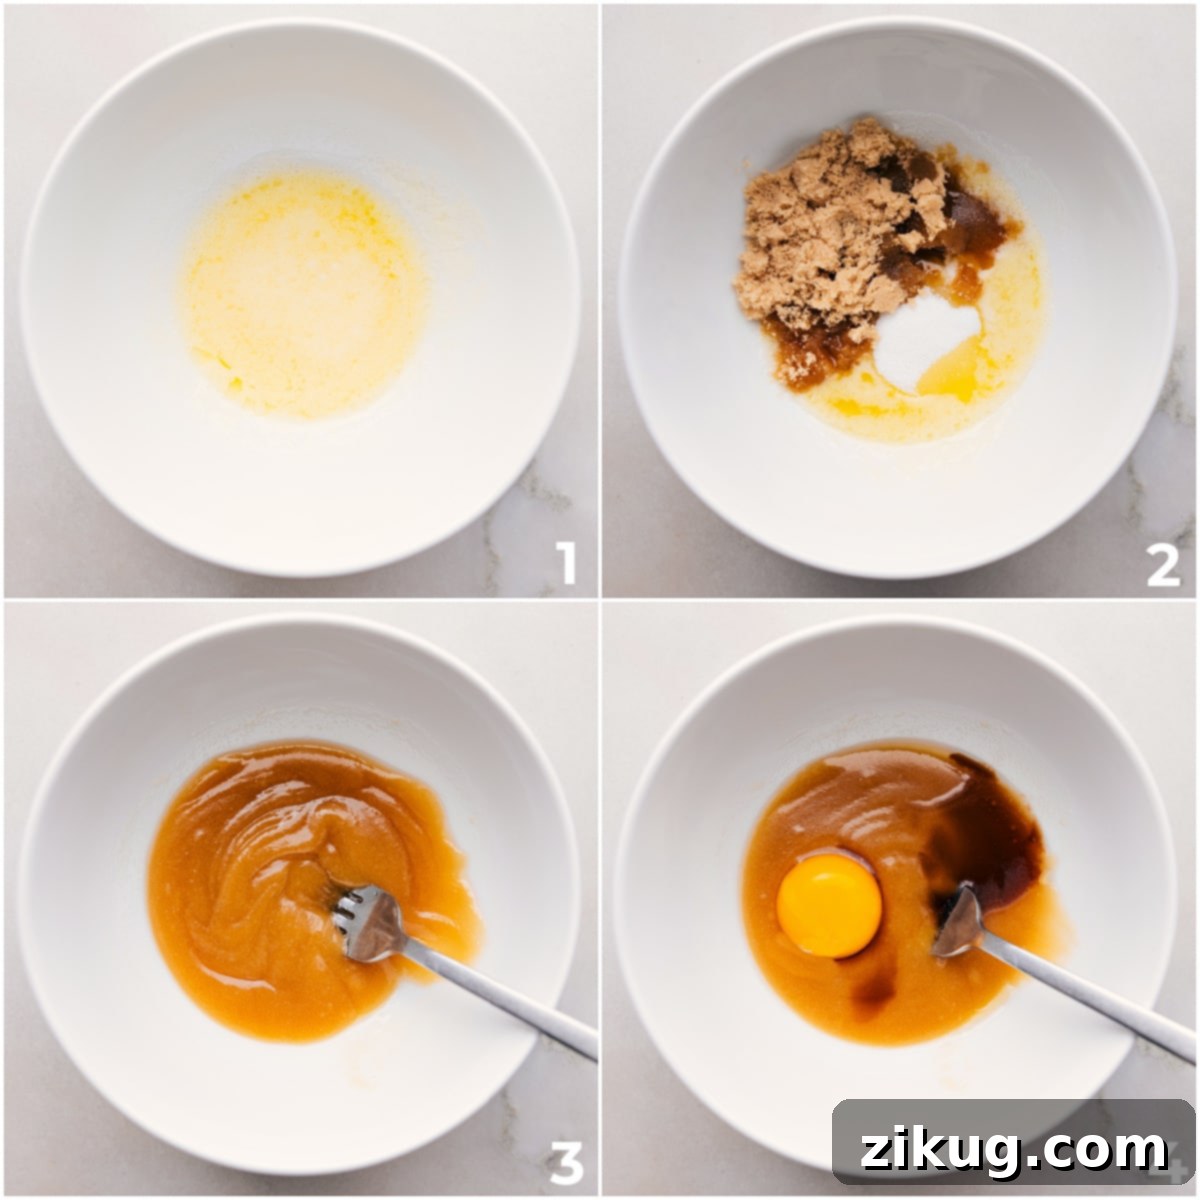
Step-by-Step: How To Make A Single Serve Chocolate Chip Cookie
Achieving a perfect single serve chocolate chip cookie is simple with these clear, concise steps. Follow this quick overview of the recipe, and get ready to enjoy warm, homemade cookies in no time:
- Prepare Your Oven and Butter: Begin by preheating your oven to 350°F (175°C). In a microwave-safe ceramic or porcelain bowl, melt the butter. It should be just melted, not hot or boiling. Allow the melted butter to cool completely to room temperature. This is a crucial step for the cookie’s final texture.
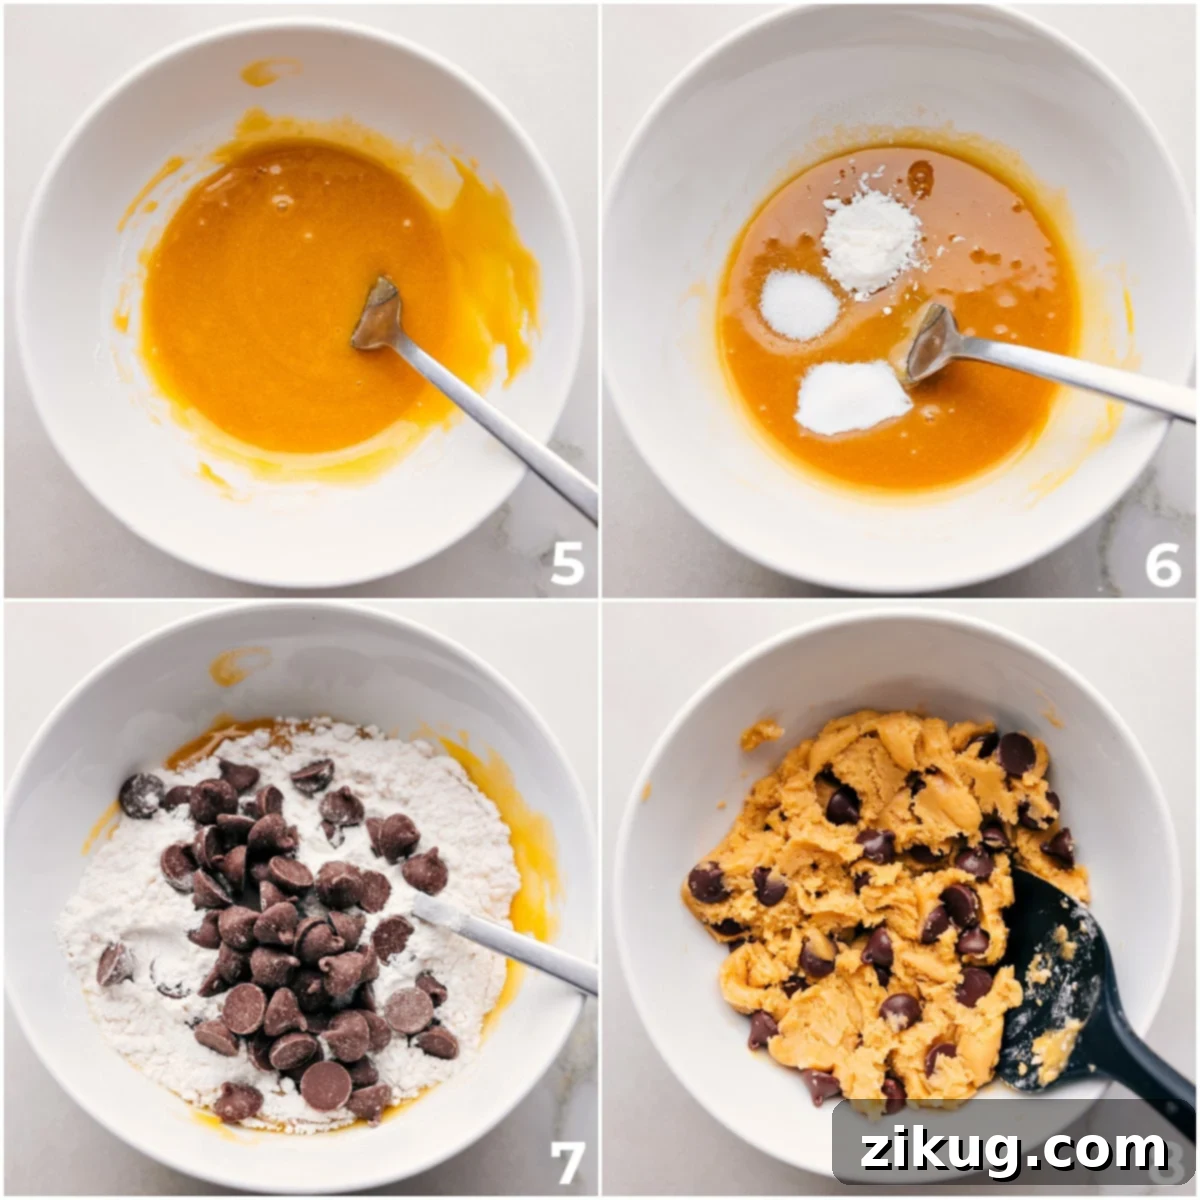
- Combine Sugars and Butter: Once the butter is cool, add both the light brown sugar (firmly packed) and granulated white sugar to the bowl. Vigorously stir the mixture with a fork until the sugars are thoroughly incorporated into the butter and it forms a cohesive, slightly gritty paste.
- Introduce Egg Yolk and Vanilla: Stir in the single egg yolk and the vanilla extract. Continue to whisk briskly with your fork until the mixture is fully emulsified and appears remarkably creamy and smooth. This step contributes significantly to the cookie’s rich flavor and tender crumb.
- Incorporate Dry Leavening Agents: Add the baking soda, along with salt (if you used unsalted butter), and the optional cornstarch. Mix these thoroughly with your fork until they are evenly distributed throughout the wet ingredients.
- Add Flour and Chocolate Chips: Gradually add the all-purpose flour to the mixture, followed by your chosen chocolate chips. Start stirring with a fork, and as the dough begins to thicken and become harder to mix, switch to a sturdy silicone spatula. Fold the ingredients together until the flour is just incorporated and no dry streaks remain. Be careful not to overmix.
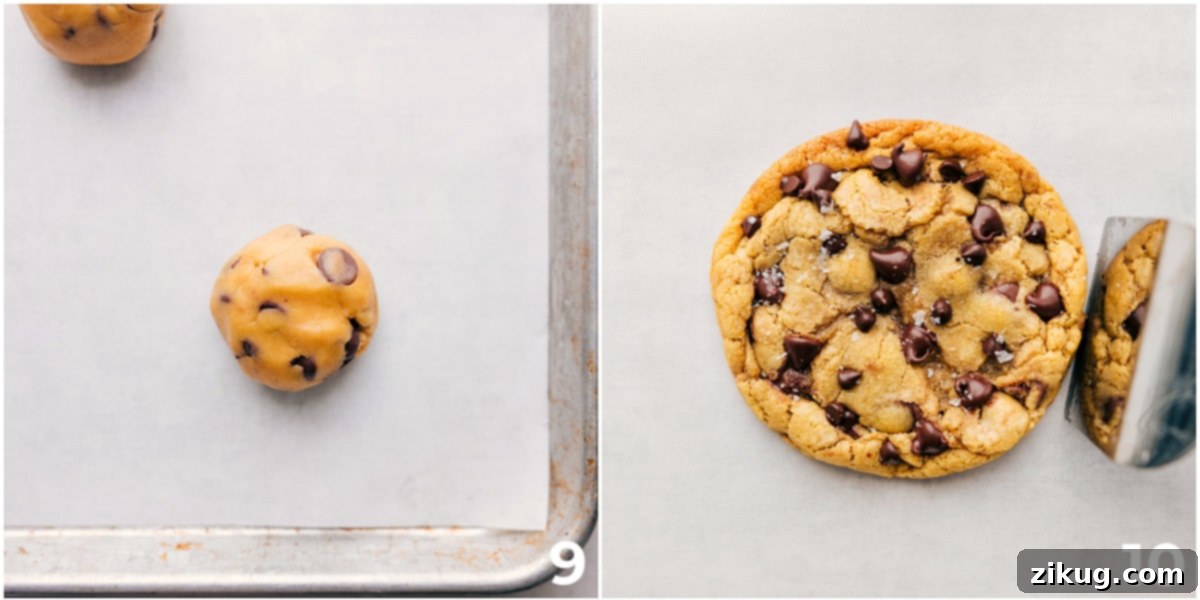
- Shape and Prepare for Baking: Using a 1/4 cup measuring cup, scoop out portions of the dough, leveling off the top, and roll them into three large, uniform balls. Any leftover dough is your chef’s treat! Place these dough balls onto a baking sheet lined with parchment paper or a silicone baking mat. For best results, freeze the shaped dough balls for 5-10 minutes while your oven finishes heating; this brief chill helps prevent excessive spreading.
- Bake to Perfection: Transfer the baking sheet to your preheated oven. Bake for approximately 10-12 minutes, or until the edges of the cookies are beautifully golden brown, but the centers still look slightly soft and underbaked. This ensures a wonderfully chewy interior.
- Cool and Shape: Immediately upon removing the cookies from the oven, use a metal spatula to gently press any uneven edges inwards, creating perfectly round cookies. This is also the ideal moment to press a few extra chocolate chips onto the tops for a visually appealing, chocolate-studded finish. Allow the cookies to cool on the baking sheet for about 5 minutes before transferring them to a wire rack or, even better, enjoying them warm!
Expert Tips for Making the Best Single Serve Chocolate Chip Cookie
While the recipe is straightforward, a few expert tips can elevate your single serve chocolate chip cookies from good to absolutely phenomenal. Pay attention to these details for consistently perfect results:
- Measure Precisely: Accuracy in baking, especially with small-batch recipes, is non-negotiable. For the most precise measurements, I highly recommend using a food scale to weigh your ingredients directly into your mixing bowl. If using traditional measuring cups and spoons, always ensure you level off the tops of dry ingredients with a straight edge to avoid over-packing.
- Proper Butter Measurement: Butter can be tricky to measure accurately if the stick’s wrapper isn’t aligned perfectly. To ensure you have exactly 3 tablespoons, cut your butter from the middle of the stick if possible. This helps prevent using too much or too little butter, which can significantly alter the cookie’s texture.
- Slightly Underbake for Gooey Centers: The secret to that coveted soft, gooey center is to remove the cookies from the oven just before they appear fully “done.” The residual heat from the baking sheet will continue to cook them as they cool, leading to a perfectly chewy, tender interior. Look for lightly browned edges and a still-soft, slightly puffy center.
- Shape After Baking: Right after taking the hot cookies out of the oven, use the back of a metal spatula or a large round cookie cutter (larger than your cookie) to gently press and shape any uneven edges inwards. Swirl the spatula around the cookie to create that perfectly round, professional bakery look. This is also the opportune moment to press a few extra chocolate chips onto the top of each cookie, ensuring a beautiful, chocolatey presentation and guaranteeing chocolate in every single bite.
- Cool the Melted Butter Completely: This tip is paramount. After melting the butter, allow it to cool *completely* to room temperature. Mixing warm butter with sugars and egg yolk can lead to a greasy dough and cookies that spread too much, resulting in a thin, overly crisp cookie rather than the desired soft and chewy texture.
- Mix the Egg Yolk Well: Ensure the egg yolk is thoroughly incorporated into the butter and sugar mixture until it becomes smooth and creamy. This helps to create an emulsion that contributes to the cookie’s rich texture and even baking.
- Flatten If Needed: If, after baking, your cookies appear a bit too puffy or dome-shaped for your liking, don’t fret! Gently tap the baking pan on the counter a couple of times immediately after removing it from the oven. This slight shock will help deflate them slightly, creating a flatter, chewier cookie.
Frequently Asked Questions About Single Serve Chocolate Chip Cookies
While you technically *can* double or triple this specific recipe to make a larger batch, it’s often easier and yields better results to use a recipe specifically designed for a larger quantity. For those times you need more than just a few, try my favorite Chewy Chocolate Chip Cookies, our popular Bakery Style Chocolate Cookies, or even the fantastic Gideon’s Bakehouse Cookie Recipe Copycat for a crowd-pleasing treat.
Reducing the sugar in this single serve chocolate chip cookie recipe is generally not recommended. Sugar plays a vital role beyond just sweetness; it’s critical for achieving the cookie’s perfect texture, contributing to both its spread and chewiness. If you’re concerned about the sweetness level, a better approach would be to use dark chocolate chips, which offer a more intense, less sweet chocolate flavor, and add an extra pinch of salt to balance the palate.
The ideal indicator for doneness is when the edges of your single serve chocolate chip cookie are set and have turned a light, golden brown, but the center still appears soft and slightly underbaked. It’s crucial to remove them at this stage because the cookies will continue to firm up and set as they cool on the baking sheet. A slightly under-baked cookie will yield the most wonderfully soft, chewy, and irresistible texture.
Unfortunately, this specific chocolate chip cookie recipe is designed for oven baking and will not work correctly in a microwave. Oven baking is essential for achieving the crisp edges, gooey center, and overall texture that makes these cookies so special. If you’re looking for a quick, microwave-friendly dessert, you might enjoy trying this delicious Microwave Caramel Corn recipe instead!
Helpful Tools for Single Serve Cookie Success
Having the right kitchen tools can make the process of baking these single serve chocolate chip cookies even more enjoyable and efficient. Here are the essential items you’ll need, along with why they’re so helpful:
- Microwave-Safe Porcelain Bowls: These are ideal for melting butter quickly in the microwave. Porcelain, in particular, cools down faster than glass, allowing your melted butter to reach room temperature sooner, which is crucial for the recipe’s success.
- Fork: A simple fork is surprisingly effective for this recipe! It’s perfect for briskly whisking the sugars with the melted butter and for emulsifying the egg yolk and vanilla until the mixture achieves that desirable smooth, creamy consistency.
- Silicone Spatula: As the dough thickens with the addition of flour and chocolate chips, a sturdy silicone spatula becomes invaluable. It helps you mix the dough thoroughly without overworking it, and its flexible edge is excellent for scraping every last bit of delicious dough from the bowl.
- Baking Tray and Liner: A good quality baking tray is essential for even heat distribution, ensuring your cookies bake consistently. Pairing it with a baking liner, such as parchment paper or a silicone baking mat, prevents sticking, promotes better bottom crust development, and makes cleanup incredibly fast and easy.
- Metal Spatula: This tool is your secret weapon for post-bake shaping. Immediately after baking, while the cookies are still warm and pliable, use a metal spatula to gently press in any rough edges, creating perfectly round and attractive cookies. It’s also great for carefully transferring the warm cookies.
Storage & Serving Suggestions
Single Serve Chocolate Chip Cookie Storage and Leftovers
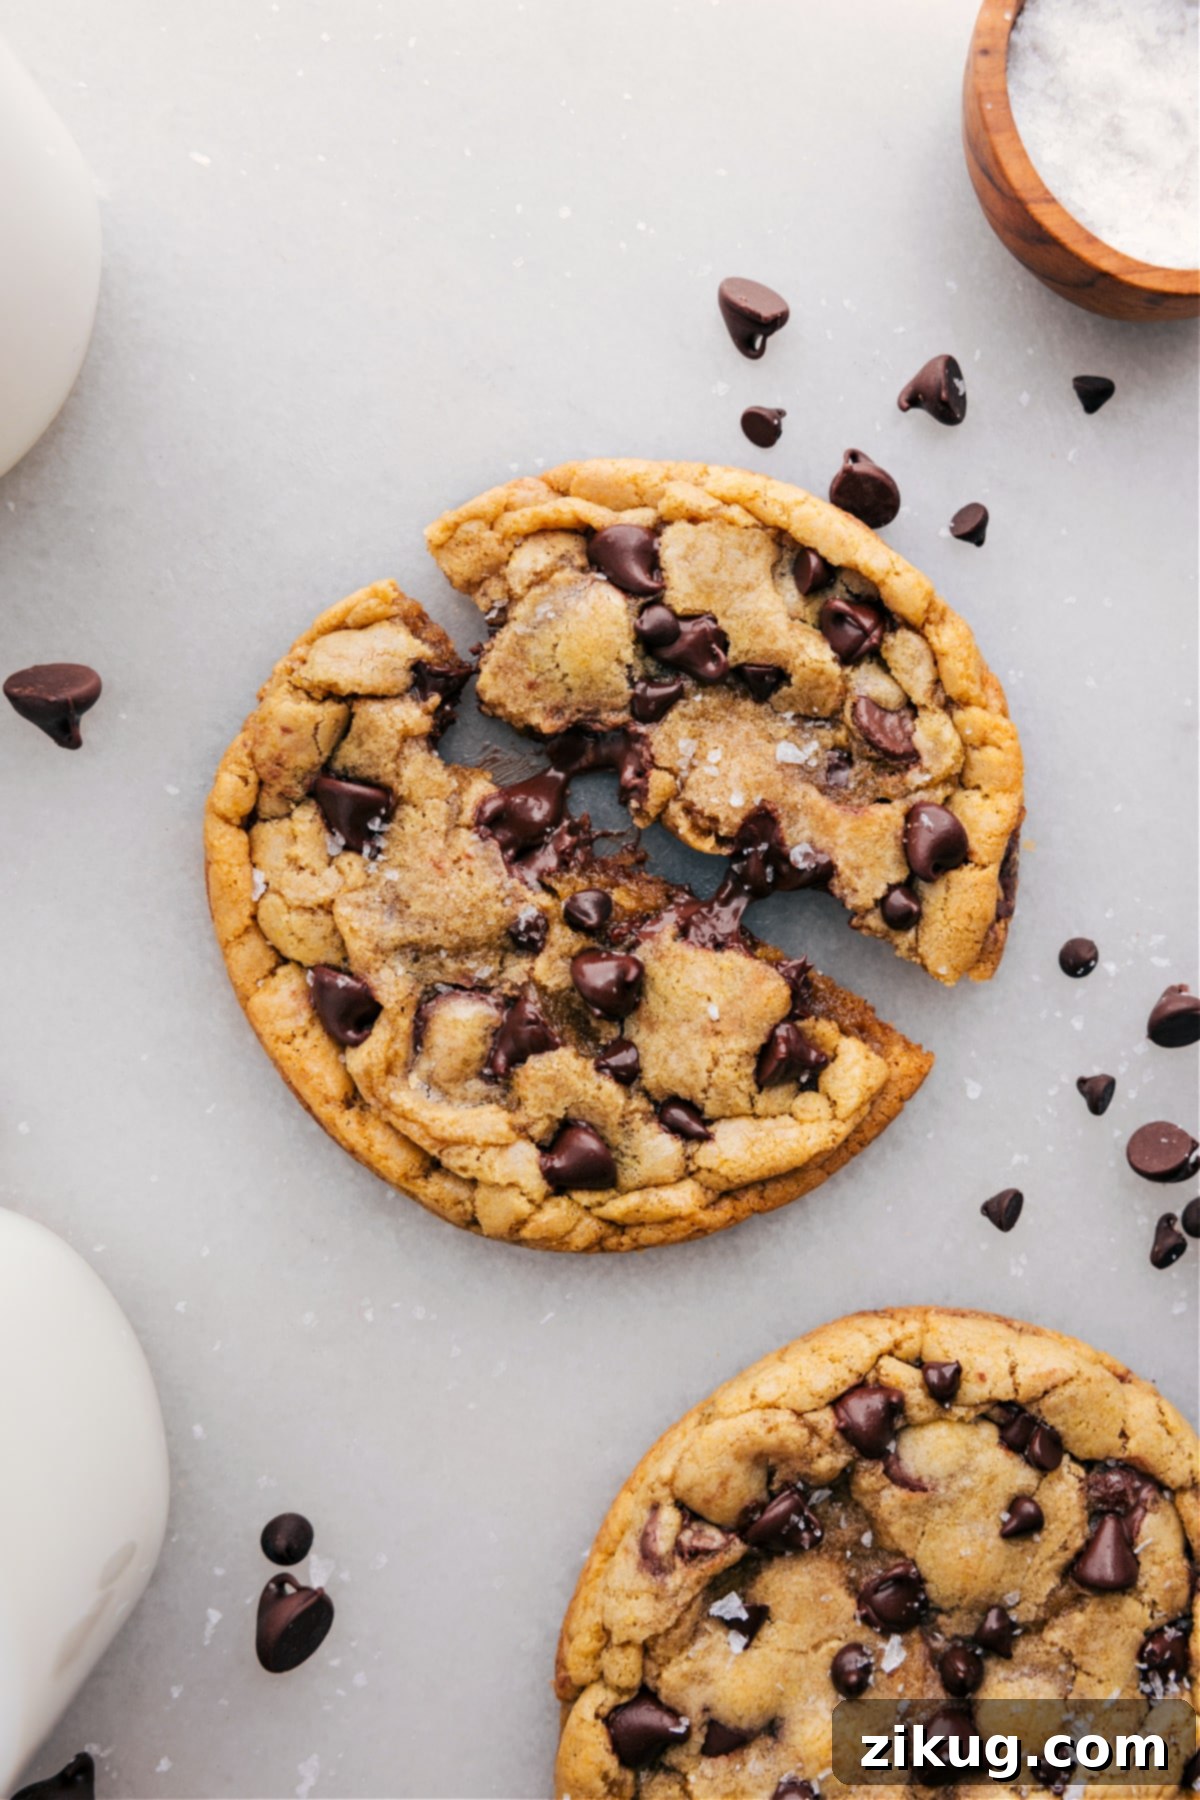
These single serve chocolate chip cookies are undoubtedly at their absolute best when enjoyed warm, fresh out of the oven. For an extra decadent treat, consider topping them with a scoop of your favorite vanilla bean ice cream – the contrast of warm cookie and cold ice cream is heavenly!
Should you miraculously have any leftovers (which is rare with these delicious cookies!), store them in an airtight container or bag at room temperature for up to 2-3 days to maintain their freshness. If you’ve prepared extra unbaked dough, it freezes beautifully. Simply place the dough balls in an airtight freezer-safe bag or container and freeze for up to one month. When a craving strikes, you can bake them directly from the freezer, adding a minute or two to the baking time.
More Quick & Easy Cookie Recipes:
Cookies
No Bake Cookies Recipe
Desserts
Irresistible Chocolate Chip Cookie Bars
Desserts
Refreshing Fruit Pizza Recipe with Sugar Cookie Crust
Desserts
Easy Avalanche Cookies (No Baking Required!)
Single Serve Chocolate Chip Cookie
Equipment
-
Sheet pan (15″ x 10″)
-
Parchment paper or silicone baking mat
Ingredients
- 3 tablespoons unsalted butter or salted buttered, see note 1
- 3 tablespoons light brown sugar firmly packed
- 1-1/2 tablespoons granulated sugar
- 1/2 teaspoon vanilla extract optional
- 1 large egg yolk see note 2
- 1/4 teaspoon baking soda
- 1/2 teaspoon cornstarch optional
- 1/2 cup all-purpose flour see note 3
- 6 tablespoons chocolate chips I love milk chocolate!
- Flaky sea salt for topping, optional
Instructions
-
Always use exact measurements and level off the tops of measuring cups and spoons for the very best results in this precise recipe.
-
Preheat your oven to 350°F (175°C). Place the butter in a microwave-safe ceramic or porcelain bowl and microwave until it is just melted, ensuring it doesn’t get hot. Crucially, allow the butter and bowl to cool completely to room temperature before proceeding.
-
To the completely cooled butter, add both the firmly packed light brown sugar and granulated white sugar. Stir vigorously with a fork until they are thoroughly combined. Next, incorporate the egg yolk and vanilla extract. Continue to whisk with your fork until the mixture is fully emulsified and appears wonderfully creamy.
-
Add the baking soda, salt (if you opted for unsalted butter), and cornstarch to the wet mixture. Mix everything thoroughly with a fork, ensuring all dry ingredients are well distributed. Finally, add the all-purpose flour and chocolate chips. Continue stirring with a fork until the dough becomes thick and difficult to mix, then switch to a silicone spatula and gently fold until the dough is uniform and no dry streaks of flour are visible.
-
Using a 1/4 cup measuring cup, fill it with dough and level off the top. Roll the dough into a large, smooth ball. Repeat this process until you have three distinct dough balls (any remaining dough is a bonus treat for you!). Place these dough balls onto a baking sheet that is lined with parchment paper or a silicone baking mat. For optimal results, freeze the shaped dough balls for 5–10 minutes while your oven finishes heating; this quick chill helps maintain their shape during baking.
-
Bake the cookies for 10–12 minutes, or until their edges are lightly browned and set, but the centers still appear soft and slightly underbaked. This is key for a chewy cookie. Immediately after removing the baking sheet from the oven, use a metal spatula to gently press the edges of the cookies inward if needed, perfecting their round shape.
-
Optionally, while the cookies are still warm, gently press a few additional chocolate chips into their tops for a beautiful presentation and sprinkle with flaky sea salt for an extra flavor boost. Allow the cookies to cool on the baking sheet for at least 5 minutes before carefully transferring them to a wire rack or, even better, enjoying them warm!
Recipe Notes
Note 2: When separating the egg yolk from the whites, take your time to ensure that no egg white makes it into the dough, as this can affect the cookie’s texture. Also, gently remove the stringy part known as the chalaza (I find it easiest to carefully pull it off with my fingers) for a smoother, richer dough.
Note 3: Accurate flour measurement is absolutely crucial for the success of these cookies. For the most precise results, use a food scale to weigh out exactly 62 grams of all-purpose flour. Too much flour will result in dry, cakey cookies, while too little will cause them to spread excessively and become thin.
Storage: To maintain their delicious freshness, store baked cookies in an airtight bag or container at room temperature for up to 2-3 days. If you have any unbaked dough, it can be stored in an airtight freezer-safe bag in the freezer for up to one month and baked directly from frozen when you’re ready for a fresh treat.
Nutrition
Nutrition information is automatically calculated, so should only be used as an approximation.