
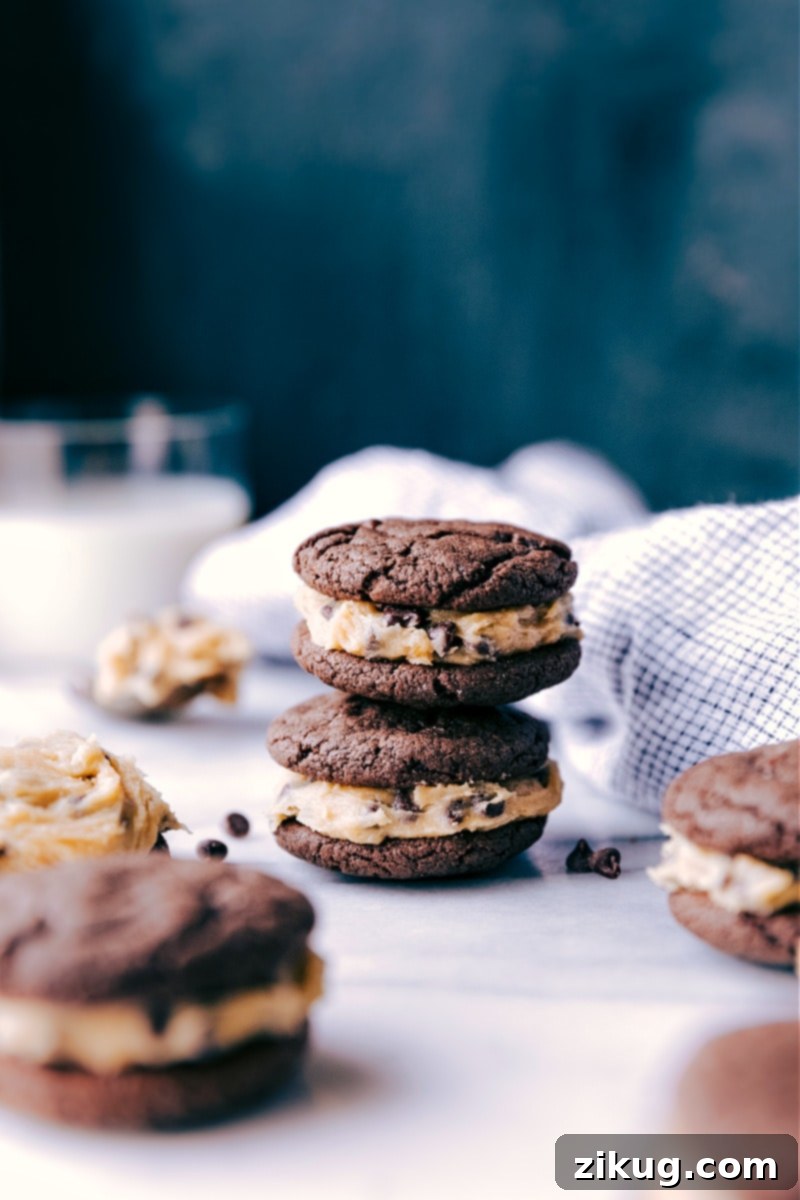
Indulge in the ultimate homemade treat: **Cookie Dough Oreos**! These decadent delights feature rich, fudgy chocolate cookies generously filled with a velvety smooth cookie dough frosting. This signature frosting is crafted from delectable edible cookie dough blended into a classic vanilla buttercream, creating a truly irresistible dessert experience.
If you’re a fan of classic sandwich cookies, be sure to try our Original Homemade Oreos recipe for another delightful baking adventure.
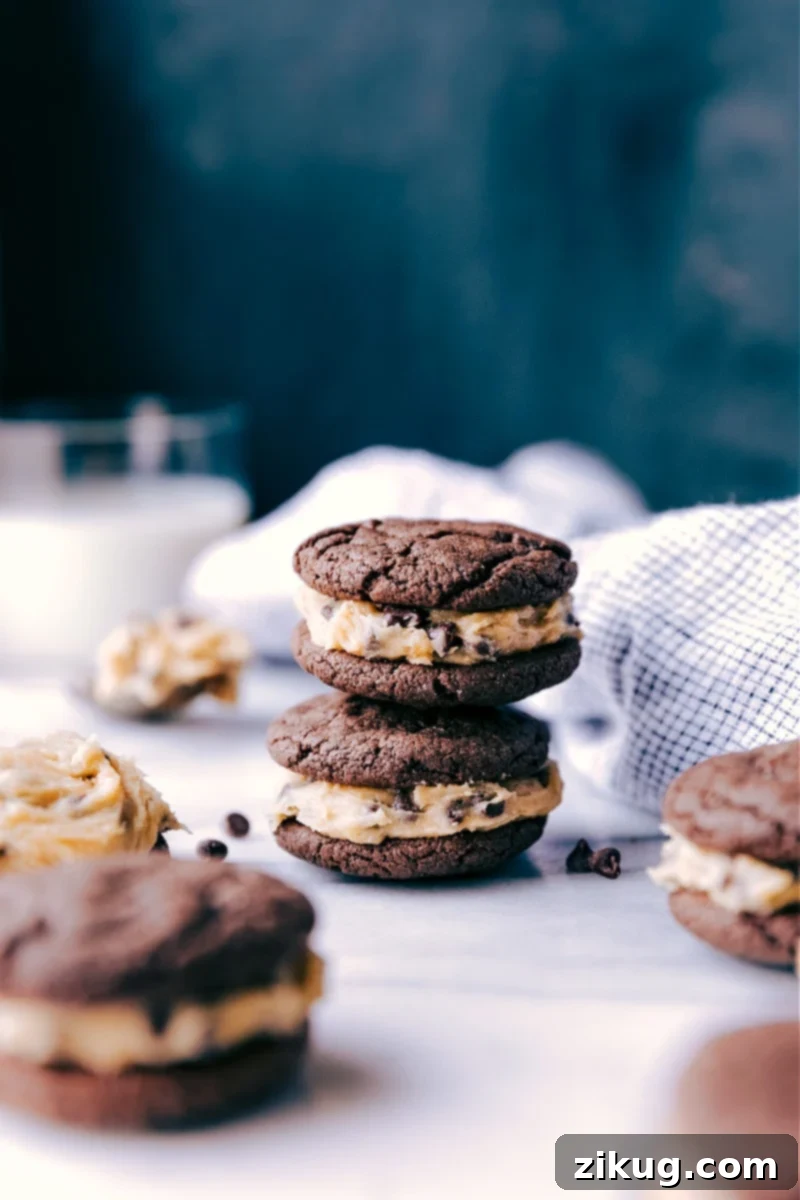
Unleash Your Inner Baker with Homemade Cookie Dough Oreos
There’s something universally comforting and undeniably delicious about an Oreo. As an avid fan, my kitchen often buzzes with Oreo-inspired creations, from Oreo Fudge to indulgent Oreo Ice Cream Cake. So, when Nabisco announced their limited-edition Cookie Dough Oreos, I was among the first to stock up. However, as with all limited-time treasures, they vanished far too quickly, leaving a craving that only a true baker could satisfy.
That’s when the mission began: to create a superior homemade version that not only captured the essence of those beloved treats but elevated them. These aren’t just any homemade cookies; they are soft, incredibly chewy, and bursting with deep chocolate flavor, reminiscent of a luxurious whoopie pie rather than a standard crunchy cookie. Each is generously filled with a luscious cookie dough frosting – a filling so good, you’ll be tempted to “double stuff” or even “triple stuff” every single one!
While crafting the frosting might take a little extra time, I promise you, the effort is unequivocally worth it. This isn’t your average buttercream; it’s a smooth, sweet, and airy concoction made with my acclaimed edible cookie dough, perfectly integrated into a simple vanilla buttercream. The result is a uniquely creamy, sweet, and fluffy frosting, free from any hint of graininess, making it the ideal complement to our rich chocolate cookies. Prepare yourself for the ultimate cookie dough experience!
The Secret to Perfect Cookies: Choosing the Right Cake Mix
One of the most surprising and ingenious aspects of these Homemade Cookie Dough Oreos is their reliance on a simple cake mix. This shortcut not only simplifies the baking process but also plays a pivotal role in achieving the cookies’ signature fudgy texture and rich flavor. Beyond the cake mix, you’ll only need four other readily available ingredients, making this an incredibly accessible recipe for bakers of all skill levels.
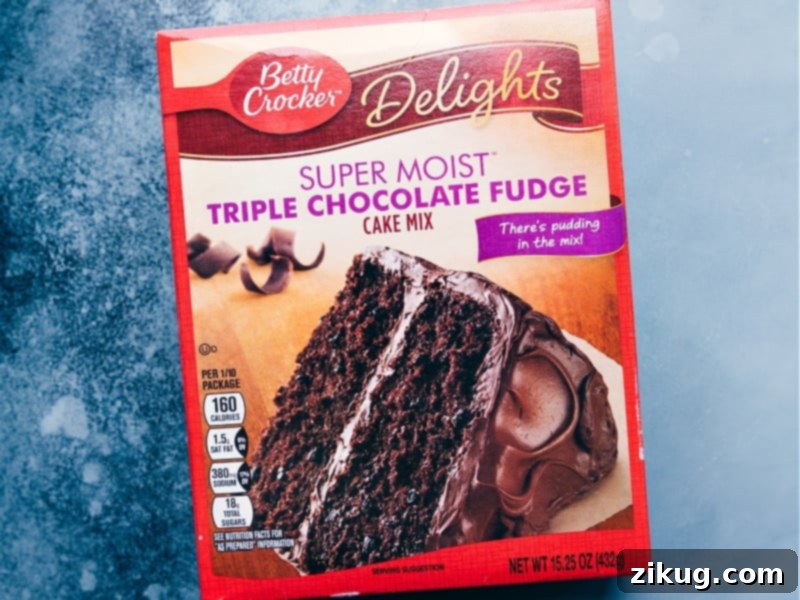
Through extensive testing and a quest for perfection, one cake mix consistently rose above the rest: **Betty Crocker’s® Super Moist Triple Chocolate Fudge Cake Mix**. This particular mix is a game-changer. It delivers an incredibly rich, deep chocolate flavor that forms the perfect base for our “Oreo” cookies. What’s more, it often includes delightful mini chocolate chips that melt and ripple through the cookies as they bake, adding an extra layer of chocolatey goodness and visual appeal. When you pick up your box, remember to set aside the package directions; we’ll be using our own unique blend of ingredients to transform it into these extraordinary sandwich cookies.
Enhancing Texture and Flavor: The Role of Pudding Mix
Beyond the cake mix, the pudding mix is another critical ingredient that contributes significantly to the irresistible moistness and decadent texture of our Homemade Cookie Dough Oreos. It acts as a secret weapon, adding an extra layer of richness and keeping the chocolate cookies incredibly soft and tender.
For optimal results, it is imperative to use **chocolate instant pudding mix**. Be sure to differentiate this from “cook-and-serve” varieties, as they behave differently in baking and will not yield the desired texture. Similarly, it’s best to avoid sugar-free or reduced-calorie options, as their chemical compositions can alter the final outcome of the cookies. Stick to the classic instant version for the best flavor and texture profile.
Always grab the small **3.9-ounce (111g)** box of instant chocolate pudding mix. Remember, you’ll be using the dry mix directly in the cookie dough – there’s no need to prepare it according to the package directions. Simply open the box and add the powdered goodness straight into your bowl to unlock that extra fudginess.
Essential Supporting Ingredients for Your Cookie Dough Oreos
While cake mix and pudding mix form the foundation of these incredible chocolate cookies, a few other carefully selected ingredients play crucial supporting roles in achieving the perfect flavor and texture for your Homemade Cookie Dough Oreos:
- Eggs: For consistent results and proper binding, always use **large eggs**. They provide structure and moisture, contributing to the soft, chewy nature of the cookies.
- Unsalted Butter: Butter is paramount for richness and tenderness. It should be at **room temperature**, which means it’s soft enough to make an indentation when gently pressed, but not melted or greasy. If your butter is too soft or melted, the cookie dough might be too loose, leading to cookies that spread too much during baking. A quick chill in the refrigerator or freezer for 15-30 minutes can remedy this, helping the dough hold its shape and bake into wonderfully thick, fudgy cookies.
- Vanilla Extract: A touch of high-quality **vanilla extract** is essential for enhancing the overall flavor profile. It acts as a bridge, deepening the chocolate notes in the cookies and adding a warm, aromatic complexity to both the cookie dough and the luxurious frosting. Don’t skimp on good vanilla; it makes a noticeable difference!
The Star Filling: Decadent Edible Cookie Dough Frosting
The heart and soul of these Homemade Cookie Dough Oreos lie in their spectacular filling: a truly indulgent edible cookie dough frosting. This isn’t just any frosting; it’s a carefully balanced creation that combines two irresistible elements to deliver a creamy, dreamy, and utterly unique experience. Let’s break down the magic behind this iconic filling:
- Edible Cookie Dough: This isn’t your average raw cookie dough from a tube! Our edible cookie dough is specifically designed to be safe for consumption. It’s meticulously prepared without any eggs, and crucially, the flour is heat-treated to eliminate potential safety concerns, such as bacteria like E. coli. The result is a delicious, buttery, and sweet dough that forms the textural and flavor backbone of our frosting, providing those delightful, chewy bits of cookie dough you crave.
- Vanilla Buttercream: Providing the smooth, luxurious base, our vanilla buttercream is anything but basic. While it starts as a standard buttercream recipe, we enhance its depth of flavor with a strategic touch of salt and a generous amount of pure vanilla extract. This combination ensures the buttercream is rich and creamy, perfectly sweet without being cloying, and beautifully complements the intense flavors of the cookie dough, creating a harmonious and utterly addictive filling.
Quick Tip: Understanding Buttercream
Buttercream is a beloved frosting widely used in professional and home baking. It’s typically made with butter, powdered sugar, cream or milk, and flavorings like vanilla. Its smooth, rich texture and balanced sweetness make it a versatile choice, offering a less sugary profile compared to many whipped cream frostings often found in commercial baked goods. This makes it an ideal canvas for our edible cookie dough!
Essential for Safety: How to Heat Treat Flour for Edible Cookie Dough
When making edible cookie dough, one of the most important steps for food safety is heat-treating the flour. Raw flour can contain harmful bacteria, such as E. coli, which can cause illness if consumed. By properly heating the flour, we eliminate this risk, ensuring your cookie dough frosting is not only delicious but also completely safe to enjoy without baking. Here are three effective methods for heat-treating flour:
- Purchase Pre-Cooked Flour: The simplest method is to buy flour that has already been heat-treated. Many brands now offer this product specifically for edible cookie dough recipes. Always double-check the label to ensure it explicitly states it is “heat-treated” or “safe for raw consumption.”
- Microwave Method: This is a quick and convenient way to heat treat flour at home.
- Place the desired amount of flour in a microwave-safe bowl.
- Microwave on high in **30-second intervals**, stirring thoroughly between each interval. This prevents burning and ensures even heating.
- Use an instant-read food thermometer to check the temperature of the flour. Continue microwaving and stirring until the flour reaches a safe internal temperature of **165°F (74°C)**.
- Once it reaches the target temperature, allow the flour to cool completely to room temperature before using it in your cookie dough.
- Oven Method: For a slightly larger batch or if you prefer oven baking, this method is also very effective.
- Preheat your oven to **300°F (150°C)**.
- Line a large baking sheet with parchment paper or a silicone baking mat.
- Spread the flour evenly in a thin layer across the prepared baking sheet.
- Bake for approximately **5-7 minutes**, stirring the flour every **1.5 to 2 minutes** to ensure even heating and prevent scorching.
- Periodically check the temperature with an instant-read thermometer until it reaches **165°F (74°C)**.
- Once safely heated, remove the flour from the oven and let it cool completely to room temperature before incorporating it into your edible cookie dough.
Remember, always ensure the flour is completely cooled before adding it to your other ingredients, as hot flour can alter the texture of your cookie dough.

Storage Solutions for Your Cookie Dough Oreos
Enjoying and Storing Leftovers
To preserve their delightful freshness and fudgy texture, store any leftover Homemade Cookie Dough Oreos in an **airtight container in the refrigerator**. While these cookies are truly at their absolute best, softest, and fudgiest on the day they are made, they will remain delicious for **2-3 days** when stored properly. For the most enjoyable experience, try to consume them within this timeframe. If you wish to extend their shelf life, you can freeze individual cookies in an airtight container for up to 1 month. Thaw at room temperature or briefly in the microwave for a warm treat.
Explore More Irresistible Cookie Creations
If you’ve fallen in love with these Cookie Dough Oreos, you’re in for a treat with our other fantastic cookie and dessert recipes. Expand your baking repertoire with these crowd-pleasing options:
- **Caramel Brownie Cookie Bars:** Indulge in layers of rich brownie, chewy cookie, and luscious caramel all in one easy-to-make bar.
- **Soft and Chewy Butterscotch Cookies:** Experience the delightful chewiness and sweet, buttery notes of these classic butterscotch cookies.
- **No-Bake Healthy Breakfast Cookies:** Start your day right with these wholesome and convenient no-bake cookies, perfect for a quick and nutritious breakfast or snack.
- **Classic Chocolate Chip Cookie Bars:** All the comforting goodness of chocolate chip cookies, baked into a convenient and shareable bar format.
- **Frosted Honey Graham Cookies:** Discover a unique blend of honey graham flavor topped with a smooth, tangy cream cheese frosting for a nostalgic treat.

Pin
Cookie Dough Oreos
Homemade Cookie Dough Oreos pair fudgy chocolate cookies with a delicious cookie dough frosting—made by blending edible cookie dough into vanilla buttercream. The best cookie combo!
Video
Equipment
-
Large sheet pan (15″ x 21″)
-
Parchment paper or silicone baking mat
-
Hand mixer
-
Cooling rack
-
Stand mixer
Ingredients
- 1 (13.25-ounce) package Super Moist Triple Chocolate Fudge cake mix Betty Crocker brand
- 1 (3.9-ounce) package instant chocolate pudding mix dry, do not prepare; small box
- 2 large eggs
- 8 tablespoons unsalted butter 1/2 cup, softened to room temperature
- 1 teaspoon vanilla extract
- 3/4 cup all-purpose flour see note 1 for heat treating
- 1/3 cup unsalted butter melted
- 1/3 cup brown sugar firmly packed; light or dark, dark preferred
- 3 tablespoons granulated sugar
- 1/4 teaspoon salt
- 1 teaspoon vanilla extract
- 1 tablespoon whole milk or heavy cream
- 1/3 cup mini chocolate chips
- 8 tablespoons unsalted butter 1/2 cup
- 1-1/2 teaspoons vanilla extract
- 1 tablespoon heavy cream
- 1/4 teaspoon salt
- 1-1/2 cups powdered sugar
Instructions
Cookies
-
Before starting, ensure all butter (2 sticks total, for both cookies and frosting) is at room temperature. Preheat your oven to 350°F (175°C). Line a large sheet pan with parchment paper or a nonstick baking liner and set it aside.
-
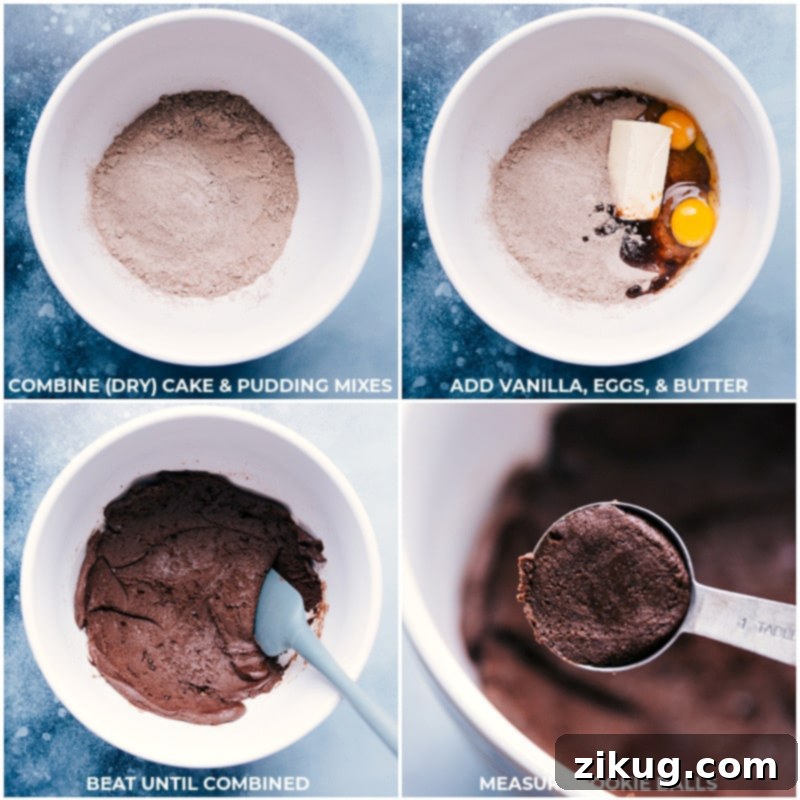
In a very large mixing bowl, combine the cake mix, instant pudding mix, room-temperature butter, eggs, and vanilla extract. Using a hand mixer, beat the ingredients until they are just combined. Initially, the mixture may appear crumbly, but it will come together to form a cohesive dough. Use a spatula to scrape down the sides and bottom of the bowl as needed. Stop mixing as soon as the dough forms to avoid overworking it.
-
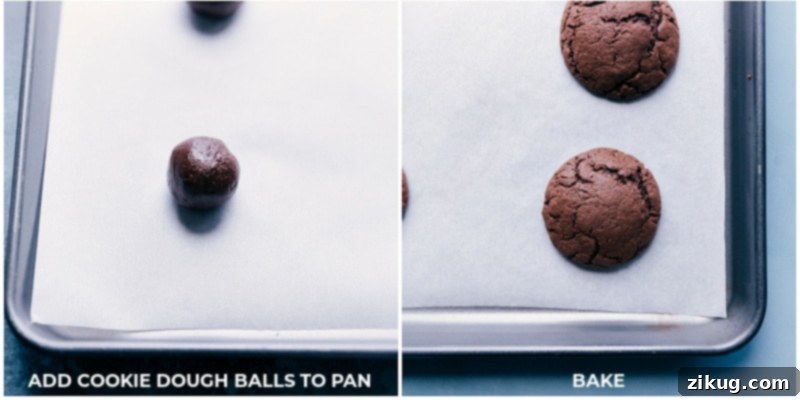
Using a one-tablespoon measuring spoon, scoop out even portions of cookie dough. Each dough ball should be approximately 1 leveled tablespoon (about 20 grams). You should yield around 34–36 cookies. If the dough balls feel too soft, place them in the freezer for 15 minutes; this helps them maintain a nice, thick shape during baking. Arrange the dough balls 2 inches apart on the lined sheet pan and bake for 7–10 minutes (8 minutes is often ideal for a perfect texture). The goal is to slightly under-bake these cookies to ensure they remain wonderfully soft and fudgy. Remove from the oven and let them rest on the cookie sheet for 3 minutes before carefully transferring them to a wire cooling rack to cool completely. Repeat this process for any remaining dough.
Edible Cookie Dough
-
Heat Treat Flour: Refer to Note 1 below for detailed instructions on heat-treating flour using either the microwave or oven method. It is crucial to let the heat-treated flour cool completely to room temperature before use. Discard any flour that appears burnt or clumpy, or smells scorched, as this indicates it’s overcooked. The flour should remain light, white, and fluffy. Once cooled, use a spoon to scoop the flour into a measuring cup and level the top with the back of a table knife. Set aside.
-
Meanwhile, melt the 1/3 cup of butter and allow it to cool back down to room temperature. Using hot butter will melt the sugars and can result in a greasy or grainy cookie dough. In a medium bowl, add the cooled melted butter. Then, add the brown sugar and granulated sugar. Briskly stir or whisk the mixture with a spatula for 1–2 minutes until it is completely smooth and fully integrated. The consistency should become creamier, with no separation of butter.
-
Once the butter and sugar mixture is smooth, stir in the salt, vanilla extract, and milk until fully integrated. Next, add the completely cooled heat-treated flour and mini chocolate chips. Mix until everything is thoroughly combined and the dough is smooth. Place the edible cookie dough in the refrigerator to chill while you prepare the frosting.
Frosting
-
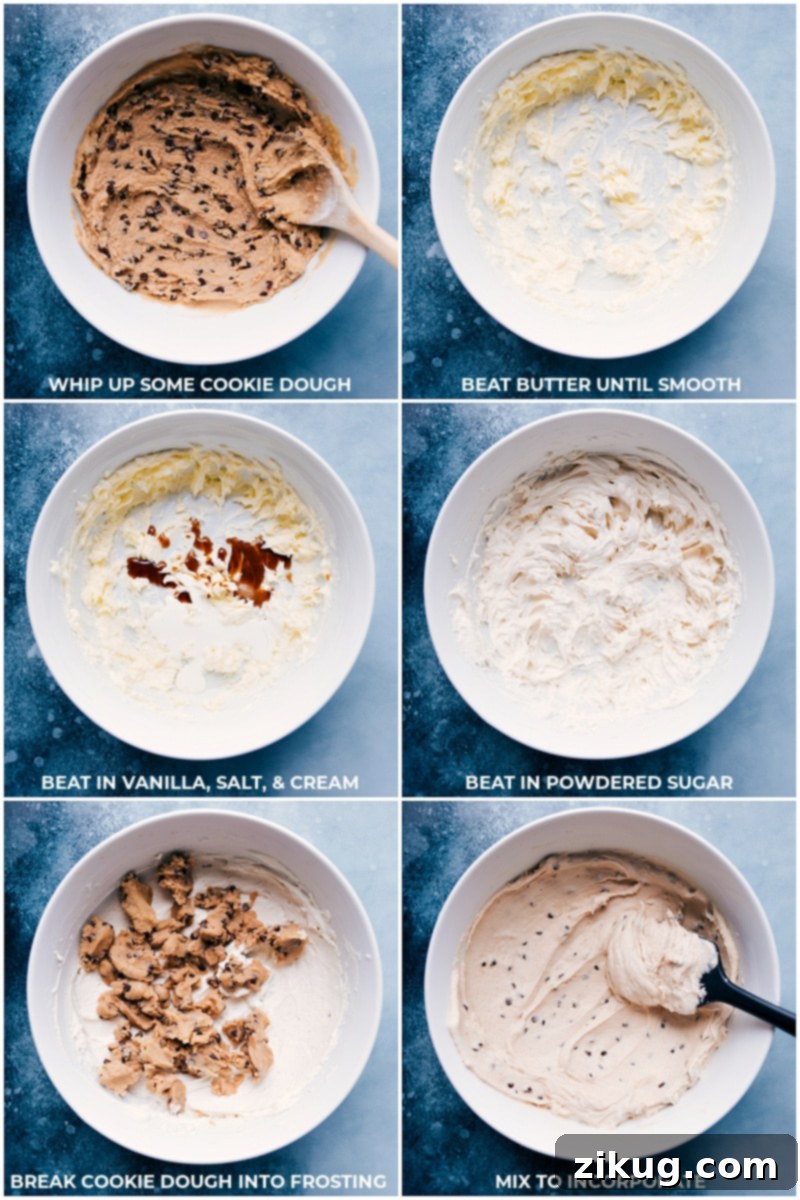
In the bowl of a stand mixer fitted with the paddle attachment, add 8 tablespoons of room-temperature butter. Beat on medium speed for 3 minutes, or until the butter is light, smooth, and fluffy. Be sure to scrape down the sides of the bowl with a spatula as needed. Add the vanilla extract, heavy cream, and salt, then beat again to combine these ingredients.
-
Gradually add the powdered sugar to the mixer, starting on low speed to prevent a cloud of sugar. Once the sugar is mostly incorporated, increase the mixer speed to medium-high and beat until the frosting becomes very light and incredibly fluffy, usually about 3–4 minutes. You’ll notice the frosting turning a much lighter, almost white, color. Next, remove the chilled edible cookie dough from the fridge and break or crumble it directly on top of the frosting. Beat on low speed for just about 10–20 seconds, only until the cookie dough is incorporated into the frosting. It’s perfectly fine, and even desirable, to have some rippled chunks of dough, as this adds a wonderful texture to the frosting!
Assembly
-
Once your chocolate cookies have mostly cooled (a slight warmth is acceptable, as they are incredibly fudgy!), divide the glorious cookie dough frosting evenly among 17–18 of the cookies. Spread a generous amount of frosting onto one cookie, then gently sandwich it with another cookie. You will likely have a small amount of frosting leftover—approximately 1/2 cup. This leftover frosting is an absolute treat on its own or as a dip; I particularly enjoy dipping fresh fruit, graham crackers, or even real Oreos into it!
Recipe Notes
Note 1: Here’s how to heat treat flour for safe edible cookie dough:
- Always heat treat approximately 1/2 cup more flour than the recipe calls for, just in case some edges burn or clump during the process.
- Microwave Method: Add flour to a microwave-safe bowl. Microwave in 30-second bursts, stirring thoroughly after each interval to prevent burning or clumping. Use an instant-read thermometer to check the temperature after each burst. The flour is safely heat-treated when it has reached an internal temperature of 165°F (74°C).
- Oven Method: Preheat your oven to 300°F (150°C). Line a large sheet pan with a nonstick liner or parchment paper. Spread the flour evenly on the pan. Bake, stirring and checking the temperature every 2 minutes, until the flour reaches 165°F (74°C). This usually takes about 3–6 minutes.
Once heat-treated, ensure the flour cools completely to room temperature before incorporating it into your edible cookie dough. Discard any flour that is burnt or smells scorched.
Storage: These Homemade Cookie Dough Oreos are truly best enjoyed on the very same day they are made. They are at their absolute softest and fudgiest on day one, and their texture will gradually firm up each day thereafter. Store in an airtight container in the refrigerator for up to 2-3 days.
Nutrition
Calories: 373kcal |
Carbohydrates: 47g |
Protein: 4g |
Fat: 20g |
Saturated Fat: 11g |
Trans Fat: 1g |
Cholesterol: 58mg |
Sodium: 364mg |
Potassium: 124mg |
Fiber: 1g |
Sugar: 29g |
Vitamin A: 488IU |
Vitamin C: 1mg |
Calcium: 55mg |
Iron: 2mg
Nutrition information is automatically calculated, so should only be used as an approximation.