
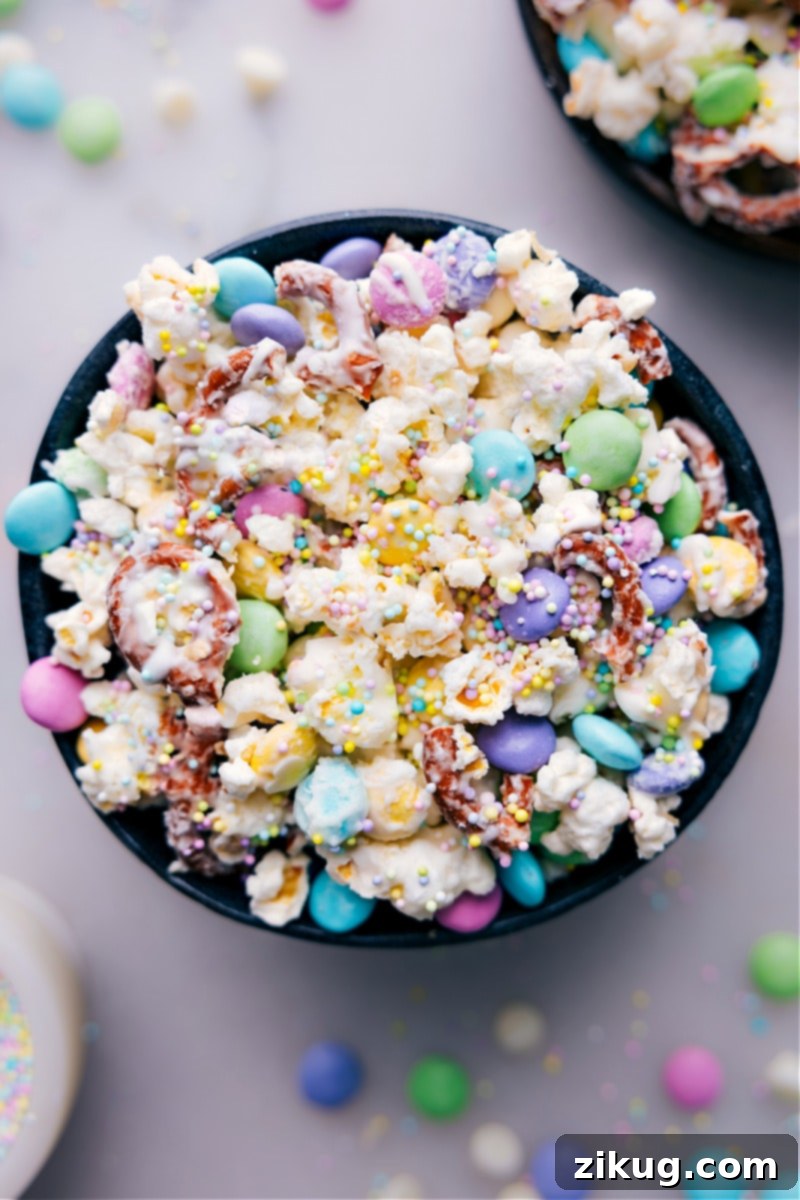
Easter Popcorn is the quintessential holiday snack, expertly combining the airy crunch of white-chocolate covered popcorn, the satisfying snap of pretzels, and the cheerful burst of Spring M&M’s. This easy-to-make, no-bake treat is a guaranteed crowd-pleaser, perfect for any festive occasion, especially during the joyous Easter season.
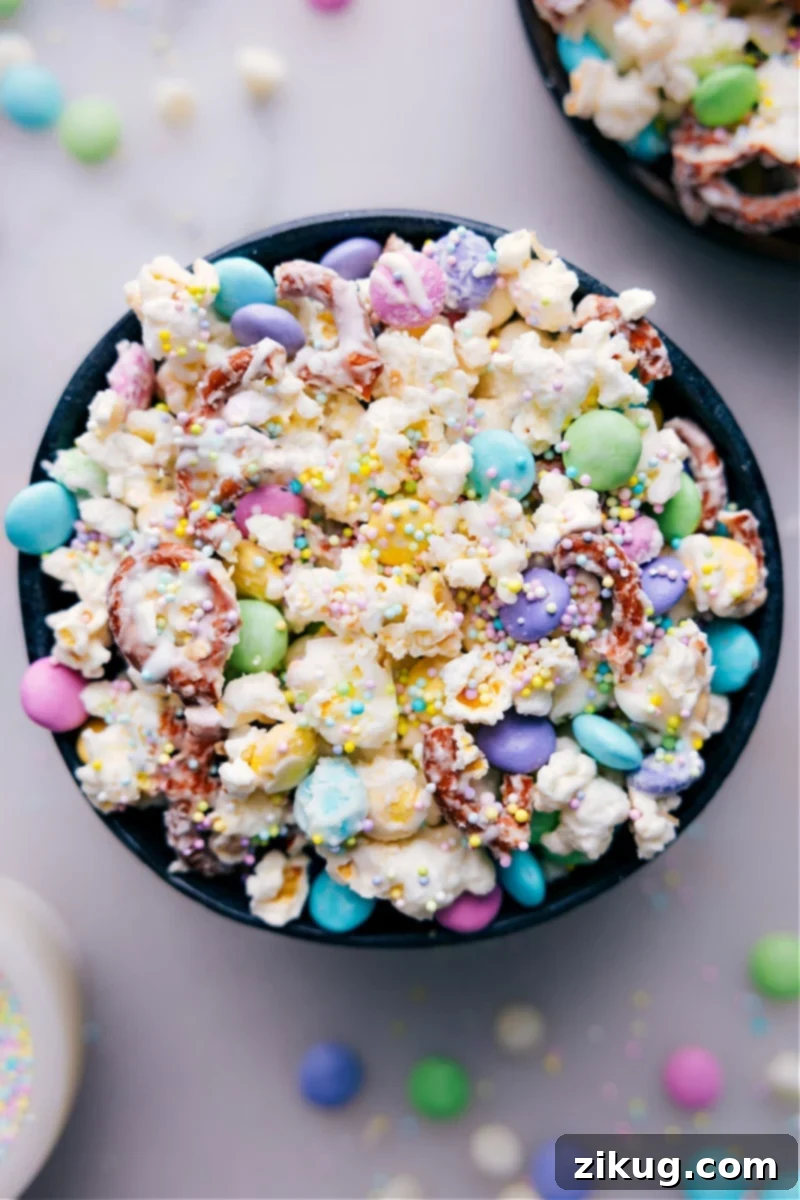
Fun, Festive, and Effortless: Your Guide to Perfect Easter Popcorn
There’s something truly special about crafting a delightful snack mix for every holiday, and Easter is no exception. These festive popcorn mixes have become my go-to for family gatherings and a beloved activity with my kids. As Easter approaches, bringing with it the promise of renewal and vibrant spring colors, it’s the perfect time to whip up a batch of this cheerful Easter Popcorn.
This irresistible mix has it all: the delicate saltiness of perfectly popped corn, the rich and creamy sweetness of white chocolate, the satisfying crunch of pretzels, and the playful color and chocolatey goodness of M&M’s. It’s the ultimate sweet and salty combination that tantalizes every taste bud. If you’re searching for an incredibly easy, no-bake, and show-stopping treat that perfectly captures the spirit of the season, look no further!
What makes Easter Popcorn truly shine is its simplicity and versatility. It comes together in minutes, requires minimal ingredients, and is a fantastic recipe for involving children in the kitchen. Plus, its vibrant appearance makes it a stunning addition to any Easter brunch, basket, or dessert table. Beyond its visual appeal, its flavor profile is universally loved, making it an ideal snack for everyone from toddlers to grandparents. Get ready to impress with this effortlessly festive creation!
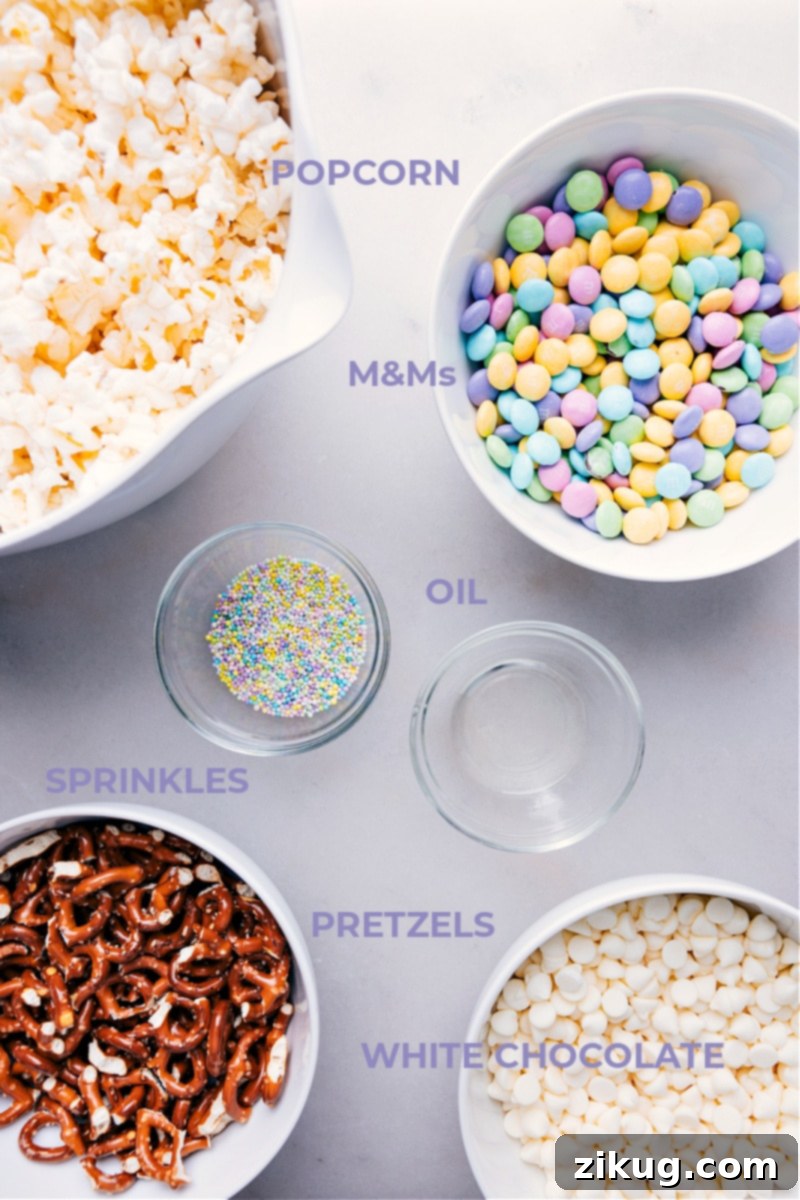
Essential Ingredients for Your Delicious Easter Popcorn
Crafting the perfect Easter Popcorn starts with selecting quality ingredients. Here’s a detailed look at what you’ll need and why each component is crucial for the ultimate sweet and salty delight:
- Popcorn: For ultimate convenience, opt for pre-popped popcorn, keeping in mind it might be a bit pricier. If you prefer to pop your own, which often yields a fresher taste, plain microwave packets (lightly salted) work wonderfully. Alternatively, stovetop or air-popped kernels are fantastic – just be sure to add a touch of salt. The key is to use plain popcorn without heavy buttering or strong seasonings, as these can interfere with the white chocolate coating.
- Pretzels: These add a critical salty crunch that perfectly balances the sweetness of the chocolate and M&M’s. Mini pretzel twists are ideal, but you can use pretzel sticks or even larger pretzels broken into smaller, bite-sized pieces. The irregular shapes and textures contribute to the overall appeal of the snack mix.
- M&M’s: To truly capture the festive spirit of Easter, use Pastel Easter M&M’s. Their soft spring colors (pinks, purples, yellows, greens, blues) instantly elevate the visual appeal. However, feel free to get creative! Swap out colors for other holidays or themes, or even mix in other small candies like jelly beans or chocolate eggs for added variety.
- White Chocolate: The quality of your white chocolate significantly impacts the final taste and texture of your Easter Popcorn. I highly recommend using good-quality white chocolate chips or melting wafers, such as Ghirardelli or Guittard. These brands are formulated to melt smoothly and offer a superior flavor compared to generic white candy melts, which can sometimes have a waxy texture. High-quality white chocolate ensures a creamy, luscious coating for your popcorn.
- Oil: A small amount of vegetable oil or shortening is essential for achieving a perfectly smooth, pourable white chocolate coating. It helps the chocolate melt more evenly, prevents it from seizing, and allows it to beautifully coat every piece of popcorn and pretzel without becoming too thick or clumpy. Canola oil is also a great alternative.
- Sprinkles: While optional, sprinkles are a fantastic way to add an extra layer of festive color and a delicate textural crunch. Choose spring-themed sprinkles or a mix of pastel colors to complement your Easter M&M’s. Nonpareils, jimmies, or even edible glitter can make your popcorn truly sparkle.
Mastering the Melt: Tips for Perfect Microwave White Chocolate
Melting white chocolate can be a delicate process, but with the right technique, you can achieve a silky-smooth coating every time. Here’s how to melt chocolate flawlessly in the microwave:
- Choose the Right Bowl: Always use a microwave-safe glass or ceramic bowl. Plastic bowls can sometimes retain heat unevenly, which can cause chocolate to burn or seize. Glass allows for more consistent heating.
- Employ Short Bursts: The golden rule for melting chocolate in the microwave is to use short intervals. Heat the white chocolate in 30-second bursts, stirring thoroughly after each one. This distributes the heat and helps the chocolate melt gradually and evenly.
- Avoid Overheating: This is crucial. Stop microwaving when there are still a few small lumps of chocolate remaining. The residual heat in the bowl and the already melted chocolate will continue to melt these last bits as you stir. Overheating chocolate, especially white chocolate, can cause it to become clumpy, grainy, or “seize,” making it unusable.
- Stir Frequently and Thoroughly: Stirring isn’t just about mixing; it’s about heat distribution. Each time you stir, you bring cooler chocolate to the center and help the melting process along. This consistent agitation prevents hot spots that can scorch the chocolate.
- Keep Utensils and Bowl Completely Dry: Even a tiny drop of water can cause chocolate to seize, turning it into a thick, gritty, unusable mess. Ensure your bowl, spatula, and any other utensils you use are perfectly dry before they come into contact with the chocolate.
- Consider a Double Boiler (Alternative): If you’re wary of the microwave or prefer a more controlled method, a double boiler is an excellent alternative. Simply place your chocolate in a heat-safe bowl over a saucepan of simmering water (ensuring the bowl doesn’t touch the water). Stir gently until smooth.
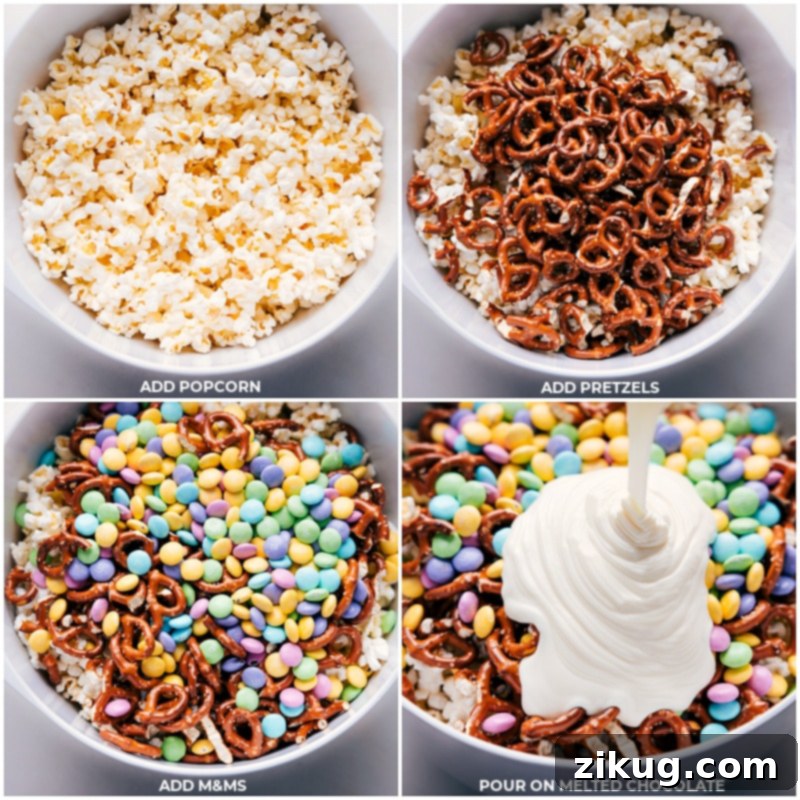
Crafting Perfect Easter Popcorn: Expert Tips for Success
Making Easter Popcorn is wonderfully straightforward, but a few key tips can elevate your snack mix from good to absolutely phenomenal. Follow these pointers for the best results:
- Start with Freshly Popped Popcorn: For the crispiest, most flavorful base, pop your popcorn just before you plan to assemble the mix. Stale popcorn will absorb the chocolate differently and won’t have the same appealing texture. If using pre-popped, ensure it’s fresh from the bag.
- Opt for a Generously Sized Bowl: When combining your popcorn, pretzels, and M&M’s, use the largest mixing bowl you have. This provides ample space for easy tossing, allowing you to coat everything evenly with white chocolate without spills or a messy counter.
- Prepare Your Pan in Advance: For effortless cleanup and to prevent sticking, always line your sheet pan with a non-stick baking mat, aluminum foil, or parchment paper. This step is a game-changer when it comes to removing the hardened popcorn and minimizing sticky residue.
- Get Creative with Sprinkles: Don’t underestimate the power of sprinkles! They add not only a delightful pop of color but also a subtle crunch. Choose Easter-themed or pastel-colored sprinkles to match your M&M’s. You can find a vast array of options, from classic nonpareils to shaped sprinkles, allowing for endless customization.
Quick Tip: Remove Unpopped Kernels Easily
No one wants to bite into a hard, un-popped kernel! To easily remove them, place your popped popcorn in a large bowl. Cover the top of the bowl with a cooling rack, then carefully invert the bowl over a clean plate or baking sheet. Shake gently, and any stubborn un-popped kernels will fall through the rack, leaving you with only fluffy, ready-to-coat popcorn.
Keeping Your Easter Popcorn Fresh: Storage Guidelines
To enjoy your delicious Easter Popcorn at its best, proper storage is key. Once the white chocolate has fully set and hardened, break the mixture into desired pieces. Store any leftovers in an airtight container at room temperature. This helps maintain the popcorn’s crispness and prevents the chocolate from becoming sticky. For optimal flavor and texture, it’s best to enjoy your Easter Popcorn within 1 to 2 days of making it. While freezing can extend its life for several weeks, the texture of the popcorn might soften slightly upon thawing. If freezing, allow it to come to room temperature before serving for the best experience.
More Delicious Easter Treats to Sweeten Your Holiday
Looking for more ways to celebrate Easter with delicious homemade goodies? Here are some other fantastic recipes that are perfect for your holiday spread, gifting, or simply enjoying with family:
- Hoppy Cottontails: A charming treat that comes with a free printable tag, making it perfect for gifting or party favors.
- Easter Cupcakes: Adorable cupcakes designed to look like birds’ nests, complete with edible eggs, bringing a touch of spring to your dessert table.
- Confetti Bars: Cheerful and colorful bars loaded with spring M&M’s, offering a delightful chewy and sweet experience.
- Easter Pretzels: Incredibly simple to make with only three ingredients, these festive pretzels are a quick and satisfying sweet and salty snack.
- Easter Chocolate Creme Egg Fudge: A super simple and decadent fudge recipe featuring everyone’s favorite Easter chocolate creme eggs, perfect for chocolate lovers.

Easter Popcorn
Chelsea Lords
20 minutes
30 minutes
50 minutes
8 servings
Equipment
-
Large sheet pan (15″ x 21″)
-
Parchment paper or aluminum foil or a silicone baking mat
Ingredients
- 8 cups plain popped popcorn (see note 1)
- 2 cups mini pretzel twists (broken in half)
- 1-1/3 cups pastel M&M’s (10-ounce bag)
- 2 cups white chocolate chips (11 to 12-ounce bag)
- 1-1/2 teaspoons vegetable oil (or canola oil)
- 2 tablespoons spring sprinkles (optional)
Instructions
- Line an extra-large sheet pan with foil, parchment paper, or a silicone liner. Set aside.
- In a very large bowl, measure and add the popped popcorn, making sure no kernels make it in! (See note 2 for an easy method to remove them.) Break the pretzels (roughly in half), measure, and add those in. Add in M&M’s.
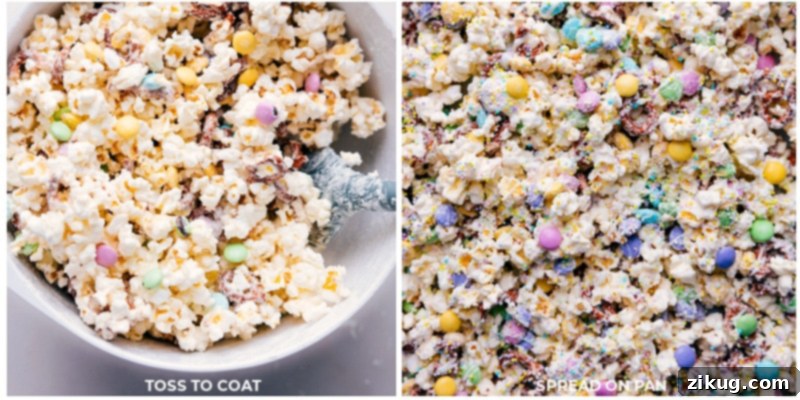
- Place white chocolate chips and oil in a microwave-safe bowl. Heat in bursts of 30 seconds, stirring between each burst until chocolate is melted and smooth. Be patient to avoid burning the chocolate, as this can make it clumpy. Once the white chocolate is smooth and fully melted, use a spatula to scrape it over the popcorn mix. Working quickly, toss everything together until evenly coated in the white chocolate.
- Spread the mixture onto the prepared pan in a single layer, and immediately sprinkle with sprinkles (if using) before the chocolate sets.
- Allow the popcorn to harden at room temperature or in the fridge until it becomes solid. Once solid, break it into pieces and enjoy! Store any leftovers in an airtight container at room temperature. For the best flavor and texture, consume within 1–2 days.
Recipe Notes
Note 1: Purchasing already popped popcorn makes this recipe come together a bit quicker, but it’s often more expensive. If you’d rather pop your own, these are the lightly salted microwave packets I use. You can also use kernels in a popcorn machine or on the stovetop (don’t forget to add a touch of salt). Whatever method you choose, measure out 8 cups of cooked popcorn.
Note 2: Remove the kernels: Put the popcorn in a large bowl and place a cooling rack over the top. Invert the bowl and shake over a plate, and all the unpopped kernels will easily fall out!
Storage: Keep leftovers in an airtight container at room temperature. Best enjoyed within 1–2 days for optimal freshness and crunch.
Nutrition
Nutrition information is automatically calculated, so should only be used as an approximation.
Enjoyed this recipe? Share your thoughts below!