
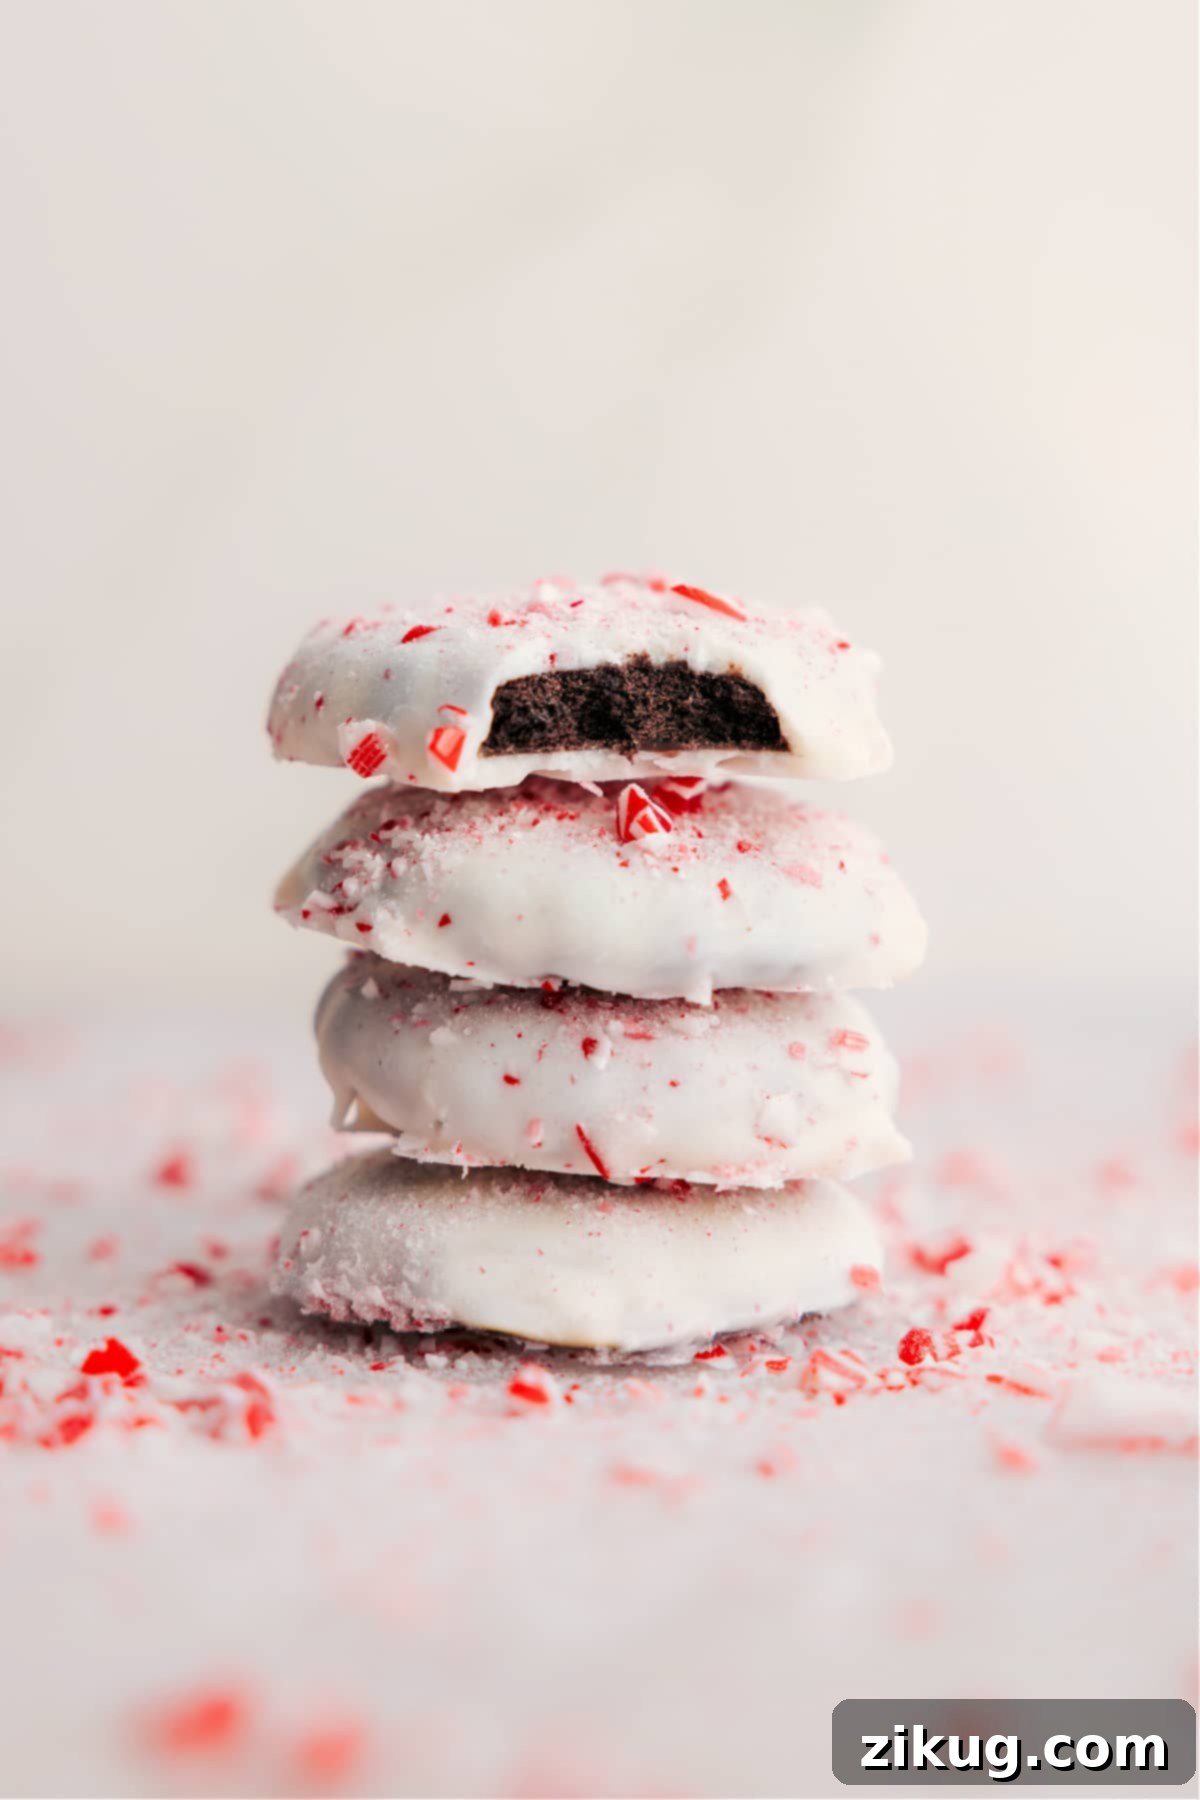
Delight your senses this holiday season with our effortless, four-ingredient **Peppermint Cookies**! These festive treats are an absolute showstopper, boasting a sophisticated appearance that belies their incredibly simple preparation. Perfect for adorning your holiday cookie platters, thoughtful gifting, or simply enjoying with a warm cup of cocoa, these cookies are destined to become a cherished part of your seasonal traditions.
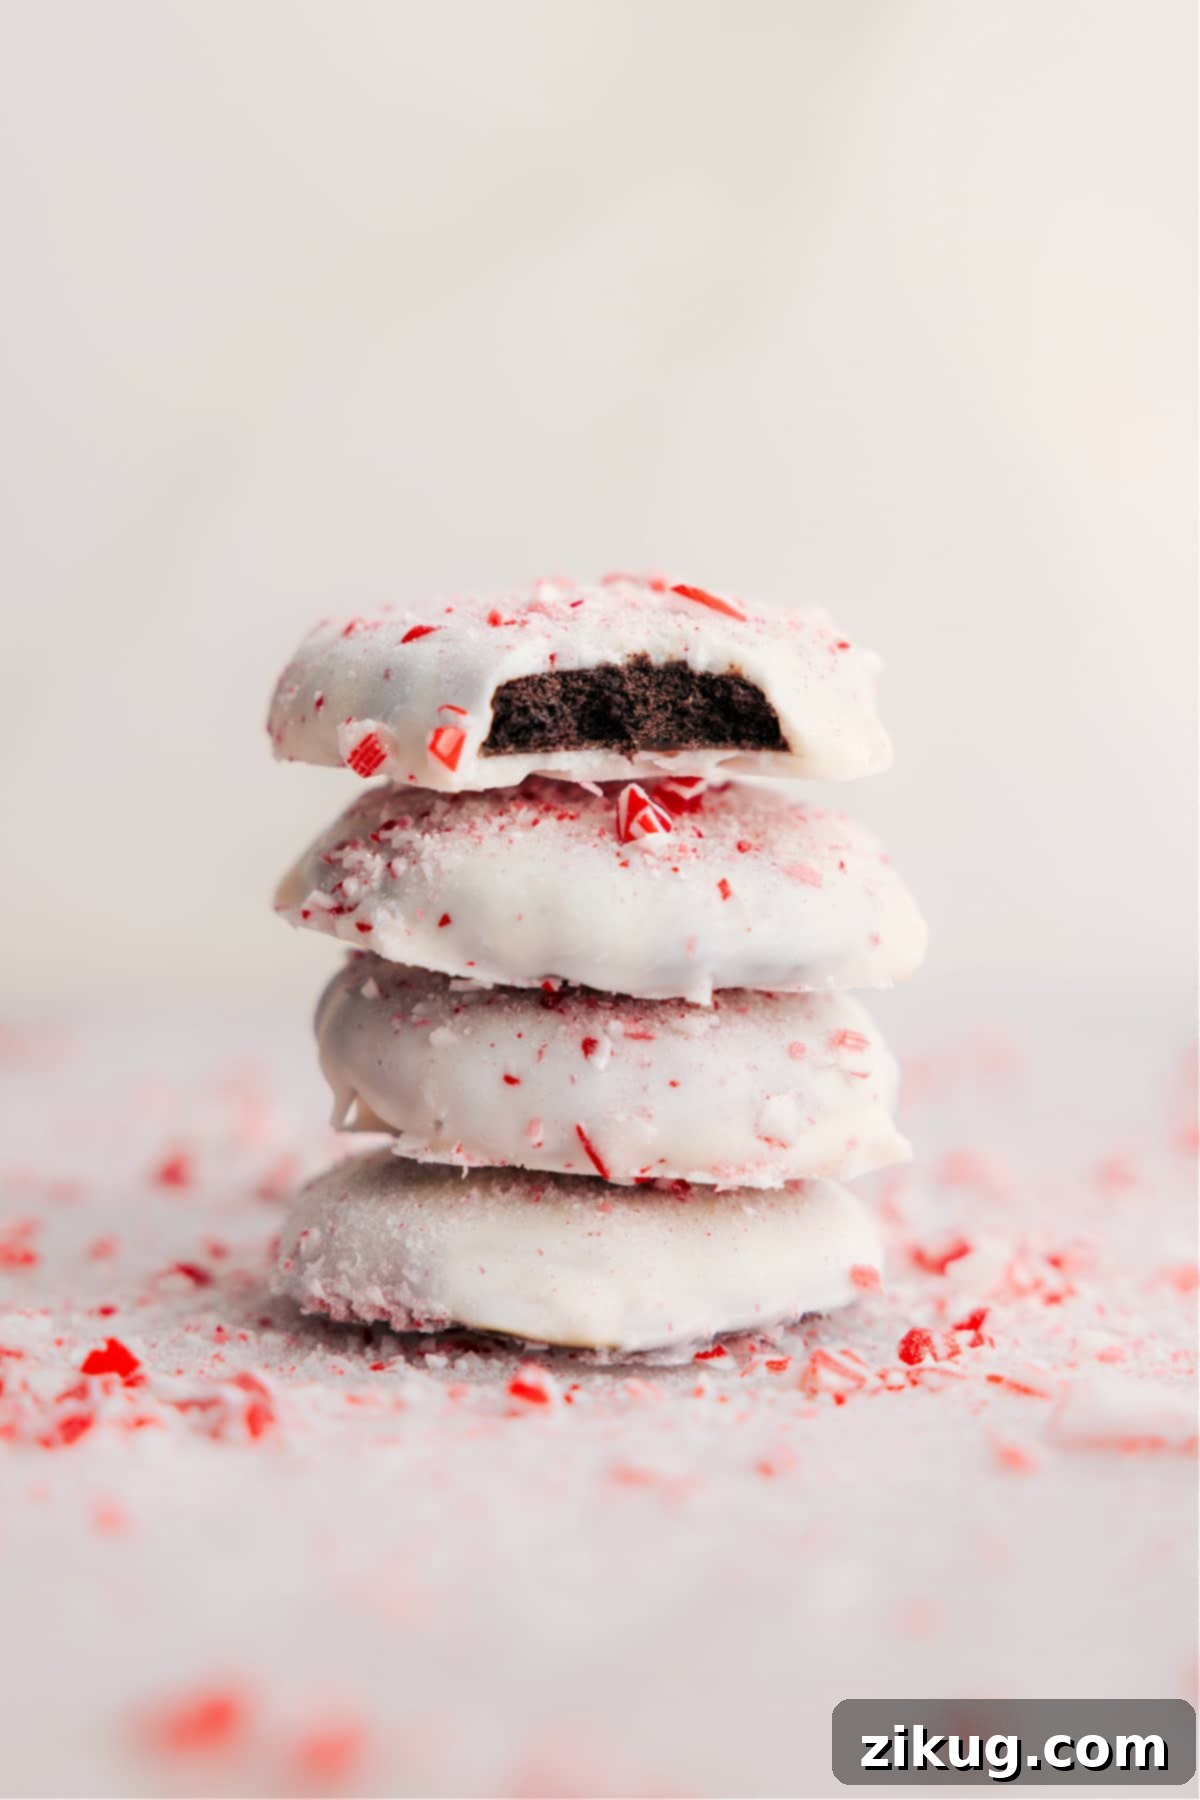
Effortlessly Festive: Your Go-To Easy Peppermint Cookies Recipe
There’s an undeniable joy in baking from scratch, a culinary art form I deeply appreciate and often indulge in. However, the holiday season, with its whirlwind of activities and celebrations, often calls for smart shortcuts that don’t compromise on flavor or presentation. That’s precisely where these incredibly easy **Peppermint Cookies** shine. They offer a delightful reprieve from complex recipes, allowing you to create impressive, delicious treats without the usual time commitment.
Imagine crafting a batch of stunning, professional-looking holiday cookies with just **four essential ingredients** and a mere handful of minutes for hands-on preparation. That’s the magic of this recipe! You can have these beautifully festive and remarkably tasty cookies ready in a flash, freeing up your valuable time for other holiday pursuits. Unlike the often time-consuming process of rolling, cutting, and decorating intricate cut-out sugar cookies, this recipe simplifies the entire experience, making holiday baking accessible and enjoyable for everyone.
These peppermint-infused delights are not just simple to make; they also deliver an exceptional taste that perfectly captures the spirit of the season. The cool, refreshing mint combined with rich white chocolate and crunchy peppermint bits creates a symphony of flavors and textures that is truly irresistible. Whether you’re a seasoned baker looking for an efficient option or a beginner seeking a foolproof holiday dessert, these easy peppermint cookies are an absolute winner.
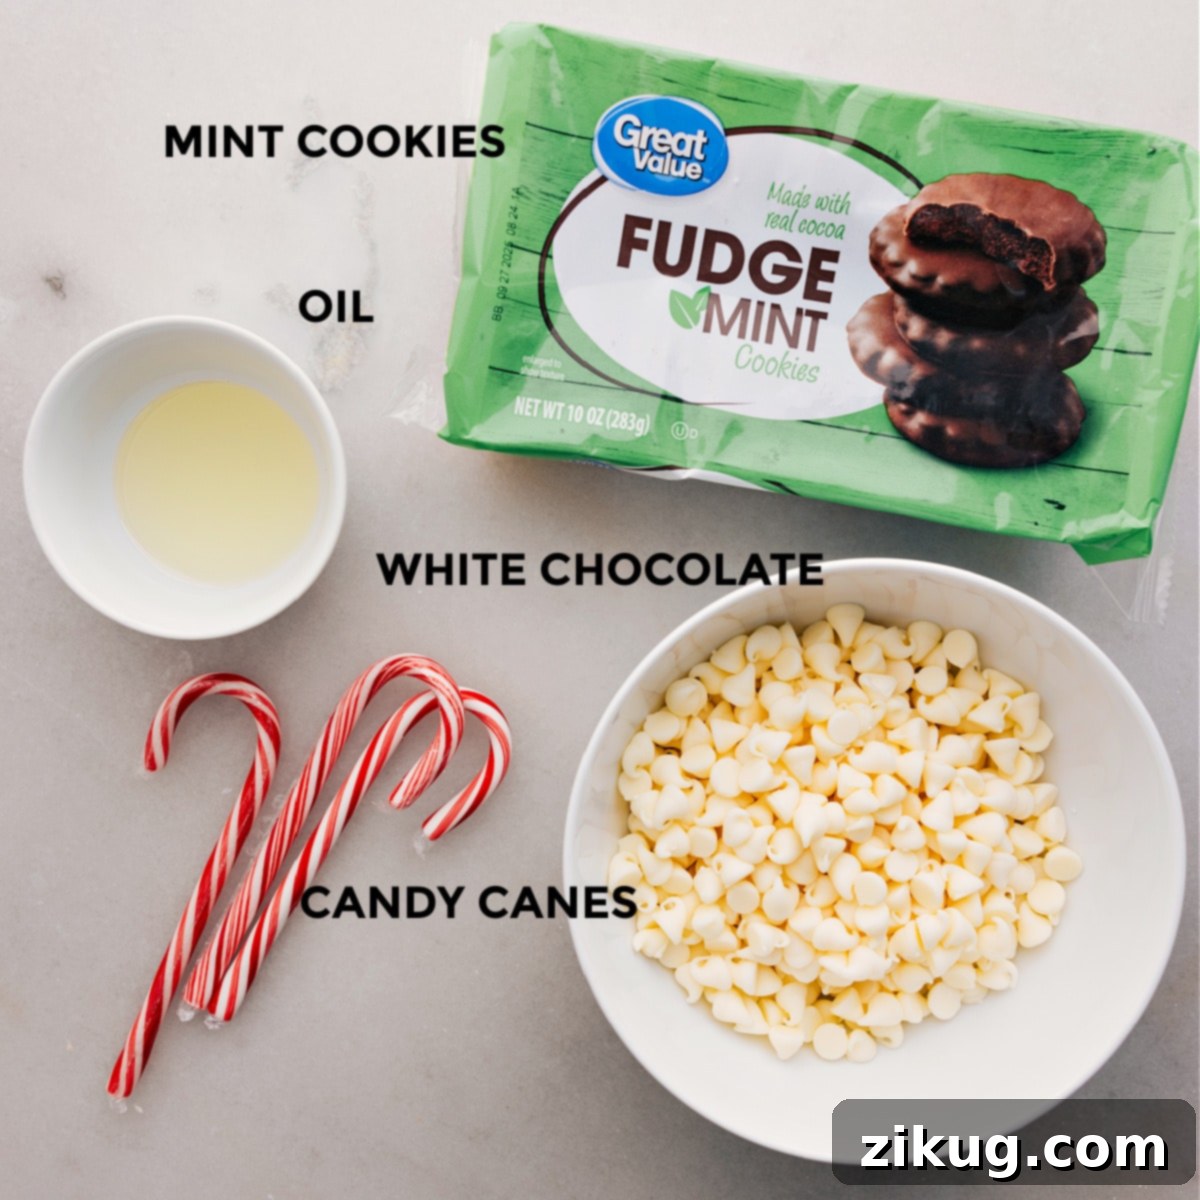
Essential Ingredients for Your Peppermint Cookie Recipe
The beauty of this recipe lies in its minimalist ingredient list. Each component plays a crucial role in creating the perfect balance of flavor, texture, and visual appeal. Here’s a closer look at what you’ll need to make these incredible holiday cookies:
- **Mint/Grasshopper Cookies (The Foundation):** The base of our cookie masterpiece starts with readily available mint-flavored sandwich cookies. You can opt for popular choices like fudge mint cookies or grasshopper cookies. These cookies already provide that fantastic minty flavor and a satisfying crunchy texture, saving you the effort of baking a base from scratch. For those who enjoy a DIY approach, my friend Sally has an excellent Homemade Thin Mint Cookie recipe that would work wonderfully as a homemade substitute. The key is a firm, chocolatey, mint-flavored cookie.
- White Chocolate (The Coating): The quality of your white chocolate significantly impacts the final result. For the smoothest, most professional-looking coating, I highly recommend using good quality white baking bars or melting wafers. Brands like Ghirardelli, Lindt, or Bakers offer superior melting properties and a richer flavor compared to standard white chocolate chips, which can sometimes seize or become grainy. Melting wafers are particularly convenient as they are designed for easy melting and a fluid consistency.
- **Coconut Oil (The Secret to Smoothness):** A small amount of coconut oil is the secret ingredient that ensures your white chocolate coating is silky smooth and easy to work with. It helps to thin the melted chocolate slightly, allowing for an even, flawless dip and preventing it from becoming too thick or clumpy. Vegetable oil or even shortening can be used as alternatives, but coconut oil imparts a subtle richness without altering the flavor profile.
- **Candy Canes or Peppermint Bark (The Festive Topping):** To achieve that signature holiday look and an extra burst of peppermint crunch, crushed candy canes are essential. Their vibrant red and white swirls instantly elevate the visual appeal of these cookies. Alternatively, finely chopped peppermint bark can also be used, offering a more complex chocolate-peppermint flavor profile as a topping. Choose whichever you prefer for that perfect finishing touch!
Creative Variations & Flavor Enhancements
While these peppermint cookies are delightful on their own, don’t hesitate to experiment with variations to suit your taste or occasion. For an extra touch of elegance and flavor, consider adding a drizzle of melted dark or milk chocolate. Simply melt your preferred chocolate, transfer it to a small piping bag (or a Ziploc bag with a tiny corner snipped off), and artfully drizzle it over the set white chocolate and crushed peppermint. This adds another layer of chocolatey goodness and creates a beautiful contrasting design. You could also experiment with different types of sprinkles, edible glitter, or even a hint of mint extract in your white chocolate for an intensified mint flavor. Get creative and make them your own!
Mastering the Art of Crushing Peppermint for Your Cookies
The crushed peppermint topping is not just for decoration; it provides a delightful crunch and intense mint flavor that beautifully complements the smooth white chocolate and mint cookie base. Achieving the right texture for your crushed peppermint is key, and it’s best to prepare it before you begin dipping your cookies. This ensures everything is ready when you need to work quickly.
For the best results, use standard candy canes or any hard peppermint candies. The goal is to create chunky, varied pieces, ranging from fine crumbs to small fragments, rather than a uniform powder. To crush them effectively, unwrap your chosen candies and place them into a sturdy, sealable plastic bag. If your bag seems thin, double-bagging is a smart move to prevent tearing and a messy kitchen. Once the candies are inside, squeeze out as much air as possible before sealing the bag.
Now, for the crushing! Use a rolling pin, a meat mallet, or even the bottom of a heavy pan to gently but firmly tap and roll over the bag. Focus on breaking the candies into your desired chunky texture. **It’s crucial to avoid using blenders or food processors for this step.** While they might seem like a quick solution, these appliances tend to pulverize the candy into a fine powder, which won’t provide the satisfying crunch and visual appeal we’re looking for in these peppermint cookies. Manual crushing gives you better control over the texture, ensuring a beautiful, varied topping.
Quick Tip for Seamless Dipping
To ensure a smooth and efficient dipping process, always **work in small batches**. Keep the majority of your mint cookies in the freezer, taking out only a few at a time to dip. This crucial step keeps the cookies firm and prevents them from melting or softening excessively when they come into contact with the warm white chocolate, ensuring a crisp cookie and a clean, even coating. This also allows you to manage the sprinkling of peppermint more effectively before the chocolate sets.
Step-by-Step Guide: How To Make Perfect Peppermint Cookies
Making these gorgeous peppermint cookies is incredibly straightforward. Follow these simple steps for a holiday treat that looks impressive and tastes even better:
- **Preparation is Key:** Begin by lining a large sheet pan with parchment paper or aluminum foil. This will prevent your dipped cookies from sticking and make cleanup a breeze. Next, place your mint cookies in the freezer for a minimum of 30 minutes. The longer they freeze, the firmer they’ll be, which is vital for preventing them from melting into the warm chocolate. While the cookies are chilling, crush your candy canes into small, chunky pieces using the method described above, and set them aside.
- **Melt the Chocolate:** In a microwave-safe bowl, combine your white chocolate melting wafers or chopped baking bars with the coconut oil. Heat the mixture in short bursts (typically 30-second intervals), stirring well after each interval. Continue until the chocolate is completely smooth and melted. Be careful not to overheat it. Once melted, let the chocolate cool slightly until it’s warm but not hot to the touch. This moderate temperature prevents the mint cookie’s coating from melting prematurely when dipped.
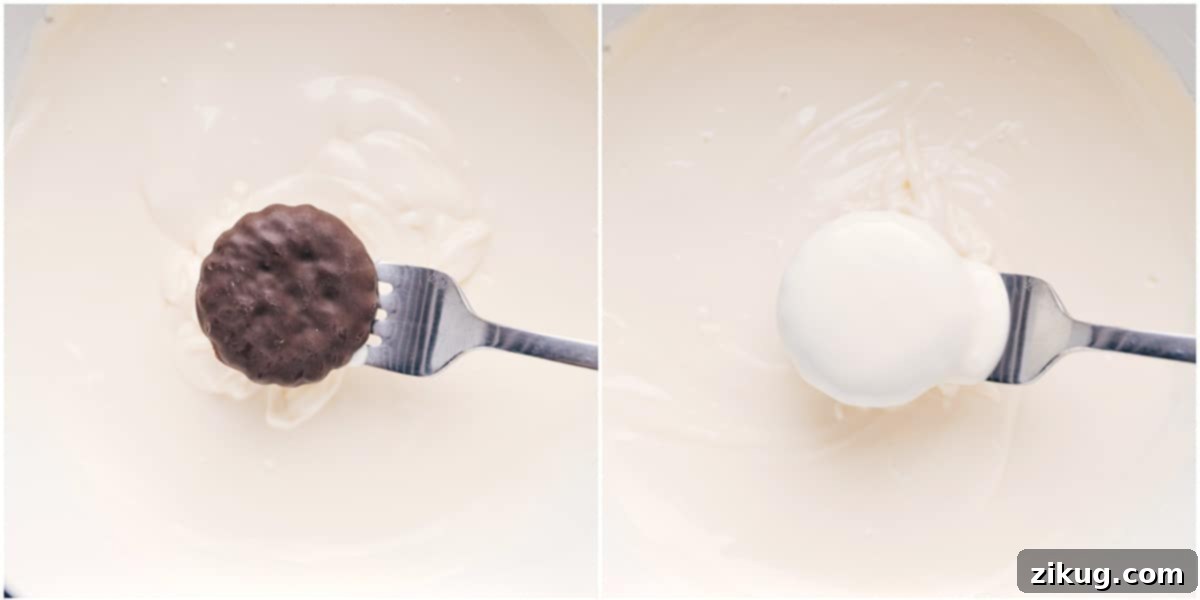
- **Expert Coating Technique:** Retrieve a few cookies at a time from the freezer. Using a fork, carefully dip each cookie into the melted white chocolate, ensuring it’s fully coated. Gently tap the fork against the side of the bowl to allow any excess chocolate to drip off, ensuring a thin, even layer. Using a knife or a second fork, carefully slide the coated cookie onto your prepared sheet pan. Work quickly during this stage to prevent the mint cookie’s original coating from melting and discoloring your beautiful white chocolate.
- **Decorate Instantly:** This is where the magic happens! Immediately after placing each chocolate-dipped cookie on the sheet pan, generously sprinkle it with the crushed candy canes. The warm chocolate will act as an adhesive, allowing the peppermint pieces to stick perfectly. Repeat the dipping and decorating process until all your cookies are beautifully coated and topped.
- **Allow to Set and Enjoy:** Once all cookies are dipped and decorated, let them sit undisturbed at room temperature until the white chocolate coating is completely firm and set. It’s important not to rush this process by refrigerating or freezing them to set the chocolate, as this can sometimes lead to blooming (white streaks) or a less stable coating. Once firm, your stunning peppermint cookies are ready to be savored!
Storage Solutions for Your Peppermint Cookie Masterpiece
Keeping Your Peppermint Cookies Fresh
These delightful peppermint cookies are at their absolute best when enjoyed **within a week** of preparation. To maintain their freshness, crispness, and vibrant flavor, store them in an airtight container. Keep the container in a cool, dark place at room temperature. There’s no need for refrigeration, though some people enjoy them chilled as well. If you choose to refrigerate, ensure they are in a well-sealed container to prevent them from absorbing other odors.
For longer-term enjoyment, these cookies are excellent candidates for freezing. You can **freeze them for up to 3 months** in an airtight container or freezer-safe bag. Layer them with parchment paper to prevent sticking. They thaw beautifully at room temperature, or for a truly unique treat, many find them utterly delicious enjoyed straight from the freezer – a frozen, minty, chocolatey delight!
More Irresistible Holiday Cookie Ideas to Explore
If you’ve fallen in love with the ease and festive charm of these Peppermint Cookies, you’ll be thrilled to discover other wonderful holiday cookie recipes that are equally delightful and perfect for sharing:
- Melted Snowman Cookies: Adorably whimsical cookies featuring a delicious peanut butter cookie base, perfect for a playful holiday touch.
- Rocky Road Cookies: A decadent combination of rich chocolate chips, crunchy peanuts, and soft marshmallows, bringing a classic candy bar to cookie form.
- Easy Cut Out Sugar Cookie Recipe: A simple, no-chill recipe for classic sugar cookies, complete with an easy icing that’s perfect for decorating fun.
- Christmas Crack: An addictive, crunchy, salty-sweet treat made with crackers, toffee, and chocolate, often topped with festive M&M’s or sprinkles.
- Mexican Wedding Cookies: Delicate, buttery shortbread cookies generously rolled in powdered sugar, offering a melt-in-your-mouth experience.

Print Recipe
Peppermint Cookies Recipe
Chelsea Lords
20
30
50
40 cookies
Video Overview
For a visual guide, watch our video tutorial on making these delicious Peppermint Cookies.
Equipment Needed
-
Large sheet pan (approximately 15″ x 21″)
-
Parchment paper or aluminum foil
-
Microwave-safe bowl or double boiler
-
Sturdy plastic bag (for crushing candy)
-
Rolling pin or meat mallet
-
Fork and small knife for dipping
Ingredients
-
1 (10-ounce) package
grasshopper cookies
(approximately 40 cookies, see note 1) -
1 (10-ounce) package
white chocolate melting wafers
(about 2 cups, see note 2) - 1-1/2 teaspoons vegetable oil (or coconut oil or shortening)
- 3 full-sized candy canes (or equivalent peppermint bark, see note 3)
Instructions
-
Line a large sheet pan with parchment paper or foil. Place the mint cookies in the freezer for at least 30 minutes; longer chilling ensures the cookies remain firm during dipping.
-
Add unwrapped candy canes to a large, sturdy plastic bag (double-bag if necessary to prevent tears). Seal the bag, pressing out excess air, and crush the candy canes into coarse crumbs using a rolling pin or meat mallet. Set aside. Avoid using blenders or food processors, as they tend to create a powder rather than chunky bits.
-
Combine white chocolate melts and oil in a microwave-safe bowl. Heat in short bursts (30-second intervals), stirring thoroughly after each, until the chocolate is fully melted and smooth. Allow it to cool slightly so it’s warm but not hot, as excessively hot chocolate can melt the mint cookie coating.
-
Remove a few cookies from the freezer at a time to keep them cold. Using a fork, dip each cookie into the melted white chocolate, ensuring it’s completely coated. Gently tap the fork on the side of the bowl to remove any excess chocolate. Using a small knife or a second fork, carefully slide the coated cookie onto the prepared sheet pan. Work quickly to avoid the mint cookie’s original coating from melting into the white chocolate. (Refer to Note 4 for troubleshooting tips.)
-
Immediately sprinkle a generous amount of crushed peppermint over the top of each dipped cookie before the white chocolate has a chance to harden. This ensures the peppermint adheres properly. Repeat this process until all cookies are coated and topped.
-
Allow the decorated cookies to sit at room temperature until the white chocolate coating is completely firm and set. Do not refrigerate or freeze to expedite setting, as this can affect the texture and appearance of the chocolate.
Recipe Notes for Perfect Peppermint Cookies
Note 2: White Chocolate Quality Matters: To achieve the best results with a smooth, even, and firm coating, I highly recommend using good quality chocolate specifically made for melting. This includes baking bars (such as Bakers®, Lindt®, or Ghirardelli®) or high-quality melting wafers (like Ghirardelli). These products are formulated to melt beautifully and set smoothly, preventing issues like seizing or a grainy texture.
**Note 3: Topping Options:** While crushed candy canes provide a classic festive look and a sharp peppermint flavor, you can also use finely chopped peppermint bark chocolates as a topping. This adds another layer of chocolate and a slightly richer, complex peppermint taste. Both options are delicious and visually appealing.
**Note 4: Troubleshooting Common Issues:**
- **Chocolate too thick?** If your melted white chocolate seems too thick to coat the cookies smoothly, add an additional 1/2 teaspoon of oil (coconut, vegetable, or shortening) and stir until you reach the desired consistency.
- **Chocolate hardens while working?** If the chocolate starts to harden as you work, simply reheat it in the microwave for brief 15-second intervals, stirring well after each, until it’s smooth and dippable again.
- **Mint cookie coating melting?** If you notice the green or dark coating of the mint cookie melting into the white chocolate, it means your cookies weren’t cold enough or your white chocolate was too hot. Ensure the cookies are frozen for a longer period (up to an hour is fine), and allow the melted white chocolate to cool down further before you begin dipping the next batch.
**Storage Best Practices:** These cookies are at their peak flavor and texture within one week. Store them in an airtight container in a cool, dark place at room temperature. They do not require refrigeration but can be kept in the fridge if preferred. For longer storage, freeze them in an airtight container for up to 3 months. They are remarkably good enjoyed straight from the freezer!
Nutrition Information (Approximate Per Serving)
Serving: 1 cookie
|
Calories: 75 kcal
|
Carbohydrates: 10.4 g
|
Protein: 0.8 g
|
Fat: 3.8 g
|
Cholesterol: 0.1 mg
|
Sodium: 18.8 mg
|
Fiber: 0.7 g
|
Sugar: 7.6 g
Nutrition information is automatically calculated and is an approximation. Values may vary based on ingredients used and preparation methods.
Love this recipe? Leave a comment below!
Your feedback helps others discover delicious treats.