
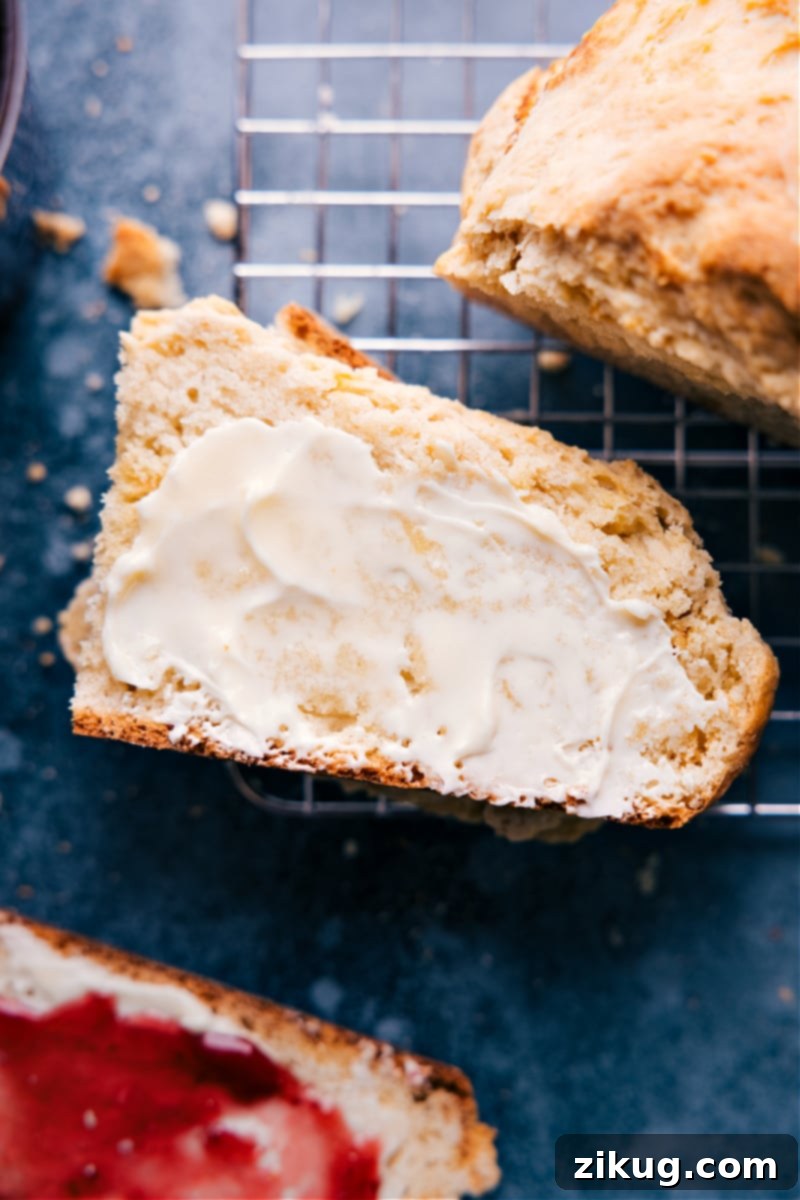
Discover the magic of homemade bread without the fuss! This simple No-Yeast Bread recipe can be whipped up in mere minutes and requires absolutely no rising time. Imagine the aroma of freshly baked bread filling your kitchen, ready to enjoy in under 90 minutes from start to finish. Perfect for busy weeknights or when you crave a warm, comforting slice without the lengthy commitment.
If you’re an experienced baker seeking traditional yeasted loaves, feel free to explore our other beloved recipes such as the classic White Bread, the hearty Honey Whole Wheat Bread, or our famously fluffy Dinner Rolls. And no matter your bread choice, don’t forget the irresistible Honey Butter to elevate every single bite!
Mastering Bread Baking Without Yeast: A Quick and Easy Guide!
Many home bakers often wonder about the secret to baking bread without yeast. The answer lies in a wonderful category known as quick breads, or more specifically, soda bread. This particular No-Yeast Bread recipe falls perfectly into the quick bread/soda bread family, relying on a brilliant chemical reaction for its impressive rise.
Instead of yeast, this bread utilizes the natural acids present in buttermilk, which react with baking agents like baking powder and baking soda. This interaction produces carbon dioxide gases, creating a beautiful lift and a tender crumb without any fermentation time. It’s a fantastic alternative for those who are short on time, sensitive to yeast, or simply looking for an incredibly straightforward baking project.
Rest assured, this easy bread recipe with no yeast truly lives up to its name for speed and simplicity. There’s no waiting for dough to rise, which means you can go from mixing bowl to oven in record time. All you need is a large bowl and a wooden spoon or spatula – no fancy hand or stand mixers are required, making cleanup a breeze and the process accessible to everyone!
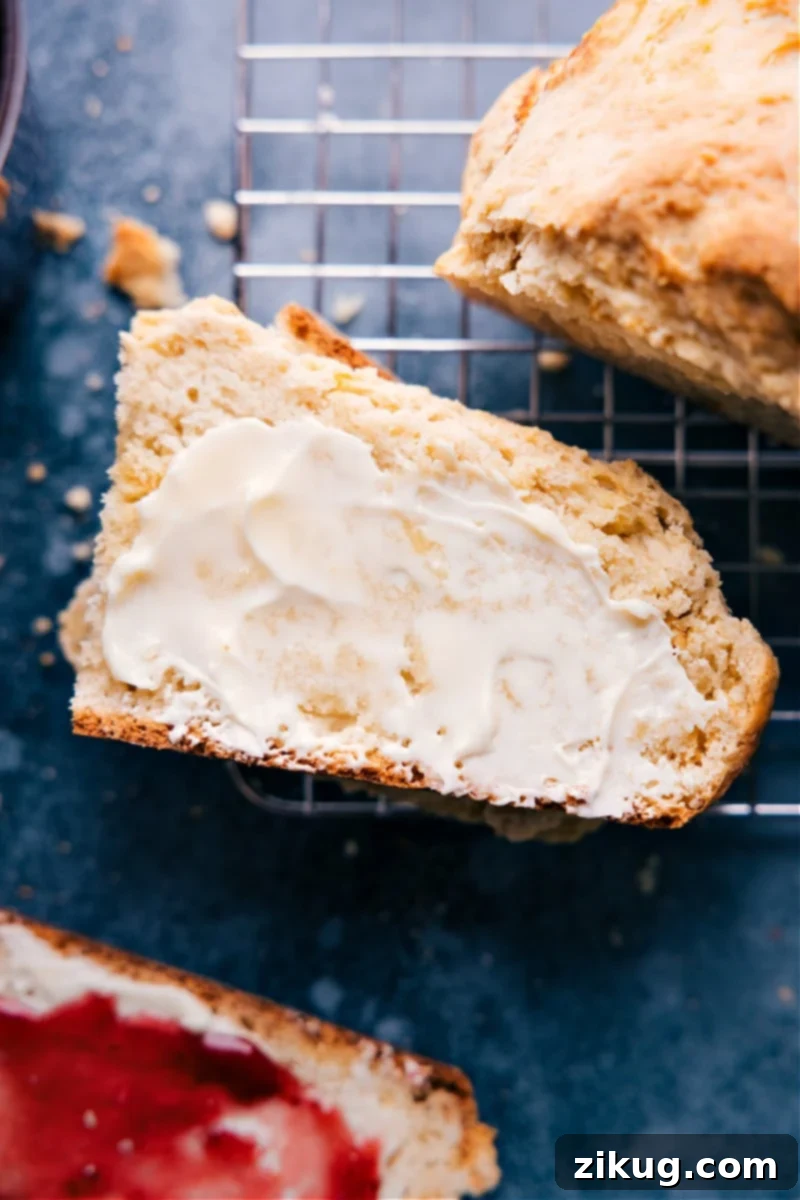
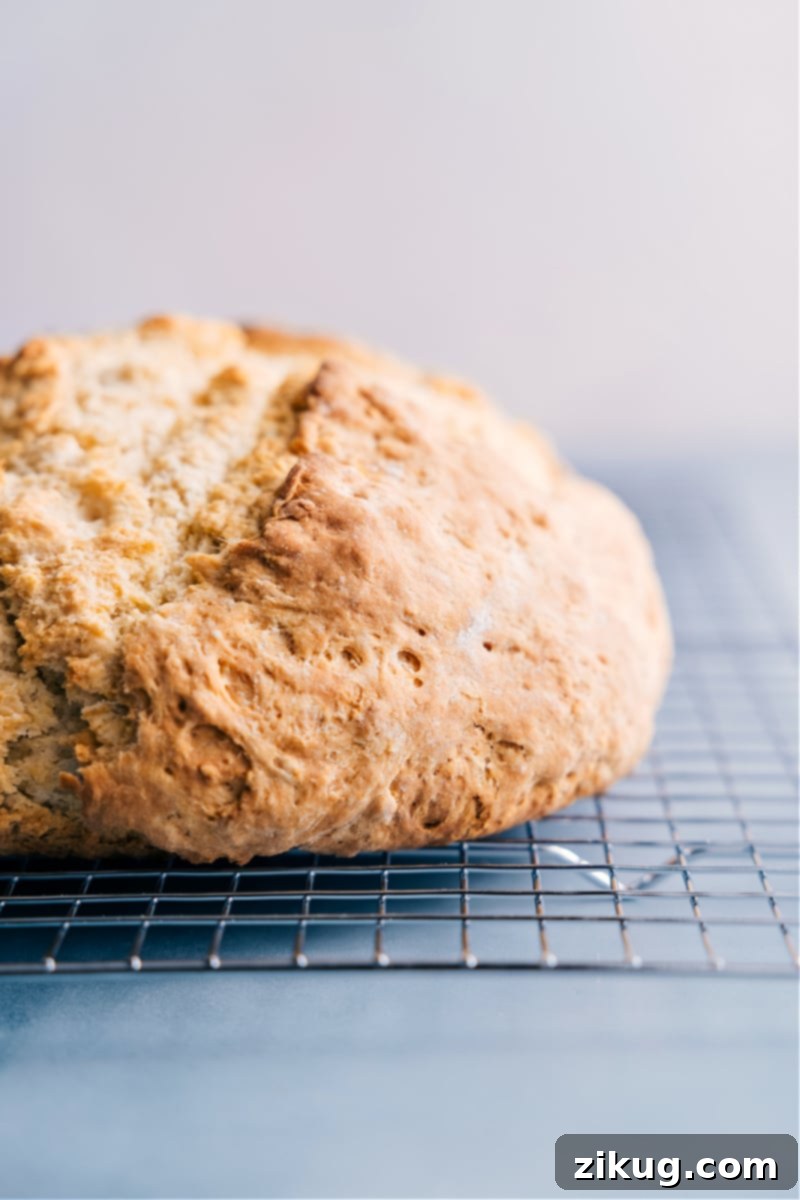
Unveiling the Texture and Taste: Prepare your palate for a delightful experience. This bread offers a buttery and rich taste, with a mild flavor profile that reminds many of a classic biscuit. While it’s delicious on its own, its true potential shines when paired with a spread. We highly recommend serving it with a generous dollop of butter or your favorite jam. The texture is simply divine: a wonderfully crisp crust gives way to a dense, tender, and moist interior. Unlike typical sandwich bread, it boasts a much tighter crumb and a softer overall texture, making it uniquely satisfying. For the best experience, we suggest enjoying this bread the same day it’s baked, much like fresh biscuits. However, it still maintains a pleasant chewier and softer texture on days two and three, perfect for toasting or repurposing.
The Ingenious “Secret” Behind Effortless No-Yeast Bread Preparation
For those familiar with our fantastic Drop Biscuits, you’ll recognize the brilliant “secret” preparation method we employ here. It’s a game-changer for achieving incredible texture with minimal effort.
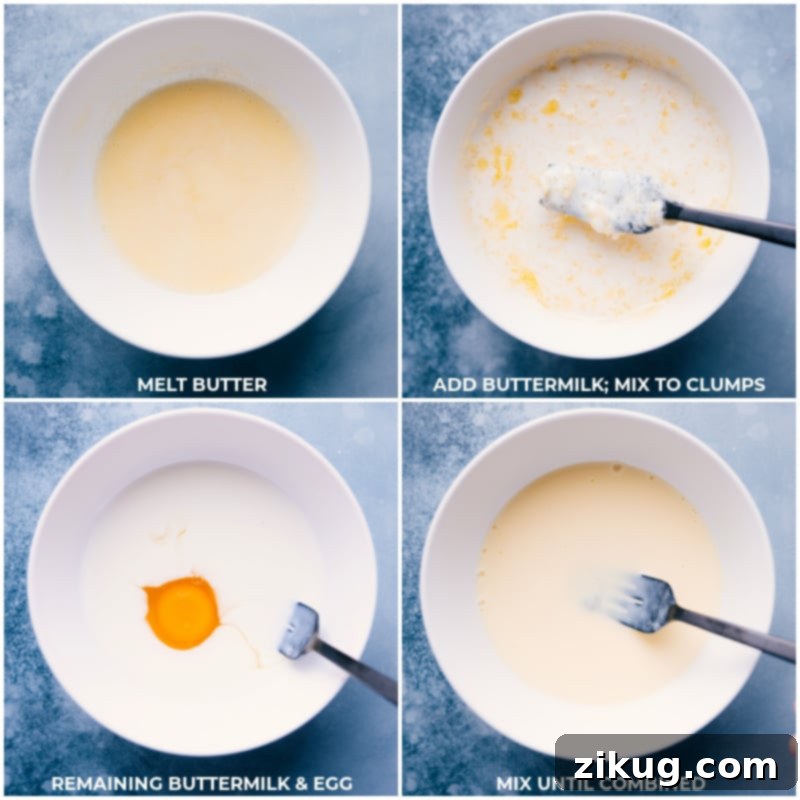
A quick recap for the uninitiated: Traditional drop biscuits often call for cold, cubed butter meticulously cut into the flour using a food processor or pastry blender. This step can be time-consuming and messy. Our revolutionary approach, however, involves actually melting the butter. While melting butter might typically lead to a less desirable texture, we ingeniously circumvent this by introducing cold buttermilk. When the chilled buttermilk meets the warm melted butter, it instantly forms tiny, irregular butter clumps (as seen in the photo above). These magical clumps are key to imbuing the bread with its wonderful, flaky texture – creating pockets of butter without any of the extra work! (A huge thank you to Cooks Illustrated for sharing this brilliant technique!).
We’ve successfully adapted this innovative method for our No-Yeast White Bread. By blending hot melted butter with cold buttermilk, we achieve those perfect butter clumps that are essential. This not only contributes significantly to the bread’s rise but also guarantees an exceptional texture throughout the loaf. Best of all, it’s dramatically simpler and faster than laboriously cutting in cold butter, making the entire baking process more enjoyable and less intimidating.
Incidentally, if you’re searching for delicious no-yeast bread *rolls*, we highly recommend giving that versatile drop biscuit recipe a try!
Quick Tip: The Role of Fat in Leavening
The small pockets of fat (butter) distributed throughout the dough are crucial. As these butter clumps melt in the oven, they create voids. The carbon dioxide (CO2) gas produced by the baking powder and baking soda then expands into these spaces, causing the bread to rise beautifully. Without sufficient butter clumps in the dough, the bread can end up hard and flat, as the CO2 has nowhere to go but out, resulting in a dense texture.
Effortless Baking: Your Step-by-Step Guide to No-Yeast Bread
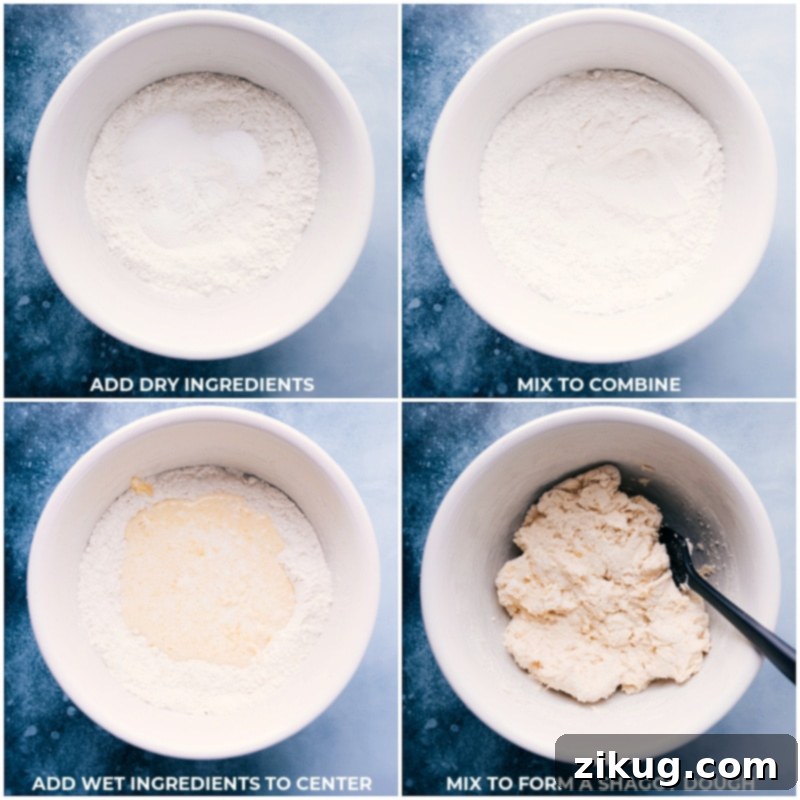
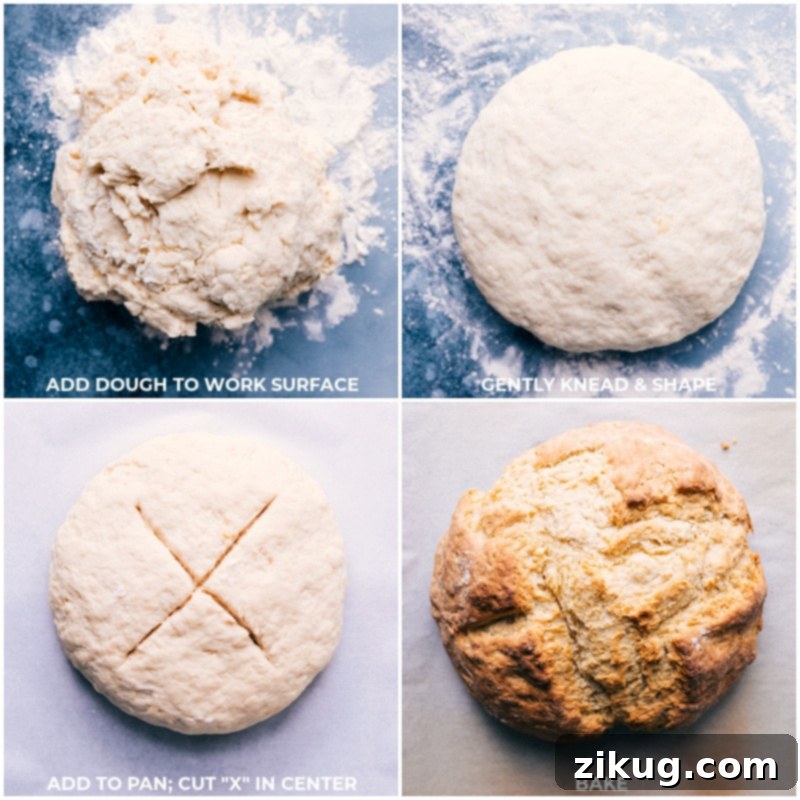
You’ll be astonished at how quickly and easily this delightful bread comes together. For a visual walkthrough, be sure to watch the quick video overview and examine the detailed step-by-step process photos provided. To ensure your No-Yeast Bread turns out perfectly every time, here are our essential top tips:
- Precise Bake Time Monitoring. Always keep a close eye on your bread as it bakes in the oven. Baking times can vary considerably due to factors like oven calibration, pan type, and even ambient humidity. Look for a beautiful golden brown crust and listen for a hollow sound when you lightly tap the center of the loaf. If you notice the crust browning too rapidly before the center is fully cooked, loosely cover the bread with aluminum foil to prevent over-browning.
- The Essential “X” Cut Before Baking. Before placing your loaf in the oven, use a sharp serrated knife to cut a shallow “X” shape across the top surface. This simple but effective technique helps the heat penetrate evenly into the center of the bread, ensuring it cooks thoroughly and prevents a doughy interior.
- Crucial Resting Period After Baking. Once removed from the oven, resist the urge to slice into your delicious bread immediately! Allow it to rest on the baking pan for 5-10 minutes, then carefully transfer it to a wire cooling rack for at least 30 minutes. This resting time is vital because the bread continues to cook from residual heat and steam, ensuring the center sets properly. Cutting it too soon will likely result in a gummy, undercooked center.
- Always use buttermilk straight from the refrigerator—the colder, the better! The drastic temperature difference between the cold buttermilk and the hot melted butter is what creates those desirable butter clumps, which are essential for the bread’s texture and rise.
- Mastering Flour Measurement is Key. The exact amount of flour needed can fluctuate based on environmental conditions such as humidity, altitude, and kitchen temperature. It’s always best to start with slightly less flour than the recipe specifies. Gradually add more, a tablespoon at a time, until the dough begins to pull away from the sides of the bowl and is no longer excessively sticky. The dough should still possess a good amount of moisture, but not be wet or shaggy.
- Consequences of Too Much Flour: An overabundance of flour will lead to a dense, dry, and less flavorful loaf of No-Yeast Bread. Conversely, using too little flour will cause the bread to spread excessively during baking, resulting in a flat, unappealing shape.
- When measuring flour for this recipe, it is imperative to use the “spoon and level” method. Do not scoop your measuring cup directly into the flour container, as this compacts the flour and results in using far too much. Instead, lightly spoon flour into your measuring cup until it overflows, then level it off with a straight edge (like the back of a knife). Learn how to properly spoon and level flour here for consistently perfect results.
Delightful Serving Suggestions for Your No-Yeast Bread
While wonderfully delicious, No-Yeast Bread has a fairly plain flavor profile, making it an excellent canvas for various toppings and accompaniments. It truly shines when enhanced with a little something extra. Here are our favorite ways to enjoy this versatile bread, transforming it into a memorable treat:
- For an immediate indulgence, slice a piece while the bread is still warm and slather it with a thick layer of room-temperature butter. If you’re using unsalted butter, a tiny pinch of sea salt will magically bring out its creamy, rich flavors. For an extra touch of gourmet, consider adding some freshly chopped herbs like fragrant rosemary or earthy thyme.
- Embrace the sweet side by adding a vibrant citrus marmalade or a luscious berry jam. If your bread isn’t piping hot fresh from the oven, a quick toast will revive its crust and perfectly melt the spread.
- Transform it into a rustic sandwich! This bread makes a fantastic base for your favorite cheese and deli meats. Or, create an elegant open-faced sandwich by toasting a slice and topping it with melted cheese and fresh greens.
- Give a classic breakfast dish a unique twist. Prepare your favorite biscuits and gravy, but swap out the traditional biscuits for a hearty slice of toasted No-Yeast Bread. We found this meal combination absolutely delightful!
- Elevate your breakfast or brunch by using slices of this bread to make incredible French Toast. Drown it in plenty of our signature buttermilk syrup, classic pancake syrup, or a burst of fruitiness with blueberry syrup.
- This robust bread is ideal for dunking! Pair it with some comforting soup. Explore our extensive list of 30 or more favorite soup recipes to find your perfect match.
Quick Tip: Utilizing Leftover Buttermilk
Don’t let any leftover buttermilk go to waste! It’s a fantastic ingredient that can elevate many dishes. Consider using it in one of these beloved recipes: our famously fluffy Homemade Pancakes, this incredibly tasty Corn Casserole with rich creamed corn, or for a sweet treat, these delightful Chocolate Chip Pancakes.
Storage Solutions
Optimal Storage for Your No-Yeast Bread
- Enjoy At Its Peak Freshness: Like many artisanal and homemade breads without preservatives, No-Yeast Bread is truly best enjoyed warm, right out of the oven, or on the same day it’s baked. It won’t have the same long shelf life as commercially produced breads.
- Room Temperature Storage: To maintain its quality, store your No-Yeast Bread in a cool, dry place. A bread box or a container that allows for some ventilation is ideal to prevent moisture buildup and inhibit mold growth. It will typically stay fresh for 3-5 days. Avoid refrigerating it, as the cold environment actually speeds up the staling process, making the bread dry and crumbly more quickly.
- Freezing for Longer Preservation: If you anticipate not finishing the loaf within 2-3 days, freezing is an excellent option. For best results, slice the bread before freezing. This allows you to thaw individual portions as needed. Properly wrapped, it can remain fresh in the freezer for up to 3 months. To enjoy, simply thaw slices at room temperature or toast them directly from the freezer for a quick and delicious treat.
Quick Tip: Enhancing Stability
No-Yeast Bread, especially as it ages a day or two, can sometimes be notoriously crumbly. For improved stability and a delightful texture, we highly recommend toasting the bread first before adding toppings or using it in sandwiches. Toasting helps firm up the crumb and makes it less prone to falling apart.
Explore More Quick & Easy Bread Recipes
If you’ve enjoyed the simplicity and deliciousness of our No-Yeast Bread, you’ll love these other fantastic quick bread recipes from our collection:
- Pumpkin Bread with its delightful crusty, sugary top, perfect for autumn.
- Healthy Banana Bread made wholesome with creamy Greek yogurt and oats.
- Lemon Blueberry Bread bursting with the vibrant flavors of fresh lemon and juicy blueberries.
- Applesauce Bread a comforting loaf featuring tender chunks of fresh apple and warm spices.
- Chocolate Banana Bread a decadent twist on a classic, studded with rich chocolate chips.
Print Recipe
No-Yeast Bread
Video
Equipment
-
Large sheet pan (15″ x 21″) or 5-quart cast-iron pot
-
Parchment paper or silicone baking mat
-
Cooling rack
Ingredients
- 8 tablespoons unsalted butter (1/2 cup, melted)
- 1-3/4 cups buttermilk (divided, see note 1 below)
- 1 large egg
- 4-1/2 cups all-purpose flour (plus more for dusting, see note 2 below)
- 3 tablespoons granulated sugar
- 2-1/2 teaspoons baking powder
- 1 teaspoon baking soda
- 1-1/2 teaspoons salt
Instructions
-
Preheat your oven to 425°F (220°C). Prepare a large sheet pan by lining it with parchment paper or a silicone baking mat. Alternatively, if using, line a 5-quart cast-iron pot with parchment paper. Set this prepared pan aside. In a medium microwave-safe bowl, melt the butter.
-
Remove the melted butter from the microwave. Carefully pour in 1 cup (237g) of cold buttermilk. Stir this mixture gently with a fork and then set it aside for approximately 5 minutes. In a separate medium bowl, combine the remaining 3/4 cup (176g) of buttermilk with the egg. Whisk these two ingredients together until the mixture is smooth and well combined; set this bowl aside as well.
-
In a very large mixing bowl, add the measured flour, granulated sugar, baking powder, baking soda, and salt. Whisk these dry ingredients together thoroughly until they are well combined. Create a well (a small indentation) in the center of the dry ingredients. Pour the buttermilk and egg mixture into this well. Stir the butter and buttermilk mixture again, ensuring it is well mixed until small clumps of butter have formed (it’s crucial to have this mixture as clumpy as possible for texture!). Use a spatula to scrape every bit of this clumpy mixture on top of the dry ingredients.
-
Using a strong spatula or a sturdy wooden spoon, gently mix the ingredients until they are just combined and no streaks of dry flour remain. Be careful not to overmix or overwork the dough, as this can lead to a tough bread. Lightly sprinkle 2 tablespoons of extra flour onto a clean work surface. Scrape all of the dough out from the bowl onto this floured surface, and then sprinkle it with 2 more tablespoons of flour. Gently knead the bread dough about 6–8 times, just enough to bring everything together into a wide, smooth ball.
-
Carefully transfer the dough ball to your prepared sheet pan or cast-iron pot. Gently pat it down until it reaches an approximate height of 1-1/2 inches. Using a sharp serrated knife, cut a shallow “X” across the surface of the loaf, about 1/4-inch deep. Place the bread in the preheated oven and bake for 25 minutes. After this initial 25 minutes, **do not open the oven door**, but reduce the oven temperature to 400°F (200°C). Continue to bake for another 20–30 minutes, or until the base of the loaf sounds hollow when lightly tapped in the middle (this usually takes 25 mins in my oven); refer to note 3 below for testing doneness.
-
Once baked, remove the tray from the oven. Let the bread stand on the pan for about 10 minutes. Then, carefully transfer the loaf to a wire cooling rack. Allow the bread to cool for at least 30 minutes before attempting to slice into it (the residual steam inside is still cooking the bread!). Rushing this step will likely result in a slightly doughy center—see note 4 below for more details.
Recipe Notes
Note 2: Accurate flour measurement is critical for the texture of this bread. For the most precise measurement, we highly recommend using a food scale. If a scale is not available, use the “spoon and level” method: lightly spoon the flour into your measuring cup until it’s overflowing, then level off the excess with the back of a knife. Never press a measuring cup directly into a container of flour, as this compacts the flour and will result in using significantly more than intended, leading to a dense loaf. Here’s a helpful video demonstrating how to spoon and level flour correctly.
Note 3: To accurately test if your bread is fully cooked, listen for a hollow sound when you tap the bottom of the loaf. To do this safely, wearing oven mitts, carefully tip the pan so the bread slides out onto your hand or a cutting board. Lift the bread with one hand and tap the bottom with your finger. Tapping the bread while it’s still on the counter or in the pan will not provide an accurate indication of doneness.
Note 4: The post-oven resting period is just as important as the bake time! Once you remove the bread from the oven, allow it to stand on the sheet pan for about 5–10 minutes, and then transfer it to a wire cooling rack for at least 30 minutes. This essential rest time allows the residual heat and trapped steam to continue cooking the inside of the bread, ensuring it is fully baked through and not doughy. As tempting as it is to cut in right away, resist the urge for the best possible texture!
Storage Tips: For optimal freshness, store your No-Yeast Bread in a cool, dry place for 3–5 days. To prevent mold, use a container that allows some air circulation, such as a bread box. It’s best to avoid storing this bread in the refrigerator, as the cold temperature can actually accelerate the staling process, making it dry and hard more quickly. For bread that is older than 2–3 days, or if you wish to preserve it for longer, freezing is an excellent option. Slice the bread before freezing, and it will stay fresh for up to 3 months. You can thaw individual slices at room temperature or toast them directly from the freezer.
Nutrition Information
Nutrition information is automatically calculated and should be used as an approximation only.