
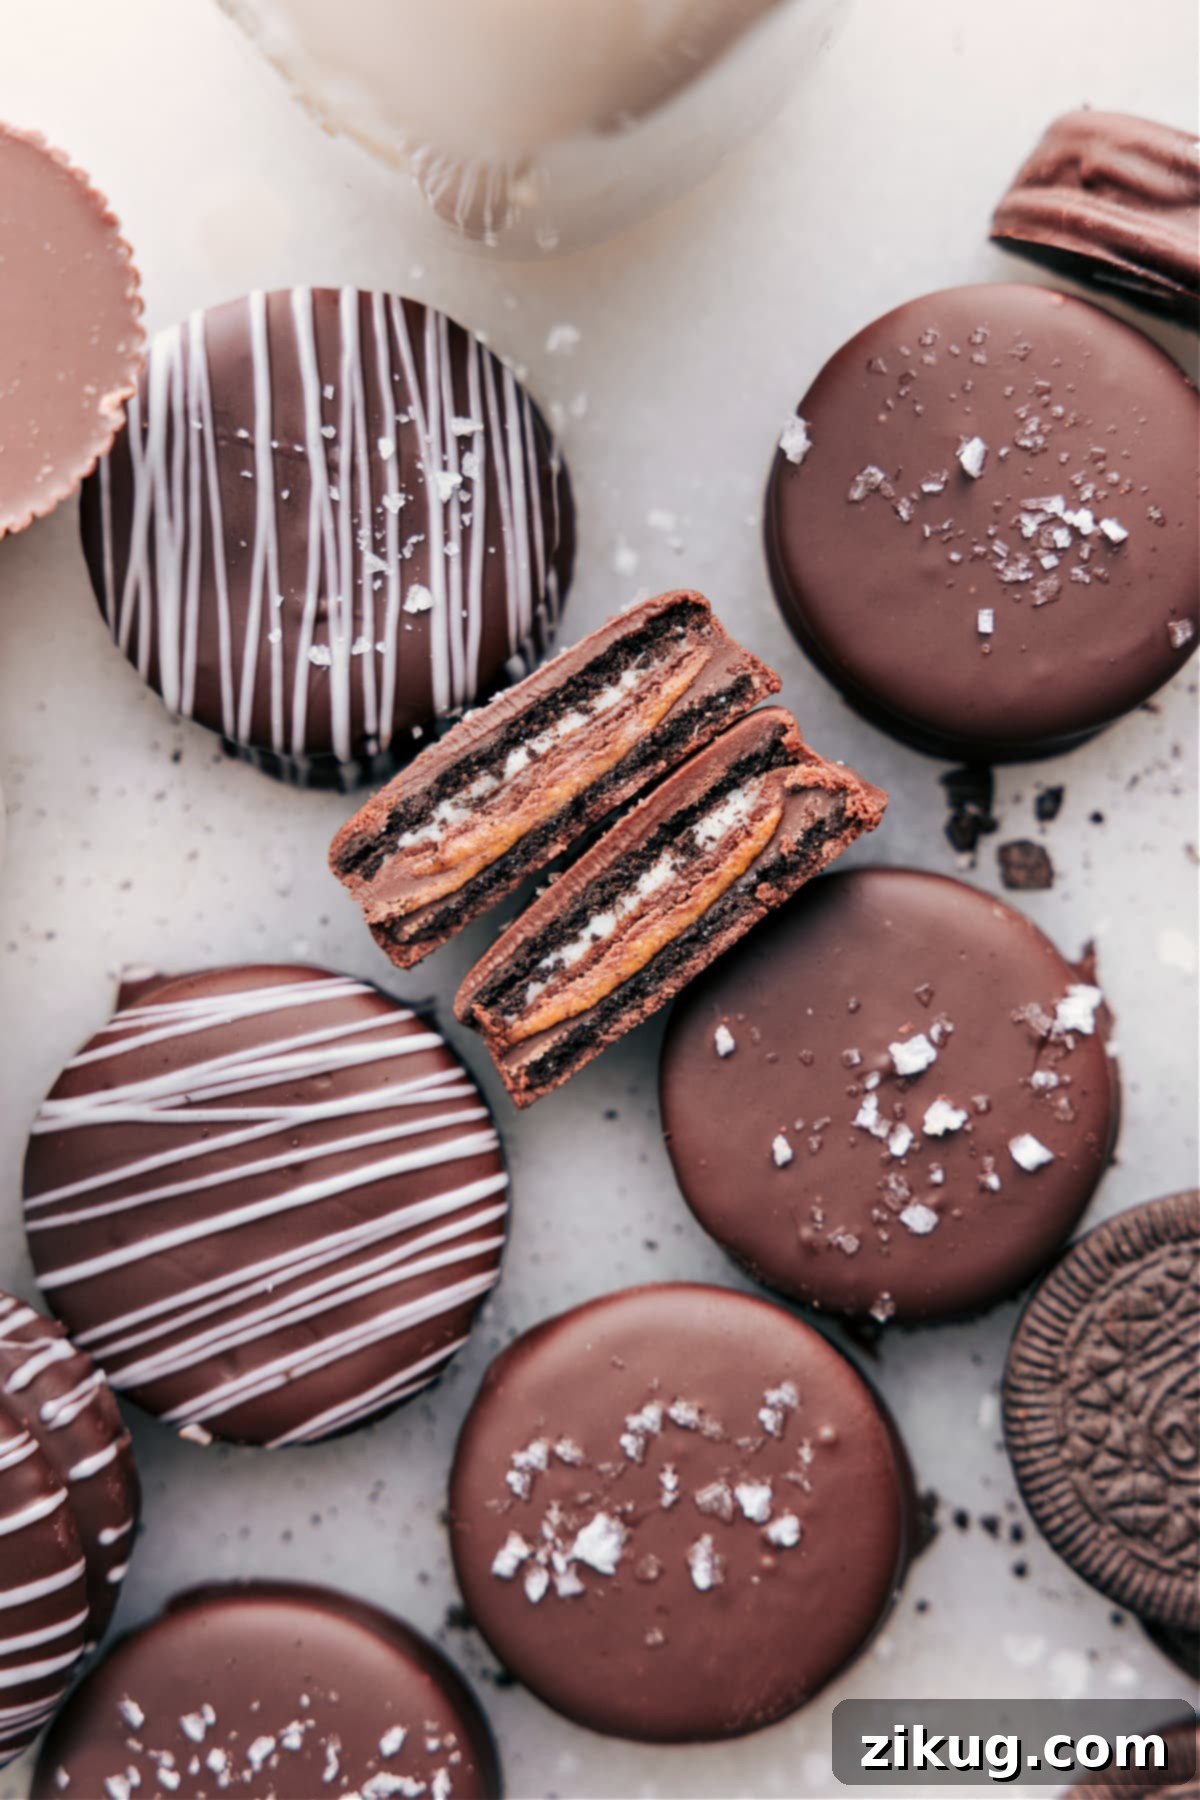
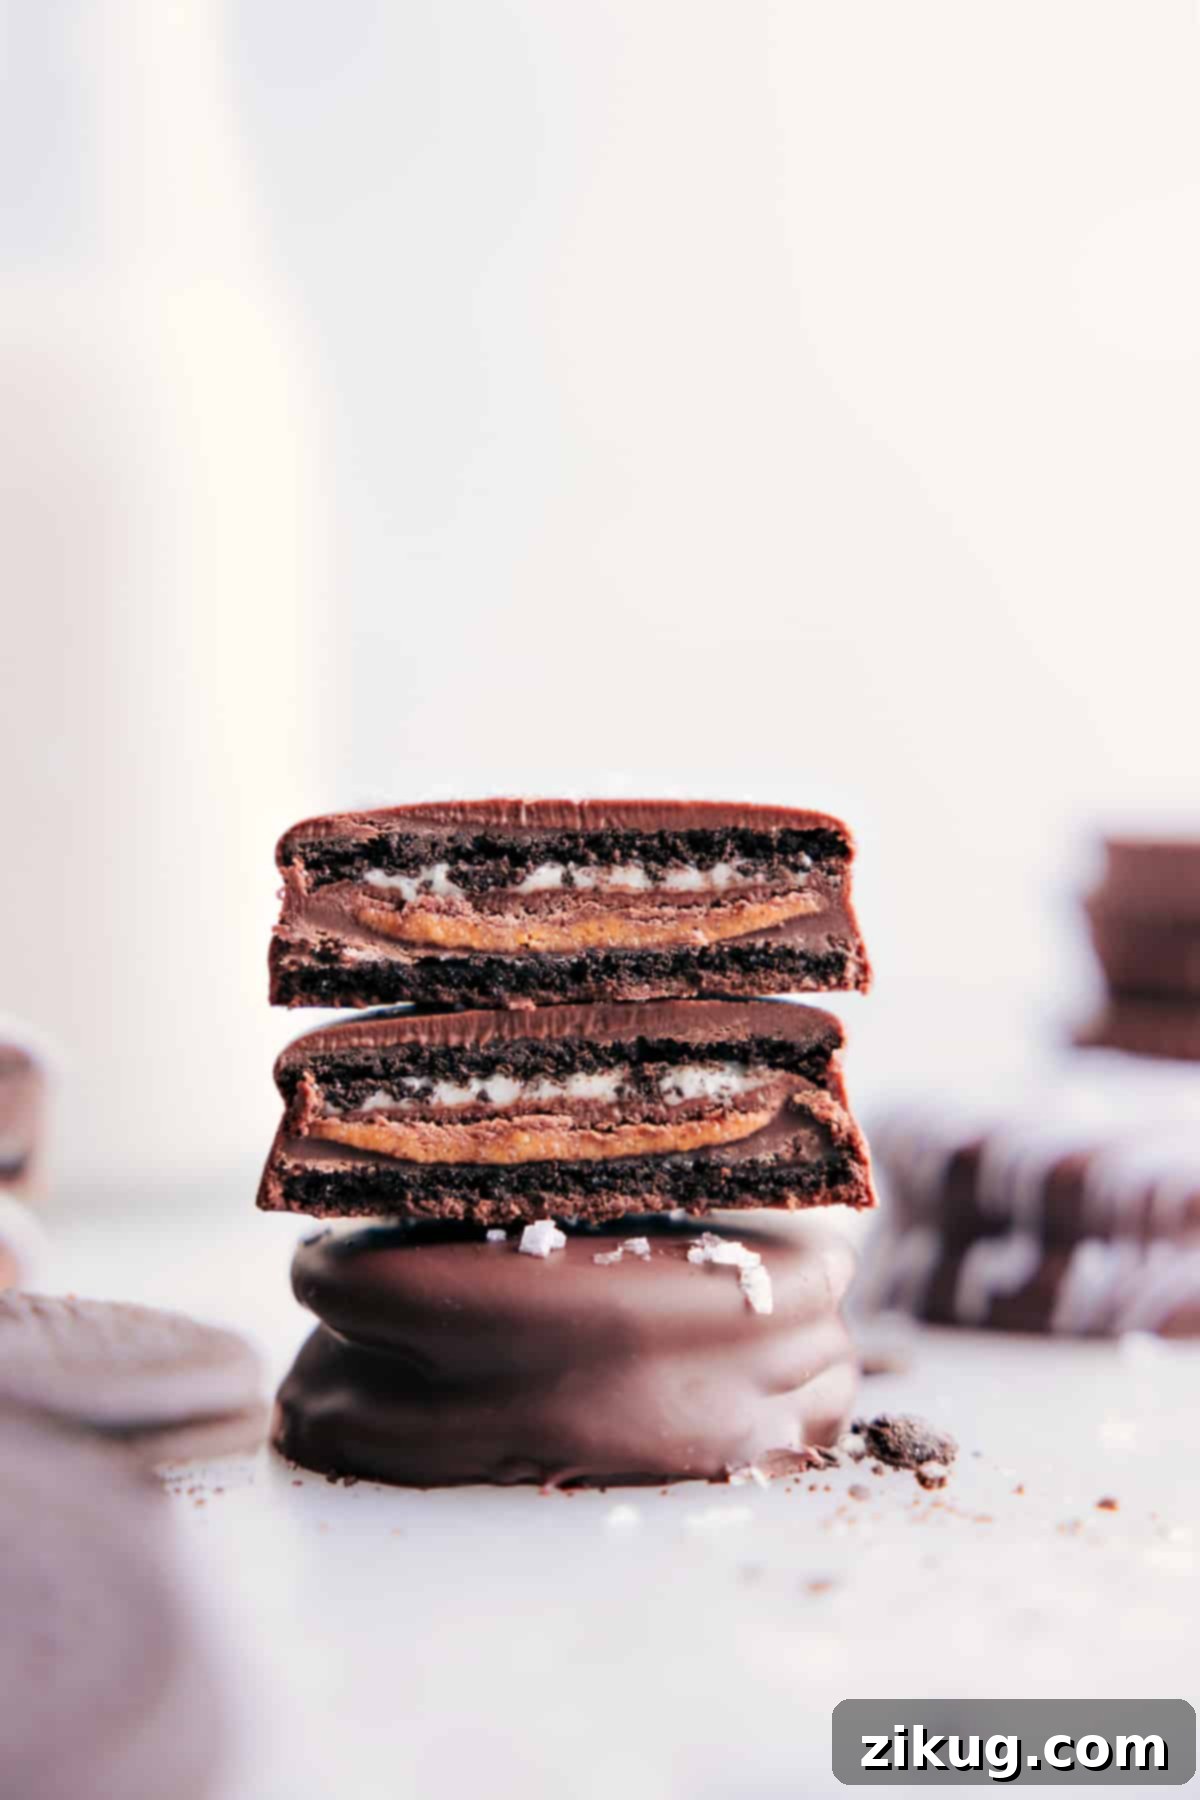
Discover the ultimate sweet and salty indulgence with our incredibly easy recipe for Ritz Cracker Peanut Butter Cups. Imagine a creamy peanut butter cup nestled between two crisp crackers or chocolatey cookies, all enveloped in a rich, melted chocolate coating. This no-bake wonder is a quick snack to assemble, perfect for satisfying those intense cravings or dazzling guests at your next gathering. Forget complicated desserts; these delightful treats come together in a snap, offering a harmonious blend of textures and flavors that will leave everyone reaching for more. Whether you prefer the classic buttery crunch of Ritz or the sweet allure of Oreos, this customizable recipe is guaranteed to become a new favorite in your kitchen.
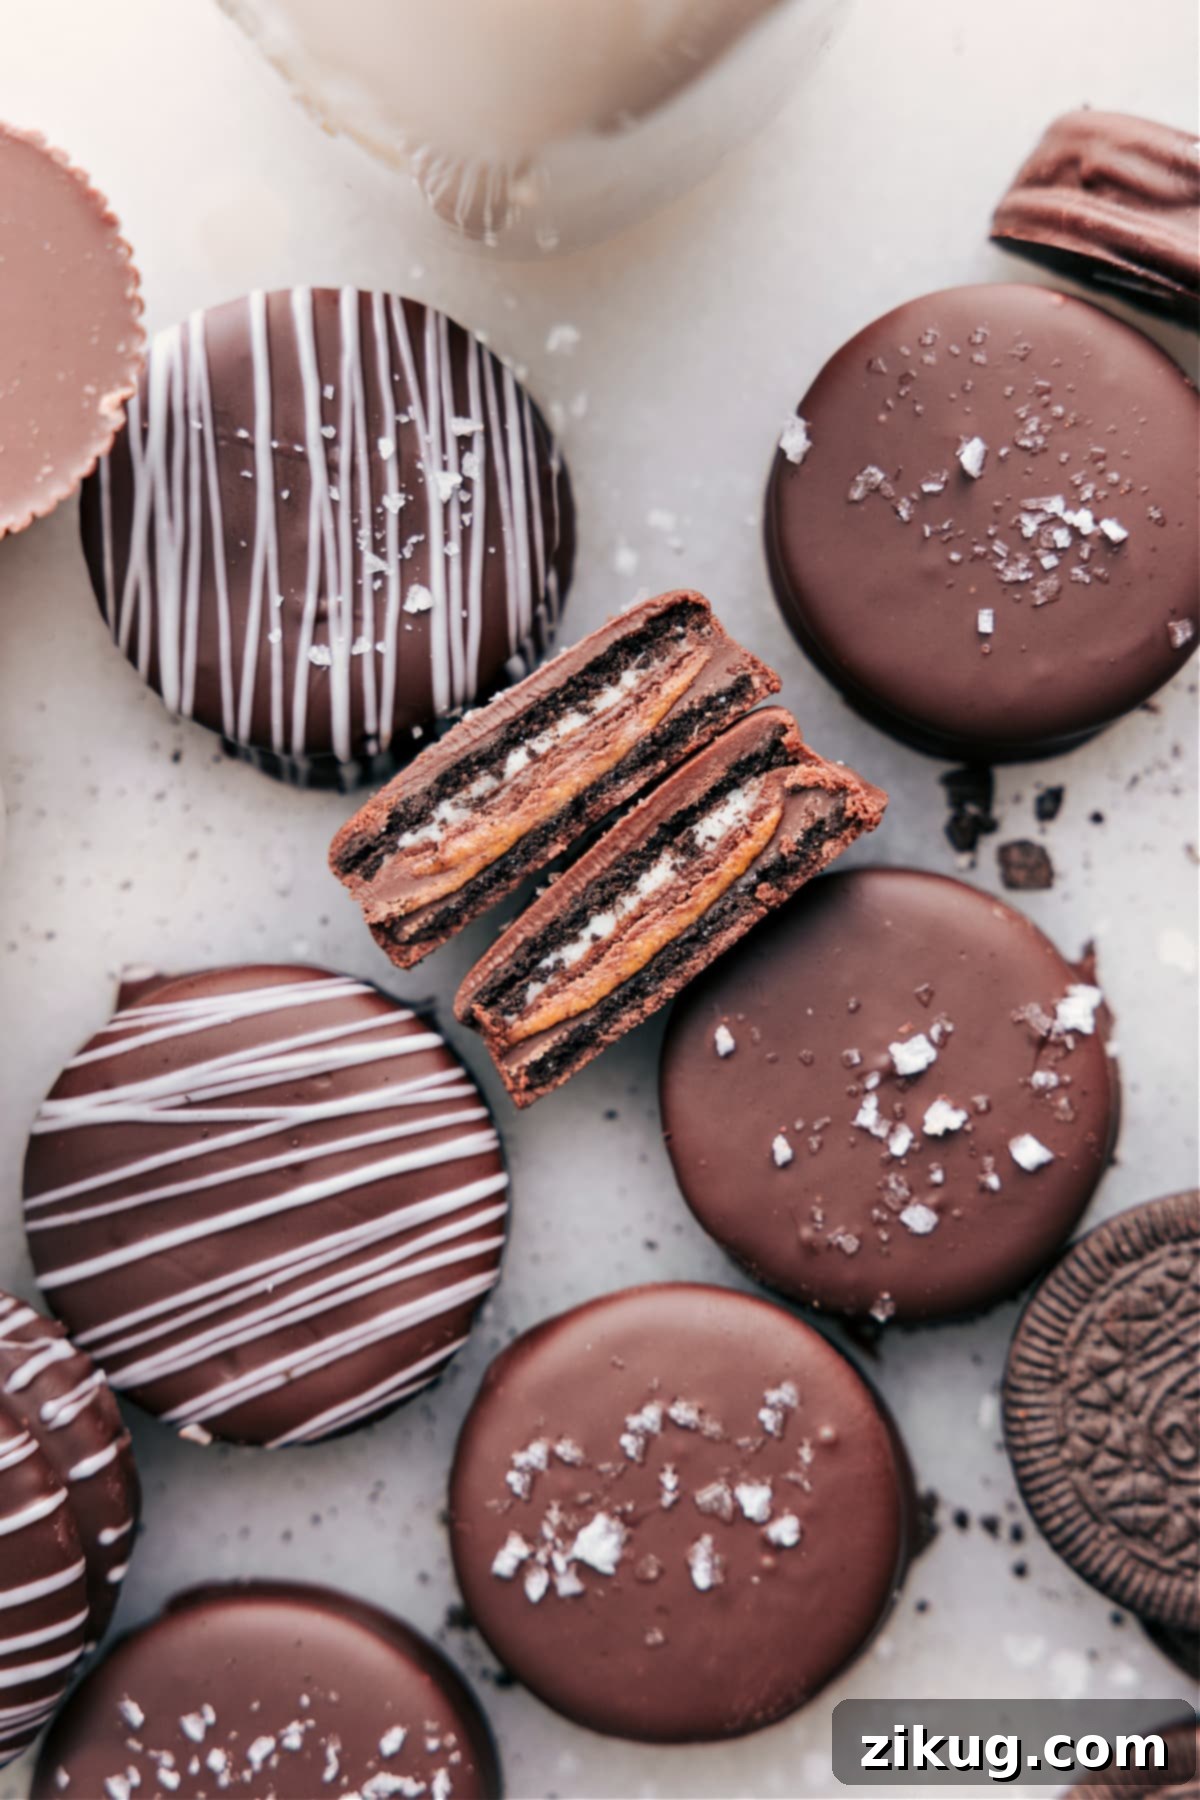
What Makes These Ritz Cracker Peanut Butter Cups Irresistible?
Our Ritz Cracker Peanut Butter Cups are more than just a dessert; they’re a delightful experience designed for simplicity and maximum flavor. Here’s why they stand out as the perfect treat:
- Effortlessly Easy: The beauty of this recipe lies in its simplicity. There’s absolutely no baking involved, making it a fantastic option for beginner cooks, busy schedules, or anyone looking for a quick dessert fix. Minimal steps mean more time enjoying your delicious creations!
- Customization at Your Fingertips: This recipe is incredibly versatile. You’re the chef, so feel free to experiment! Will it be the classic salty-sweet kick of Ritz Crackers, or the added sweetness and crunch of Oreo Thins? Beyond the base, the chocolate choice is all yours – rich dark chocolate, smooth milk chocolate, or sweet white chocolate. Each combination offers a unique twist, ensuring there’s a perfect version for every palate.
- A Guaranteed Party Pleaser: Planning a party or potluck? These treats are consistently a crowd-pleaser. Their charming appearance, coupled with their irresistible sweet and salty profile, ensures they’ll be the first to disappear from the dessert table. They’re bite-sized, easy to handle, and universally loved.
- Basic Kitchen Tools Are All You Need: No need for fancy stand mixers, complex molds, or specialized equipment. This recipe relies on fundamental kitchen items like a baking sheet, parchment paper, and a microwave-safe bowl. It’s accessible to everyone, regardless of their kitchen gadget collection.
- Perfect for Preparing Ahead: Life gets busy, but that shouldn’t stop you from enjoying homemade treats. These peanut butter cups can be prepared in advance, allowing you to free up time on the day of your event or simply have a stash of delicious snacks ready for whenever a craving strikes. They store beautifully, making them ideal for meal prep (dessert style!).
Key Ingredients for Your Delicious Creation
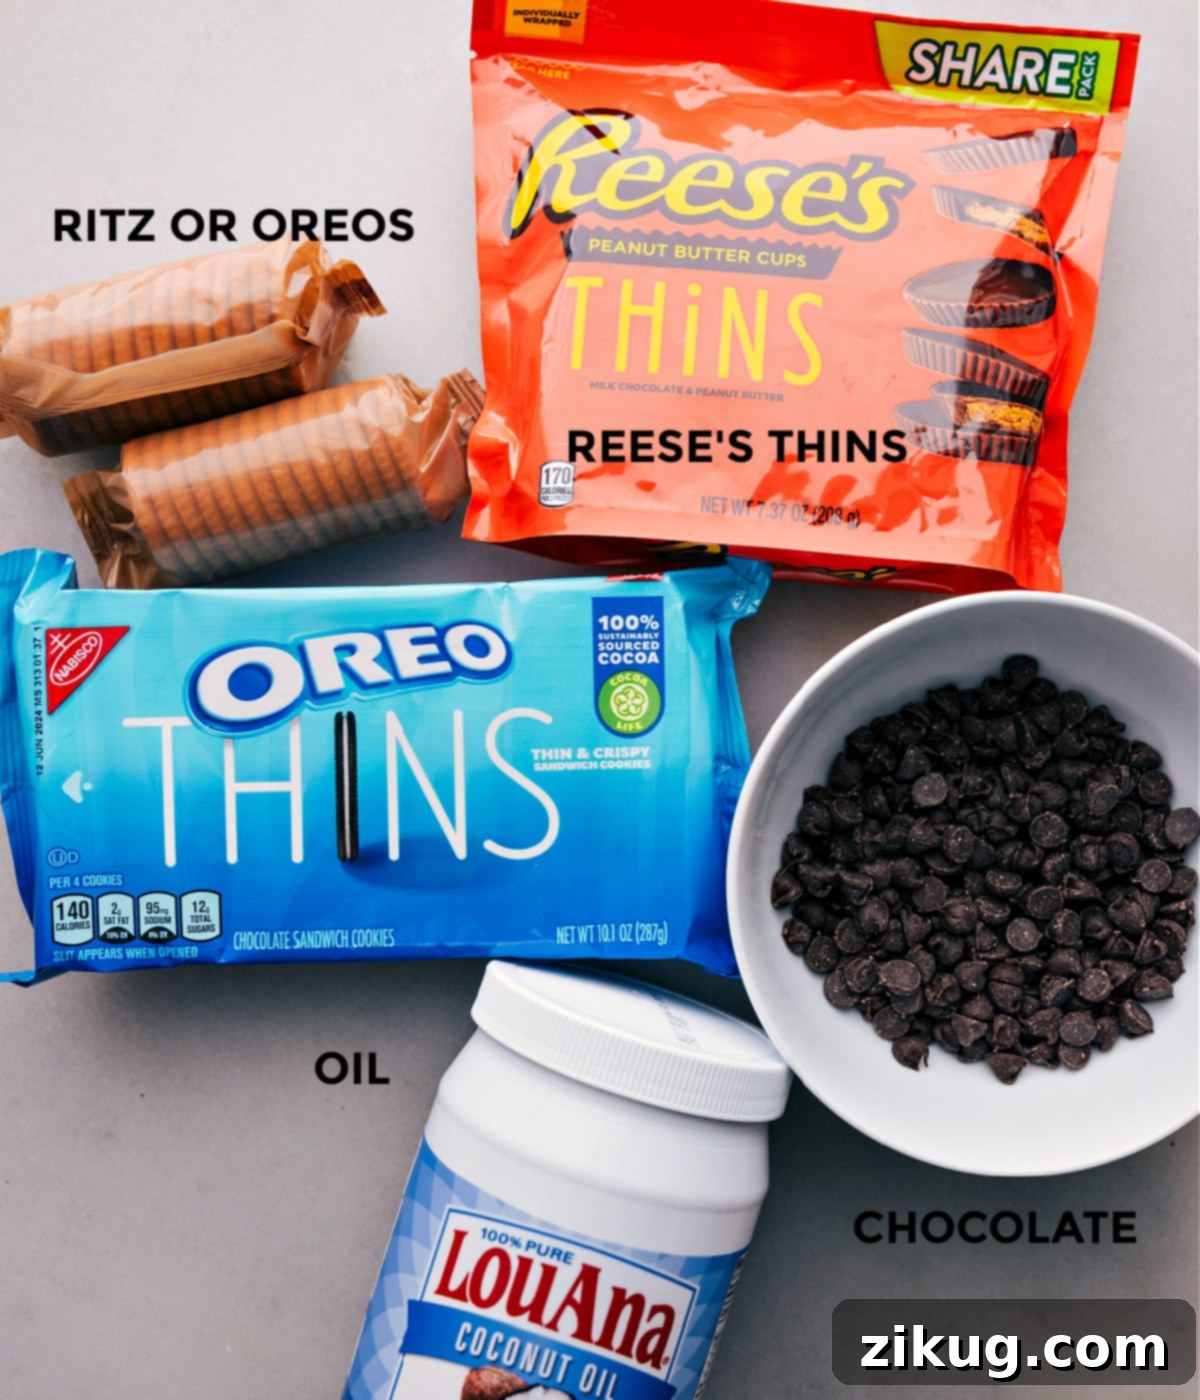
Crafting these delectable Ritz Cracker Peanut Butter Cups requires just a few simple ingredients, each playing a crucial role in achieving that perfect balance of sweet, salty, and creamy.
- Ritz Crackers or Oreo Thins: This is where the magic begins! For a truly iconic sweet and salty experience, traditional Ritz Crackers are your go-to. Their buttery, slightly salty flavor perfectly complements the rich sweetness of chocolate and peanut butter. If you’re leaning towards a sweeter, more intensely chocolatey treat, Oreo Thins offer a delightful crunch and a hint of cocoa that works wonderfully. The “thins” version of both crackers/cookies is recommended for a balanced sandwich that isn’t overly bulky, allowing the peanut butter cup to shine.
- Reese’s Thins: The heart of our treat! Reese’s Thins are specifically chosen for their thinner profile, which prevents the final product from becoming too tall or challenging to eat. Their classic combination of milk chocolate and creamy peanut butter is non-negotiable for that authentic flavor everyone loves. Using the ‘thins’ variety ensures a harmonious ratio of components in your final bite.
- High-Quality Chocolate Wafers or Chips: The chocolate coating makes all the difference. Opt for high-quality chocolate melting wafers or good baking chips (such as Ghirardelli or Baker’s brands). These are formulated to melt smoothly and consistently, providing a glossy, even coating without becoming grainy or seizing. You can choose milk chocolate for a sweeter finish, dark chocolate for a richer, more intense flavor, or semi-sweet for a balanced taste.
- Coconut Oil or Vegetable Oil: A small amount of oil is key to achieving a beautifully smooth and pourable chocolate consistency. It helps the chocolate melt more evenly, prevents it from becoming too thick, and gives your finished treats a lovely, glossy sheen that looks professionally made. Coconut oil adds a subtle hint of flavor, while vegetable oil is a neutral choice.
- Optional White Chocolate: For an extra touch of elegance and visual appeal, a drizzle of melted white chocolate can elevate your peanut butter cups. It adds a contrasting sweetness and a beautiful decorative element, making your treats even more Instagram-worthy.
- Optional Sea Salt Flakes: If you’re a true fan of the sweet and salty dynamic, a sprinkle of flaky sea salt (like Maldon) on top of the still-wet chocolate coating is an absolute game-changer. It intensifies the flavors, adding a sophisticated textural crunch and highlighting the sweetness of the chocolate and peanut butter.
Quick Tip: Brand Recognition
Please note that this recipe mentions specific trademarked brands like Ritz Crackers, Oreo Thins, and Reese’s Thins. We use these names for two important reasons: firstly, these are high-quality products that consistently perform well in our test kitchen, and secondly, they provide instant name recognition, helping to clearly illustrate the exact components and steps in our recipe process. We always respect trademarks and branding, aiming only to guide you to the best possible results!
Step-by-Step Guide: Crafting Your Ritz Cracker Peanut Butter Cups
Follow these simple instructions to create your irresistible sweet and salty treats:
- 1. Prepare Your Workspace: Begin by lining a large baking sheet with parchment paper. This crucial step prevents sticking and makes for easy cleanup once your chocolate-covered delights have set. Preheat your oven to a low 250°F (120°C). This gentle warmth is just enough to slightly soften the peanut butter cups, ensuring they adhere well without melting completely.
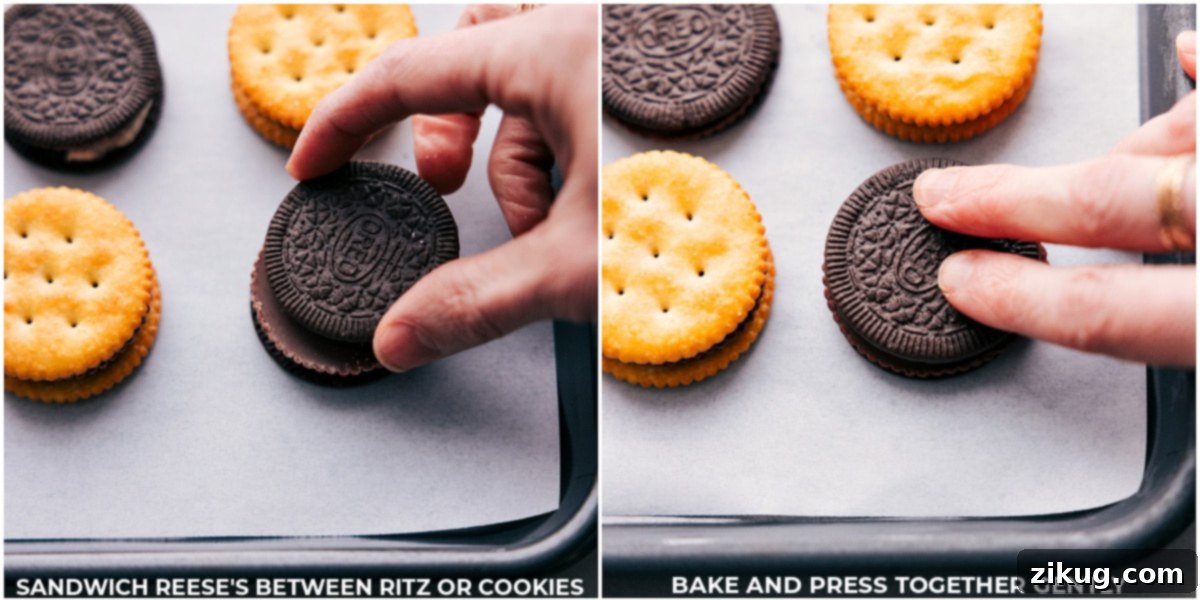
- 2. Assemble the Sandwiches: If using Oreos, carefully separate them, ensuring the creme filling remains on one side. Place one Reese’s Thin onto the creme-covered Oreo half, then top with the other Oreo half. If you’re opting for Ritz, simply place one Reese’s Thin onto a Ritz cracker, then gently top with a second Ritz cracker. You’ll be creating a perfect little sandwich.
- 3. Gentle Bake and Chill: Carefully transfer your assembled cracker or cookie sandwiches to the preheated oven. Bake for a very short duration, approximately 2 to 2.5 minutes at 250°F. This brief warming period slightly softens the peanut butter cup, allowing it to meld perfectly with the crackers/cookies. Immediately after removing them from the oven, gently press down on each sandwich to ensure all layers are securely adhered. Then, place the entire tray into the refrigerator or freezer until the sandwiches are firm and cool to the touch. This chilling step is vital for preventing the peanut butter cups from disintegrating when dipped into warm chocolate.
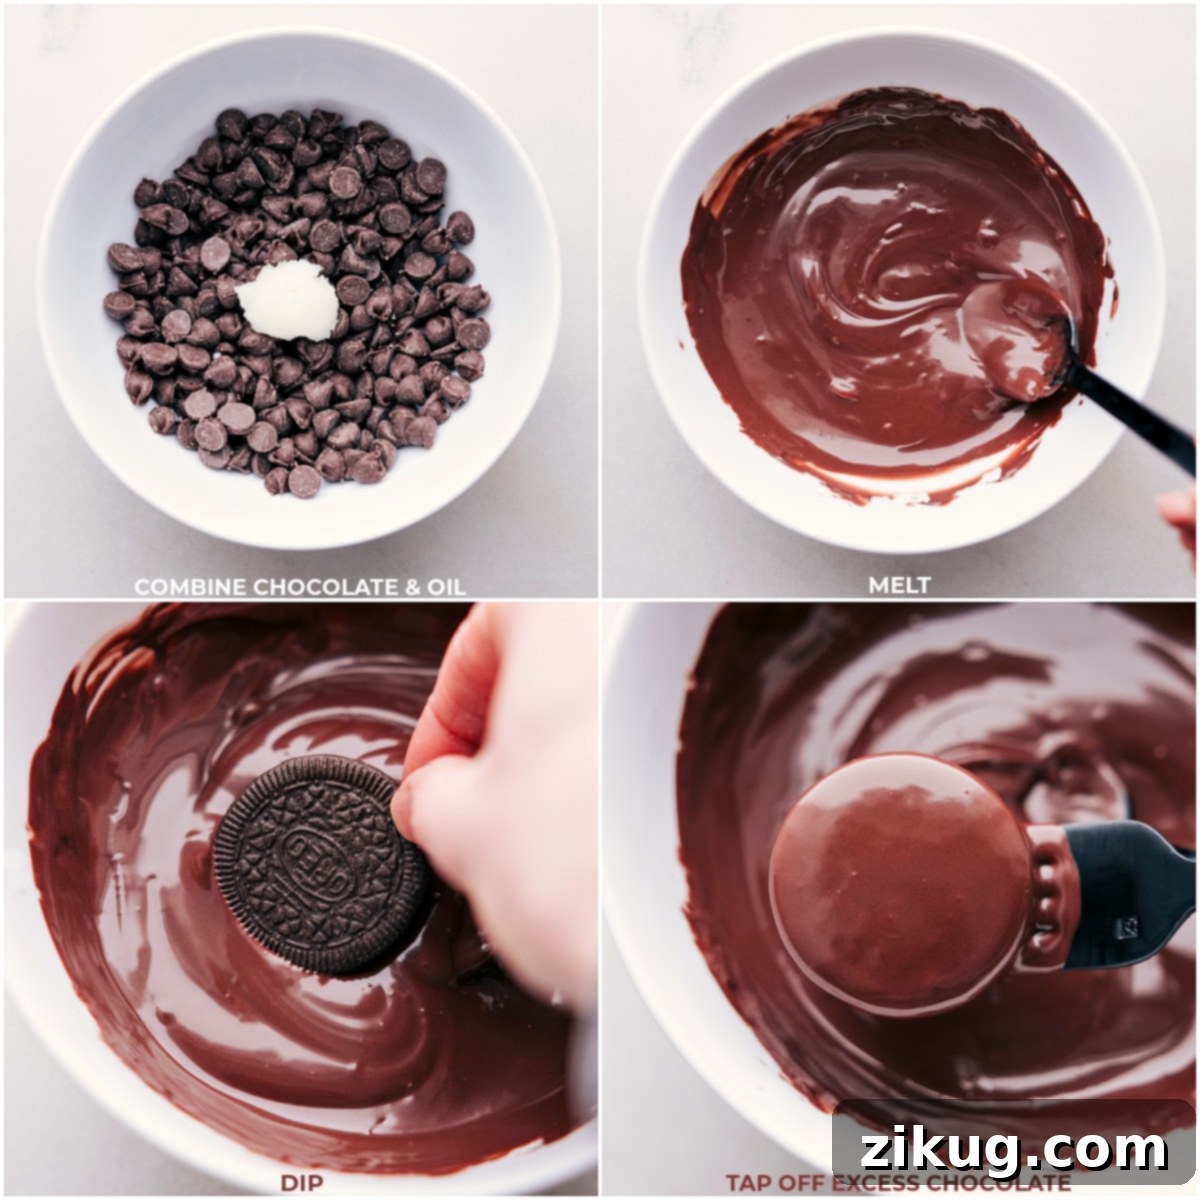
- 4. Melt the Chocolate to Perfection: In a microwave-safe bowl, combine 1 cup of your chosen chocolate melting wafers (or chips) with 1.5 teaspoons of coconut or vegetable oil. Microwave in short bursts of 15-20 seconds, stirring thoroughly after each interval. Continue this process until the chocolate is completely smooth and free of any lumps. It’s essential not to overheat the chocolate, as this can cause it to seize and become grainy or scorched. The goal is a velvety, flowing consistency.
- 5. Dip and Coat with Care: Once your sandwiches are firm and your chocolate is perfectly melted, it’s time for dipping! Using a fork, carefully submerge one sandwich at a time into the melted chocolate. Turn the sandwich gently to ensure it’s evenly coated on all sides. Lift it out of the chocolate, gently tapping the fork against the edge of the bowl to allow any excess chocolate to drip off. This helps achieve a smooth, professional finish. If you notice any small air bubbles on the surface, use a toothpick to gently pop them.
- 6. Set and Finish: Carefully slide each chocolate-coated treat off the fork using a table knife and place it onto your parchment-lined baking sheet. Repeat this process with the remaining sandwiches, melting more chocolate as needed (see Note 2 in the recipe card for re-melting tips). Allow the chocolate to set completely at room temperature or in the refrigerator for faster setting.
- 7. Optional Decorations (Drizzle & Salt): For an added touch, melt some white chocolate and transfer it to a resealable plastic bag. Snip a tiny corner off the bag and drizzle decorative lines over your set chocolate-covered sandwiches. Alternatively, for an intensified sweet-and-salty flavor, sprinkle a pinch of flaky sea salt over the chocolate coating immediately after dipping, while it’s still wet.
Mastering Chocolate Melting: Tips for a Perfect Coat
Melting chocolate can seem daunting, but with a few simple tricks, you can achieve a perfectly smooth and glossy coating every time. These tips are crucial for your Ritz Cracker Peanut Butter Cups:
- Use Short Bursts: When microwaving chocolate, always do so in short, 15-second intervals. Chocolate holds heat well, and it can continue to melt even after it’s out of the microwave. Overheating can cause it to burn or seize, turning it thick and unusable. Patience is key here!
- Stir Consistently and Thoroughly: After each microwave interval, take the bowl out and stir the chocolate vigorously. Even if the chocolate doesn’t look fully melted, stirring helps distribute the heat and allows the residual warmth to melt any remaining solid pieces. This process ensures an even melt and prevents hot spots.
- Maintain Low Heat: The goal is gentle warming, not boiling or intense heat. If you’re using a double boiler, keep the water at a gentle simmer, not a rolling boil, and ensure the bottom of your chocolate bowl doesn’t touch the water. For microwaving, using low power settings or shorter bursts prevents scorching.
- Add a Touch of Oil: Incorporating a teaspoon or two of coconut oil (or vegetable oil) into your melting chocolate is a secret weapon. It lowers the chocolate’s viscosity, making it thinner and easier to dip with, and provides that beautiful, professional-looking glossy finish. Start with a small amount and add more sparingly if needed to reach your desired consistency.
- Strictly Avoid Water: This is perhaps the most critical rule for melting chocolate. Even a single drop of water introduced into melting chocolate can cause it to “seize.” This means the chocolate will instantly clump up, become thick, grainy, and unusable. Ensure all your bowls, spatulas, and utensils are completely dry before they come into contact with the chocolate. Humidity can also be a factor, so choose a dry environment if possible.
Creative Variations and Customization Ideas
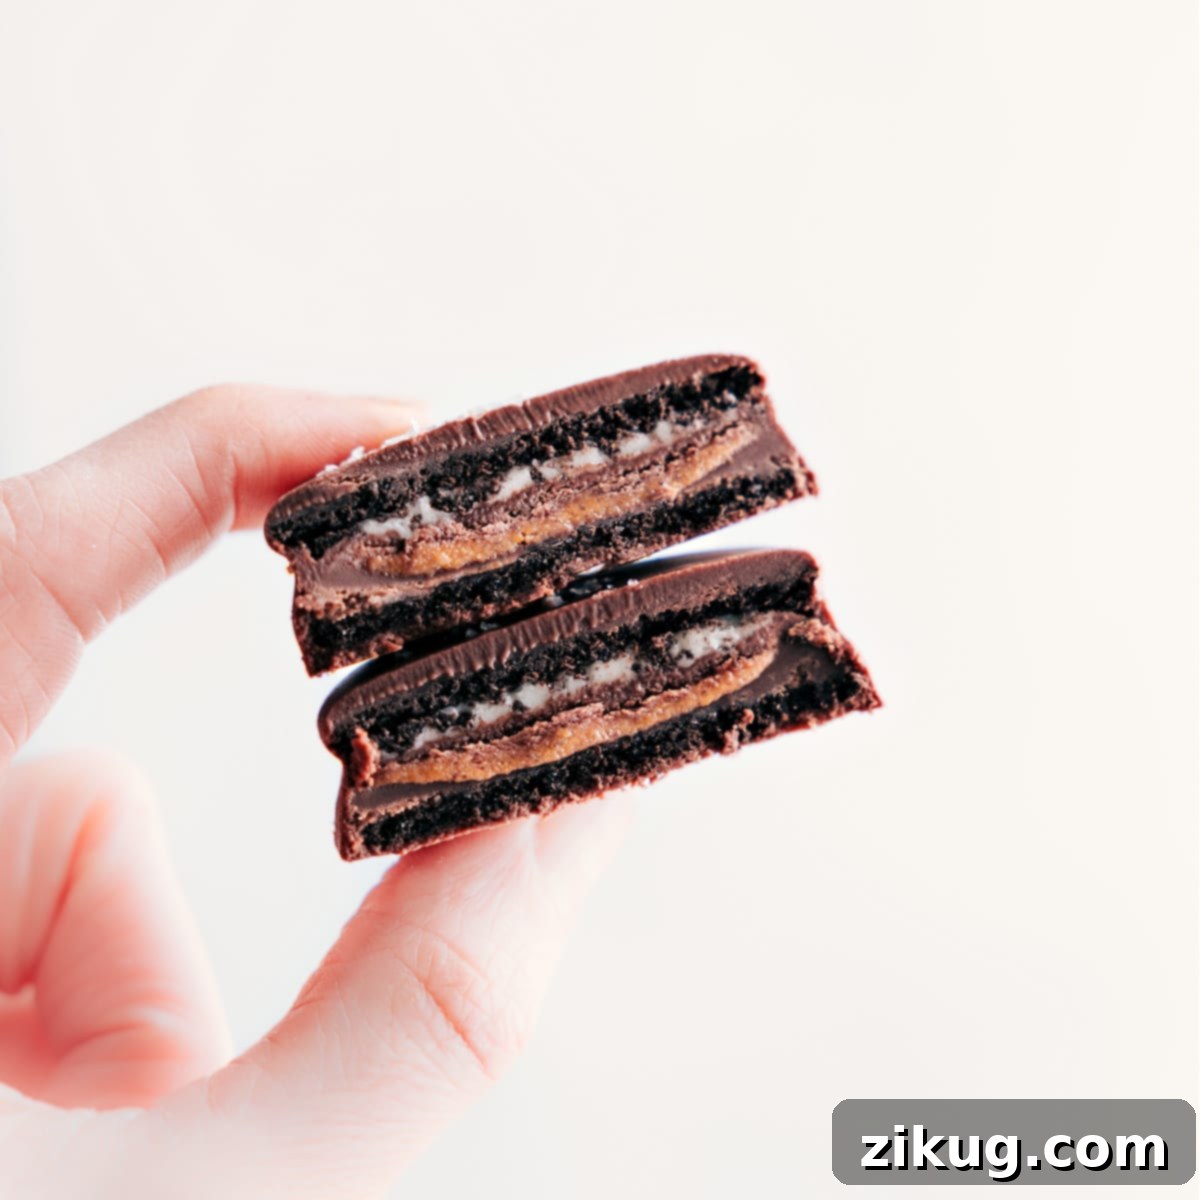
While the classic Ritz Cracker Peanut Butter Cup is undeniably delicious, this recipe is a fantastic canvas for your creativity. Here are some ideas to inspire your next batch:
- Chocolate Choices: Don’t limit yourself to one type of chocolate! Try a combination – dip in milk chocolate and drizzle with dark chocolate, or vice versa. White chocolate can also be used as the primary coating for a sweeter, creamier treat, especially delightful with Oreo Thins.
- Different Fillings: Experiment with other small, individually wrapped candies. Caramel squares, peppermint patties (especially around the holidays!), or even mini cookies could replace the peanut butter cups for a completely different flavor profile.
- Topping Galore: Beyond sea salt flakes or white chocolate drizzle, the possibilities for toppings are endless. Consider chopped nuts (peanuts, almonds, pecans), sprinkles for a festive look, shredded coconut, mini chocolate chips, or even a light dusting of cocoa powder. Apply toppings while the chocolate coating is still wet to ensure they stick.
- Spicy Kick: For the adventurous palate, a tiny pinch of cayenne pepper added to the melted chocolate can create an intriguing sweet-and-spicy contrast.
- Nut-Free Option: If allergies are a concern, substitute the Reese’s Thins with a chocolate bar or another suitable non-nut candy. Ensure the crackers/cookies and chocolate used are also nut-free.
- Holiday Themes: Customize your sprinkles and chocolate colors for specific holidays. Red and green sprinkles for Christmas, pastels for Easter, or orange and black for Halloween. These treats are versatile enough for any celebration!
Storage and Gifting Your No-Bake Delights
These Ritz Cracker Peanut Butter Cups are so popular, you might find yourself with no leftovers! However, if you’ve made an extra-large batch or are planning to share them, here are some handy storage and gifting tips:
- Optimal Storage: Store your finished treats in an airtight container at room temperature. For best quality and to prevent them from sticking together or melting into each other, place sheets of wax paper or parchment paper between layers of cookies.
- Shelf Life: When stored properly, these delicious no-bake treats will stay fresh and enjoyable for up to 2-3 weeks. This makes them perfect for making ahead of time for parties or for enjoying over an extended period.
- Thoughtful Gifting: Homemade treats make wonderful gifts!
- Cellophane Bags: For a simple yet charming presentation, place a few cookies in clear cellophane bags and tie them securely with a festive ribbon.
- Tin Containers: Elegant decorative tins lined with parchment paper are excellent for gifting a larger quantity. They also help keep the cookies fresh for longer.
- Custom Boxes: Small, plain gift boxes can be personalized with tissue paper, labels, and your own creative touches, then filled with these delightful cookies.
- Holiday Containers: During festive seasons, look for theme-matching containers to make your gift extra special and timely.
Frequently Asked Questions (FAQs)
Here are some common questions about making Ritz Cracker Peanut Butter Cups:
- Can I use regular peanut butter cups instead of Thins? Yes, you can, but keep in mind that regular-sized peanut butter cups are thicker. This might make the sandwich bulkier and a bit harder to dip evenly. The Thins are recommended for their ideal proportion within the cracker/cookie sandwich.
- What if my chocolate becomes too thick while dipping? If your chocolate starts to thicken as it cools or if you’re working with a large batch, simply microwave it again for 10-15 seconds and stir well. You might also want to add another tiny bit (half a teaspoon) of coconut or vegetable oil to restore its smooth consistency.
- Can I use chocolate chips instead of melting wafers? While melting wafers are highly recommended for their smooth melting properties and glossy finish, good quality chocolate chips (like Ghirardelli or Nestle Toll House) can also work. You might need to add a bit more oil to achieve the desired dipping consistency if using chips, as they can be thicker.
- How can I prevent the crackers/cookies from becoming soggy? The key is to ensure the chocolate coating fully encases the sandwich and that the treats are stored in an airtight container once set. The chocolate acts as a barrier, keeping the crackers or cookies crisp.
- Are these good for shipping as gifts? Yes, these treats generally hold up well for shipping, especially in cooler weather. Package them securely in an airtight container, layered with parchment paper, and consider using insulated packaging if sending to warmer climates to prevent melting.
More Easy No-Bake Treats You’ll Love:
If you loved the simplicity and deliciousness of these Ritz Cracker Peanut Butter Cups, you’re in for a treat! Explore these other fantastic no-bake recipes that are just as easy to make and equally satisfying:
- Classic No-Bake Cookies
- Four More Irresistible No-Bake Treats
- Delicious S’mores Muddy Buddies
- Simple and Sweet Oreo Balls
- Perfect Rice Krispies Treats Recipe

Ritz Cracker Peanut Butter Cups
Equipment
-
Large sheet pan (15″ x 21″)
-
Parchment paper or silicone baking mat
Ingredients
- 36 Ritz crackers or 18 Oreo THINS
- 1 (7.3-ounce) package Reese’s THINS about 18 cups
- 2 cups (12 ounces) chocolate melting wafers milk, dark, or semi-sweet, see note 1
- 3 teaspoons coconut oil divided
- White chocolate optional topping, for a drizzle
- Flaky sea salt optional topping
Instructions
-
Line a large sheet pan with parchment paper. Preheat oven to 250°F (120°C).
-
Separate Oreos, keeping the creme on. Sandwich a Reese’s Thin between 2 Oreos. Alternatively, sandwich the Reese’s Thin between 2 Ritz Crackers.
-
Place in oven for 2 and 1/2 minutes, remove, then press gently to adhere. Chill in fridge or freezer until firm.
-
Microwave 1 cup chocolate with 1 and 1/2 teaspoons oil in 15-second intervals, stirring between, until smooth (see note 2).
-
Dip each firm sandwich into the chocolate, using a fork to turn and coat evenly. Tap the fork to remove excess chocolate and smooth out. Use a toothpick to pop any air bubbles.
-
Use a table knife to slide the cookie off the fork and onto the parchment-lined sheet pan. Repeat with remaining chocolate and oil.
If chocolate thickens while dipping, microwave for 15 seconds and stir. You may need to add a bit more oil. Let set at room temperature.
-
Optional Decoration: Melt white chocolate, put in a resealable plastic bag, cut a small hole, and drizzle over sandwiches. Or add sea salt flakes to chocolate-coated Oreos.
Recipe Notes
Note 2: Microwaving tip: Avoid scorching the chocolate by melting it in short bursts and stirring frequently. The chocolate should just get warm enough to melt smoothly and remain at room temperature once melted.
Nutrition Note: Nutrition information is calculated for 1 treat, using the options for a Ritz Cracker, milk chocolate, and no optional garnishes.
Storage: Store in an airtight container at room temperature, with layers separated by wax or parchment paper for up to 2–3 weeks.
Nutrition
Nutrition information is automatically calculated, so should only be used as an approximation.