
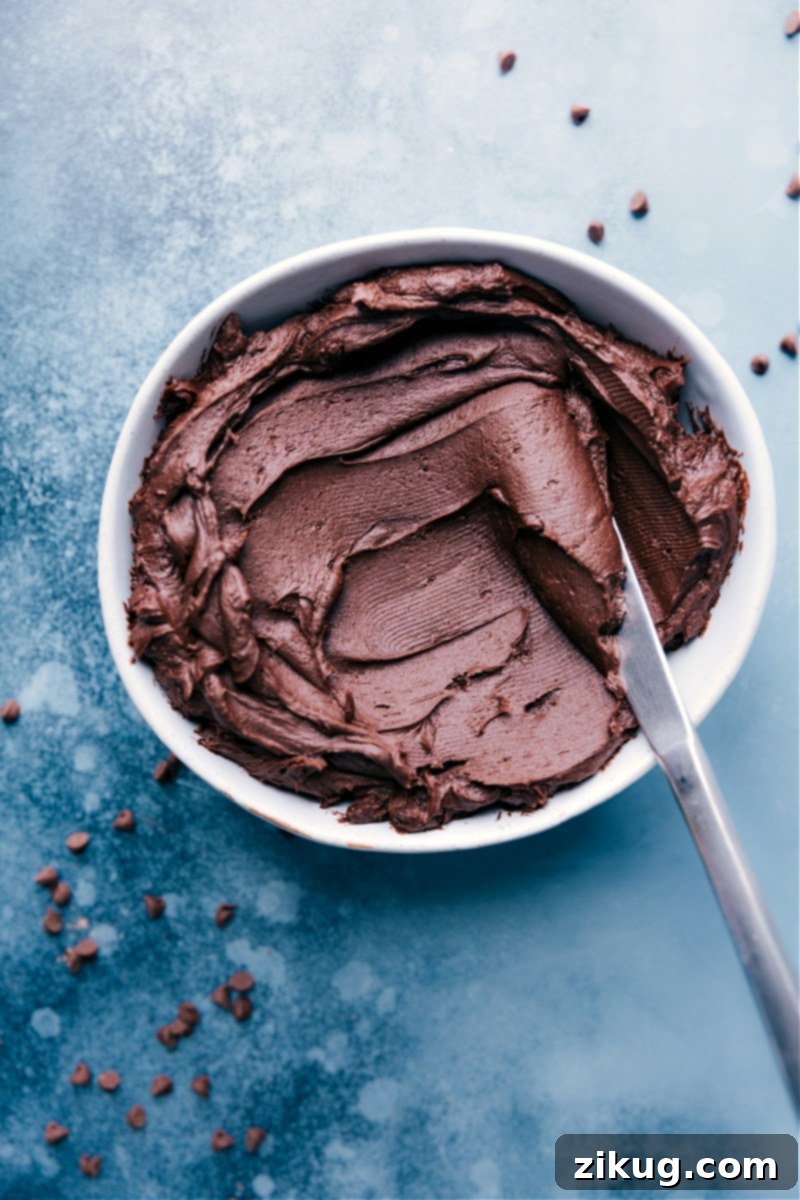
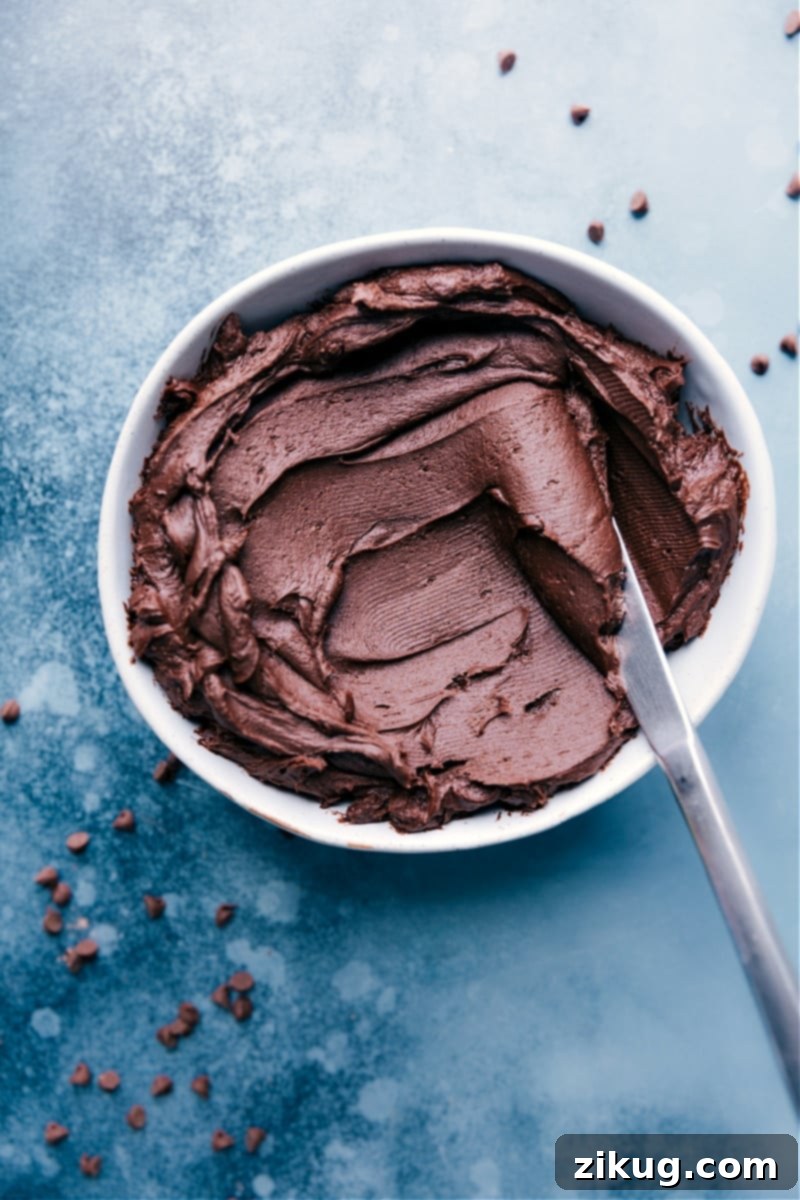
This Chocolate Buttercream Frosting Recipe delivers the ultimate indulgence: a rich, unbelievably smooth texture, and a profoundly deep chocolate flavor. It’s a classic American-style frosting, elevated to perfection, making it the ideal topping for virtually any dessert you can imagine – from elegant layer cakes and delightful cupcakes to festive cookies and even unexpected, delightful snacks. Prepare to impress everyone with this lusciously creamy creation.

Author’s Culinary Journey
The Ultimate Quest for Spoon-Worthy Chocolate Buttercream
Like many passionate home bakers, I’ve embarked on countless culinary adventures, particularly in the delightful yet sometimes challenging realm of chocolate frostings. For the longest time, however, none truly captured the essence of what I envisioned as “perfect.” Some batches ended up overwhelmingly sweet, inadvertently masking the chocolate’s natural complexity. Others, disappointingly, lacked that intense cocoa depth I craved, while a few presented an unappealing, almost gritty texture that was far from ideal. This persistent quest for perfection ultimately led me on a dedicated mission.
One memorable afternoon, armed with determination and a clear vision, I decided it was time for a systematic approach. I gathered all my favorite, high-quality baking ingredients, powered on my trusty stand mixer, and began a series of meticulous tests. The key breakthroughs came from a few strategic changes and careful experimentation: I swapped standard natural cocoa powder for the richer, darker, and less acidic Dutch-process variety. I then painstakingly fine-tuned the delicate balance between powdered sugar and softened butter, experimenting with ratios until the sweetness was just right. Finally, I gradually incorporated heavy cream, observing how its fat content transformed the consistency into the smooth, luscious, and profoundly chocolatey frosting I had been dreaming about for so long.
The moment I tasted that final iteration, a wave of immense satisfaction washed over me. Standing there with the spatula, savoring every spoonful, I knew instantly, “This is it. This is *the one*.” Since that pivotal day, this very recipe has become my absolute go-to, a cherished staple in my kitchen. It now graces everything from elegant birthday cakes and chewy cookies to decadent brownies and even simple graham cracker sandwiches, elevating each treat to a new level of deliciousness. And yes, more often than I’d care to admit, it’s enjoyed straight from the bowl, by the spoonful, a delightful testament to its irresistible charm and perfect balance of flavor and texture. It truly is a frosting you’ll want to eat by the spoonful!
What Makes This Chocolate Buttercream Frosting Truly Exceptional?
In a world overflowing with countless frosting recipes, you might wonder what makes this particular chocolate buttercream truly stand out from the rest. The answer lies in a combination of thoughtfully selected, high-quality ingredients and precise techniques that consistently yield a superior result. This recipe prioritizes an authentic, deep, and complex chocolate flavor over mere cloying sweetness, ensuring a sophisticated taste that appeals to a wide range of palates, from discerning adults to eager children. The texture is flawlessly smooth, remarkably creamy, and incredibly light, making it exceptionally easy to spread evenly across cakes or pipe into intricate designs on cupcakes. Its inherent stability also means it holds its shape beautifully, making it perfect for various decorating needs. Furthermore, it’s surprisingly adaptable, allowing for minor, on-the-fly adjustments to achieve your precise desired consistency without ever compromising on its rich, indulgent flavor. This isn’t just a frosting; it’s a statement piece for your desserts.
Essential Ingredients for Crafting Your Perfect Chocolate Buttercream
Creating an outstanding chocolate buttercream begins with understanding the purpose and contribution of each ingredient. Here’s a detailed breakdown of what you’ll need and why each component is absolutely vital for achieving that rich, incredibly smooth, and deeply flavorful result.
| Ingredient | Why It’s Essential & Pro Tip |
|---|---|
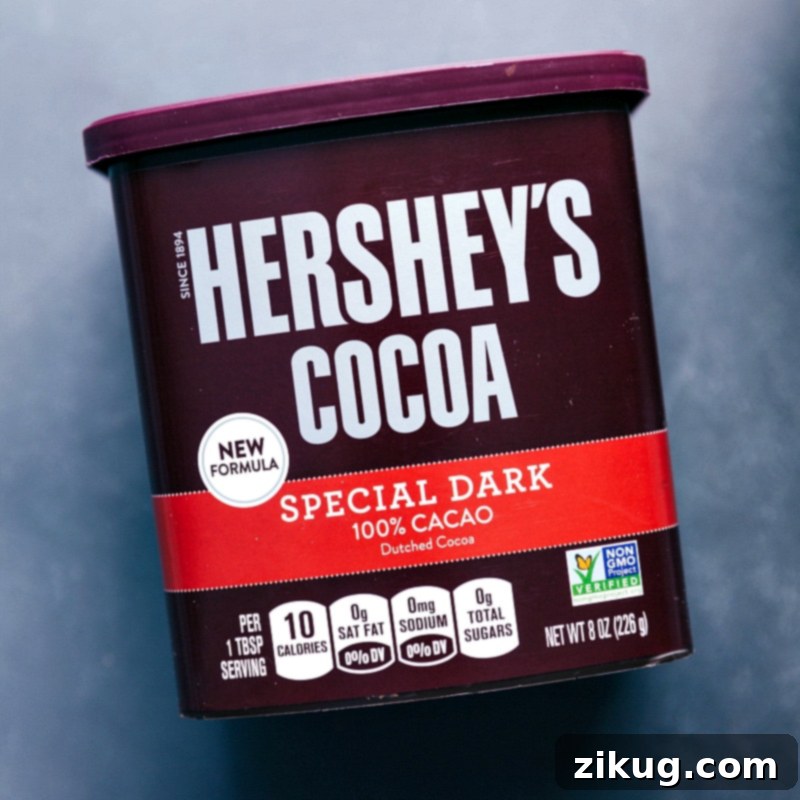
| Dutch-process cocoa powder | This is the undisputed secret to achieving an intensely bold, wonderfully dark chocolate flavor and a stunning rich color. Unlike natural cocoa powder, Dutch-process cocoa has undergone an alkalization process that reduces its acidity, resulting in a smoother, less bitter taste profile. It also reacts differently with leavening agents, but in buttercream, its impact is purely on flavor and color. Brands like Hershey’s® Special Dark are exceptional choices for guaranteeing that deep, luxurious cocoa profile. |
| Real unsalted butter | Always, without exception, opt for high-quality, real unsalted butter. Margarine simply cannot replicate the authentic creamy texture or the rich, dairy-forward flavor that is characteristic of a truly exceptional buttercream. Using unsalted butter also gives you precise control over the overall saltiness of your frosting. The critical factor here is ensuring your butter is at the perfect room temperature – soft enough to yield to a gentle press, but not melted or greasy. |
| Powdered sugar (confectioners’ sugar) | This finely ground sugar, also known as icing sugar, is essential because its ultra-fine particles dissolve effortlessly into the butter, directly contributing to the frosting’s signature smooth and velvety texture. For the absolute creamiest, lump-free results, take the vital extra step to sift your powdered sugar meticulously before adding it to the butter. This simple, often overlooked step makes an astonishing difference in the final product. |
| Heavy cream | Heavy cream is significantly superior to milk for achieving that luxurious, silky smooth consistency we crave in buttercream. Its higher fat content plays a crucial role in emulsifying the frosting, making it inherently richer, more stable, and more delightful to work with. You’ll typically need between 3 to 5 tablespoons, but remember this is a flexible component that can be adjusted based on your desired consistency. |
| Sea salt & vanilla extract | These aren’t merely minor additions; they are crucial flavor enhancers that act as unsung heroes in any sweet recipe. A tiny pinch of high-quality sea salt brilliantly balances the sweetness of the sugar and intensely deepens the chocolate flavor, preventing the frosting from tasting flat or one-dimensional. High-quality pure vanilla extract, meanwhile, adds a layer of warmth, complexity, and aromatic sweetness that complements the rich cocoa notes beautifully, tying all the flavors together in harmony. |
Mastering Buttercream Consistency: Your Secret Weapon
Achieving the ideal frosting consistency is an art, not a rigid science, and it’s absolutely fundamental for both its delectable taste and ease of application. Buttercream can be a bit temperamental, as ingredient quantities might vary slightly based on external factors like humidity, the precise temperature of your butter, and even the specific brand of cocoa powder you use. But fear not – this is where your inner baker truly shines! Don’t be afraid to adjust the recipe as you go. If you find your Chocolate Buttercream too thick or too stiff for effortless spreading or smooth piping, gradually add a dash more of heavy cream, incorporating it one teaspoon at a time. Mix thoroughly after each addition until it reaches your desired silky smoothness. Conversely, if your frosting appears too thin or runny, incorporate a tablespoon or two of additional sifted powdered sugar. These two ingredients are your absolute best friends in fine-tuning the frosting to perfection, giving you complete control over its texture. Always mix well after each slight addition to fully observe the change before adding more. This iterative process guarantees a perfect outcome every time.
Step-by-Step Guide: How to Craft the Best Chocolate Buttercream Frosting
Making this unbelievably delectable chocolate buttercream is a surprisingly straightforward process that consistently yields impressive, professional-quality results. Follow these detailed steps carefully, paying attention to the nuances, for a frosting that is rich, exceptionally smooth, and perfectly poised to elevate any dessert to a memorable culinary experience.
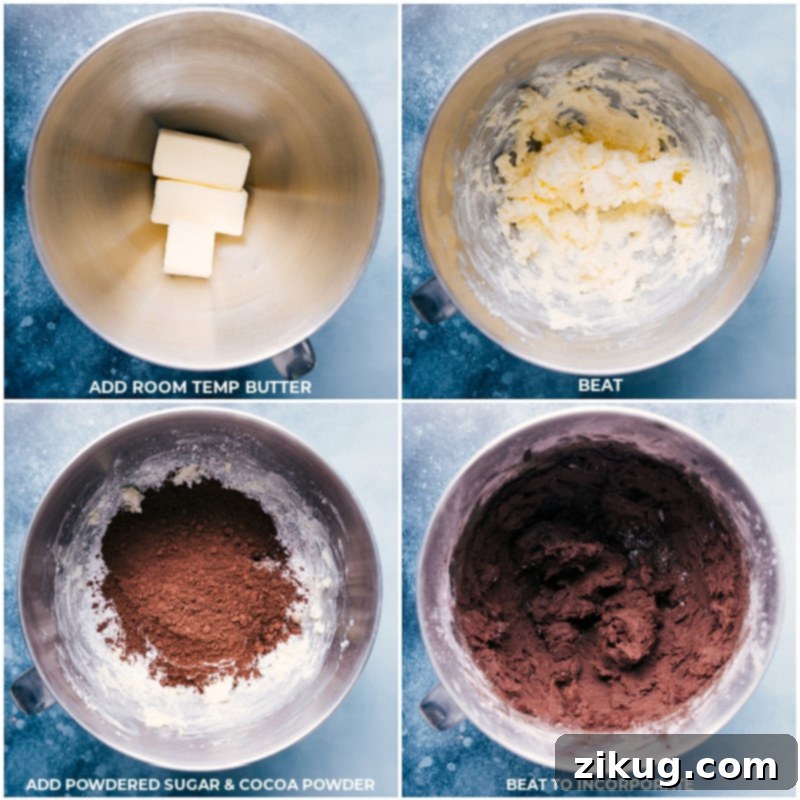
- Prepare Your Butter at Perfect Room Temperature: This is arguably the most foundational and crucial step. Your unsalted butter must be at a true room temperature – meaning it should be soft enough to easily indent with a gentle finger press, but absolutely not melted, oily, or shiny. If the butter is too cold, it will not cream properly, leading to a lumpy, dense frosting. If it’s too warm, your frosting risks becoming greasy and separating. Plan ahead to let it soften naturally.
- Cream the Butter until Light and Fluffy: In the bowl of your stand mixer (using a paddle attachment is highly recommended for optimal results, though a good hand mixer can also work), beat the softened butter on medium speed for a good 2 to 3 minutes. Observe its transformation: it should change from a dense, yellowish block into a much paler, airy, and wonderfully fluffy consistency. This crucial step incorporates ample air, making the buttercream delightfully light and effortlessly spreadable. Throughout this process, remember to pause frequently and scrape down the sides and bottom of the bowl with a rubber spatula to ensure every bit of butter is evenly mixed.
- Gradually Add Dry Ingredients with Care: With your mixer now set to its lowest speed, slowly begin to add the sifted Dutch-process cocoa powder and powdered sugar. Add them one cup at a time, mixing only until just combined and no dry streaks of powder are visible. At this stage, the mixture will appear quite thick, almost crumbly, and somewhat pasty. As before, stop and meticulously scrape down the sides and bottom of the bowl again to ensure all dry ingredients are fully and uniformly incorporated into the butter mixture.
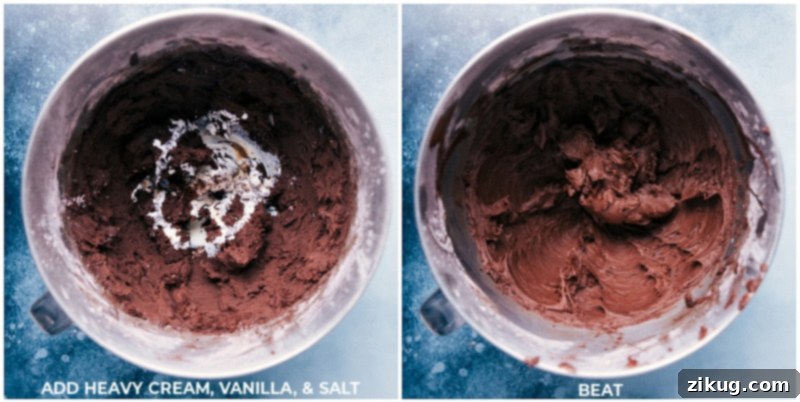
- Incorporate the Liquids and Flavor Enhancers: Now it’s time to introduce the vital liquid components and flavor boosters. Pour in the heavy cream (start with 3 tablespoons; you can always add more later to fine-tune consistency), the high-quality vanilla extract, and that essential pinch of sea salt. Mix again on low speed until all these ingredients are fully incorporated into the thick mixture, and you start to see a more cohesive, creamy mass forming.
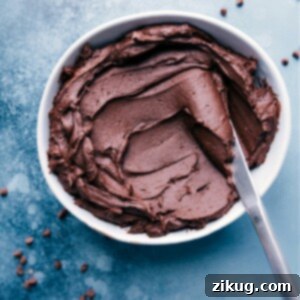
- Whip to Velvety Perfection for the Final Touch: Once all ingredients are thoroughly combined and you have a consistent base, increase the mixer speed to high. Continue to beat the frosting for an additional 30 to 60 seconds. This final, vigorous whip serves multiple purposes: it will lighten the frosting’s color ever so slightly, incorporate more air for a truly fluffy texture, and, most importantly, make it incredibly smooth, velvety, and creamy. During this stage, taste your frosting! This is your opportunity to adjust if necessary – add another tiny pinch of salt if it still tastes too sweet, or fine-tune the consistency with a bit more heavy cream (for thinner) or powdered sugar (for thicker). Use immediately for the best texture and freshness, or prepare for storage.
Beyond the Cake: Creative and Versatile Uses for Chocolate Buttercream
While chocolate buttercream is an undeniably classic and perfect choice for adorning layer cakes and festive cupcakes, its rich flavor, sumptuously smooth texture, and irresistible appeal make it incredibly versatile for a multitude of other delightful culinary applications. Don’t limit your imagination – this decadent frosting is your secret weapon for expanding your dessert repertoire and adding a touch of gourmet flair to everyday treats!
- Gourmet Graham Cracker Sandwiches: Transform a simple childhood favorite into a sophisticated adult indulgence. Spread a generous, thick layer of this creamy chocolate buttercream between two crisp graham crackers for a treat that’s both nostalgic and incredibly satisfying.
- Decadent Melting Sauce: For an instant upgrade to almost any dessert, gently warm a portion of the buttercream in a microwave-safe bowl (in short bursts) or in a small saucepan over very low heat, stirring constantly, until it transforms into a smooth, pourable chocolate sauce. Drizzle this liquid chocolate gold over warm fudgy brownies, generous scoops of creamy ice cream or gelato, or even over fluffy pancakes and waffles for an unbelievably rich breakfast or brunch sensation.
- Ultimate Cookie Sandwiches: Elevate your homemade cookies to an entirely new dimension of deliciousness. Sandwich a dollop of this luscious buttercream between two of your favorite baked cookies, such as tender chewy chocolate chip cookies, classic oatmeal raisin cookies, or even delicate shortbread, for an indulgent, bakery-style dessert that’s hard to resist.
- Fun Dipping for Snack Time: This rich buttercream isn’t solely reserved for sophisticated baked goods! Serve it as a delightful and unexpected dip for a variety of crunchy or soft snacks. Pretzels offer a wonderful sweet and salty contrast that is utterly addictive, Teddy Grahams are a perfect, fun pairing for both kids and adults alike, and fluffy marshmallows become an even more irresistible treat when plunged into this creamy chocolate goodness.
- Gourmet Frosted Donut Holes: Transform plain or store-bought donut holes into a gourmet delight with minimal effort. Simply dip them generously into the chocolate buttercream and, if desired, finish with a sprinkle of colorful sprinkles, finely chopped nuts, or extra chocolate shavings for a quick, impressive, and utterly delicious dessert.
- Enhancer for Certain Fruits: While it might seem unconventional, a small, elegant dollop of this rich buttercream can be a delightful accompaniment to certain fresh fruits. It pairs surprisingly well with sweet strawberries, ripe banana slices, or even juicy orange segments, adding a touch of decadent sweetness and creamy texture that transforms a simple fruit plate.
Pro Tips for Achieving Flawless Chocolate Buttercream Every Time
Achieving consistently bakery-quality buttercream isn’t just about the ingredients you choose; it’s equally about mastering a few key techniques and paying attention to crucial details. These expert tips will help ensure your frosting is always smooth, stable, delicious, and a joy to work with, elevating your baking game significantly.
- The Golden Rule of Butter Temperature is Paramount: This cannot be stressed enough – always, always use butter that is genuinely at true room temperature. This means it should be soft enough to leave a slight indentation when you gently press it with your finger, but it should absolutely not be oily, shiny, greasy, or melted in any way. Butter that is too cold will not cream properly, resulting in a frustratingly lumpy, dense texture. Conversely, butter that is too warm will yield a runny, greasy, and potentially separated frosting. Patience here is a virtue.
- Quick Hacks for Bringing Butter to Temperature: If you find yourself short on time and your butter is stubbornly cold, avoid the temptation to microwave it until melted, as this will lead to a greasy frosting. Instead, a better method is to cut your cold butter into smaller, 1-inch pieces and let it sit out on the counter for about 30 minutes to an hour; the increased surface area helps it warm faster. For an even quicker hack, place the entire wrapped sticks of butter in a bowl of warm (not hot) water for 10-15 minutes, flipping them halfway through.
- Choose Your Mixer Wisely for Optimal Results: A powerful stand mixer fitted with a paddle attachment is highly recommended for its consistent power and efficiency. It excels at thoroughly whipping and aerating the buttercream, ensuring a light and fluffy texture. However, don’t despair if you only have a hand mixer; a good quality hand mixer can also achieve excellent results, though it might require a bit more patience and consistent scraping of the bowl.
- Scrape the Bowl Frequently and Meticulously: This seemingly minor step is incredibly important for achieving uniform texture. Buttercream ingredients tend to stick to the sides and bottom of the mixing bowl, especially during the initial stages. To prevent unmixed clumps of butter or sugar and to ensure a consistently smooth, homogeneous texture throughout your frosting, pause your mixer often (every 1-2 minutes) and use a flexible rubber spatula to meticulously scrape down all the ingredients from the sides and bottom into the center of the bowl.
- Sifting Powdered Sugar is Non-Negotiable: As previously emphasized, taking the time to sift your powdered sugar before adding it to the butter is absolutely crucial. This simple yet vital step effectively removes any tiny lumps or granules that may have formed in the sugar, guaranteeing an incredibly smooth, luxurious, and velvety buttercream without any undesirable grainy bits.
- Avoid Overmixing at the Final Stage: While the final whip is essential for aeration and lightening the frosting, be mindful not to overmix after all ingredients are combined and the frosting has reached its desired consistency. Excessive beating can sometimes incorporate too much air, which might make the frosting appear overly “fluffy” initially but can paradoxically reduce its stability, making it prone to collapsing or deflating over time. Whip until just lightened and creamy, then stop.
Storage and Revitalization Tips for Your Buttercream
Proper storage is absolutely essential for maintaining the freshness, quality, and delectable texture of your homemade chocolate buttercream. Happily, it’s also incredibly simple to bring it back to its ideal, fluffy consistency when you’re ready to use it again.
- Refrigerator Storage (Short-Term): For short-term preservation, transfer any leftover buttercream into an airtight container. This barrier prevents it from absorbing odors or drying out. It will keep beautifully fresh in the refrigerator for up to 1 week. When you’re ready to use it, the frosting will likely be quite firm. To restore its perfect consistency, simply let the frosting sit out at room temperature for approximately 30–60 minutes to soften naturally. Once softened, transfer it back to your mixer and re-whip it with your paddle attachment or whisk on medium-high speed for a minute or two until it regains its original smooth, light, and fluffy texture. This re-whipping step is crucial for restoring its original spreadable and pipeable consistency.
- Freezer Storage (Long-Term): For longer-term preservation, chocolate buttercream freezes exceptionally well! Spoon the frosting into a sealed, freezer-safe container, or for even better protection against freezer burn, transfer it to a heavy-duty zip-top freezer bag, pressing out as much air as possible before sealing. It can be safely stored in the freezer for up to 2 months. To use, planning ahead is key: thaw the frozen frosting in the refrigerator overnight. Once fully thawed, allow it to come to room temperature for about 30-60 minutes on the counter. Then, just like with refrigerated buttercream, re-whip it thoroughly in your mixer until it’s wonderfully light, airy, and perfectly smooth again, ready for piping or spreading.
Common Buttercream Problems and Easy Solutions
Even seasoned bakers occasionally encounter minor hurdles when making buttercream. Don’t worry if things don’t go perfectly on your first try! Here are solutions to some common buttercream issues:
- Buttercream is Too Greasy or Soupy: This is a common issue that typically arises if your butter was too warm to begin with (causing the fat to separate) or if you accidentally added too much liquid. The best remedy is to try chilling the entire bowl of frosting in the refrigerator for 15-20 minutes. Then, remove it and re-whip it vigorously. The cooler temperature will help the butter firm up and re-emulsify. If it still feels too greasy or too soft, you can gradually add a bit more sifted powdered sugar, one tablespoon at a time, until the consistency improves.
- The Texture is Grainy or Gritty: A grainy texture is almost always due to either unsifted powdered sugar or insufficient mixing time. Tiny sugar crystals that haven’t dissolved completely cause this unpleasant sensation. The most important preventative step is to ensure you thoroughly sift your powdered sugar before adding it to the butter. If your frosting is already mixed and feels grainy, try continuing to beat it on high speed for a few more minutes; the friction and continued agitation can sometimes help dissolve any remaining sugar crystals.
- The Chocolate Flavor Isn’t Deep Enough: If your buttercream tastes more sweet than intensely chocolatey, there are a few fixes. First, ensure you are using Dutch-process cocoa powder, as it yields a darker, richer flavor. You can also try adding an additional tablespoon of Dutch-process cocoa. Another fantastic trick is to incorporate a teaspoon of espresso powder or a tiny amount of strong, cooled coffee along with your liquids; espresso powder is a brilliant flavor enhancer for chocolate and will deepen the cocoa notes without imparting a coffee taste.
- The Buttercream is Overly Sweet: A frequent complaint with traditional American buttercreams is their sweetness. The pinch of salt recommended in the recipe is absolutely crucial, as it balances the sweetness beautifully. If you find it still too sweet, you can add another tiny pinch of fine sea salt. Another option, similar to the flavor issue, is to incorporate a very small amount (half a teaspoon) of plain, unsweetened cocoa powder, or a few drops of black coffee or espresso. These additions will help cut through the sweetness without making the frosting taste like coffee.
Elevating Your Desserts: The Magic of This Chocolate Buttercream
This rich and smooth chocolate buttercream isn’t merely a topping; it’s an indispensable component that transforms an ordinary baked good into an extraordinary dessert experience. Its deep, complex cocoa notes, combined with its velvety, melt-in-your-mouth consistency, create a symphony of flavor and texture that can elevate anything it touches. Imagine a simple, classic vanilla cake crowned with this decadent frosting – it instantly becomes a showstopper. Or consider how plain sugar cookies can be transformed into gourmet, bakery-worthy treats with a generous swirl of this chocolate perfection. It adds a touch of elegance, a burst of intense flavor, and a satisfying richness that truly fulfills any chocolate craving you might have.
Whether you’re a seasoned baking enthusiast looking for that perfect go-to chocolate frosting recipe, or a novice eager to impress family and friends with your homemade creations, mastering this versatile buttercream will equip you with an invaluable tool. It’s not just a recipe; it’s an invitation to explore a world of delicious possibilities, ensuring every bite is a moment of pure, unadulterated pleasure. Enjoy the process, savor the flavor, and delight in the compliments!
More Irresistible Chocolate Dessert Recipes:
Desserts
Edible Brownie Batter
Desserts
Chocolate Rice Krispie Treats
Breakfast
Chocolate Chip Scones Recipe
Cookies
Homemade Oreos
Print Recipe
Rating: 5 out of 5 stars (based on 1 rating)
Chocolate Buttercream Frosting Recipe
By Chelsea Lords
This Chocolate Buttercream Frosting Recipe is rich, smooth, and indulgent, serving as the perfect topping for a wide variety of desserts!
Prep Time: 20 minutes
Set out butter in advance to come to room temperature: 1 hour
Total Time: 20 minutes (excluding butter softening)
Yields: 3 cups
Video Instructions
For a visual guide and to watch the step-by-step process of making this luscious chocolate buttercream frosting, refer to the video tutorial provided on the original recipe page.
Equipment
- Stand mixer with paddle attachment (or a robust hand mixer)
- Flexible rubber spatula
- Standard measuring cups and spoons
- Fine-mesh sieve (for sifting powdered sugar)
Ingredients
- 20 tablespoons (2 ½ sticks or 1 ¼ cups) unsalted butter, at room temperature
- 3 cups powdered sugar, sifted
- ¾ cup Dutch process cocoa powder (see Note 1 for optimal flavor)
- 3 to 5 tablespoons heavy cream (start with 3, adjust as needed)
- 1 teaspoon pure vanilla extract (recommended)
- ⅛ teaspoon fine sea salt (start with 1/16 tsp and adjust to taste, crucial for balancing sweetness)
Instructions
- Cream the Butter: Using a stand mixer fitted with a paddle attachment (or a handheld mixer), beat the softened, room-temperature unsalted butter on medium speed for 2–3 minutes. Continue beating until the butter is noticeably light, airy, and creamy. During this step, frequently pause and scrape down the sides and bottom of the bowl with a rubber spatula to ensure uniform creaming.
- Incorporate Dry Ingredients: Reduce the mixer speed to low. Gradually add the sifted powdered sugar and Dutch-process cocoa powder to the creamed butter, one cup at a time. Mix gently until just incorporated and no dry streaks of powder are visible. At this point, the mixture will be quite thick and somewhat crumbly. Again, scrape down the sides and bottom of the bowl thoroughly to ensure everything is well combined.
- Add Liquids and Flavorings: With the mixer still on low speed, pour in the heavy cream (begin with 3 tablespoons), vanilla extract, and the initial pinch of sea salt. Mix until these liquid components are fully combined into the thick butter-sugar-cocoa mixture.
- Whip to Perfection: Increase the mixer speed to high. Beat the frosting for an additional 30–60 seconds. This final, vigorous whipping session will lighten the frosting’s color slightly, incorporate more air for a fluffy texture, and render it exceptionally smooth and velvety.
- Adjust Consistency and Taste: Now is the time for fine-tuning. If the frosting feels too thick or stiff for your intended use (spreading or piping), gradually add more heavy cream, one teaspoon at a time, mixing well after each addition until the desired consistency is achieved. If, conversely, the frosting is too thin, mix in a tablespoon or two of additional sifted powdered sugar. Finally, taste the buttercream. If it’s too sweet, a tiny pinch more sea salt can effectively balance the flavors and enhance the chocolate notes. Use your perfectly crafted chocolate buttercream immediately.
Recipe Notes
Note 1: Importance of Dutch-Process Cocoa: For the most intense, rich, and deeply satisfying chocolate flavor, the use of Dutch-process cocoa powder is highly recommended. Brands such as Hershey’s Special Dark are excellent choices for achieving this specific flavor profile and dark color. While natural cocoa powder can be substituted, it will result in a lighter color and a slightly more acidic, less mellow chocolate taste.
Storage Best Practices: To store any leftover chocolate buttercream, transfer it promptly into an airtight container. It will remain fresh and delicious in the refrigerator for up to 1 week. When you are ready to use it again, allow the frosting to sit at room temperature for 30-60 minutes until it softens. Then, re-whip it with your mixer until it becomes smooth and fluffy once more. For longer preservation, this buttercream freezes exceptionally well. Place it in a sealed, freezer-safe container or a heavy-duty zip-top bag (ensure as much air as possible is removed) for up to 2 months. Thaw it overnight in the refrigerator, bring to room temperature, and then re-whip thoroughly before using.
Nutrition Information (Approximate)
- Serving Size: 1 serving (approx. 1/3 of the recipe yields 1 cup)
- Calories: 1252 kcal
- Carbohydrates: 271g
- Protein: 12g
- Fat: 30g
- Saturated Fat: 18g
- Polyunsaturated Fat: 1g
- Monounsaturated Fat: 8g
- Trans Fat: 1g
- Cholesterol: 63mg
- Sodium: 74mg
- Potassium: 924mg
- Fiber: 20g
- Sugar: 233g
- Vitamin A: 713 IU
- Vitamin C: 1mg
- Calcium: 93mg
- Iron: 8mg
Nutrition information is automatically calculated based on typical ingredient values and should only be used as an approximation. Actual nutritional content may vary depending on specific brands and exact quantities used.
Love this recipe? Share your thoughts and leave a comment below!