
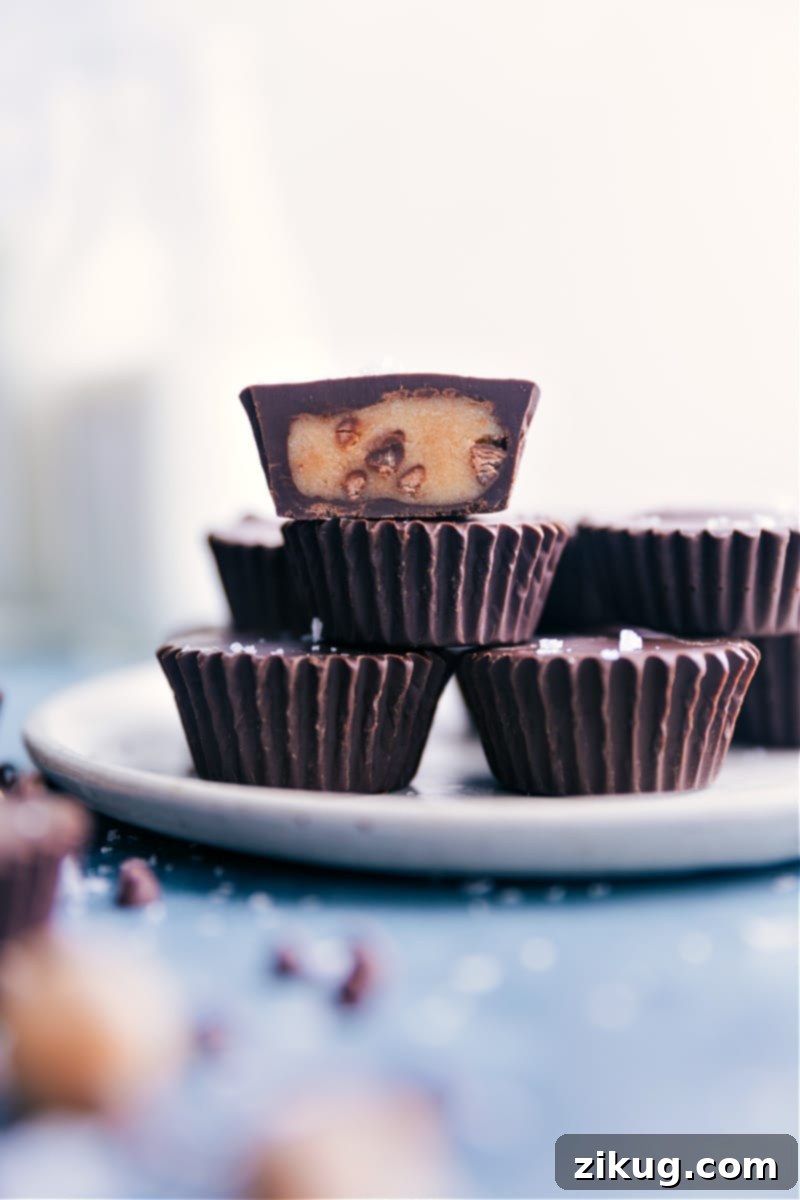
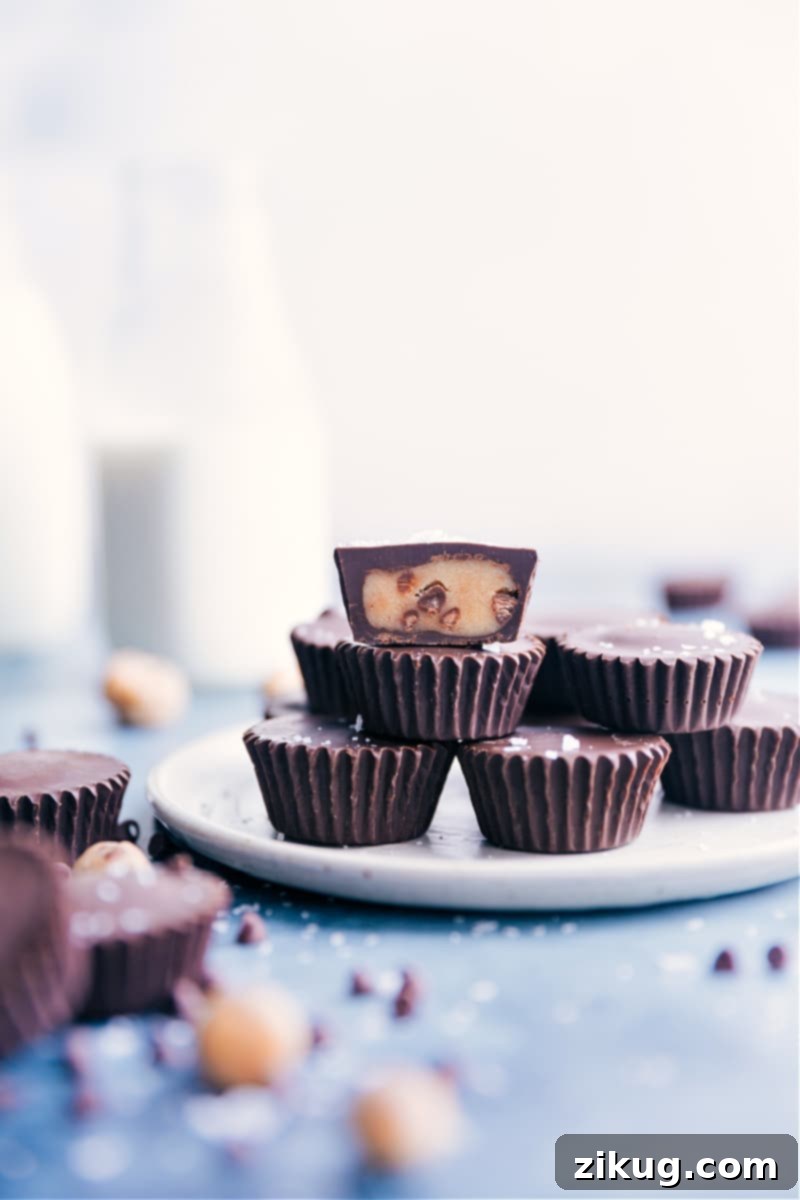
Welcome to the world of pure dessert indulgence! These Cookie Dough Cups are a dream come true for anyone who adores the rich, sweet taste of raw cookie dough, reimagined in a perfect bite-sized format. Imagine your favorite Reese’s Peanut Butter Cups, but instead of the nutty filling, you’re treated to a luscious, safe-to-eat edible cookie dough, all encased in a smooth, melted chocolate shell. Crafted effortlessly in a mini muffin tin, these treats are incredibly simple to make and promise to be a show-stopping hit.

From the Author’s Kitchen
Move Over Reese’s, There’s a New Cup in Town!
Like many families, my household has a deep-seated love for classic treats like Peanut Butter Cups. Yet, if given the ultimate choice, the undeniable champion for their hearts would always be cookie dough. This revelation sparked an idea: why not merge these two beloved concepts into one irresistible treat? The result? These divine edible cookie dough chocolate cups that have officially elevated my status to “family favorite” status!
These Cookie Dough Cups aren’t just a dessert; they’re pure culinary magic. Each bite offers a harmonious blend of textures and flavors: a soft, perfectly chewy, and richly flavored cookie dough center, expertly enrobed in a smooth, decadent chocolate shell that melts delightfully in your mouth. It’s a symphony of sweet satisfaction that’s hard to resist.
What makes this recipe even more appealing is its simplicity. You don’t need any fancy or specialized candy-making equipment to achieve professional-looking results. All you truly need are a standard mini muffin tin and some liners, making this a wonderfully accessible project for bakers of all skill levels. Get ready to create a dessert that will have everyone asking for more!
Why You’ll Fall in Love with These Cookie Dough Cups
There are countless reasons why these chocolate-covered cookie dough bites are an absolute must-try. Beyond their incredible taste, they offer:
- Uncomplicated Joy: A straightforward, no-bake recipe that anyone can master, even if you’re new to candy making.
- Customizable Fun: Easily adapt the cookie dough base with your favorite mix-ins, from sprinkles to nuts.
- Perfect Portions: The mini muffin tin creates perfectly sized individual treats, ideal for sharing or controlled indulgence.
- Crowd-Pleaser: Guaranteed to be a hit at parties, potlucks, or as a special homemade gift.
- Make-Ahead Friendly: They store beautifully, making them perfect for preparing in advance.
Essential Tools for Perfect Cookie Dough Cups
One of the best aspects of this recipe is that it requires minimal specialized equipment. You likely have most of these items in your kitchen already. Here’s a quick rundown of what you’ll need to assemble these delightful homemade cookie dough candies:
- Mini Muffin Pan: This is crucial for shaping your cups. The small indentations are perfect for creating uniform, bite-sized treats. Using a mini pan ensures each cup is a delightful pop-in-your-mouth experience.
- Miniature Muffin Liners: These are essential for easy removal and to give your cookie dough cups that professional, store-bought look. Parchment paper liners work wonderfully to prevent sticking and add a touch of elegance.
- Mixing Bowls: A medium-sized bowl for preparing the cookie dough and a small microwave-safe bowl for melting chocolate.
- Whisk or Spatula: For combining ingredients smoothly.
- Measuring Cups and Spoons: For accurate ingredient proportions.
- Rubber Spatula: Ideal for scraping down the sides of bowls and folding in chocolate chips.
Crafting Your Own Edible Cookie Dough Cups: A Step-by-Step Guide
Making these no-bake cookie dough treats is surprisingly simple. Just follow these steps, and you’ll be enjoying your homemade delights in no time:
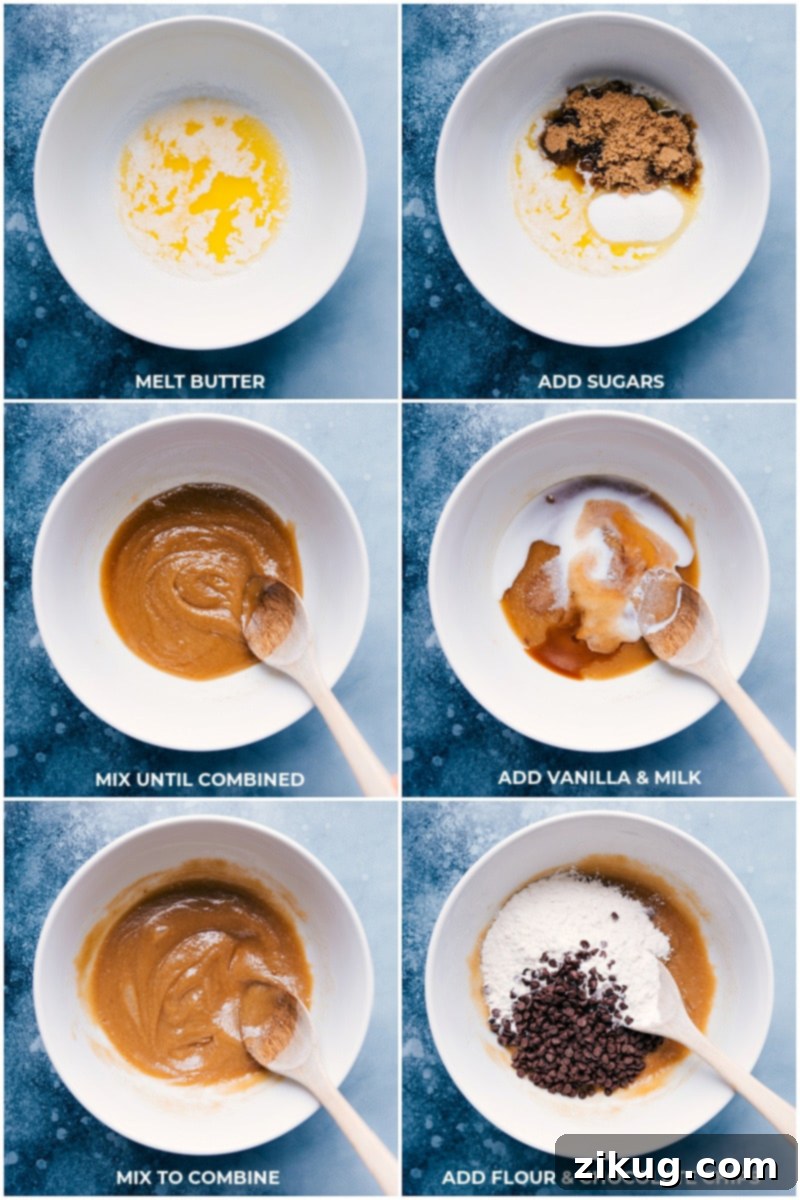
- Prepare the Edible Cookie Dough: Begin by whipping together softened butter, rich brown sugar, granulated sugar, and pure vanilla extract until the mixture is light and fluffy. Once the base is smooth, carefully fold in your heat-treated flour (more on this important step below) and a generous portion of mini chocolate chips. This ensures a classic cookie dough texture and flavor, ready for its chocolate embrace.
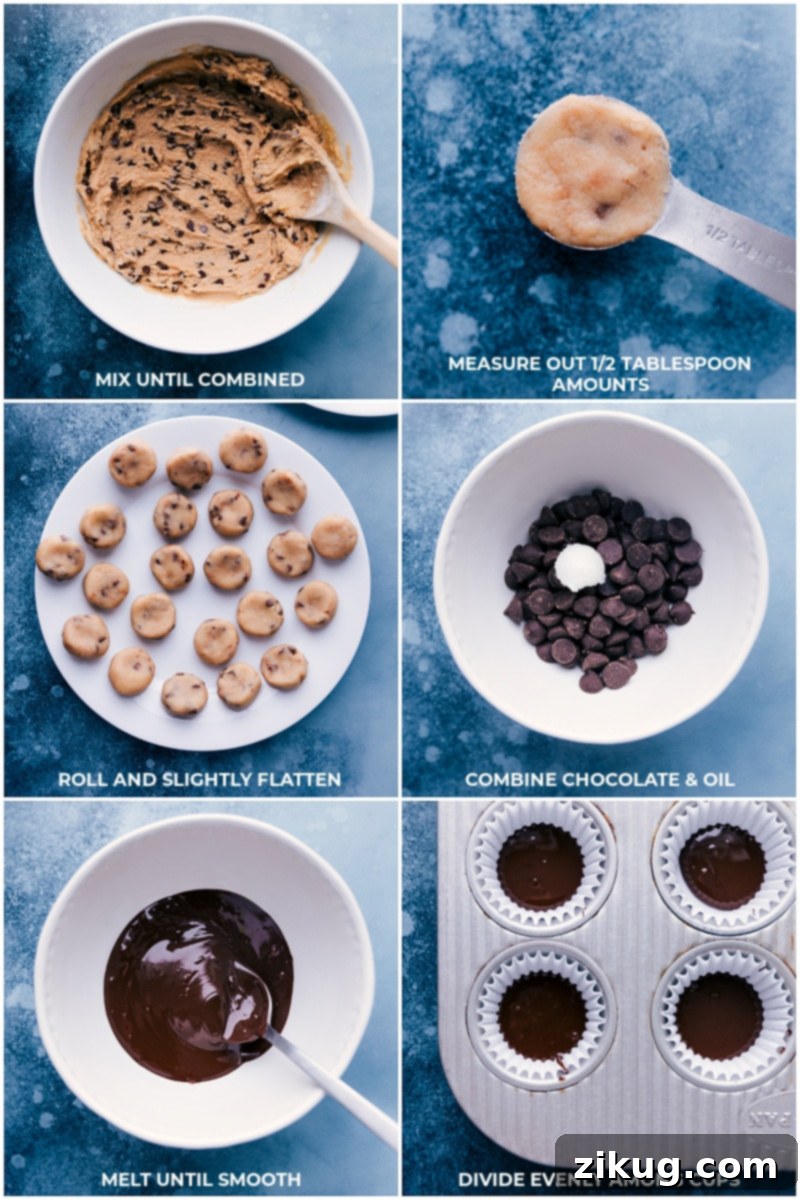
- Melt the First Chocolate Layer: In a microwave-safe bowl, gently melt about three-quarters of your chocolate chips with a small amount of coconut oil. Microwave in short, 30-second bursts, stirring diligently after each interval to prevent burning and ensure a smooth, luscious consistency. The coconut oil helps create a beautifully shiny and firm chocolate shell.
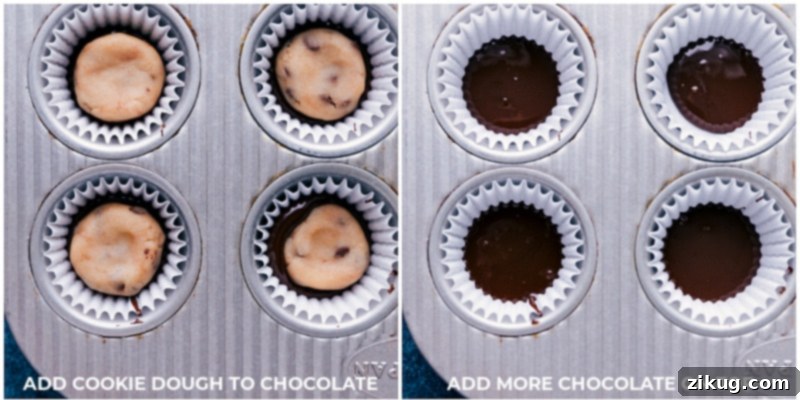
- Layer the First Chocolate Base: Spoon approximately one teaspoon of the melted chocolate into the bottom of each lined mini-muffin well. This forms the foundational layer of your cup. Once filled, gently tap the muffin pan against your counter a few times. This action helps to level the chocolate, removing any air bubbles and creating a smooth, even base for your cookie dough. Pop the tray into the refrigerator for about 5 minutes to allow this layer to set quickly.
- Fill with Cookie Dough: Once the chocolate base is slightly firm, take about one teaspoon of your prepared edible cookie dough and gently press it into the center of each chocolate-lined well. Ensure the dough is slightly flattened into a disk shape and doesn’t quite touch the edges, leaving room for the top chocolate layer.
- Cap with More Chocolate & Chill: Return to your melted chocolate (reheat briefly if necessary). Pour another teaspoon of melted chocolate over each cookie dough center, fully encasing it. Gently tap the pan once more to ensure an even chocolate top and sprinkle with a pinch of flaky sea salt for an extra touch of gourmet flair. Place the entire pan back into the refrigerator to chill until the chocolate is completely firm, typically about 30 minutes to an hour. Once set, they are ready to be enjoyed!
Understanding and Safely Heat-Treating Flour
When it comes to enjoying edible cookie dough, safety is paramount. Many people are aware of the risks associated with raw eggs, but often overlook the fact that raw flour can also harbor harmful bacteria, such as E. coli. This makes heat-treating flour a critical step for any recipe where flour is consumed uncooked. Heat treatment effectively kills these potential pathogens, ensuring your cookie dough is delicious and safe.
You have a few convenient options for heat-treating your flour:
- Purchasing Preheat-Treated Flour: For ultimate convenience, you can buy commercially preheat-treated flour. This flour has already undergone the necessary process and is ready to use directly in your no-bake recipes.
- Microwaving Flour at Home: This is a quick and effective method. Simply place the desired amount of flour (I recommend treating a little extra, about 1/2 to 1 cup more than needed, to account for any loss) in a microwave-safe bowl. Microwave it on high power in 30-second intervals, stirring thoroughly between each burst. Continue this process until the flour reaches an internal temperature of 165°F (74°C) throughout. Use a food thermometer to check several spots to ensure it’s fully heated.
- Baking Flour in the Oven: Another reliable method is to bake the flour. Preheat your oven to 300°F (150°C). Spread your flour (again, treating extra is a good idea) evenly on a baking sheet lined with parchment paper. Bake for 5-7 minutes, stirring every 1.5 to 2 minutes, until it reaches an internal temperature of 165°F (74°C). This method ensures even heat distribution and safety.
Regardless of the method you choose, here are a few quick but important tips:
- Cool Completely Before Use: After heat-treating, it’s crucial to let the flour cool down to room temperature before incorporating it into your dough. Hot flour can melt butter and negatively affect the texture of your cookie dough. Speed up cooling by placing it in the fridge.
- Inspect and Discard Clumps: If you notice any burnt bits or hard clumps after heating, discard them. These can impart an unpleasant flavor or gritty texture to your finished cookie dough. The flour should remain light, white, and fluffy.
- Treat Extra Flour: Always heat-treat a little more flour than your recipe calls for. Sometimes, a small amount can stick to the pan or become clumpy, so having a buffer ensures you have enough usable, safe flour.
Pro Tips for Irresistible Cookie Dough Cups
Elevate your chocolate-covered cookie dough cups from great to absolutely extraordinary with these expert tips:
- The Secret to Thicker Shells: Keep it Cool. For a noticeably thicker and more satisfying chocolate shell, start with a cold muffin pan. Before you even begin mixing your dough, pop your empty mini muffin tin into the freezer for at least 10-15 minutes. The cold surface will help the melted chocolate set faster and create a more robust, substantial outer layer, giving your cups a luxurious feel and preventing premature melting.
- Achieve a Candy-Shop Shine: The Shiny Finish Hack. Want your homemade cookie dough chocolate cups to look like they came straight from a gourmet candy shop? Stir just ½ teaspoon of a neutral-flavored oil (like coconut oil or vegetable oil) into your melted chocolate. This small addition significantly improves the chocolate’s texture, making it smoother and giving it that beautiful, glossy finish that’s so appealing.
- Prep Ahead & Freeze for Future Treats: Batch & Freeze. These edible cookie dough delights are perfect for making in large batches and storing for later enjoyment. Once your finished cookie dough cups are fully set and firm, arrange them in a single layer on a parchment-lined baking sheet and freeze until solid. Once frozen, transfer them to an airtight freezer bag or container. This prevents them from sticking together and preserves their freshness. They thaw perfectly in a lunchbox by noon, offering an instant, convenient, and incredibly delicious treat on the go.
Storage and Creative Uses for Leftover Cookie Dough
These chocolate cookie dough cups are best enjoyed fresh, but they store remarkably well, making them ideal for meal prep or unexpected cravings. Here’s how to keep them delicious and what to do with any extra edible cookie dough:
- Refrigerator Storage: For the best texture and immediate enjoyment, store your finished cookie dough cups in an airtight container in the refrigerator. They will maintain their deliciousness and ideal consistency for up to 10 days. I personally find them most satisfying when enjoyed straight out of the fridge, as the chocolate shell is firm and the cookie dough center is perfectly chilled.
- Freezer Storage: If you’ve made a large batch or want to save some for a later date, these cups freeze beautifully. Freeze them on a parchment-lined baking sheet until solid, then transfer them to an airtight freezer-safe bag or container. They will keep well for up to 3 months. When you’re ready to enjoy, let them sit at room temperature for about 10 minutes before biting in, unless you prefer a truly rock-hard chocolate experience!
- Creative Uses for Leftover Dough: Sometimes you might have a bit of edible cookie dough left over, or you might intentionally make extra! Don’t let it go to waste. Roll the leftover dough into mini balls, freeze them until firm, and then stir them into homemade or store-bought ice cream for an incredible cookie dough ice cream sundae. My daughter swears by this trick, and it’s always a huge hit! You can also crumble it over yogurt, blend it into milkshakes, or simply enjoy spoonfuls of it as a quick, safe snack.
Exciting Add-In Ideas for Your Cookie Dough Cups
While classic chocolate chip cookie dough cups are fantastic on their own, don’t hesitate to get creative with additional mix-ins to customize your treats. These simple additions can elevate the flavor and texture of your cookie dough, offering delightful surprises in every bite:
| Add-in | How Much | Why It Works |
|---|---|---|
| Crushed Pretzels | 2 Tbsp | Adds a fantastic salty crunch that beautifully complements the sweet chocolate and cookie dough, creating an irresistible sweet-and-salty balance. |
| Rainbow Sprinkles | 1 Tbsp | Perfect for a festive, birthday-party vibe. The vibrant colors make the cups visually appealing and add a subtle, fun texture. |
| Toasted Coconut Flakes | 2 Tbsp | Infuses an exotic, nutty flavor reminiscent of an Almond Joy or Mounds bar. The toasty notes add depth to the sweetness. |
| Mini M&M’s | 3 Tbsp | A burst of color and extra chocolatey goodness. The candy shell provides a satisfying crunch against the soft dough. |
| Chopped Nuts (Pecans, Walnuts) | 2 Tbsp | For those who love a nutty bite, these add a rich, earthy flavor and a delightful textural contrast. |
| Peppermint Extract or Crushed Candy Canes | 1/4 tsp extract / 2 Tbsp crushed | Ideal for holiday treats, offering a refreshing minty kick or a festive crunch (add crushed candy canes to chocolate coating). |
More Decadent Chocolate Desserts to Explore:
Desserts
Brownie Ice Cream Bars
Desserts
Oreo Icebox Cake
Desserts
Chocolate Rice Krispie Treats
Desserts
Chocolate Cheesecake
Cookie Dough Cups
By Chelsea Lords
These Cookie Dough Cups are a delightful no-bake dessert featuring a creamy, safe-to-eat cookie dough center enrobed in rich chocolate. They’re a fun, easy, and customizable treat perfect for any occasion!
Print Recipe
Equipment
- Mini muffin pan with liners
- Small microwave-safe bowl
- Medium mixing bowl
- Whisk or rubber spatula
- Food thermometer (for heat-treating flour)
Ingredients
For the Edible Cookie Dough:
- 3/4 cup all-purpose flour (heat-treated for safety, see Note 2)
- 1/3 cup unsalted butter, melted and cooled to room temperature
- 1/3 cup dark brown sugar, firmly packed
- 3 tablespoons granulated sugar
- 1/4 teaspoon salt
- 1 teaspoon vanilla extract
- 1 tablespoon whole milk or heavy cream
- 1/3 cup mini chocolate chips
For the Chocolate Coating:
- 2 cups chocolate chips (milk, semi-sweet, or dark; divided as 3/4 cup and 1 1/4 cup, see Note 1)
- 1 1/2 teaspoons coconut oil (divided as 1/2 teaspoon and 1 teaspoon)
- Optional: Flaky sea salt for sprinkling
Instructions
- Heat Treat Flour: First and foremost, heat treat your flour using either the microwave or oven method (refer to Note 2 for detailed instructions). It is crucial that the flour reaches 165°F (74°C) to ensure it is safe for consumption. After treating, allow the flour to cool completely to room temperature. It should be light, white, and fluffy. If you notice any discoloration or clumping, it may be burnt and should not be used. Carefully spoon the cooled flour into a 3/4 measuring cup and level the top with a table knife, then set it aside.
- Prepare Cookie Dough Base: Melt the unsalted butter and set it aside to cool completely to room temperature. This is important as hot butter can melt the sugars prematurely, resulting in a greasy or grainy cookie dough. In a medium mixing bowl, whisk together the cooled melted butter, dark brown sugar, and granulated sugar until the mixture is fully integrated, smooth, and creamy.
- Combine Dough Ingredients: Add the salt, vanilla extract, and whole milk (or heavy cream) to the butter and sugar mixture. Stir until these wet ingredients are fully integrated. Next, gently fold in the heat-treated flour and the mini chocolate chips. Mix just until combined and smooth, taking care not to overmix. Place the finished cookie dough in the refrigerator for at least 10 minutes to firm up slightly, making it easier to handle.
- Form Cookie Dough Disks: Remove the chilled cookie dough from the fridge. Using about 1/2 tablespoon of dough for each cup, roll the dough into small, uniform balls. Then, gently flatten these balls into thick disks. You should yield approximately 36 cookie dough disks from this recipe. However, you only need 24 disks for this recipe’s yield of cups. The extra disks make fantastic standalone edible cookie dough treats or can be used as a topping for ice cream.
- Prepare Muffin Pan: Line a miniature muffin pan with 24 miniature muffin liners. Ensure the liners fit snugly. For best results and a thicker chocolate shell, place the lined muffin pan in the freezer while you prepare the chocolate.
- First Chocolate Layer: In a small microwave-safe bowl, melt 3/4 cup of chocolate chips with 1/2 teaspoon of coconut oil. Microwave in 30-second bursts, stirring well after each, until smooth and completely melted. Spoon an even amount of this melted chocolate mixture into the bottom of each of the 24 lined muffin cups, using up all the chocolate for this layer. Gently tap the miniature muffin pan on your counter a few times to ensure the chocolate settles into an even, flat layer.
- Add Cookie Dough and Final Chocolate Layer: Carefully place one cookie dough disk on top of the set chocolate in each cup. In the same microwave-safe bowl, melt the remaining 1 1/4 cups of chocolate chips with the remaining 1 teaspoon of coconut oil, following the same microwave and stirring method.
- Cap the Cups: Pour an even amount of this second batch of melted chocolate over each of the cookie dough disks, ensuring the dough is fully covered and the cups are filled almost to the top. Gently tap the muffin pan on the counter again a few times to create a smooth, even chocolate coating on top. If desired, sprinkle with flaky sea salt for an enhanced flavor and visual appeal.
- Chill and Enjoy: Place the entire muffin pan back into the refrigerator to chill for at least 30 minutes, or until the chocolate is completely set and firm. Once firm, gently remove the cookie dough cups from the muffin tin and peel away the liners. Enjoy these decadent homemade treats!
Recipe Notes
Note 1: Chocolate Choice: While I personally prefer the smooth sweetness of milk chocolate for these cups, semi-sweet or dark chocolate chips also work wonderfully. Feel free to use whichever type of chocolate you love most to customize the flavor profile to your liking.
Note 2: Flour Safety – Heat Treating is Key: Raw, uncooked flour can contain dangerous bacteria. Although it is an optional step for some, I strongly recommend heat-treating your flour to ensure these edible cookie dough cups are completely food safe. Here are detailed instructions for both microwave and oven methods:
Heat Treat Flour in the Microwave: Add the flour to a microwave-safe bowl. It’s a good practice to heat treat a little more than the recipe requires (about 1/2 to 1 cup extra) to ensure you have plenty of usable flour. Microwave the flour on high power in short 30-second bursts, making sure to stir the flour thoroughly after each interval. This even stirring prevents any parts from burning or clumping. Continue microwaving and stirring until a food thermometer inserted into several spots confirms the flour has reached an internal temperature of 165°F (74°C) throughout. Allow to cool completely before use.
Heat Treat Flour in the Oven: Preheat your oven to 300°F (150°C). Line a large sheet pan with sides with a nonstick liner or parchment paper. Spread the flour (again, consider treating extra) evenly across the prepared pan. As the flour bakes, remove the pan from the oven and stir the flour every 1.5 to 2 minutes. Each time you stir, use a food thermometer to check the temperature. As soon as the flour reaches 165°F (74°C), it is safe to use. This process typically takes about 3 to 6 minutes in most ovens. Allow to cool completely before use.
Storage: Store your finished cookie dough cups in an airtight container in the refrigerator for up to 1 week. For longer storage, freeze them for up to 3 months. For the best experience, I recommend enjoying them straight from the fridge.
Nutrition Information
Nutrition information is automatically calculated and should only be used as an approximation. It is based on the ingredients and methods described in this recipe and may vary depending on brands and specific preparation.
Serving: 1 cup | Calories: 88kcal | Carbohydrates: 13g | Protein: 1g | Fat: 4g | Saturated Fat: 2g | Trans Fat: 1g | Cholesterol: 8mg | Sodium: 28mg | Potassium: 14mg | Fiber: 1g | Sugar: 7g | Vitamin A: 90IU | Vitamin C: 1mg | Calcium: 9mg | Iron: 1mg
Ready to make these? Start creating your own Cookie Dough Cups today!