

Unlock the secrets to crafting the most exquisite crepes with this authentic recipe, straight from a real French bakery. These delicate delights are incredibly light, airy, with perfectly tender edges and an irresistibly soft bite. Whether you prefer them filled with fresh berries and a dollop of whipped cream or simply drizzled with warm Nutella, these homemade crepes promise a truly delightful and versatile treat for any meal or occasion.


Author’s Culinary Journey
An Authentic Crepe Recipe Passed Down From a French Bakery!
My passion for crepes truly ignited back in high school when we had the pleasure of hosting an incredibly sweet exchange student from France. Her father, a revered pastry chef at their family’s traditional French bakery, became my culinary hero. Naturally, we seized every opportunity to beg for their coveted family recipes.
Among all the delicious secrets shared, the one we collectively obsessed over the most was, without a doubt, their perfect crepe recipe. She didn’t just share ingredients; she meticulously demonstrated exactly how to make them, revealing all the subtle nuances and techniques that make a truly exceptional crepe. She also introduced us to her favorite ways to enjoy them, both sweet and savory. It’s safe to say that “crepe nights” rapidly transformed from a novelty into a cherished, almost nightly, ritual – we’re talking three times a week kind of regular!
Today, I am absolutely thrilled to share this super easy, step-by-step guide to making these authentic French crepes. You’ll find all our tried-and-true go-to sweet and savory filling combinations, along with those invaluable tips and tricks she so generously taught us along the way. Get ready to impress your family and friends with this timeless French classic!
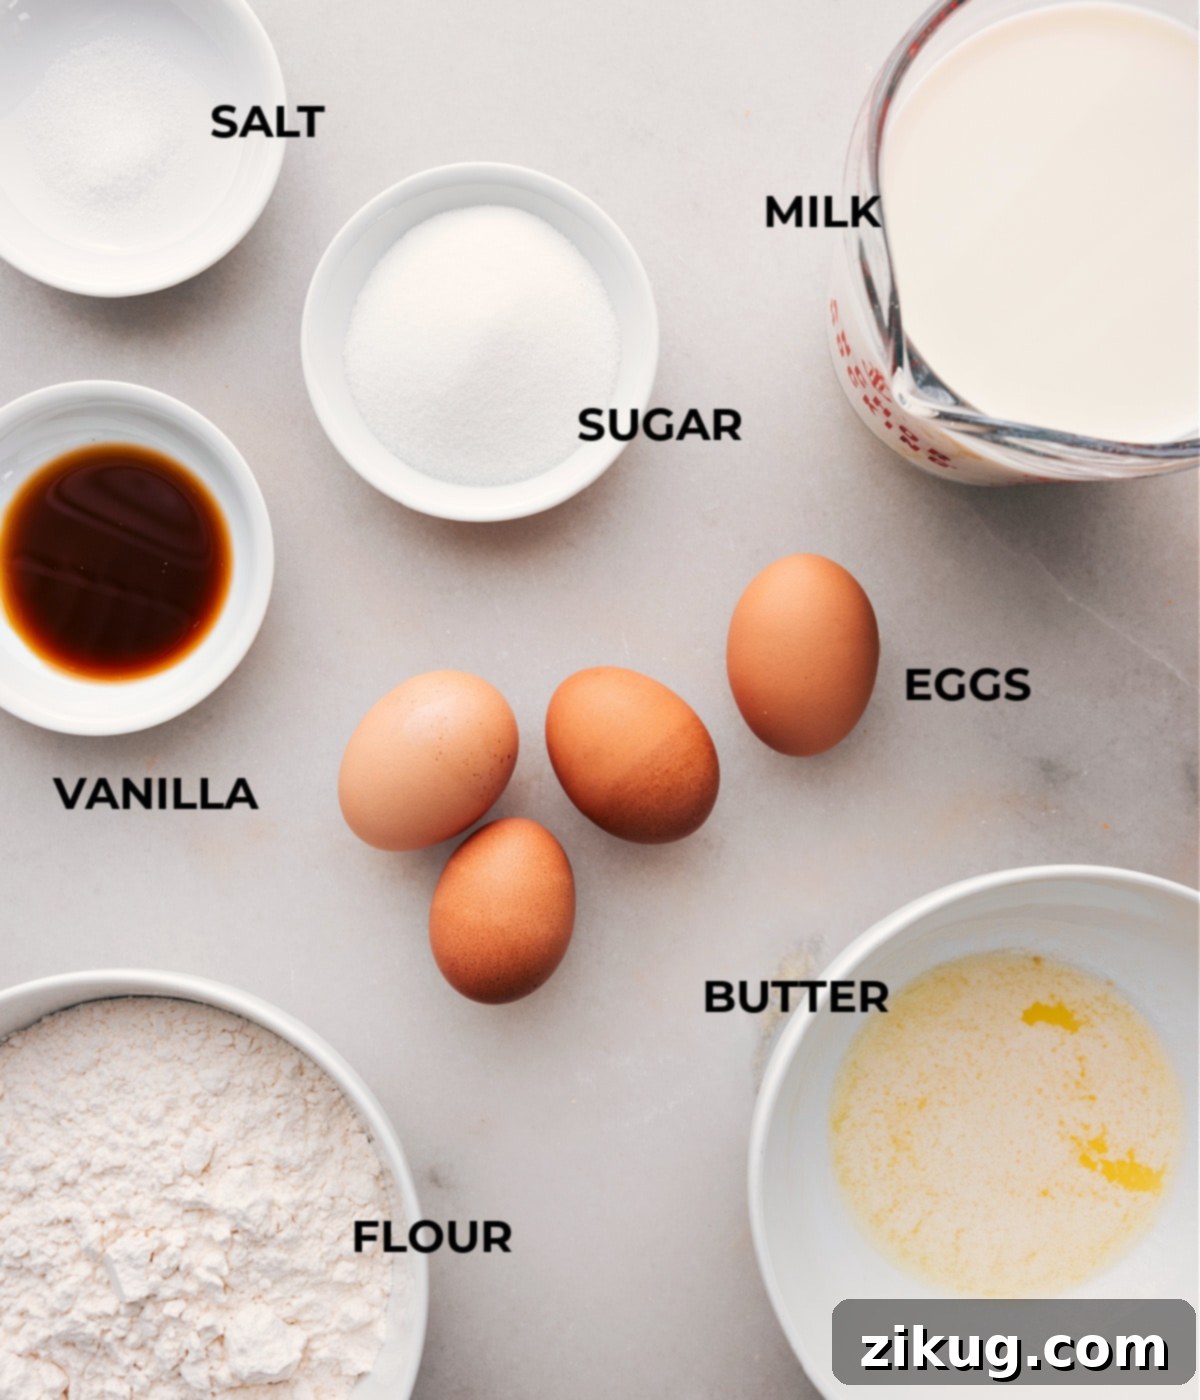
Essential Ingredients for Perfect French Crepes
Crafting perfect crepes starts with understanding the role each ingredient plays. This recipe uses simple, wholesome components that come together to create a delicate and flavorful batter. Here’s what you’ll need and some helpful tips for each:
| Ingredient | Swaps or Expert Tips |
|---|---|
| Whole Milk | For the richest flavor and best texture, whole milk is recommended. However, 2% milk works perfectly fine. If you prefer even thinner, more delicate crepes, consider using a mix of half milk and half water. The fat content in whole milk contributes significantly to the crepe’s tenderness. |
| Large Eggs | Eggs are crucial for binding the batter and providing structure. Always use large eggs for consistent results. For crepes with an unbelievably tender bite, try adding an extra egg yolk to the batter. This increases richness and improves elasticity. |
| All-Purpose Flour | Standard all-purpose flour creates a wonderfully smooth batter. When measuring, spoon the flour into your measuring cup and level it off to avoid a dense batter. For those with gluten sensitivities, a high-quality 1:1 gluten-free flour blend can be used successfully. |
| Granulated Sugar | A touch of sugar not only adds a subtle sweetness but also helps the crepes achieve that beautiful golden-brown color as they cook. For savory crepes, you can easily reduce the sugar amount or omit it entirely. A hint of honey can also be a delightful alternative for a natural sweetness. |
| Unsalted Butter (Melted) | Melted butter imparts a rich, authentic flavor to the crepes and helps make them tender. Be sure to melt the butter and let it cool slightly before adding it to the batter to prevent it from scrambling the eggs. Ghee or a neutral-flavored oil (like canola or vegetable oil) can be used as a substitute. |
| Salt | Never underestimate the power of salt in a sweet recipe! A pinch of salt enhances all the other flavors, balancing the sweetness and adding depth to the crepe batter. It truly makes the ingredients pop. |
| Vanilla Extract | Vanilla extract adds a classic, warm aroma and flavor that perfectly complements sweet crepes. For savory variations, you can simply skip it. If you’re feeling adventurous, a dash of almond extract offers a fun and sophisticated flavor twist. |
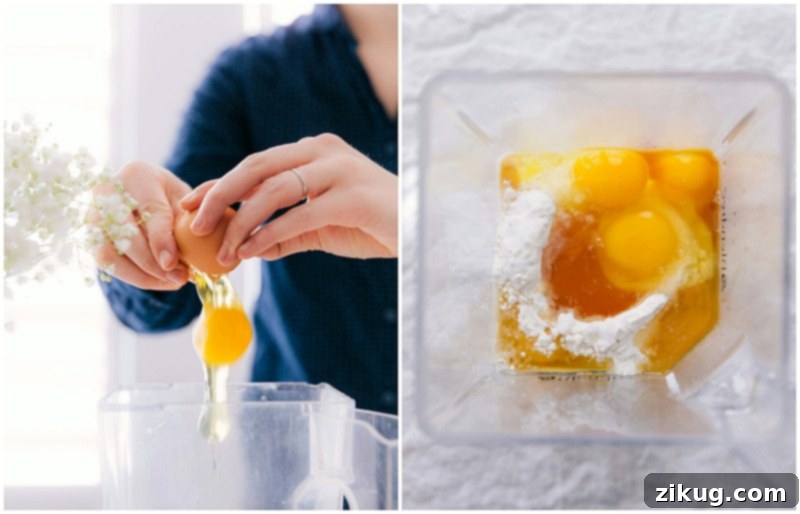
Mastering the Art: Step-by-Step Guide to Making Flawless Crepes
Making crepes might seem intimidating, but with this straightforward method, you’ll be flipping like a pro in no time! The key is in the technique and a little patience.
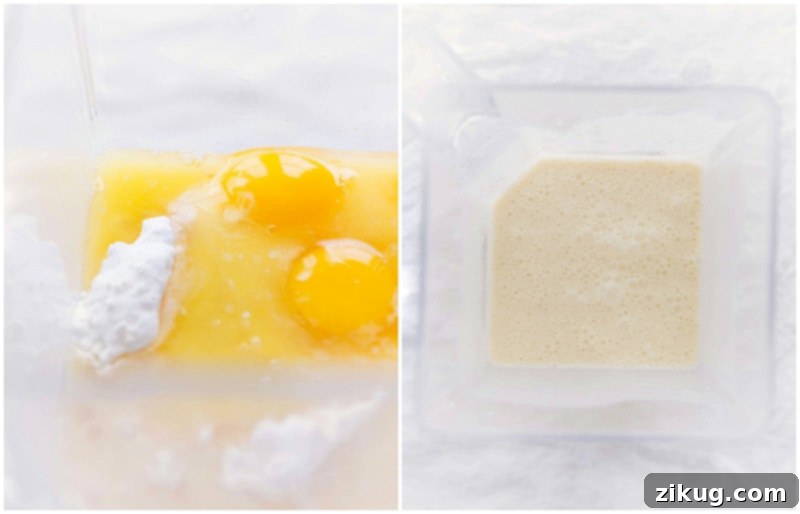
- Prepare the Batter in a Blender: Start by combining all your liquid ingredients first – milk, melted and cooled butter, vanilla, and eggs. Then add your dry ingredients: all-purpose flour, granulated sugar, and salt into a high-powered blender. Begin pulsing on low speed, gradually increasing to medium until the mixture is completely smooth and free of any lumps. This usually takes about 10-15 seconds. Avoid over-blending, as this can overdevelop the gluten and make your crepes tough.
- Scrape and Re-blend (If Needed): After the initial blend, pause and use a spatula to scrape down the sides and bottom of the blender. Sometimes, flour can stick to the edges, creating hidden pockets of dry ingredients. Give it a few more quick pulses to ensure everything is thoroughly incorporated into a uniform, silky batter.
- The Essential Chill: This step is crucial for achieving truly tender crepes with fewer bubbles. Transfer your smooth batter to a covered container and refrigerate it for at least one hour, or ideally, overnight. Chilling allows the flour to fully absorb the liquid, and the gluten to relax, resulting in a more pliable and tear-resistant crepe. This rest also deepens the flavor.
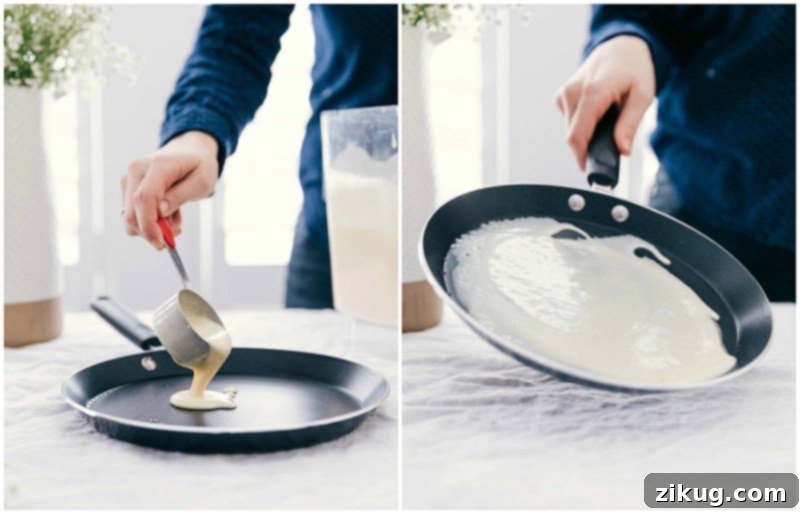
- Heat and Cook: Before you start cooking, lightly butter an 8 to 10-inch nonstick skillet. Heat it over medium to medium-low heat. The pan should be hot enough that a drop of water sizzles, but not smoking. Give your chilled batter a gentle stir before pouring. Pour about 1/4 cup of batter into the center of the hot pan, then immediately tilt and swirl the pan in a circular motion to evenly coat the entire bottom with a very thin layer of batter. Cook for 1-2 minutes until the edges are golden brown and crisp, and the top looks dry.
- Flip and Finish: Carefully lift one edge of the crepe with a thin offset spatula (or a rubber spatula) and confidently flip it to the other side. Cook for another 1-2 minutes until golden brown spots appear. Transfer the cooked crepe to a plate and cover with parchment or wax paper to keep it warm and prevent sticking while you cook the remaining batter.
- Serve and Enjoy: Once all your crepes are cooked, it’s time for the fun part! Add your favorite sweet or savory fillings. You can fold them in half, then in half again to create elegant triangles, roll them up like a burrito, or simply spread and fold. Dust with powdered sugar, add a dollop of whipped cream, or drizzle with your preferred syrup for a truly delightful experience.
Quick Tip: Meal Prep Magic!
One of the best advantages of this fantastic crepe recipe is that it yields a generous batch! This makes them absolutely perfect for meal prepping throughout the week. Cooked crepes store beautifully in the fridge for up to 4–5 days. Simply grab a few anytime you’re craving a fast, delicious breakfast or a delightful snack. They reheat wonderfully in a lightly buttered pan or microwave, making healthy and tasty eating effortless.
Irresistible Crepe Filling and Topping Ideas
The versatility of crepes is one of their most charming qualities. They serve as a perfect canvas for an endless array of sweet and savory fillings. Here are some of our absolute favorite combinations to inspire your next crepe creation:
- Delightful Sweet Crêpes:
- Classic Nutella Bliss: A thick smear of warm Nutella is a perennial favorite. The hazelnut-chocolate spread melts slightly into the warm crepe, creating pure indulgence.
- Gourmet S’mores: Recreate the campfire classic! Fill your crepes with marshmallow creme, a generous drizzle of homemade chocolate sauce, and a sprinkle of crushed graham crackers. A quick toast under the broiler makes it extra gooey.
- Fresh Berry Medley: Light and refreshing, this option is perfect for breakfast or brunch. Combine fresh seasonal berries like strawberries, blueberries, and raspberries with a cloud of homemade whipped cream. Finish with a delicate vanilla sauce or a vibrant blueberry syrup drizzle.
- Lemon & Sugar: A traditional French favorite! A simple squeeze of fresh lemon juice and a sprinkle of granulated sugar brings out the delicate flavor of the crepe itself.
- Cinnamon Apple: Sautéed apples with cinnamon and a touch of brown sugar, perhaps with a scoop of vanilla ice cream.
- Hearty Savory Crêpes:
- Vibrant Garden Crêpe: A wholesome and flavorful choice. Fill with tender artichoke hearts, sun-ripened diced tomatoes, fresh baby spinach, and a generous grating of Parmesan cheese. A light vinaigrette can be added for extra zest.
- Mediterranean Italian: Transport yourself to Italy with a combination of juicy tomatoes, fragrant pesto, and melted mozzarella cheese. You can even add some grilled chicken or sun-dried tomatoes.
- Traditional Breakfast Powerhouse: Ideal for a hearty brunch. Layer with thinly sliced ham, fluffy scrambled eggs, and spicy pepper jack cheese for a kick.
- Sweet & Savory Egg & Cheese: A delightful twist! Combine crispy bacon, perfectly cooked eggs, and sharp cheddar cheese. A surprising but delicious drizzle of maple syrup balances the flavors beautifully.
- Spinach and Feta: Sautéed spinach with crumbled feta cheese and a hint of garlic.
Chef’s Secrets: Tips for Crepe-Making Perfection
Achieving consistently perfect crepes is an art that can be mastered with a few simple techniques. These tips, gleaned from years of experience (and a French pastry chef!), will ensure your crepes are consistently flawless:
- Always Chill the Batter: This isn’t just a suggestion; it’s a game-changer! Allowing the batter to rest in the refrigerator for at least an hour (or ideally, overnight) gives the flour ample time to fully absorb the liquid. This process significantly reduces the formation of small bubbles during cooking, resulting in a much smoother, more pliable, and less prone-to-tearing crepe. It also allows the gluten to relax, making the crepes incredibly tender.
- Warm the Pan Slowly and Evenly: Resist the urge to crank up the heat. A gradual and even heating of your pan is essential. Start with medium-low to medium heat and let the pan come up to temperature slowly. High heat can lead to burnt exteriors and uncooked interiors, or uneven browning.
- Butter the Pan Judiciously: You only need to lightly coat your nonstick pan with melted butter once, using a pastry brush or paper towel. This initial greasing should typically last for several crepes, if not the entire batch. Adding butter too frequently can make your crepes greasy and lead to uneven cooking.
- Patience is Key: Wait to Flip! Knowing when to flip is crucial. Look for clear signs: the edges will appear golden brown and slightly crisp, and the entire surface of the crepe will look dry, losing its raw, shiny appearance. You might also see small bubbles forming on the surface. Flipping too soon can cause the crepe to tear.
- Master the Swirl: As soon as you pour about 1/4 cup of batter into the center of the hot pan, immediately pick up the pan and quickly tilt and swirl it in a circular motion. This rapid movement spreads the batter into an ultra-thin, even layer across the entire bottom of the pan. The quicker you swirl, the thinner your crepes will be!
- Use Parchment Paper for Stacking: To prevent your freshly cooked crepes from sticking together as you stack them, place a small square of parchment or wax paper between each crepe. This makes them easy to separate and serve later.
- Adjust Heat as You Go: Pay attention to your pan’s temperature. If your crepes are browning too quickly, slightly lower the heat. If they’re taking too long or not browning enough, increase it slightly. Consistency is built on continuous small adjustments.
Explore More Delicious Breakfast & Brunch Favorites:
Breakfast
Classic French Toast
Breakfast
Savory Ham and Cheese Quiche
Desserts
Decadent Croissant Breakfast Bake
Muffins And Quick Breads
Healthy Chocolate Chip Muffins

Print Recipe
Authentic French Crepes Recipe
Chelsea Lords
10 minutes
1 hour
1 hour
10 minutes
20
crepes
Video Guide
Equipment You’ll Need
-
Blender: Essential for a smooth, lump-free batter.
-
Parchment Paper: For stacking cooked crepes to prevent sticking.
-
Nonstick Pan: An 8 to 10-inch pan is ideal for consistent crepe size. (See Note 1 for my specific recommendation.)
-
Offset Spatula or Rubber Spatula: For easy flipping and handling of delicate crepes.
Ingredients
This recipe yields approximately 20 crepes. Adjust ingredient quantities proportionally if you wish to make more or fewer servings.
- 2-1/2 cups whole milk (recommended for richness, 2% works too)
- 2 cups all-purpose flour (measured by spooning and leveling)
- 1/4 cup granulated sugar
- 1/4 teaspoon salt
- 4 tablespoons unsalted butter (melted and slightly cooled)
- 2 teaspoons vanilla extract
- 4 large eggs
- 2 to 3 tablespoons unsalted butter (melted, for cooking the crepes)
- Toppings (as desired, see Note 2)
Instructions for Flawless Crepes
-
1. Blend the Batter: In a high-powered blender, combine the milk, all-purpose flour, granulated sugar, salt, melted butter (ensure it’s slightly cooled to prevent cooking the eggs), vanilla extract, and large eggs. Pulse on low speed initially, then increase to medium, blending until the mixture is completely smooth and free of any lumps. This should take about 10–15 seconds. Be careful not to over-beat the batter, as this can lead to tough crepes.
-
2. Scrape and Chill: Stop the blender and use a spatula to scrape down any flour or ingredients sticking to the sides and bottom of the blender jar. Blend for a few more seconds if necessary to ensure a perfectly smooth consistency. Cover the blender jar or transfer the batter to an airtight container and refrigerate for at least 1 hour, or preferably overnight. This chilling period is crucial for flavor development and to allow the gluten to relax, which results in more tender crepes with fewer bubbles.
-
3. Prepare for Stacking: While the batter chills or as you start cooking, cut several small squares of parchment paper. These will be placed between each cooked crepe to prevent them from sticking together when stacked, making them easier to handle and store.
-
4. Heat the Pan: Place an 8 to 10-inch nonstick pan over medium to medium-low heat. It’s important to allow the pan to heat gradually and evenly. While the pan heats, stir your chilled batter gently to reincorporate any settled ingredients. Have a clean tray or platter ready, lined with a piece of parchment paper, for stacking your finished crepes.
-
5. Cook the Crepes: Lightly butter the hot pan. You can use a pastry brush or a paper towel for this. Pour approximately 1/4 cup of crepe batter into the very center of the pan. Immediately pick up the pan and tilt and swirl it quickly in a circular motion to spread the batter thinly and evenly across the entire bottom surface. Return the pan to the heat.
-
6. Flip and Continue Cooking: Cook the first side of the crepe until the edges begin to turn golden brown, the top appears dry and set, and you see small bubbles. This usually takes 1–2 minutes. Carefully lift an edge of the crepe with an offset spatula (or a thin rubber spatula) and confidently flip it over. Cook the second side for another 1–2 minutes, until golden brown spots appear. Transfer the cooked crepe to your prepared plate/tray, layering it with a piece of parchment or wax paper to prevent sticking.
-
7. Repeat the Process: Continue cooking the remaining batter, repeating steps 5 and 6. Remember to gently stir the batter occasionally as you go. Adjust your burner temperature as needed throughout the cooking process to maintain a consistent cooking speed and browning.
-
8. Fill and Serve: Once all the crepes are cooked, fill them with your preferred sweet or savory fillings. For a classic presentation, fold them in half, then in half again to form elegant triangles. You can also roll them up like a burrito. Finish by sprinkling with powdered sugar, adding a dollop of whipped cream, or drizzling with your favorite syrup, as desired. Enjoy immediately!
Recipe Notes for Success
Note 2 – Topping Inspiration: The beauty of crepes lies in their adaptability. You can go simple or elaborate! Consider serving with: powdered sugar, a variety of fruit syrups (maple, blueberry, strawberry), fresh fruit, whipped cream, chocolate sauce, Nutella, lemon curd, or even savory options like cheese, ham, or sautéed vegetables. Let your creativity be your guide!
Note 3 – Key Cooking Tips:
- Butter Coverage: Ensure an even, thin coating of melted butter on the bottom and sides of the pan before cooking your first crepe. A good initial buttering should be sufficient for several crepes, reducing the need to re-butter frequently.
- Don’t Flip Too Soon: This is a common mistake! Wait until the crepe’s surface develops visible golden brown spots, its edges appear set and slightly crisp, and the top no longer looks wet or shiny before attempting to flip. Premature flipping can lead to tearing and an undercooked interior.
- First Crepe Phenomenon: Don’t be discouraged if your first crepe isn’t perfect! The first one often serves as a “test crepe” to gauge your pan’s temperature and batter consistency. It helps you adjust the heat and technique for the rest of the batch.
Nutrition Note: Please be aware that the nutritional information provided below is calculated solely for the crepes themselves, without the addition of any fillings or toppings. The calorie and macro counts will vary significantly depending on what you choose to fill and top your crepes with.
Storage Instructions: To keep your delicious crepes fresh, allow them to cool completely to room temperature after cooking. Once cooled, gently transfer them to a large resealable plastic bag or an airtight container, placing parchment or wax paper between each crepe. Seal the bag or container, removing as much air as possible, and store in the refrigerator for up to 5 days. For longer storage, crepes can be frozen in an airtight bag for up to 3 months. Thaw frozen crepes in the refrigerator overnight or at room temperature, then gently reheat in a lightly buttered pan or microwave before serving.
Nutritional Information (Per Crepe)
|
Calories: 121kcal
|
Carbohydrates: 15g
|
Protein: 4g
|
Fat: 5g
|
Saturated Fat: 3g
|
Trans Fat: 1g
|
Cholesterol: 51mg
|
Sodium: 63mg
|
Potassium: 76mg
|
Fiber: 1g
|
Sugar: 5g
|
Vitamin A: 193IU
|
Calcium: 47mg
|
Iron: 1mg
Nutrition information is automatically calculated and is an approximation only. It does not include fillings or toppings.
Love this recipe? Leave a comment below!
Your feedback helps us create more delicious content!
Frequently Asked Questions About Crepes
Preventing crepes from sticking is key to perfect results. First, always use a high-quality nonstick pan. Before heating, thoroughly grease the pan with melted butter, ensuring the entire surface and a bit up the sides are coated. A pastry brush or paper towel works well for this. This initial greasing is usually sufficient for multiple crepes. If crepes start to stick, you may need to re-butter very lightly. Also, ensure your pan is adequately heated before pouring the batter, but not smoking hot.
Once your crepes are cooked, allow them to cool completely to room temperature. This is important to prevent condensation, which can make them soggy. Once cool, stack them with a piece of parchment paper or wax paper between each crepe to prevent sticking. Then, transfer the stack to a large resealable plastic bag or an airtight container. Seal the bag, pressing out any excess air, and store it in the refrigerator for up to 5 days. They make for a quick and easy breakfast or snack throughout the week!
Absolutely! Crepes freeze beautifully, making them excellent for future meals. To freeze, allow them to cool completely. Stack them with parchment or wax paper in between each crepe. Once stacked, wrap the entire pile tightly in plastic wrap, then place it in a heavy-duty freezer bag or an airtight freezer-safe container. They can be stored in the freezer for up to two months. When you’re ready to enjoy them, thaw the crepes in the refrigerator overnight or at room temperature for a few hours. Reheat gently in a lightly buttered pan or microwave before serving with your favorite fillings.
Chilling the crepe batter is a crucial step for several reasons. Firstly, it allows the flour to fully hydrate and absorb the liquids, resulting in a more uniform and pliable batter. This hydration helps prevent lumps and creates a smoother, more tender crepe that is less likely to tear during cooking. Secondly, chilling allows the gluten in the flour to relax. When gluten is over-worked (like during blending), it can make crepes tough. A rest in the fridge helps the gluten strands relax, contributing to that signature delicate, melt-in-your-mouth texture. Finally, a cold batter produces fewer bubbles on the surface of the crepe while cooking, leading to a more aesthetically pleasing and evenly cooked product.
The hallmark of a truly great French crepe is its delicate thinness. The ideal crepe should be almost translucent, with slightly crispy edges and a soft, yielding center. Achieving this comes down to two main factors: the consistency of your batter (which should be thin enough to easily swirl) and your technique when pouring and swirling the batter in the hot pan. You want to pour just enough batter to thinly coat the entire bottom surface of the pan in one swift motion. Practice makes perfect, and you’ll quickly develop a feel for the right amount of batter and the speed of the swirl.