
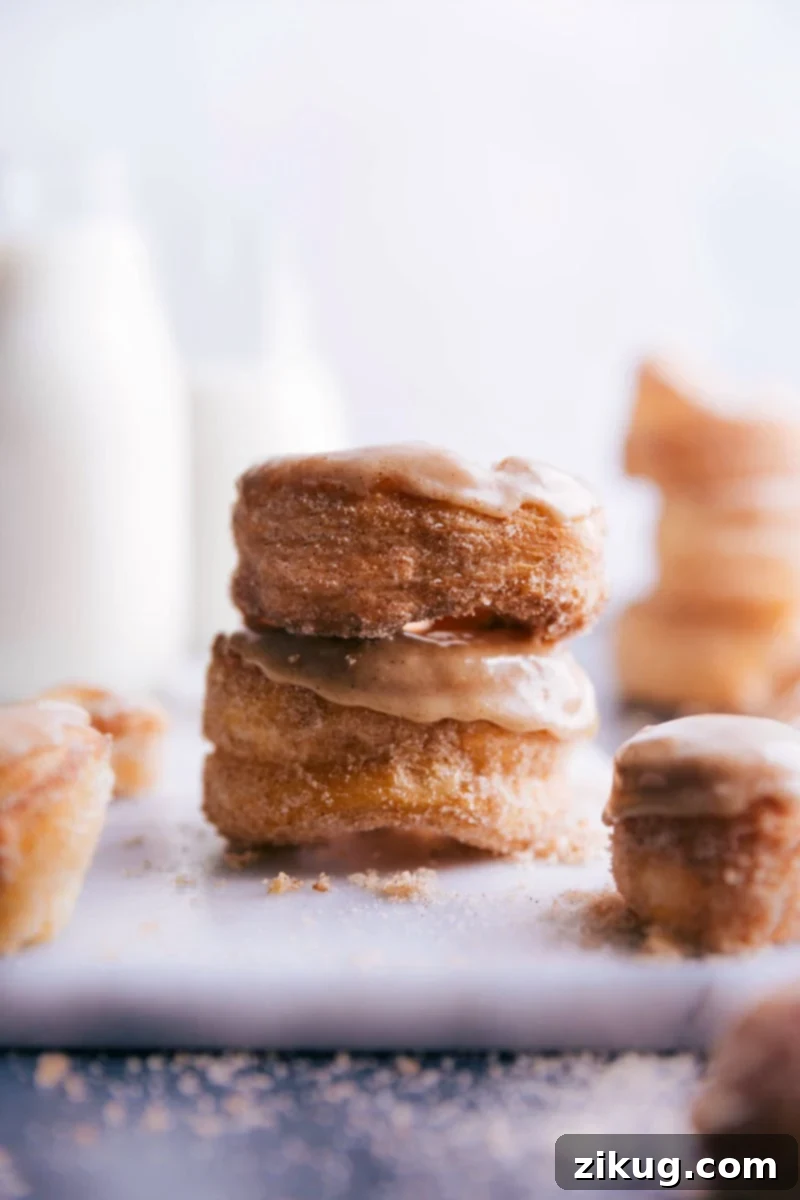
Unleash your inner pastry chef with this incredible **Cronut Recipe**, promising flaky, buttery, and perfectly sweet results in just 35 minutes! Thanks to a clever store-bought shortcut, you can now master this viral sensation without spending hours in the kitchen. Say goodbye to long bakery lines and hello to homemade perfection.
Imagine biting into a warm, crisp pastry, its delicate layers unfolding with a whisper, followed by a tender, melt-in-your-mouth interior. This isn’t just any dessert; it’s a culinary experience. Pair your freshly made cronut with a comforting cup of hot chocolate or a soothing pumpkin spice steamer for the ultimate treat. It’s the perfect indulgence for breakfast, brunch, or an afternoon delight, promising to elevate any moment into a special occasion.
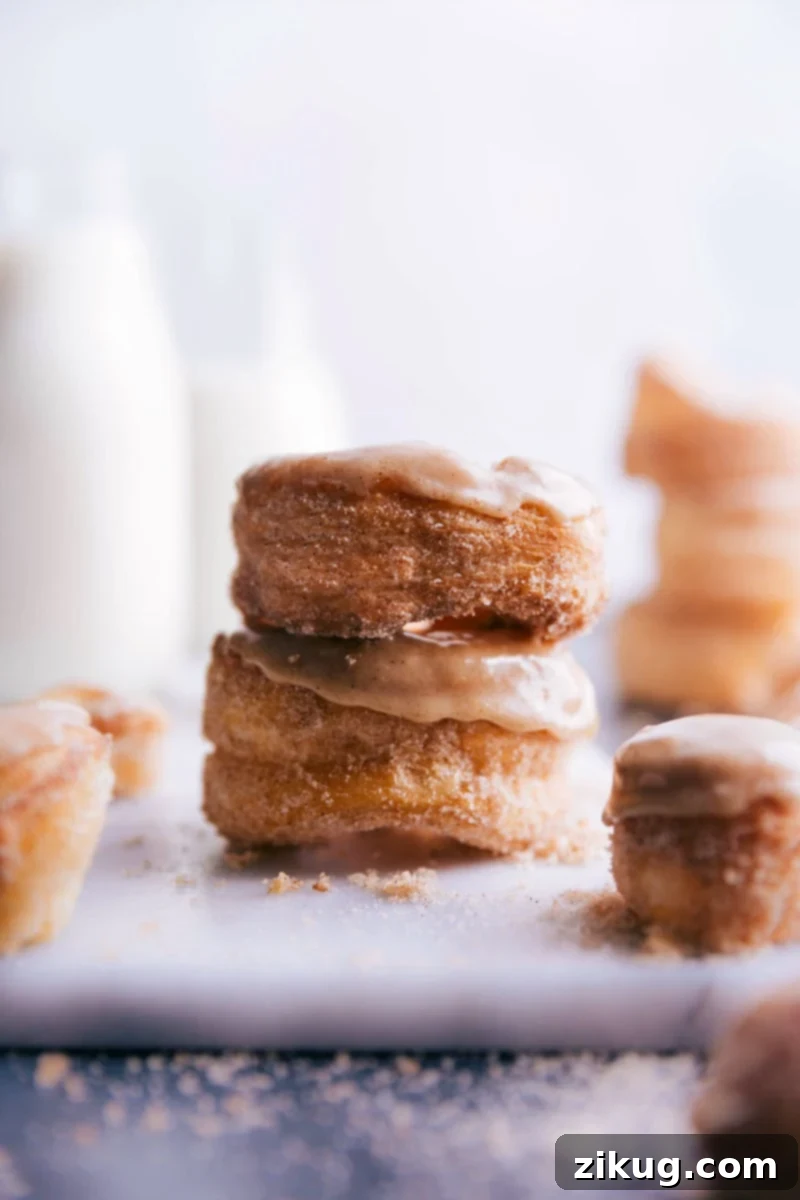
What Exactly Is A Cronut? The Story Behind The Viral Pastry
The cronut is not just a pastry; it’s a global phenomenon, a brilliant culinary innovation that took the world by storm. These delectable treats are a viral sensation, a masterful hybrid combining the delicate, flaky layers of a classic croissant with the rich, fried goodness of a traditional donut. It was famously invented by the visionary New York City pastry chef, Dominique Ansel.
Ansel, drawing inspiration from his time working in bakeries in France, ingeniously blended these two beloved pastries. He first introduced his creation in his New York City bakeries, where it quickly garnered massive attention, leading to eager customers lining up for hours just to get a taste. The original Cronuts crafted by Ansel feature a distinct croissant-like dough, meticulously fried to perfection, then injected with a luscious flavored cream, rolled in sugar, and finally adorned with a sweet glaze. The result is a pastry that offers a symphony of textures and flavors – crisp on the outside, light and airy within, and wonderfully rich with every bite.
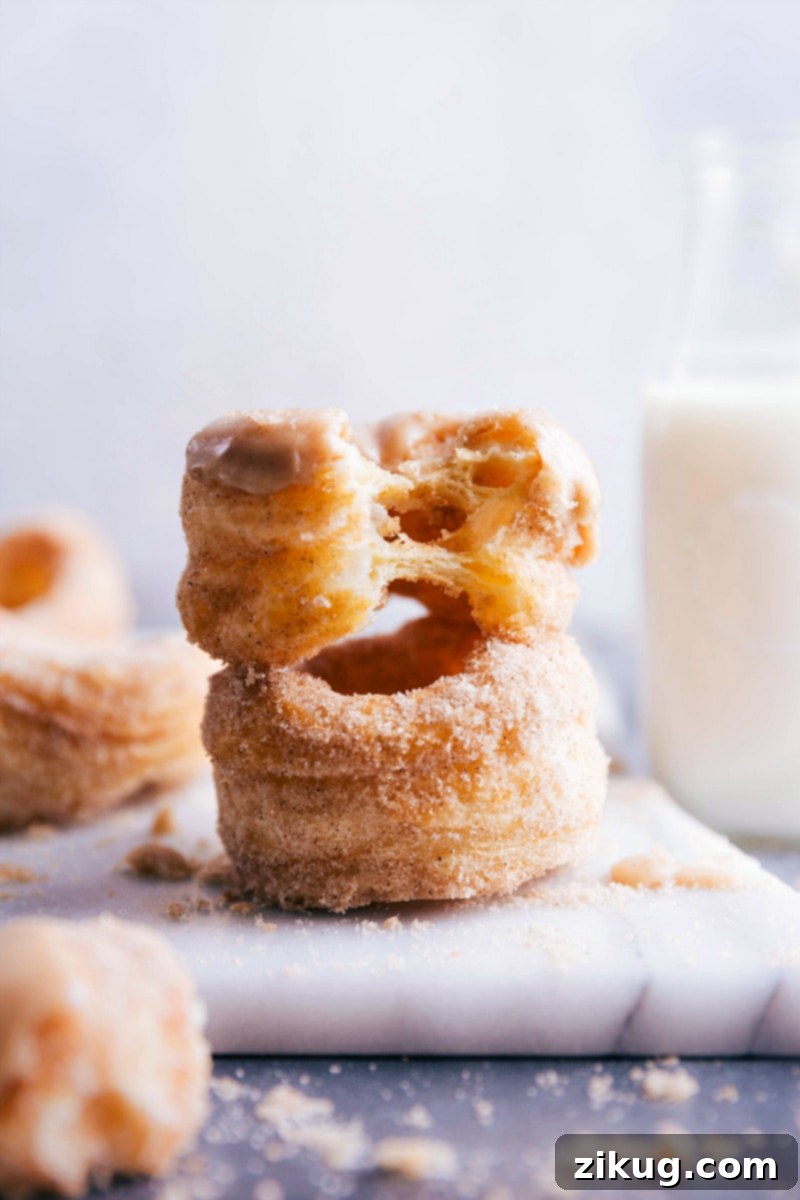
Unlike a regular donut, which is typically made from yeast dough and has a denser crumb, cronuts boast a signature laminated dough, similar to what’s used for croissants. This intricate layering, achieved by repeatedly folding butter into the dough, is what gives cronuts their characteristic airy, multi-layered interior. When fried, these layers separate, creating an incredibly tender, almost ethereal texture that’s completely unique. It’s truly the best of both worlds, offering the satisfying chew of a donut coupled with the sophisticated flakiness of a croissant.
Essential Ingredients for Your Easy Cronut Recipe
Creating these delightful cronuts at home is surprisingly straightforward, especially with our secret shortcut. Here are the key ingredients you’ll need, along with why each one is crucial for achieving cronut perfection:
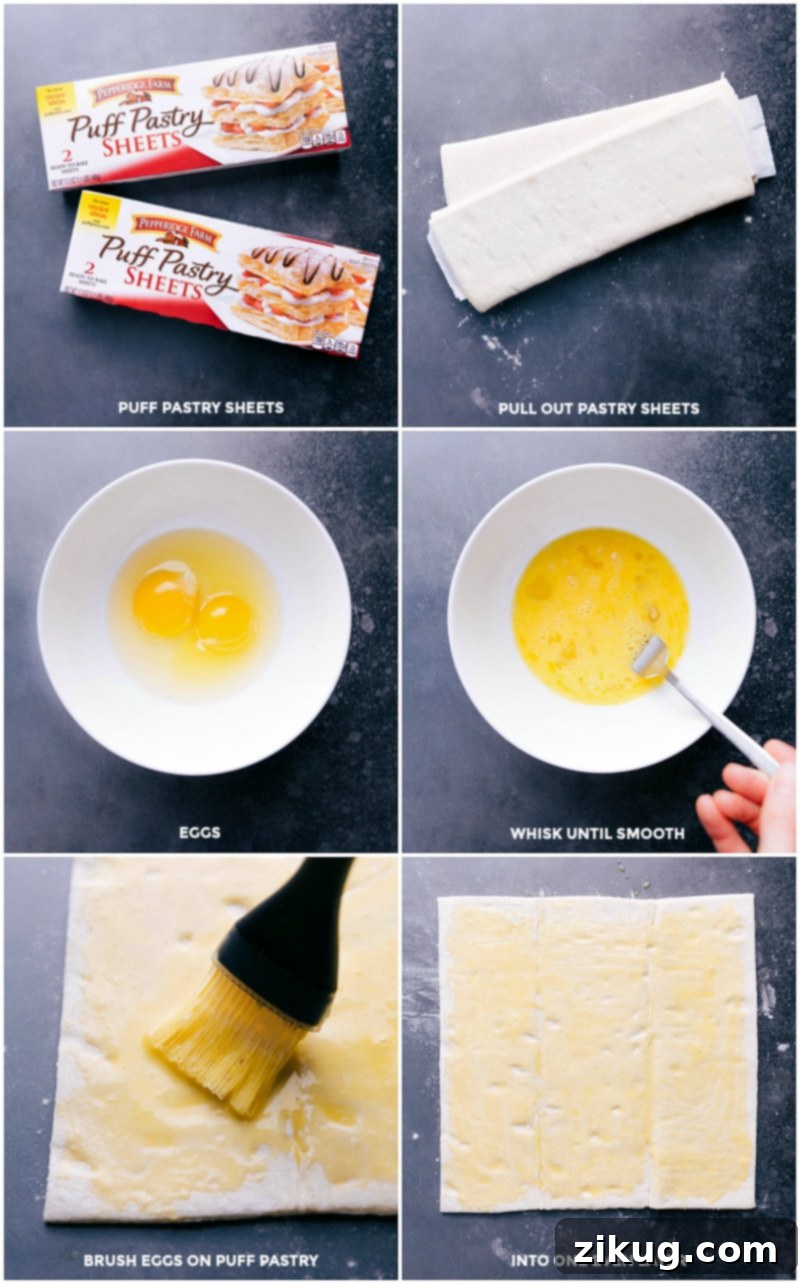
- Puff Pastry Dough: This is our game-changing shortcut! Instead of making laminated dough from scratch (a process that can take hours), store-bought puff pastry provides the delicate, flaky, and light base essential for authentic cronut texture. Look for it in the frozen dessert aisle of your grocery store.
- Flour: A small amount of all-purpose flour is used to lightly dust your work surface. This is critical for preventing the delicate puff pastry from sticking as you handle and shape it, ensuring clean cuts and easy manipulation.
- Vegetable/Canola Oil: The choice of oil is crucial for deep frying. Vegetable or canola oil are excellent choices due to their high smoke point and neutral flavor, which won’t overpower the cronuts’ natural buttery taste. The oil allows the cronuts to cook quickly, achieving that desirable golden-brown exterior and fluffy interior.
- Eggs: Whisked eggs create an egg wash, which is brushed onto the puff pastry before chilling. This helps to seal the layers slightly and contributes to a beautiful, crispy, and golden exterior once fried.
- Granulated Sugar and Ground Cinnamon: This classic combination forms the sweet and spiced coating that gives cronuts their irresistible aroma and flavor. The sugar provides sweetness and a pleasant texture, while cinnamon adds warmth and aromatic depth, making each bite truly memorable.
For the optional yet highly recommended glaze, you’ll also need powdered sugar, very soft unsalted butter, maple syrup (or milk if adjusting consistency), vanilla extract, and a pinch more ground cinnamon. These ingredients come together to create a smooth, sweet glaze that adds an extra layer of decadence to your homemade cronuts.
Step-by-Step Guide: Crafting Your Perfect Homemade Cronuts
Get ready to create bakery-quality cronuts right in your own kitchen with these easy-to-follow steps:
- Thaw and Prepare Dough: Begin by following the package directions to thaw your puff pastry dough. Most packages, like Pepperidge Farm’s, contain two sheets. Lightly flour a clean, flat working surface. Carefully unfold both dough sheets—avoid rolling them out or pressing them down, as this can compress the delicate layers. Place them gently on your floured surface.
- Apply Egg Wash, Fold, and Chill: In a small bowl, whisk two large eggs briskly with a fork. Using a pastry brush, evenly coat one side of each puff pastry sheet with this egg wash. Then, fold each dough sheet into thirds, similar to how a letter is folded (and how it was likely packaged). This process helps create additional layers. Immediately transfer the folded dough to the freezer for 20 minutes. This crucial chilling step firms up the butter in the pastry, which prevents it from melting too quickly during frying, ensuring maximum flakiness.
- Heat Oil to Perfect Temperature: Pour about 1 gallon of vegetable or canola oil into a deep fryer or a heavy-bottomed, deep pot (the amount needed will depend on your pot, aiming for about 1/3 full). Heat the oil to precisely 350°F (175°C). We highly recommend using a deep fryer or a candy thermometer to monitor the temperature constantly. Maintaining a consistent temperature is paramount: oil that’s too hot will burn the outside while leaving the inside raw, and oil that’s too cool will result in greasy, overly chewy cronuts.
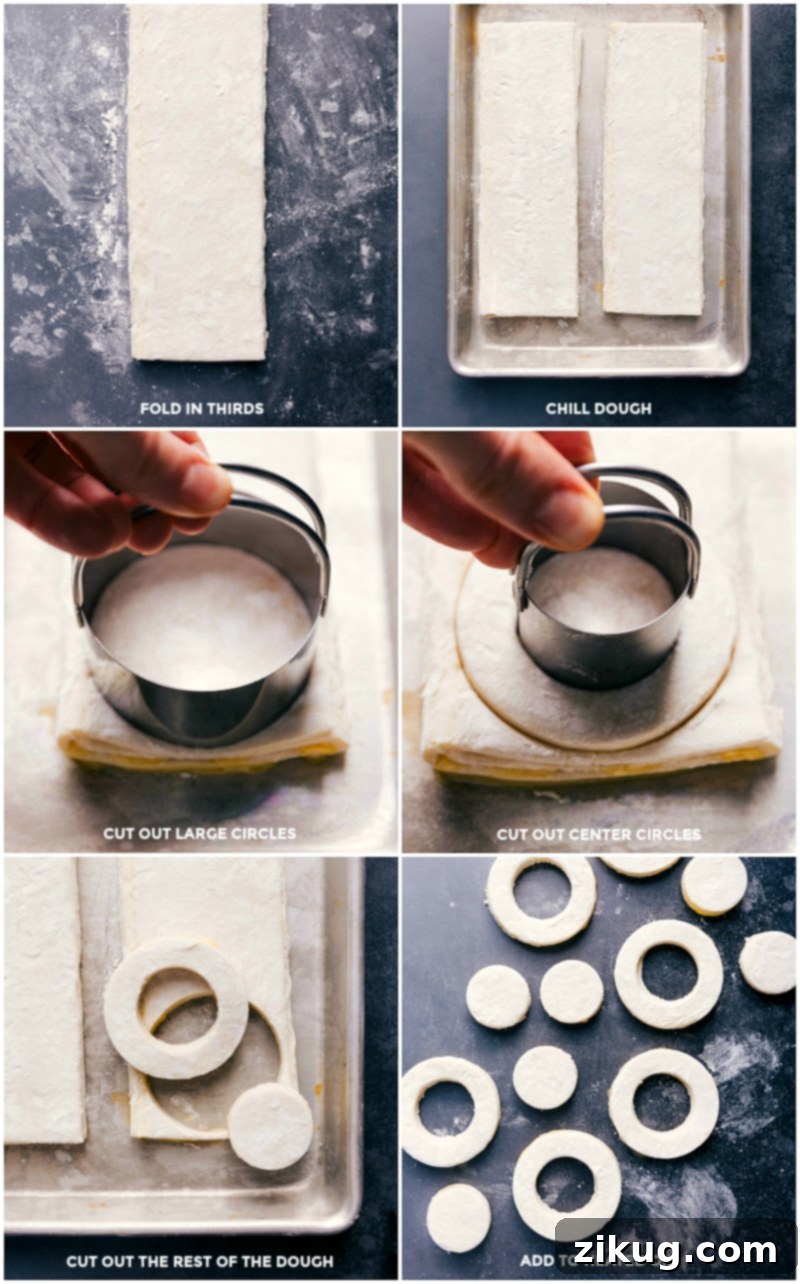
- Cut and Shape Your Cronuts: Remove the chilled dough from the freezer. Using donut or pastry cutters, cut out large cronuts. A 2-1/2-inch cutter is ideal for yielding about 3 cronuts per puff pastry sheet. Then, use a smaller 1-1/2-inch cutter to create the signature hole in the center of each cronut. Repeat with the second sheet for a total of 6 large cronuts and 6 mini donut holes. Don’t discard the dough scraps; you can lightly fry these too for a tasty bonus! For precise cuts, these biscuit cutters work wonderfully.
- Fry to Golden Perfection: Carefully place 3-4 cronuts at a time into the hot oil. Avoid overcrowding the pot, as this will drop the oil temperature. Fry them for a total of 5 minutes, flipping them every 1 to 1 1/2 minutes with a fork until each side has puffed up and achieved a beautiful golden brown. Throughout this process, keep a close eye on your thermometer to ensure the oil remains at 350°F. Once golden, use a slotted spoon to carefully remove the cronuts and place them on a plate lined with several paper towels to drain excess oil. Repeat with the remaining cronuts and donut holes.
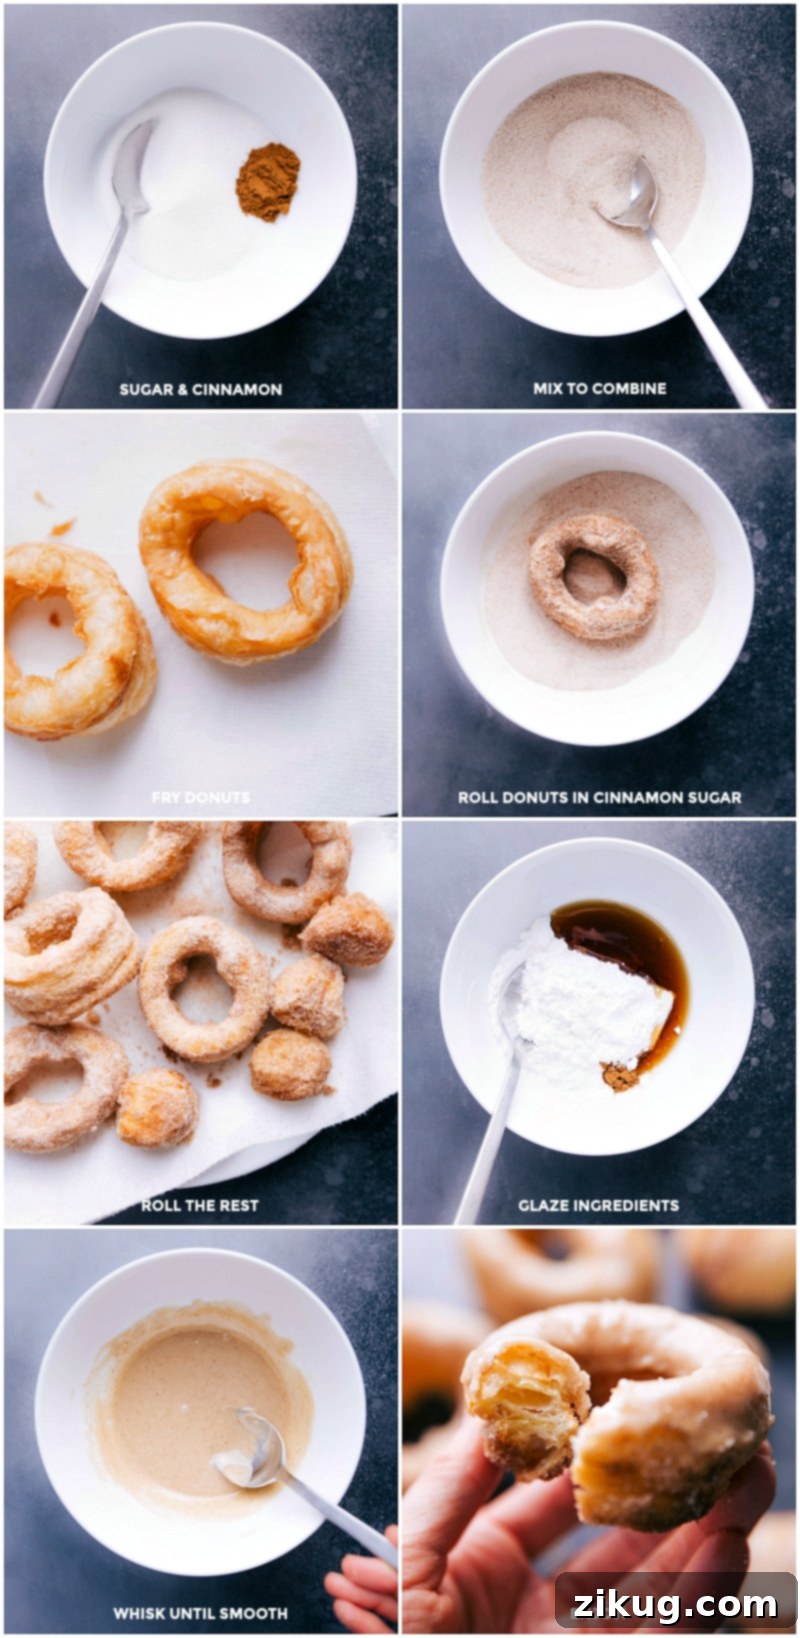
- Coat with Cinnamon Sugar: While the cronuts are still hot from the fryer, combine 1/2 cup granulated sugar and 1 teaspoon ground cinnamon in a shallow bowl. Using tongs or two forks (the cronuts will be very hot), transfer the drained cronuts into the cinnamon sugar mixture. Gently spoon the cinnamon sugar over the cronuts and rotate them until they are generously coated on all sides. Enjoy them immediately for the best experience, or proceed to the optional glaze step.
- Optional Glaze for Extra Indulgence: For an added layer of sweetness, prepare the glaze. Whisk together 1/2 cup powdered sugar, 1/2 tablespoon very soft unsalted butter, 2 tablespoons maple syrup, 1/4 teaspoon vanilla extract, and 1/8 teaspoon ground cinnamon. If the glaze is too thick, add a teaspoon more maple syrup (or milk) at a time until it reaches a dippable consistency. Briefly microwave the glaze for 5-10 seconds to thin it slightly if needed. Gently dip the hot cronuts into the warm glaze, or drizzle it over them. Allow the glaze to set for a minute before serving. Cronuts are truly best enjoyed hot and fresh, whether simply coated in cinnamon sugar or beautifully glazed!
Quick Tip: Locating Your Puff Pastry
Puff pastry dough is a freezer staple! You’ll typically find it in the frozen aisle of most grocery stores, often located near frozen desserts, pie crusts, or sometimes even frozen breakfast pastries. If you’re having trouble locating it, a quick search on your grocery store’s website or using a store locator app can guide you. Remember, always follow the specific package instructions for thawing your puff pastry before you begin this recipe to ensure the best results.
Expert Tips for Cronut Perfection Every Time
Achieving perfectly crisp and flaky cronuts is simple when you follow these insider tips:
- Precision in Oil Temperature is Key: This is arguably the most critical factor. Always use a candy thermometer to monitor your oil temperature meticulously. The ideal temperature of 350°F (175°C) ensures the cronuts cook evenly – golden brown on the outside and wonderfully tender and flaky within. Too hot, and they’ll burn; too cool, and they’ll become greasy.
- Fry in Small Batches: To maintain a consistent oil temperature and prevent overcrowding, fry only 3-4 cronuts at a time. Overloading the pot will cause the oil temperature to drop significantly, leading to unevenly cooked and soggy pastries. Patience here yields the best results.
- Coat Immediately While Hot: The moment your cronuts are out of the oil and have briefly drained any excess, roll them directly into the cinnamon-sugar mixture. The residual heat and slight stickiness from the frying process are essential for the sugar to adhere properly. If they cool down too much, the sugar won’t stick as effectively.
- Don’t Overwork the Dough: Puff pastry relies on its delicate layers. When handling, thawing, and cutting, be gentle. Avoid stretching, pressing down hard, or rolling out the dough unnecessarily, as this can compress the layers and reduce the flakiness.
- Ensure Adequate Chilling: The freezer chilling step after applying the egg wash and folding is vital. This firms up the butter within the pastry layers, which then creates steam during frying, resulting in those desirable airy pockets and distinct flaky texture. Don’t skip or shorten this step.
- Quality Ingredients Matter: While our recipe uses a shortcut, choosing a high-quality store-bought puff pastry makes a difference. Look for brands known for their buttery taste and distinct layers. Fresh eggs and good quality oil also contribute to the overall flavor and texture.
Storage Solutions for Your Delicious Cronuts
How to Store Cronut Leftovers
While cronuts are undeniably best enjoyed fresh and warm, you can absolutely store any delicious leftovers to savor later. Proper storage ensures they remain as delightful as possible:
- Airtight Container is Key: To maintain freshness and prevent them from drying out or absorbing external odors, always store your cronuts in an airtight container.
- Room Temperature for Short-Term: For immediate indulgence, cronuts can be kept at room temperature for up to 2 days. Place them on the counter, away from direct sunlight or heat. The texture might soften slightly, but they will still be delicious.
- Refrigerate for Extended Freshness: If you wish to store them for a longer period, transfer them to an airtight container and refrigerate for up to 5 days. This will help preserve their quality, especially if they have a cream filling or glaze.
- Reheating for Best Enjoyment: To bring refrigerated cronuts back to life, gently reheat them before serving. A few minutes in a preheated oven at 300°F (150°C) can help restore some of their crispness. Alternatively, a quick zap in the microwave for 10-15 seconds will warm them through, though it may soften the texture further. Avoid overheating, which can make them tough.
Remember, the fresher, the better for cronuts, but these storage tips ensure you can enjoy every last bite!
More Irresistible Dessert Recipes To Love:
Desserts
Crispy Homemade Churros
Desserts
Decadent Cinnamon Roll Cupcakes
Desserts
Delightful Mini Oreo Cheesecakes
Desserts
Easy Cinnamon Roll Cookie Recipe
Homemade Cronut Recipe
Video
Equipment
-
Deep fryer or deep, heavy-bottomed pot and thermometer
Ingredients
- 1 (17.3-ounce) package puff pastry sheets see note 1 below
- Flour for work surface
- 1 gallon vegetable oil 3.78L; or canola oil, see note 2 below
- 2 large eggs
- 1/2 cup granulated sugar
- 1 teaspoon ground cinnamon
- 1/2 cup powdered sugar
- 1/2 tablespoon unsalted butter very soft
- 2 tablespoons maple syrup
- 1/4 teaspoon vanilla extract
- 1/8 teaspoon ground cinnamon
Instructions
-
Follow package directions to thaw the puff pastry dough. If using Pepperidge Farm’s dough, there should be 2 sheets per package. Lightly flour a flat working surface. Unfold the 2 dough sheets (do not roll it out or press it down) and place them on your lightly floured surface.
-
Pour oil into a deep fryer or heavy-bottomed deep pot (refer to Note 2 for quantity). Use a candy thermometer to gauge the heat, aiming for 350°F (175°C). It’s crucial to monitor the heat constantly: oil that is too hot will burn the cronuts outside and leave them raw inside, while oil that is too cool will make them overly chewy and greasy.
-
Crack both eggs into a small bowl and whisk briskly with a fork. Using a pastry brush, brush one side of both puff pastry dough sheets with the egg wash. Then, fold each dough sheet in thirds (like folding a letter). Place the folded dough sheets into the freezer for 20 minutes to chill.
-
Using donut or pastry cutters, cut out large cronuts. A 2-1/2-inch cutter will typically yield 3 cronuts per sheet of puff pastry. Use a 1-1/2-inch cutter to cut out the center of each cronut. Repeat this process with the second sheet of puff pastry dough for a total of 6 cronuts and 6 donut holes. You can also save and fry any dough scraps to prevent waste.
-
Carefully place 3-4 cronuts into the hot oil and fry for 5 minutes, flipping every 1 and 1/2 minutes with a fork, until each side has puffed up and is golden brown. Ensure the oil temperature consistently stays at 350°F (175°C). Use a slotted spoon to remove the fried cronuts and place them on a plate lined with a few paper towels to drain excess oil. Repeat until all cronuts and donut holes are fried.
-
Meanwhile, in a bowl, stir together the granulated sugar and cinnamon until well combined. Using tongs or two forks (as the cronuts will be very hot), transfer the hot cronuts from the paper-towel-lined plate into this bowl. Gently spoon cinnamon sugar over the cronuts and rotate them with a fork until they are generously coated. Enjoy them now, or proceed to add an optional glaze in the next step.
-
Optional Glaze: Whisk together all the glaze ingredients. If the glaze appears too thick, add more maple syrup (or milk) 1 teaspoon at a time until desired consistency is reached. Briefly microwave the glaze for 5–10 seconds or until thin enough for dipping or drizzling. Gently dip the cronuts into the warm glaze or drizzle it over them (note that the cinnamon sugar might make the glaze adhere slightly less smoothly). Allow the glaze to set for about a minute before serving. Cronuts are truly best enjoyed hot and fresh after being coated in sugar and/or glazed!
Recipe Notes
Note 2: The exact amount of oil needed will depend on the size and depth of your pot. Generally, you’ll want to fill your pot about 1/3 full. A deep fryer will typically require more oil than a deep pan, where 1–2 quarts usually suffice. While the original cronut recipe often uses grapeseed oil, we find that readily available vegetable or canola oil works perfectly for achieving delicious results.
Nutrition Note: Please note that the nutritional information provided below does not include the oil absorbed during the frying process. This information is an approximation of the ingredients listed.
Storage: For best freshness, store leftover cronuts in an airtight container at room temperature for up to 2 days. If you need to store them longer, they can be refrigerated for up to 5 days. Reheat briefly in the oven or microwave before serving for optimal enjoyment.
Nutrition
Nutrition information is automatically calculated, so should only be used as an approximation.