
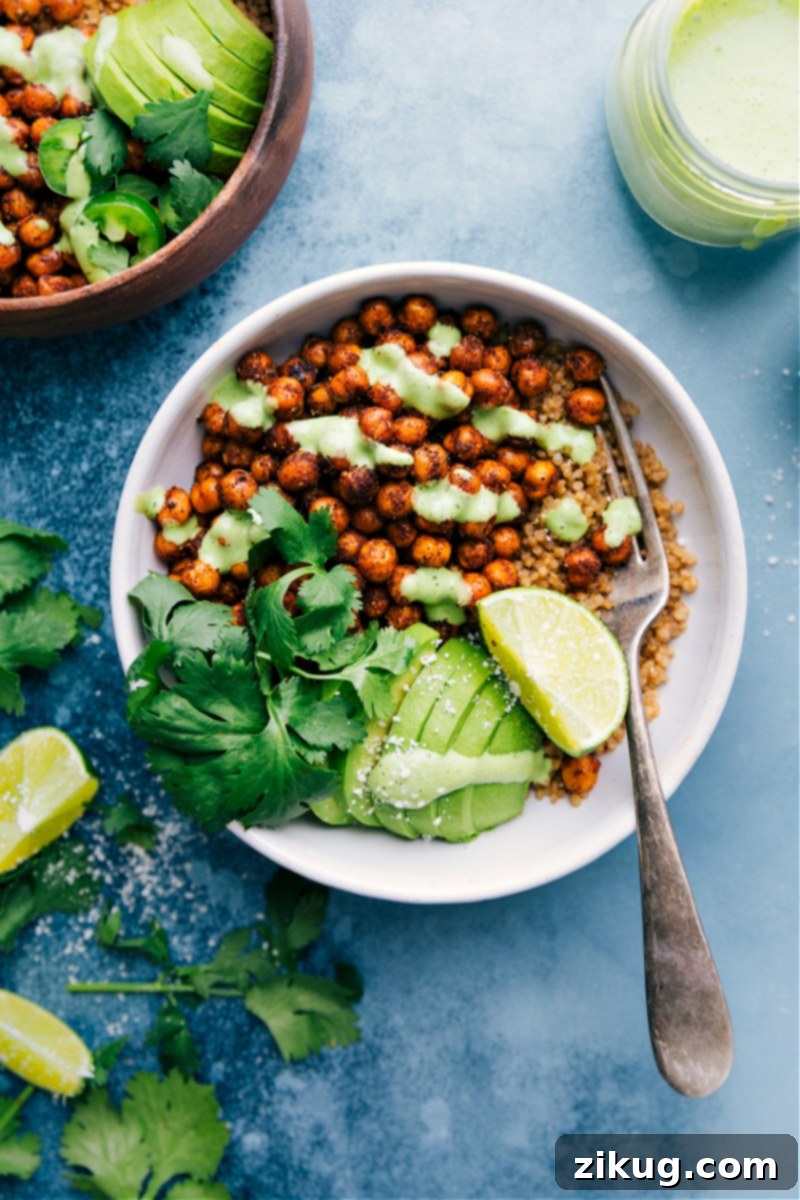
Irresistible Mexican Chickpeas: Your Ultimate Guide to Flavorful Plant-Based Meals
Discover the magic of perfectly spiced Mexican Chickpeas, roasted to golden perfection and generously drizzled with an exquisite creamy cilantro-lime sauce. This vibrant, plant-based dish is not just incredibly delicious but also remarkably versatile, making it an ideal choice for healthy weeknight dinners or flavorful meal prep. Whether you prefer to serve them in hearty bowls with fluffy quinoa or tucked into crisp lettuce wraps, these chickpeas are guaranteed to become a new favorite in your culinary repertoire.
Looking for more ways to enjoy wholesome, plant-forward meals? Explore other beloved recipes featuring roasted chickpeas like Vegetarian Gyros or creative Hummus Wraps. These recipes showcase how simple ingredients can transform into extraordinary dishes.
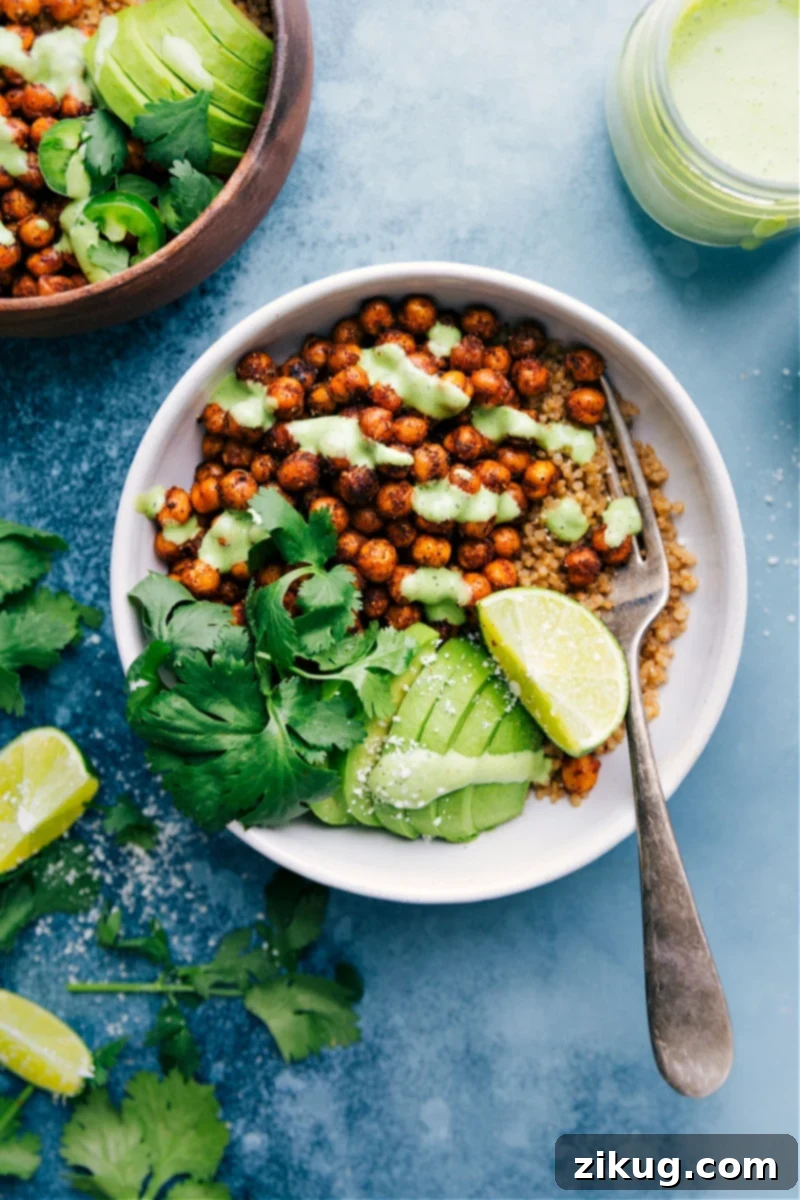
Mexican Chickpeas: A Burst of Flavor in Every Bite
We simply cannot get enough of these delectable roasted Mexican-spiced chickpeas! Each bite delivers a deeply savory experience, with a delightful crispness on the outside and a satisfying chewiness within. Their utterly addicting texture and bold flavor have made them a staple in our kitchen. We’ve enjoyed them so often that we’ve perfected two primary serving styles: in a wholesome bowl paired with fluffy quinoa or as light and refreshing lettuce wraps. The versatility means you can enjoy them differently each time, adapting to your mood or dietary needs!
Contrary to the misconception that meatless dishes might not be as filling, this recipe proves otherwise. Chickpeas (also known as garbanzo beans) and quinoa are both exceptional sources of plant-based protein, making them incredibly satiating and perfect for sustaining energy throughout your day. When combined with the healthy fats from a ripe avocado, this dish transforms into a remarkably well-rounded meal, offering a superb balance of protein, complex carbohydrates, and essential good fats. It’s a fantastic option for anyone seeking a nutritious, hearty, and flavorful vegetarian or vegan meal (with simple swaps for sour cream and honey) that doesn’t compromise on taste or satisfaction. This dish is naturally gluten-free, appealing to a wide range of dietary preferences and needs, making it a truly inclusive and delicious choice for any table.
Smart Shortcuts and Make-Ahead Tips for Effortless Cooking
These Mexican Chickpeas are designed with simplicity and efficiency in mind, ensuring a quick prep time and swift assembly. We’ve incorporated several clever shortcuts to streamline your cooking process, making healthy eating more accessible than ever before. Embrace these strategies to make mealtime a breeze, especially on busy weeknights:
- Pre-cooked Quinoa for Unmatched Speed: The secret to a truly fast and filling meal lies in leveraging the convenience of pre-cooked quinoa. Grabbing a packet or two (if you plan to feed more people or want extra for leftovers) of this readily available grain will drastically cut down on your cooking time. Quinoa is a powerhouse of plant-based protein, boasting all nine essential amino acids, making it an incredibly satiating and nutritious base for these vibrant bowls. For example, this type of microwavable quinoa takes just 90 seconds to prepare, or a mere few minutes on the stovetop, proving that quick meals can still be incredibly wholesome and satisfying.
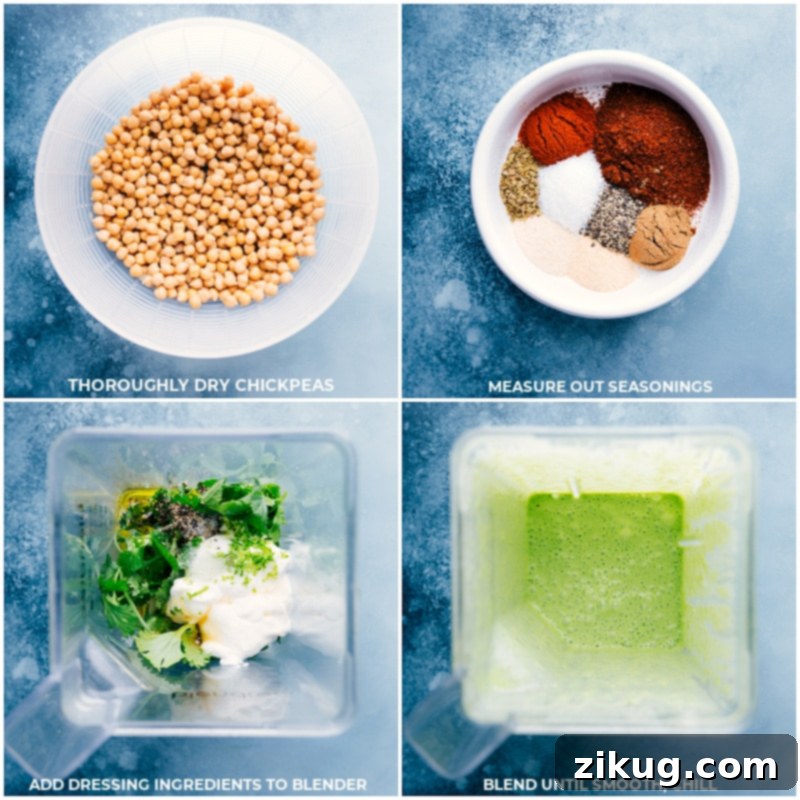
- Prepare the Sauce in Advance: While not strictly a “shortcut,” preparing the creamy cilantro-lime sauce ahead of time is a brilliant meal prep strategy for quicker dinner assembly. The sauce not only holds up beautifully in the refrigerator for several days but also tastes even better as it chills, allowing the vibrant flavors of lime, cilantro, and garlic to meld and deepen harmoniously. Whip it up a day or two before you plan to serve, and you’ll be amazed at how quickly your meal comes together when you’re ready to plate. This simple step transforms prep from a chore into a seamless experience.
- Homemade Taco Seasoning Blend: We are particularly fond of our homemade seasoning blend for these Mexican Chickpeas, as it offers a depth of flavor and control over ingredients unmatched by most store-bought alternatives. However, in a pinch, a ready-made packet of your favorite taco seasoning can certainly do the trick to infuse that characteristic Mexican flavor. For the best of both worlds – convenience and superior flavor – consider making your own seasoning packets in advance. This approach lets you control the ingredients, adjust the spice level to your preference, and avoid unwanted additives often found in commercial blends.
- Batch Prep Your Custom Seasoning Blends: The initial step of measuring out individual spices for your seasoning blend takes only a few minutes, but the payoff is immense. Our homemade blend elevates the chickpeas far beyond anything you can buy ready-made. Since you’ll have all your spices out anyway, we highly recommend making 5–6 extra batches. Store these perfectly pre-portioned blends in labeled snack-size bags or small airtight containers alongside your other spices. The next time you’re craving these Mexican Chickpeas—or any other Mexican-inspired dish—your custom seasoning will be ready to go, saving you valuable time and effort. This versatile blend is also fantastic in recipes like Turkey Tacos, savory Taco-Stuffed Sweet Potatoes, or indulgent Loaded Taco Fries, proving its multi-purpose utility in your kitchen.
Mexican Chickpeas: Optimal Cooking Methods for Perfect Crispiness
Achieving that ideal crispy exterior while maintaining a tender interior is key to delicious roasted chickpeas. We’ve extensively tested these Mexican Chickpeas using both the oven and an air fryer, and while both methods yield excellent results, the air fryer often provides a faster cook time and an even crispier finish. If you own an air fryer, we highly encourage you to give it a try for an accelerated cooking experience that locks in maximum flavor and crunch. (For reference, this is the Air Fryer we personally use and recommend for consistent results, ensuring you get that perfect texture every time.)
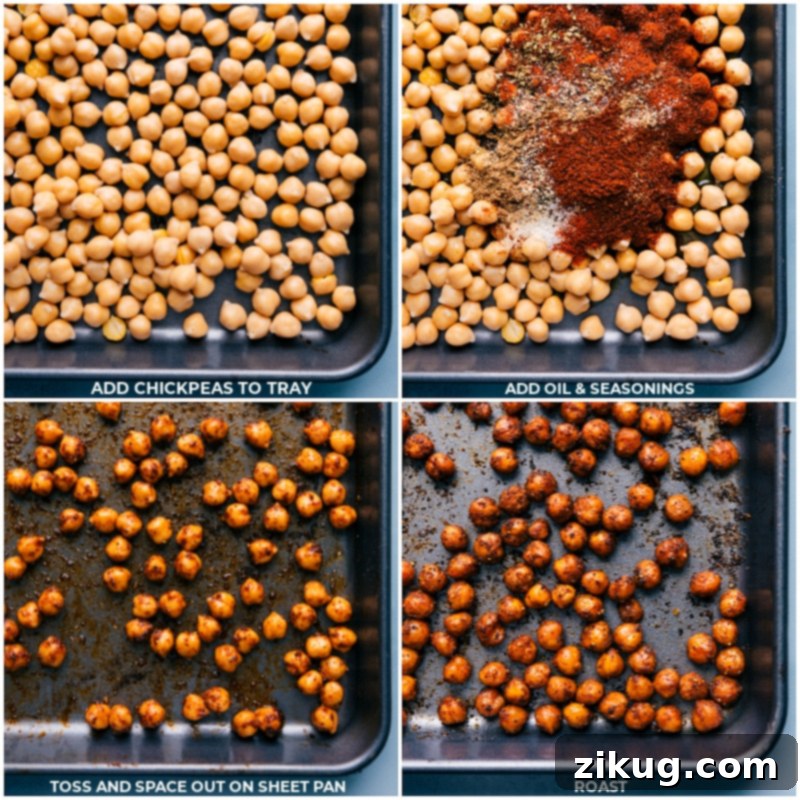
- Oven Roasting Method: Begin by tossing the prepared chickpeas with olive oil and your flavorful seasoning blend directly on a greased baking tray. It is absolutely crucial to ensure they are spread out in a single, even layer, with no chickpeas overlapping. This prevents steaming and encourages maximum crispiness and browning, which is where all the flavor truly develops. Roast them in a preheated oven at a steady 400°F (200°C) for approximately 18 to 22 minutes. For uniform cooking and browning, remember to shake the tray vigorously halfway through the roasting process. We generally find that 20 minutes is the sweet spot, yielding chickpeas that are beautifully crisp on the outside but still tender and not excessively hard on the inside.
- Air Fryer Method: For a quicker route to crispy perfection, preheat your air fryer to 390°F (199°C). In a separate bowl, toss the chickpeas with olive oil and the seasoning blend until thoroughly coated, ensuring every chickpea is seasoned evenly. Then, transfer them to the air fryer basket. It’s crucial not to overcrowd the basket; cook in batches if necessary to ensure a single layer. Overcrowding will lead to steaming and soft chickpeas. Cook for 10 to 13 minutes, giving the basket a good shake halfway through to promote even hot air circulation and crisping. For us, 11 minutes consistently delivers the best results—perfectly crunchy, intensely flavorful, and ready to enjoy in a fraction of the time.
Expert Tips for the Best Mexican Chickpeas
To ensure your Mexican Chickpeas turn out perfectly crisp and flavorful every single time, pay close attention to these essential tips. These small details can make a significant difference in the final outcome of your dish, guaranteeing a culinary success that will impress both your family and friends:
- Achieve Ultimate Crispiness by Thoroughly Drying Chickpeas: This is perhaps the most critical step for achieving truly crispy chickpeas. Before adding them to your air fryer or oven for roasting, it is absolutely essential to drain, rinse, and then thoroughly dry the chickpeas. Any residual moisture will cause them to steam rather than roast or fry, resulting in a disappointingly soft, rather than delightfully crispy, texture. A salad spinner works wonders for this, or you can meticulously pat them dry with several layers of paper towels or a clean kitchen towel until they are completely moisture-free. This ensures that the spices adhere beautifully and the chickpeas achieve that desirable, golden-brown crunch.
- Utilize an Extra-Large Sheet Pan for Oven Roasting: When oven roasting, the size of your sheet pan matters immensely for optimal results. Using an extra-large sheet pan allows the chickpeas ample room to spread out in a single layer, preventing overcrowding. When chickpeas are too close together or overlap, they tend to steam each other instead of crisping up, leading to unevenly cooked results and a less satisfying texture. We highly recommend a generous 15×21-inch tray for optimal browning and consistent crispiness across all chickpeas. This generous spacing is crucial for maximizing flavor development and achieving that perfect crunchy exterior.
- Spread Chickpeas in a Single, Even Layer: Whether you’re using an air fryer basket or a sheet pan for the oven, always ensure your chickpeas are arranged in a single, even layer without any pieces overlapping. This allows hot air to circulate freely and uniformly around each individual chickpea, promoting consistent browning and creating that coveted crispy exterior on all sides. Remember, browning equals intensified flavor, so don’t skip this important step! If necessary, cook in multiple smaller batches to avoid any overcrowding.
- Enjoy Immediately for Peak Freshness and Texture: Roasted chickpeas are at their absolute best when consumed right after they have finished cooking. Their texture is freshest, crispiest, and most satisfying at this point. As they sit out, they tend to absorb moisture from the air and can gradually lose their delightful crunch, becoming softer. While still delicious as leftovers, for the ultimate experience, serve them warm and fresh from the oven or air fryer, allowing their vibrant flavors and textures to shine.
- Invest in Quality Citrus Tools: The vibrant and zesty creamy cilantro-lime sauce, a crucial component that truly elevates these Mexican Chickpeas, relies heavily on fresh lime juice and zest for its bright, refreshing flavor. If you frequently cook with citrus, having a good quality citrus juicer for efficient juice extraction and a sharp microplane for finely zesting the peel will prove invaluable. These tools make extracting maximum flavor from your limes effortless, ensuring your sauce is bursting with fresh, authentic taste every time.
- Customizing Spice Levels to Your Preference: The base recipe for these Mexican Chickpeas is intentionally mild, designed to be balanced by the cooling and creamy cilantro-lime sauce. If you prefer a more pronounced kick and heat, it’s incredibly easy to adjust the spice level. Simply add 1/4 teaspoon of cayenne pepper to the dry seasoning blend before tossing and roasting the chickpeas. Alternatively, for a fresh burst of heat and a textural contrast, top your finished bowls or wraps with thinly sliced fresh jalapeños. For a milder heat, remember to remove the seeds and ribs from the jalapeño; for an extra fiery punch, leave them in!
- Optimal Storage for Best Leftovers: While best enjoyed fresh, any leftover Mexican Chickpeas and the cilantro-lime sauce can be stored separately in individual airtight containers in the refrigerator. The chickpeas will keep well for up to 3-4 days, and the sauce for up to a week. When ready to enjoy leftovers, to regain some of their original crispiness, we recommend reheating the chickpeas gently in a dry skillet over medium heat on the stovetop or briefly in a hot oven or air fryer until warmed through and slightly re-crisped. Drizzle with the chilled cilantro-lime sauce just before serving to maintain the sauce’s fresh flavor and creamy texture.
Pro Tip: The Right Baking Sheet Makes All the Difference
Using an expansive 15×21-inch sheet pan is a genuine game-changer when it comes to roasting chickpeas. This generous surface area provides ample space for the chickpeas to spread out without touching, which is absolutely essential for them to roast evenly and achieve that coveted crispy, golden-brown texture. When chickpeas are crowded or overlap on a smaller pan, they essentially steam each other, resulting in a soft, unevenly cooked batch where some might become overly crispy while others remain disappointingly chewy. Investing in a larger pan ensures every single chickpea gets its moment to shine, developing a uniform crust and maximum flavor, transforming them from good to truly exceptional.
Explore More Delicious Vegetarian Recipes:
Dinner
Kidney Bean Bowls (With Sweet Potatoes!)
Dinner
Vegetarian Sushi Bowls
Dinner
Vegetable Masala
Vegetarian
Butter Chickpeas
Mexican Chickpeas
Equipment
-
Small blender or food processor
-
Large sheet pan (15″ x 21″)
Ingredients
- 2 (15.5-ounce) cans chickpeas also called garbanzo beans; drained, rinsed, and thoroughly dried
- 3 tablespoons olive oil
- 1 tablespoon ground chili powder ensure it’s mild chili powder, not cayenne (see note 2)
- 1 teaspoon ground cumin
- 1 teaspoon paprika
- 1/2 teaspoon onion powder
- 1/2 teaspoon garlic powder
- 1/2 teaspoon dried oregano
- Salt and freshly ground black pepper to taste
- 2 limes zested and juiced (you’ll need about 1/2 tsp zest and 3 tbsp juice)
- 1 clove garlic peeled
- 1/2 cup loosely packed fresh cilantro leaves and tender stems
- 1/2 tablespoon coarsely chopped jalapeño seeds and ribs removed for mild heat, or include for more spice
- 1/3 cup sour cream fat-free or lite options work great; for a vegan alternative, use plain dairy-free yogurt or vegan sour cream
- 2 tablespoons olive oil
- 1/2 tablespoon honey for a vegan option, use maple syrup or agave nectar
- 1-1/2 cups cooked quinoa or 1 (8-ounce) packet precooked quinoa for convenience (see note 4)
- 1 large ripe avocado thinly sliced or chopped
- Optional garnishes and serving suggestions fresh lime wedges, extra cilantro, pickled red onions, or a sprinkle of cotija cheese (see note 5)
Instructions
-
1. Prepare Chickpeas: Preheat your oven to 400°F (200°C). Drain, rinse, and thoroughly dry the canned chickpeas. This crucial step can be done efficiently using a salad spinner, or by patting them meticulously dry with paper or clean kitchen towels. Remember, any excess moisture will prevent the chickpeas from achieving a desirable crispness during roasting.
-
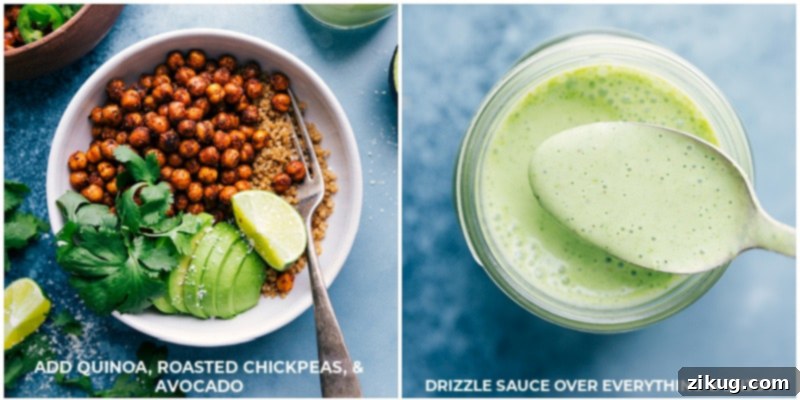
2. Make the Cilantro-Lime Sauce: It’s best to start with the sauce so it has time to chill and allow the flavors to deepen. Combine all sauce ingredients—lime zest, lime juice, garlic, fresh cilantro, chopped jalapeño, sour cream, olive oil, and honey—into a small blender or food processor. Begin with 1/2 teaspoon of lime zest and 3 tablespoons of lime juice. Blend until the mixture is completely smooth and creamy. Taste the sauce and adjust the seasoning as needed with fine sea salt and freshly ground black pepper (we suggest starting with 1/4 teaspoon of each, using less if using table salt). Once satisfied, transfer the sauce to a mason jar or airtight container and refrigerate until you are ready to serve.
-
3. Roast the Chickpeas: Place the thoroughly dried chickpeas onto an extra-large sheet pan (a 15×21-inch pan is ideal for ample spacing). Drizzle them generously with olive oil, then sprinkle with the entire seasoning blend (chili powder, cumin, paprika, onion powder, garlic powder, dried oregano), along with salt and pepper to taste (we recommend 1 teaspoon salt and 1/2 teaspoon pepper). Using your hands, toss everything together until the chickpeas are uniformly coated with the rich spices. Spread the seasoned chickpeas out in a single, even layer on the tray, ensuring no pieces overlap. Roast for 18–22 minutes, making sure to shake the tray vigorously halfway through the cooking time to promote even crisping. The chickpeas are perfectly done when they are crisp on the outside but not overly hard; our preference is typically around 20 minutes. (For air frying instructions, refer to Note 3 below.) Remove from oven and set aside.
-
4. Prepare Quinoa: While the chickpeas are roasting, prepare your quinoa according to the package directions. If using pre-cooked quinoa packets, follow the simple instructions for a quick heat-up (see note 4).
-
5. Serving Option #1: Wholesome Chickpea Quinoa Bowl: Divide the freshly cooked quinoa evenly among 2 to 4 serving bowls (use 2 bowls for substantial, large portions, or 4 for smaller, lighter meals). Generously top each bowl with an even distribution of the warm, roasted Mexican Chickpeas. Thinly slice or chop the ripe avocado and add equal amounts to each bowl. Drizzle the bowls generously with the creamy cilantro-lime sauce, adjusting the amount to your personal taste. You might have leftover sauce, which can be stored in the fridge for up to a week. Serve each bowl with fresh lime wedges on the side, encouraging a final squeeze of lime juice just before eating to brighten the flavors. Garnish with additional fresh cilantro leaves if desired for an extra pop of color and freshness.
-
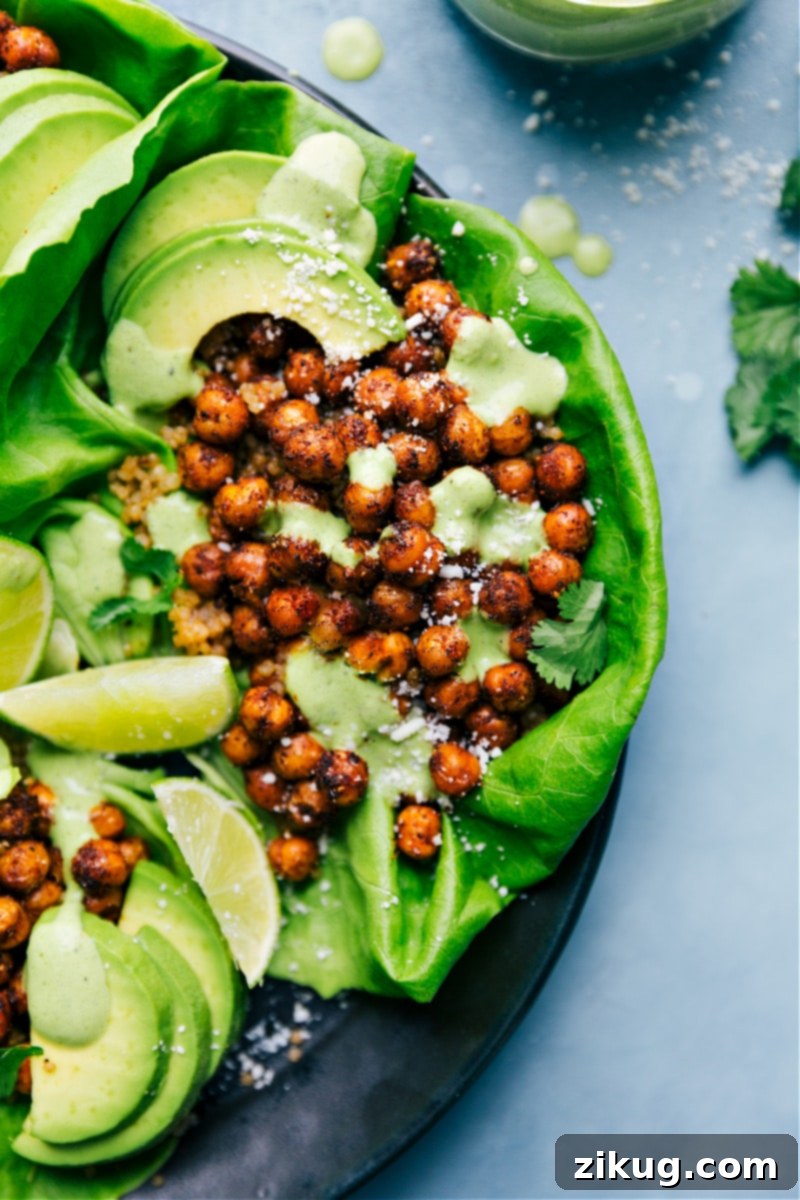
6. Serving Option #2: Refreshing Chickpea Lettuce Wraps: For a lighter, crunchier alternative, prepare refreshing lettuce wraps. Wash and thoroughly dry the lettuce leaves (such as Boston or butter lettuce). This dryness is essential for the wraps to be truly enjoyable. Arrange the dried lettuce leaves on plates and spoon in even amounts of cooked quinoa, followed by the warm Mexican Chickpeas, and then delicate avocado slices. Drizzle the lettuce wraps generously with the cilantro-lime sauce, according to your preference. Serve immediately with fresh lime wedges for an optional citrusy squeeze. Garnish with fresh cilantro if desired. Roll up and savor these delightful, crisp wraps!
Recipe Notes
Note 2 – Chili Powder Clarification: It’s crucial not to confuse the ground chili powder specified in this recipe with “chilli powder,” which is typically much hotter and often contains cayenne. For this recipe, we use a mild chili powder, such as McCormick chili powder, which contributes a rich, smoky flavor without excessive heat. Always check your labels to ensure you’re using the correct type for the intended spice level.
Note 3 – Air Fryer Directions for Crispy Chickpeas: To achieve impeccably crisp chickpeas using an air fryer: First, preheat your air fryer to 390°F (199°C). In a bowl, toss the drained and thoroughly dried chickpeas with olive oil and the prepared seasoning blend until every chickpea is well coated. Carefully place the seasoned chickpeas into the air fryer basket in a single, even layer. If the basket is too full and the chickpeas overlap, they will steam rather than crisp, so fry them in batches if necessary. Cook for 10–14 minutes, with our preferred crispiness achieved around 11 minutes. Remember to shake the air fryer basket halfway through the cooking process to ensure even frying and maximum crunch.
Note 4 – Quinoa Convenience: To save time and streamline your cooking, especially since you’re already preparing chickpeas and a homemade sauce, consider taking a convenient shortcut with the quinoa. We often use microwaveable quinoa packets that cook in just 90 seconds or a few minutes on the stovetop. If you’re aiming to stretch the chickpeas to serve more, grab two packets. Alternatively, if you prefer to cook quinoa from scratch, here’s a helpful guide on how to cook perfect quinoa.
Note 5 – Versatile Serving Suggestions: Enhance your Mexican Chickpeas experience with a variety of garnishes. Fresh lime wedges and extra fresh cilantro are always excellent choices. For lettuce wraps, you’ll typically need 1 head of crisp Boston or butter lettuce. Other delightful additions include pickled red onions for a tangy counterpoint, a sprinkle of crumbled cotija cheese (omit for vegan), or a dash of your favorite hot sauce for an extra kick.
Nutrition Note: The provided nutrition information exclusively pertains to the Mexican Chickpeas component of the dish. The creamy cilantro-lime sauce contributes an additional 86 calories per serving. Please note that these figures are approximations.
Storage Instructions: For optimal freshness and texture, store the roasted Mexican Chickpeas and the cilantro-lime sauce separately in individual airtight containers in the refrigerator. The chickpeas will keep for up to 3-4 days, and the sauce for up to a week. When ready to enjoy leftovers, reheat the chickpeas gently in the oven or on the stovetop to restore their crispiness, then drizzle with the chilled sauce just before serving.
Nutrition
Nutrition information is automatically calculated, so should only be used as an approximation.