
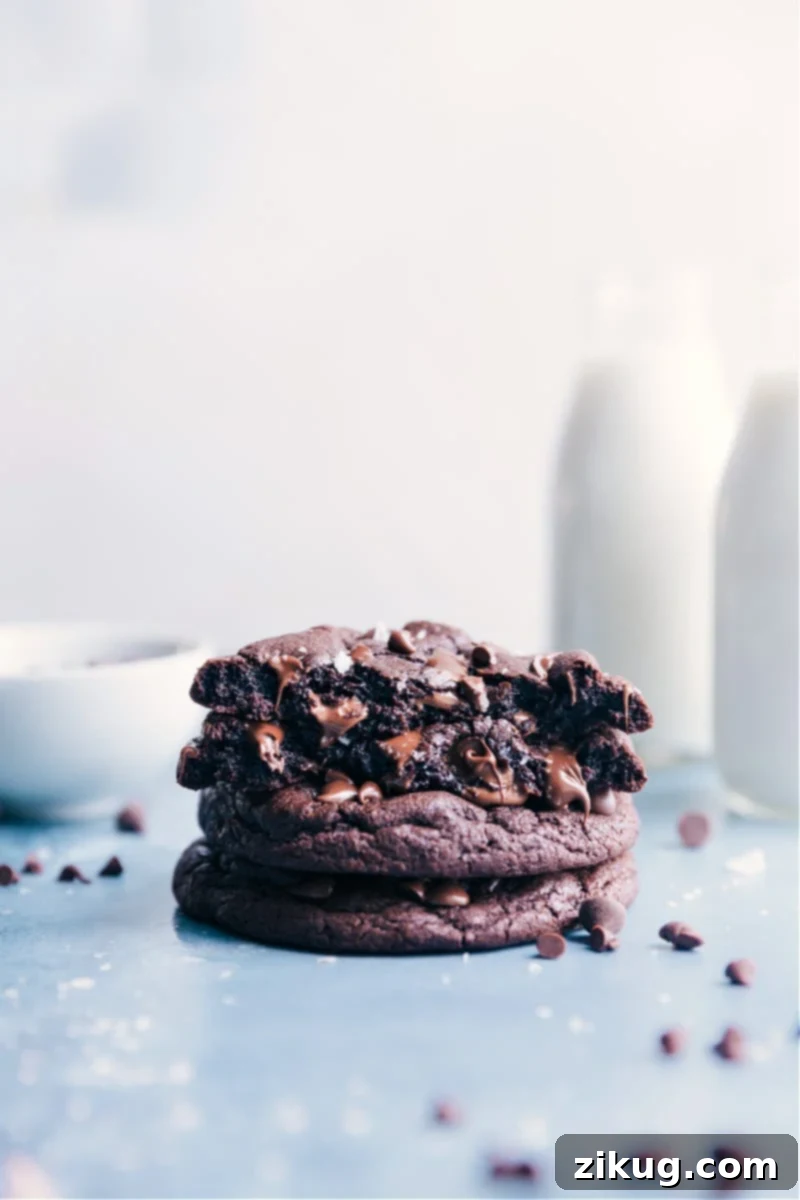
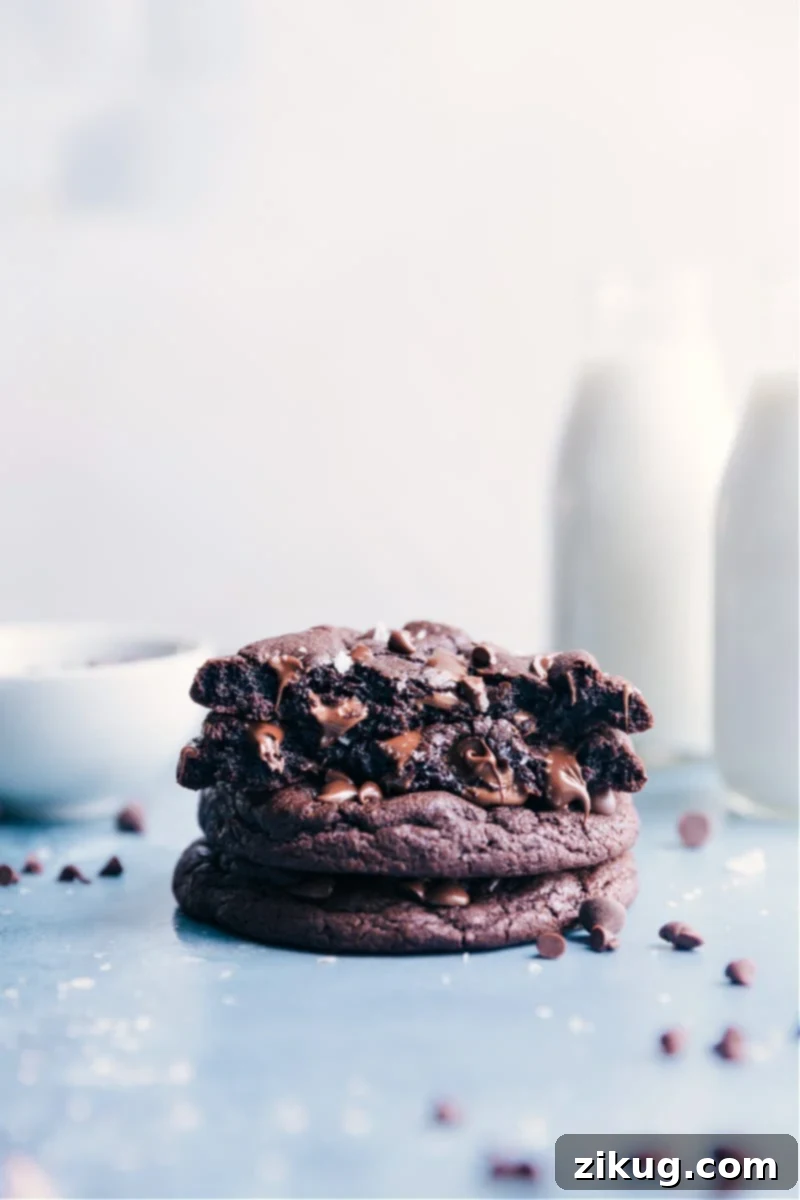
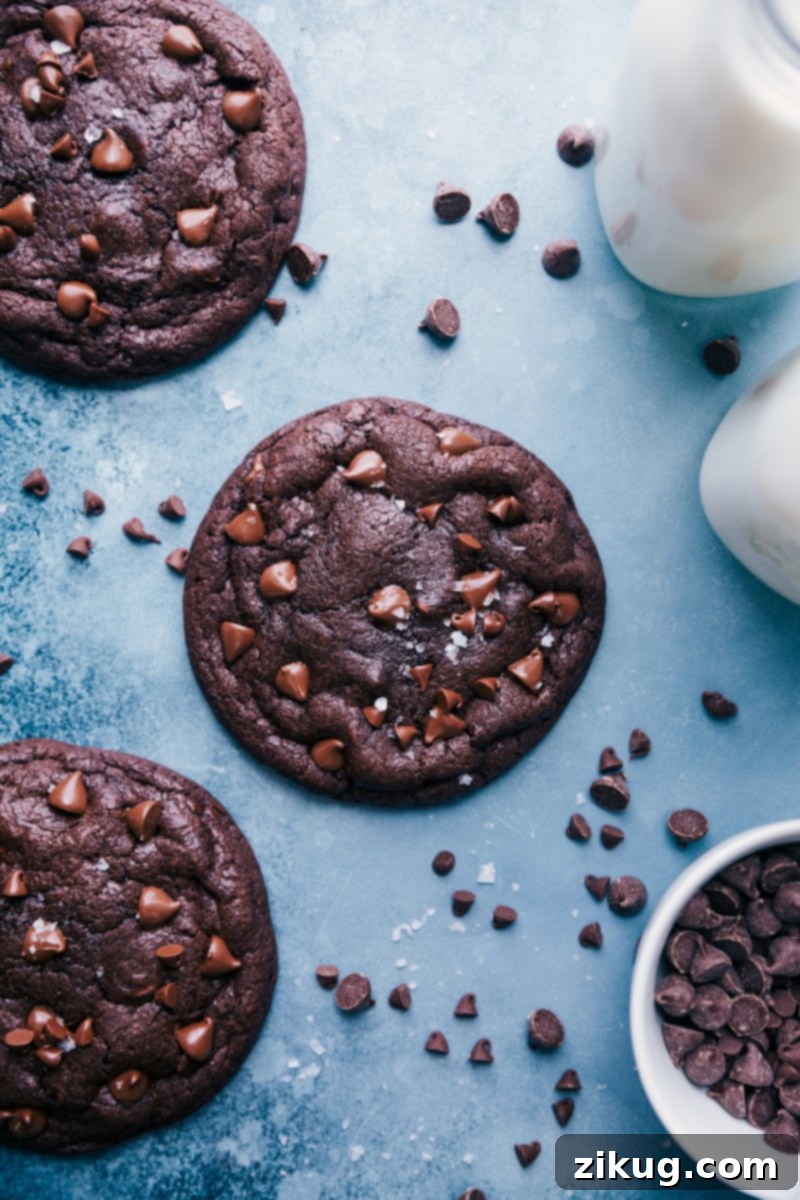
Bakery Style Chocolate Cookies are not just cookies; they’re an experience. These magnificent treats are renowned for their impressive size, irresistibly soft and chewy texture, and an unbelievably rich, deep chocolate flavor that leaves you craving more. Each cookie features a gloriously gooey, thick center perfectly contrasted by delicately crisp edges, making them the ultimate indulgence for any chocolate aficionado. Imagine biting into a cookie that rivals your favorite local bakery’s masterpiece – that’s precisely what this recipe delivers.

A Note from the Baker
Crafting the Ultimate Bakery-Style Chocolate Cookie Dream
For years, I embarked on a personal quest to perfect the chocolate cookie. My journey was filled with trials and errors, often resulting in cookies that were either disappointingly dry or lacked the profound chocolate essence I desired. Finally, after countless batches, I perfected my go-to Chocolate Cookies recipe. It quickly became a beloved staple in my home, a true delight for any chocolate lover, consistently delivering a satisfying, classic treat.
However, I soon realized that this cherished recipe, while perfect for smaller, 1-tablespoon sized cookies, couldn’t quite achieve the grand scale and distinct texture of the “bakery-style” giants I envisioned. Those large, robust cookies with their impressive heft and unforgettable chewiness were a different challenge altogether. This sparked a new culinary adventure: to develop a recipe specifically for those impressively large, luxuriously soft, and intensely rich cookies you find at gourmet bakeries. I wanted that thick, unyielding center combined with a slightly crisp edge, a hallmark of true bakery excellence.
Through extensive testing, experimenting with different ratios of fats and sugars, exploring various flour combinations, and fine-tuning baking techniques, I am absolutely thrilled to finally share the culmination of that effort: these magnificent Bakery-Style Chocolate Cookies. Each substantial cookie weighs a generous 4 ounces, boasting a deeply moist, incredibly rich profile, and an abundance of melted chocolate chips that guarantees a delightful bite every single time. Prepare to be amazed by the depth of flavor and perfect texture you can achieve right in your own kitchen!
Unlocking the Secret: Key Ingredients for Bakery-Style Chocolate Cookies
Achieving that signature bakery-style richness and texture in your chocolate cookies isn’t just about mixing ingredients; it’s about choosing the right ones. Two standout ingredients are absolutely crucial for this recipe’s success: premium Dutch-process cocoa powder and delicate cake flour. These aren’t mere substitutions; they are foundational to the cookies’ unique profile, contributing significantly to their deep flavor, soft crumb, and irresistible chewiness. Understanding their roles is key to mastering this recipe.
The Magic of Dutch-Process Cocoa Powder
When it comes to chocolate cookies, not all cocoa powders are created equal. Dutch-process cocoa powder undergoes an alkalizing process that neutralizes its natural acidity. This treatment results in a cocoa that is darker in color, milder in flavor (less bitter than natural cocoa), and produces a wonderfully soft, moist crumb in baked goods.
- Flavor Profile & Color: This special cocoa powder imparts a deep, rich, almost earthy chocolate flavor that is more profound and less acidic than natural cocoa. It also gives your cookies a significantly darker, more appealing hue, making them visually striking and intensely satisfying to the palate. The difference in color alone is often enough to convince bakers to make the switch.
- Texture Enhancement: Because its acidity has been neutralized, Dutch-process cocoa reacts differently with leavening agents like baking soda (which needs an acid to activate). This difference in chemical reaction contributes to a softer, more tender, and chewier cookie texture, avoiding the drier, sometimes crumbly result you might get with natural cocoa powder.
- Where to Find It: High-quality Dutch-process cocoa is surprisingly accessible. Look for brands like Hershey’s® “Special Dark” or Ghirardelli® Unsweetened Dutch-Process Cocoa at most major grocery stores. These are excellent and reliable options for home bakers.
- Key Identification: Always ensure the label explicitly states “unsweetened” and “Dutch process” or “Dutched” to guarantee you’re using the correct type for this recipe. Do not confuse it with natural cocoa powder, as the results will be significantly different.
The Delicate Touch of Cake Flour
Another essential component in our quest for the perfect bakery-style cookie is cake flour. This fine, low-protein flour is a game-changer for achieving that desired delicate, melt-in-your-mouth texture that makes these cookies so special. Its unique properties are what give these cookies their characteristic softness without compromising on structure.
- Finer Texture: Cake flour is milled to a much finer consistency than standard all-purpose flour. This finer particle size contributes to a more tender crumb and a smoother texture in the final baked cookie, preventing any grainy or rough mouthfeel.
- Lower Protein Content: The secret behind cake flour’s tenderness lies in its significantly lower protein content (typically 7-9%) compared to all-purpose flour (10-12%). Less protein means less gluten development when mixed with liquids. Reduced gluten results in a softer, more delicate, and ultimately gooier cookie, preventing them from becoming tough, dense, or overly chewy. It’s crucial for that bakery-style softness.
- Structural Support: Despite its low protein, cake flour, when combined with all-purpose flour in this recipe, still provides ample structural support. This ensures your large cookies hold their impressive shape beautifully during baking while maintaining their signature soft, tender interior. It’s a delicate balance that cake flour helps achieve.
- Availability: You can typically find cake flour readily available in the baking aisle of your local grocery store, often located alongside other specialized flours like bread flour or self-rising flour. It’s a worthy investment for any serious baker.
Essential Tools for Bakery-Style Chocolate Cookie Perfection
While the ingredients are paramount, the right tools can significantly elevate your baking experience and ensure consistent, professional-looking results every time. For these Bakery-Style Chocolate Cookies, a few key pieces of equipment will make all the difference, helping you achieve that perfect shape, texture, and even bake.
- Silicone Baking Mat: This non-stick marvel is indispensable for achieving perfectly baked cookies. A silicone baking mat, such as a Silpat, promotes incredibly even heat distribution, preventing hot spots that can lead to overly crispy or burnt bottoms. It also ensures your large, delicate cookies release effortlessly from the pan without sticking or tearing. While parchment paper is a good alternative, silicone mats offer superior consistency, are reusable, and often lead to a more uniform browning.
- Food Scale: For cookies that are uniformly sized, bake evenly, and boast that coveted “bakery-style” appearance, a food scale is a non-negotiable tool. Measuring dough by weight (each cookie ball at approximately 4 ounces or 117 grams for this recipe) guarantees precision that volume measurements (like using a scoop) simply cannot match. This consistency in size is key to both achieving the ideal chewy texture across all cookies and ensuring they all finish baking at the same time.
- Electric Mixer (Hand or Stand): Achieving the thick, creamy, peanut butter-like consistency for your butter and brown sugar mixture is crucial for the cookie’s final texture. This process, known as creaming, incorporates air into the mixture, which contributes to the cookies’ light yet chewy texture. A sturdy electric mixer, whether a powerful hand-held model or a versatile stand mixer with a paddle attachment, provides the necessary power and efficiency to properly cream these ingredients. Attempting to replicate this critical step with just a wooden spoon would be nearly impossible and would likely result in a denser, less appealing cookie.
Pro Tips for Baking Unforgettable Bakery-Style Chocolate Cookies
Transforming simple ingredients into bakery-worthy masterpieces requires a little attention to detail and a few insider tips that can make all the difference. Follow these expert guidelines to ensure your Bakery-Style Chocolate Cookies turn out perfectly, with the ideal texture and flavor, every single time.
- Stick to the Recipe, No Substitutions: Baking, especially when aiming for a specific texture like these bakery-style cookies, is a science. This recipe has been meticulously tested and refined to deliver the best possible results, from ingredient ratios to chilling times. Every component plays a specific and crucial role in achieving the ideal flavor, texture, and structure. Resist the urge to make substitutions unless explicitly suggested within the notes, as even minor changes can significantly alter the outcome and compromise the integrity of the cookie. Trust the process for perfection.
- Choose Your Chocolate Wisely: The type and quality of chocolate chips you use profoundly impact the cookie’s flavor and melt characteristics. While I personally adore a harmonious combination of semi-sweet and milk chocolate chips for a balanced sweetness and varied melt, feel free to experiment with your favorite blend. Dark chocolate chips can introduce a deeper, more sophisticated bitterness that complements the rich cocoa, while white chocolate can offer a creamy contrast. For superior flavor and a luxurious melt, consider using high-quality chocolate brands like Ghirardelli or Guittard. Chocolate chunks or even chopped baking bars can also add a delightful textural variation.
- Don’t Skip the Sea Salt Sprinkle: A delicate sprinkle of flaky sea salt over the warm, freshly baked cookies is not just for garnish; it’s a powerful flavor enhancer. The coarse salt crystals provide a delightful textural contrast against the soft cookie and brilliantly balance the intense sweetness and rich chocolate. This subtle addition elevates the entire flavor profile, creating a more complex, nuanced, and ultimately satisfying taste experience that highlights the chocolate notes.
-
Embrace the Chill Time: Chilling the cookie dough is a non-negotiable step for these bakery-style beauties, and patience here is key to success. This crucial process allows several important transformations to occur:
- Flavor Development: The flavors in the dough have time to meld and deepen, resulting in a more complex and rich taste.
- Fat Solidification: Chilling solidifies the fats in the butter, preventing the cookies from spreading too much during baking. This is essential for achieving those coveted thick, chewy centers and distinct, slightly crisp edges.
- Hydration: The dry ingredients fully hydrate, leading to a more uniform and tender crumb.
Do not rush this step – insufficient chilling will lead to flatter, greasier, and less flavorful cookies. The recommended time is a minimum, and longer chilling (up to 24-48 hours) can sometimes further enhance the results.
Storage Solutions for Your Bakery-Style Chocolate Cookies
Ensuring your delicious Bakery-Style Chocolate Cookies stay fresh and delightful is simple with the right storage techniques. Here’s how to preserve their quality, whether for a few days of immediate enjoyment or for future indulgence. Proper storage ensures you can savor these treats for longer.
Storing Baked Cookies
- Room Temperature Storage: Once completely cooled to room temperature, store your Bakery-Style Chocolate Cookies in an airtight container. They are undeniably at their absolute best the day they are baked, offering peak texture and flavor. While they will last for up to a week, their texture and intense flavor begin to diminish noticeably after 3-4 days. To maintain optimal freshness, enjoy them within this shorter window.
- Reheating Tip: To recapture that glorious fresh-from-the-oven warmth and gooey, melted chocolate center, gently rewarm cooled cookies in the microwave for 10-15 second increments. Be careful not to overheat, which can quickly dry them out and make them tough. A few seconds is usually all it takes to bring them back to life.
Freezing Cookie Dough for Future Enjoyment
- Freeze Dough, Not Baked Cookies: For long-term storage and ultimate convenience, it’s highly recommended to freeze the unbaked cookie dough rather than the baked cookies. Freezing dough preserves the fresh texture and flavor much better, allowing you to bake fresh cookies whenever a craving strikes.
- Preparation for Freezing: After forming the cookie dough into individual balls (approximately 4 ounces each, or your desired size as per the recipe), place these dough balls onto a baking sheet lined with parchment paper, ensuring they don’t touch each other. Freeze until they are completely solid, which typically takes a few hours. This step prevents them from sticking together in the freezer.
- Long-Term Storage: Once solid, transfer the frozen cookie dough balls into a freezer-safe, airtight container or a heavy-duty freezer bag. Label clearly with the date. They can be stored in the freezer for up to three months without significant loss of quality.
- Baking from Frozen: The best part? You can bake these cookies straight from the freezer! There’s no need to thaw the dough beforehand. Simply place the frozen dough balls on a prepared baking sheet and add an extra 2-5 minutes to the usual baking time (refer to the recipe instructions for standard bake times). Bake until the edges are lightly browned and set, and the centers are still soft and slightly underbaked for that perfect chewy texture. This method allows for warm, fresh cookies on demand!
Explore More Irresistible Cookie Recipes
If you’ve enjoyed mastering these Bakery-Style Chocolate Cookies, you’ll love delving into our collection of other delectable cookie creations. From classic favorites to unique twists, there’s a perfect cookie waiting for every occasion and every palate. Expand your baking repertoire with these tried-and-true recipes:
Desserts
Salted Caramel Cookies
Desserts
Copycat Gideon’s Bakehouse Cookies
Desserts
Chocolate Chip Pudding Cookies
Desserts
Circus Animal Cookies
Bakery Style Chocolate Cookies Recipe
Chelsea Lords
Experience the ultimate chocolate indulgence with these Bakery Style Chocolate Cookies: large, irresistibly soft, delightfully chewy, and generously packed with rich, gooey chocolate. They boast perfectly thick centers and subtly crisp edges, making them a dream come true for any chocolate enthusiast.
30 minutes
15 minutes
1 hour
1 hour 45 minutes
6 large cookies
Equipment
-
Hand mixer or stand mixer
-
Large sheet pan (15″ x 21″)
-
Silicone baking mat or parchment paper
-
Food Scale
Ingredients
- 1/2 cup unsalted butter, cut into small cubes (straight from the fridge)
- 3/4 cup light brown sugar, firmly packed
- 1 large egg
- 1 teaspoon vanilla extract
- 1/2 teaspoon cornstarch
- 1/2 teaspoon baking soda
- 1/2 teaspoon salt
- 1/4 cup Dutch process cocoa powder (see Note 1)
- 1/2 cup cake flour (see Note 2)
- 3/4 cup all-purpose flour (see Note 3 for proper measuring)
- 1/2 cup mini chocolate chips
- 1 cup milk chocolate chips (or semi-sweet chocolate chips, see Note 4)
Instructions
-
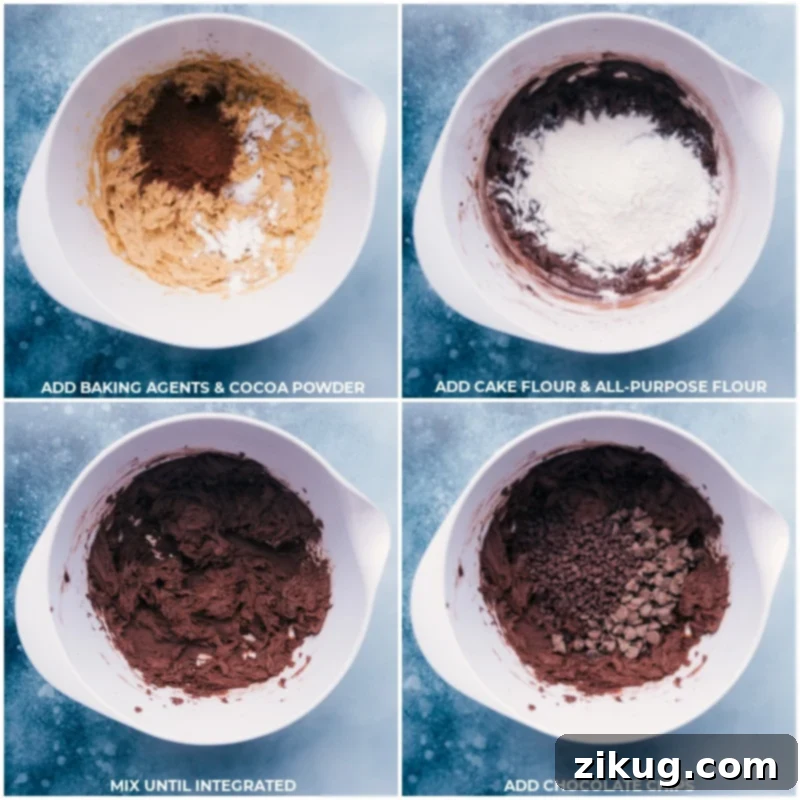
In a large mixing bowl, or the bowl of a stand mixer fitted with the whisk attachment, combine the cubed, cold unsalted butter and light brown sugar. Beat on medium-high speed for about 3-4 minutes until the mixture is completely combined, light, and creamy, resembling the consistency of smooth peanut butter. Ensure there are no visible lumps of butter remaining. This creaming process is vital for incorporating air and creating the right cookie texture.
-
Add the large egg and vanilla extract to the creamed butter and sugar mixture. Beat until just combined, ensuring the egg is fully incorporated but avoid overmixing. Scrape down the sides of the bowl as needed to guarantee all ingredients are well blended. Next, add the cornstarch, baking soda, salt, and Dutch-process cocoa powder to the bowl. Beat again on low speed until these dry ingredients are just incorporated into the wet mixture. Overmixing at this stage can lead to a less tender cookie.
-
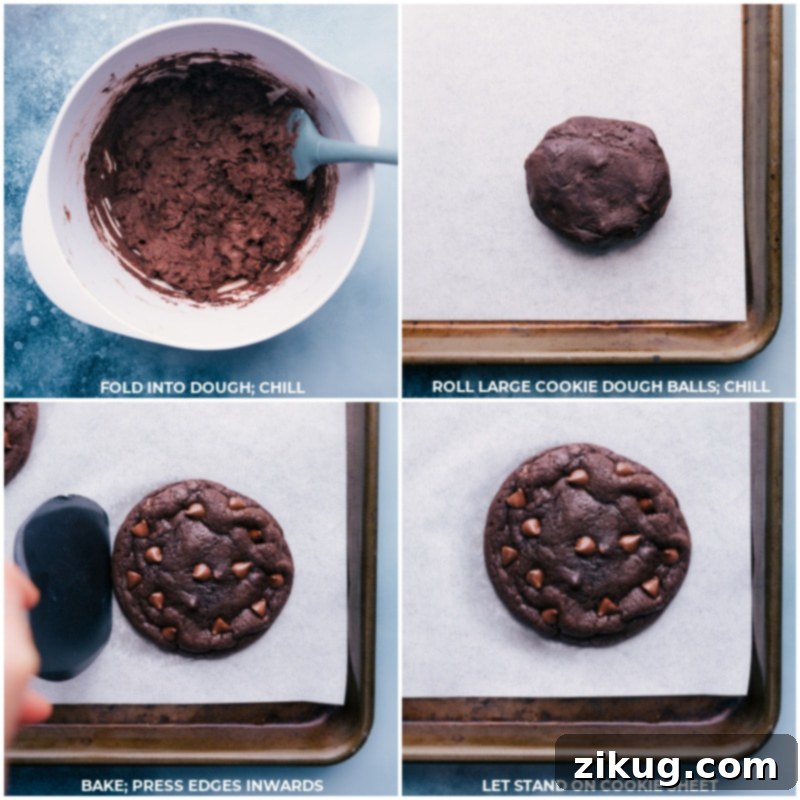
Gradually mix in the cake flour and all-purpose flour (refer to Note 3 for the proper “spoon and level” measuring technique to avoid adding too much flour) until just combined. Mix only until no streaks of dry flour remain; overmixing the flour develops too much gluten, which can result in tough cookies. Finally, use a sturdy spatula to gently fold in both the mini chocolate chips and the regular-sized chocolate chips until they are evenly distributed throughout the dough. Cover the bowl tightly with plastic wrap and refrigerate the dough for a minimum of 45 minutes, up to 2 hours. This chilling step is absolutely essential for flavor development and to prevent excessive spreading during baking.
-
Once the dough is adequately chilled, remove it from the fridge. Using a food scale for precision, form 6 large, uniform cookie balls, each weighing approximately 4 ounces (about 117 grams). Roll them into smooth, round balls between your palms and place them on a parchment-lined sheet or plate. Return these formed dough balls to the fridge or freezer for an additional 15 minutes of chilling (see Note 5). This second chill helps set the shape and minimizes spread. If you prefer smaller cookies, please refer to Note 7 for adjusted portion sizes and baking times.
-
While the cookie dough balls are chilling for the second time, preheat your oven to 325°F (160°C). Line a large sheet pan with a silicone baking mat or parchment paper. Place no more than 3 cookie balls on the prepared pan, ensuring ample space between them (at least 3-4 inches) to allow for their significant spreading. Bake for 13-18 minutes. For a supremely fudgy and chewy cookie, it’s best to slightly underbake them (15-16 minutes is often the perfect sweet spot). Look for firm, golden-brown edges and a set center that isn’t overly glossy or wet. Remember, the residual heat from the pan will continue to bake the cookies for several minutes after they’re removed from the oven, so trust the process and err on the side of underbaking.
-
Immediately upon removing the cookies from the oven, while they are still warm and pliable, use a metal spatula or the back of a large spoon to gently press the edges of each cookie inward. This technique helps to create that perfectly round, thick, and polished “bakery-style” appearance. If desired, press a few extra chocolate chips onto the tops of the warm cookies for an even more irresistible and visually appealing finish. Allow the cookies to cool on the baking sheet for 10-15 minutes before carefully transferring them to a wire rack to cool completely. This resting period allows them to set up properly without breaking. Repeat the baking process with the remaining dough balls.
Recipe Notes for Perfect Results
Note 1: Dutch-Process Cocoa Powder Significance
The choice of cocoa powder is absolutely pivotal in achieving the signature flavor and texture of these cookies. Dutch-process cocoa powder is alkalized, which neutralizes its natural acidity and significantly deepens its color and flavor, resulting in a richer, more robust chocolate taste and a wonderfully soft, moist texture. Using natural (non-Dutched) cocoa powder is not recommended as it reacts differently with leavening agents and will yield a drier cookie with a less intense chocolate flavor and lighter color. Brands like Hershey’s® “Special Dark” are widely available and work wonderfully for this recipe.
Note 2: The Role of Cake Flour
Cake flour is a non-negotiable ingredient for achieving the incredibly soft and fluffy texture of these cookies. Its fine grind and lower protein content contribute to less gluten development during mixing, ensuring a tender, delicate crumb that simply melts in your mouth. Combining it with all-purpose flour creates the perfect balance of tenderness and structural integrity. For this specific recipe, using substitutes for cake flour or attempting homemade cake flour alternatives (like adding cornstarch to all-purpose flour) are not advised, as they typically do not produce the desired texture and structural consistency.
Note 3: Accurate Flour Measurement
Properly measuring flour is one of the most critical steps in baking to ensure the correct texture. Scooping a measuring cup directly into a bag of flour compacts it tightly, which can lead to adding far too much flour—sometimes up to 25% more than intended. This excess flour can result in dry, dense, and tough cookies. Instead, always use the “spoon and level” method: gently spoon the flour into your measuring cup until it’s overfilled, then use the flat side of a table knife or another straight edge to level off the excess, ensuring a precise and accurate measurement. This simple technique makes a huge difference.
Note 4: Customizing Your Chocolate Chips
My personal preference for these cookies is a delightful blend of regular-sized milk chocolate chips and mini semi-sweet chocolate chips, offering a balanced sweetness and varied melt profile in every bite. However, feel free to customize your chocolate experience! For a less sweet or more intensely rich chocolate cookie, opt for all semi-sweet or even dark chocolate chips. Consider using high-quality chocolate brands like Ghirardelli and Guittard; their superior flavor and melt characteristics will truly elevate your cookies. Don’t hesitate to experiment with different types of chocolate (e.g., chocolate chunks, chopped baking bars) for varied textures and flavors.
Note 5: The Importance of Chilling Time
Do not skip or rush the chilling process for the cookie dough. This step is fundamental to achieving the desired bakery-style thick, chewy texture. Chilling allows the butter to firm up, preventing the cookies from spreading too thinly during baking. It also allows the dry ingredients to fully hydrate, resulting in a more uniform crumb, and significantly deepens the overall flavor profile of the cookies. Insufficient chilling will almost certainly lead to flatter, greasier, and less flavorful cookies that lack that characteristic bakery heft. Patience truly is a virtue here.
Note 6: Achieving the Perfect Bake (Underbaking for Chewy Goodness)
The secret to truly soft, chewy, and intensely flavorful bakery-style cookies lies in slightly underbaking them. Overbaking will quickly lead to dry, cake-like cookies, losing that signature gooey center. Remove cookies from the oven when their edges are firm and lightly golden-brown, but the centers still appear slightly soft, puffed, and not overly glossy or wet. It’s crucial to remember that cookies continue to cook on the hot baking sheet for several minutes after being removed from the oven due to residual heat, so trust the process and always err on the side of underbaking for optimal chewiness.
Note 7: Adjusting for Smaller Cookies
While this recipe is designed for generous, large bakery-style cookies, the dough can be easily adapted for smaller treats if preferred. After the initial dough chilling, roll even-sized cookie dough balls that are a packed 2 tablespoons (approximately 40 grams) each. Chill these smaller, formed dough balls for at least 30 minutes before baking to help them maintain their shape. Bake for 10-14 minutes, or until the edges are lightly set and the centers are no longer glossy. Immediately after baking, and working quickly, gently press the edges inward with a metal spatula for a perfectly round shape. If desired, press a few extra chocolate chips into the tops for an enhanced appearance. Let them stand on the cookie sheet for 5 minutes before carefully transferring them to a cooling rack to finish cooling.
Nutrition Information (Approximate Per Serving)
Serving Size: 1 cookie | Calories: 665 kcal | Carbohydrates: 98g | Protein: 10g | Fat: 29g | Saturated Fat: 18g | Polyunsaturated Fat: 1g | Monounsaturated Fat: 5g | Trans Fat: 1g | Cholesterol: 82mg | Sodium: 46mg | Potassium: 258mg | Fiber: 5g | Sugar: 53g | Vitamin A: 582IU | Vitamin C: 1mg | Calcium: 77mg | Iron: 4mg
Disclaimer: Nutrition information is an automatic calculation based on ingredients and standard portion sizes. It should be used as an approximation only and may vary based on specific brands, exact measurements, and preparation methods. It is not a substitute for professional dietary advice.
Love this recipe? Share your thoughts below!